Color Fusers-June-Its NEW In Color Season!
/Yay! One of my most favourite time of year is here—new In Color Season! While it is sad to say good bye to favourites, like Pretty in Pink and Petunia Pop (I am keeping my fingers crossed they might be a part of the 2027 Color Refresh!), I am happy to have some new colours to play and experiment with!
I am really happy to see the return of Crisp Cantaloupe—it plays so well with Petal Pink and Calypso Coral. I also immediately loved Barely Blush and Peaceful Pine. On the fence about Golden Glow….someone will make me love it with one of their creations and Hydrangea Hue—is it purple or is it blue? Hue can tell…
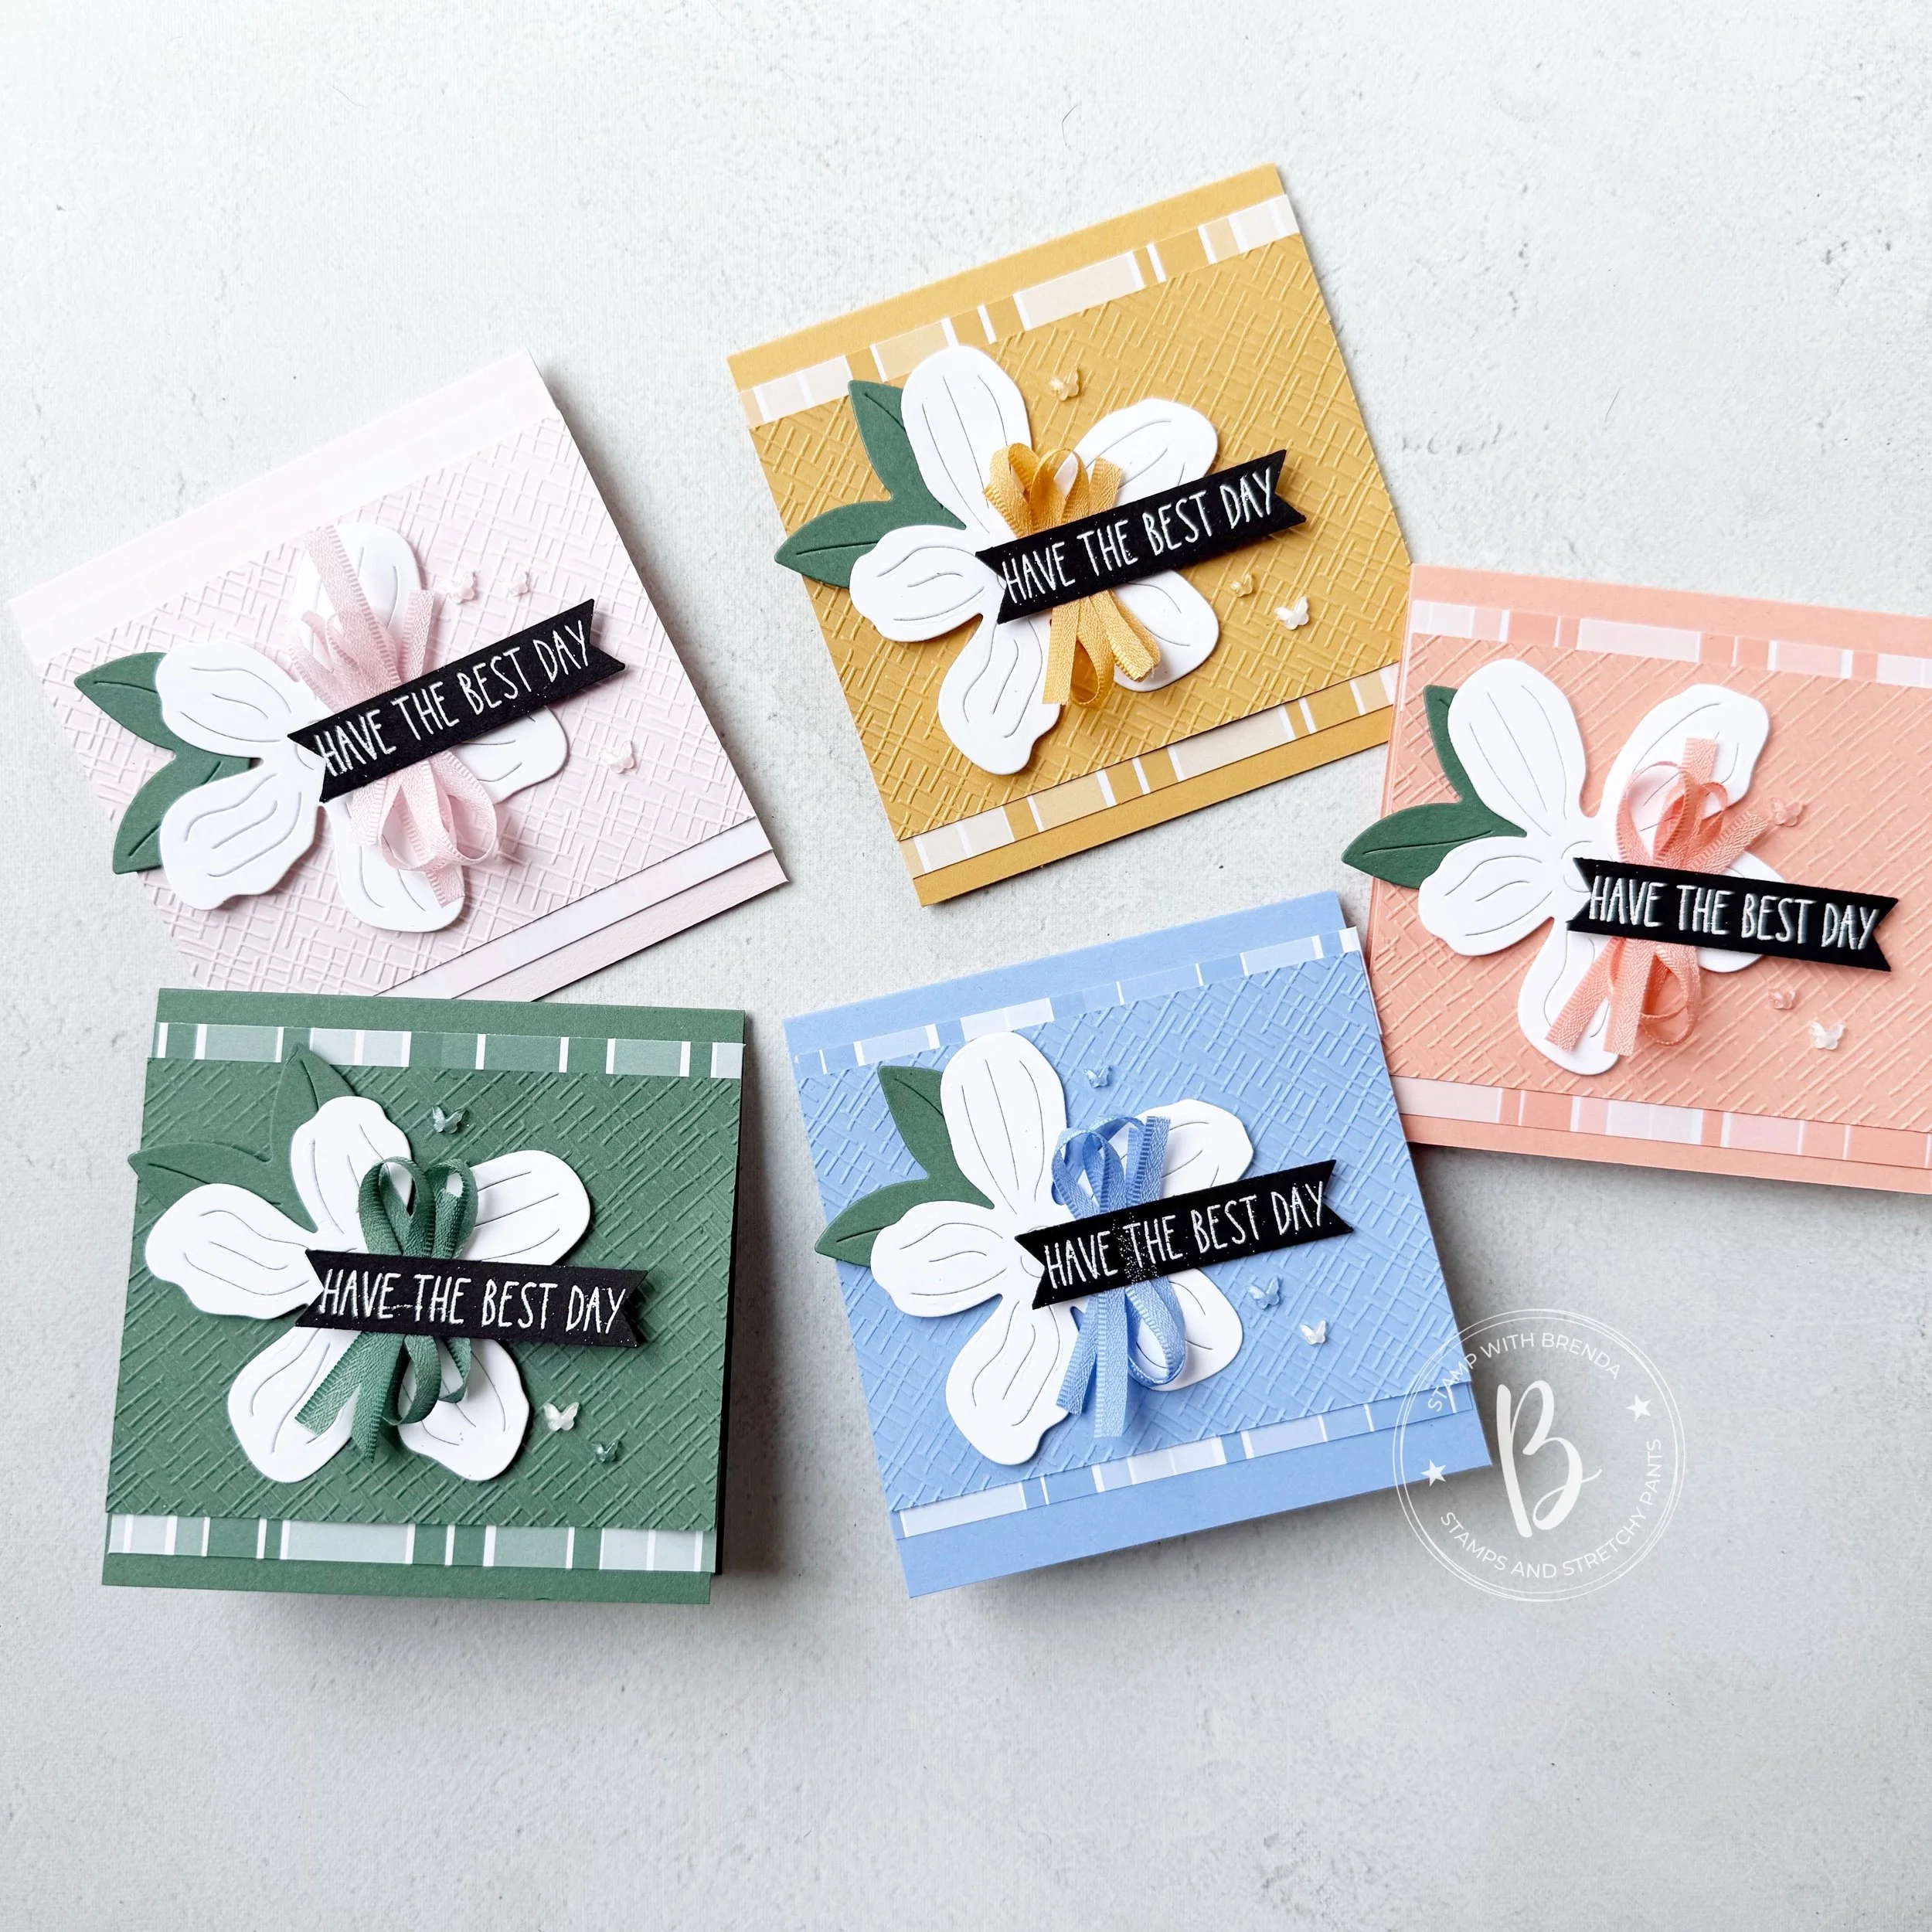
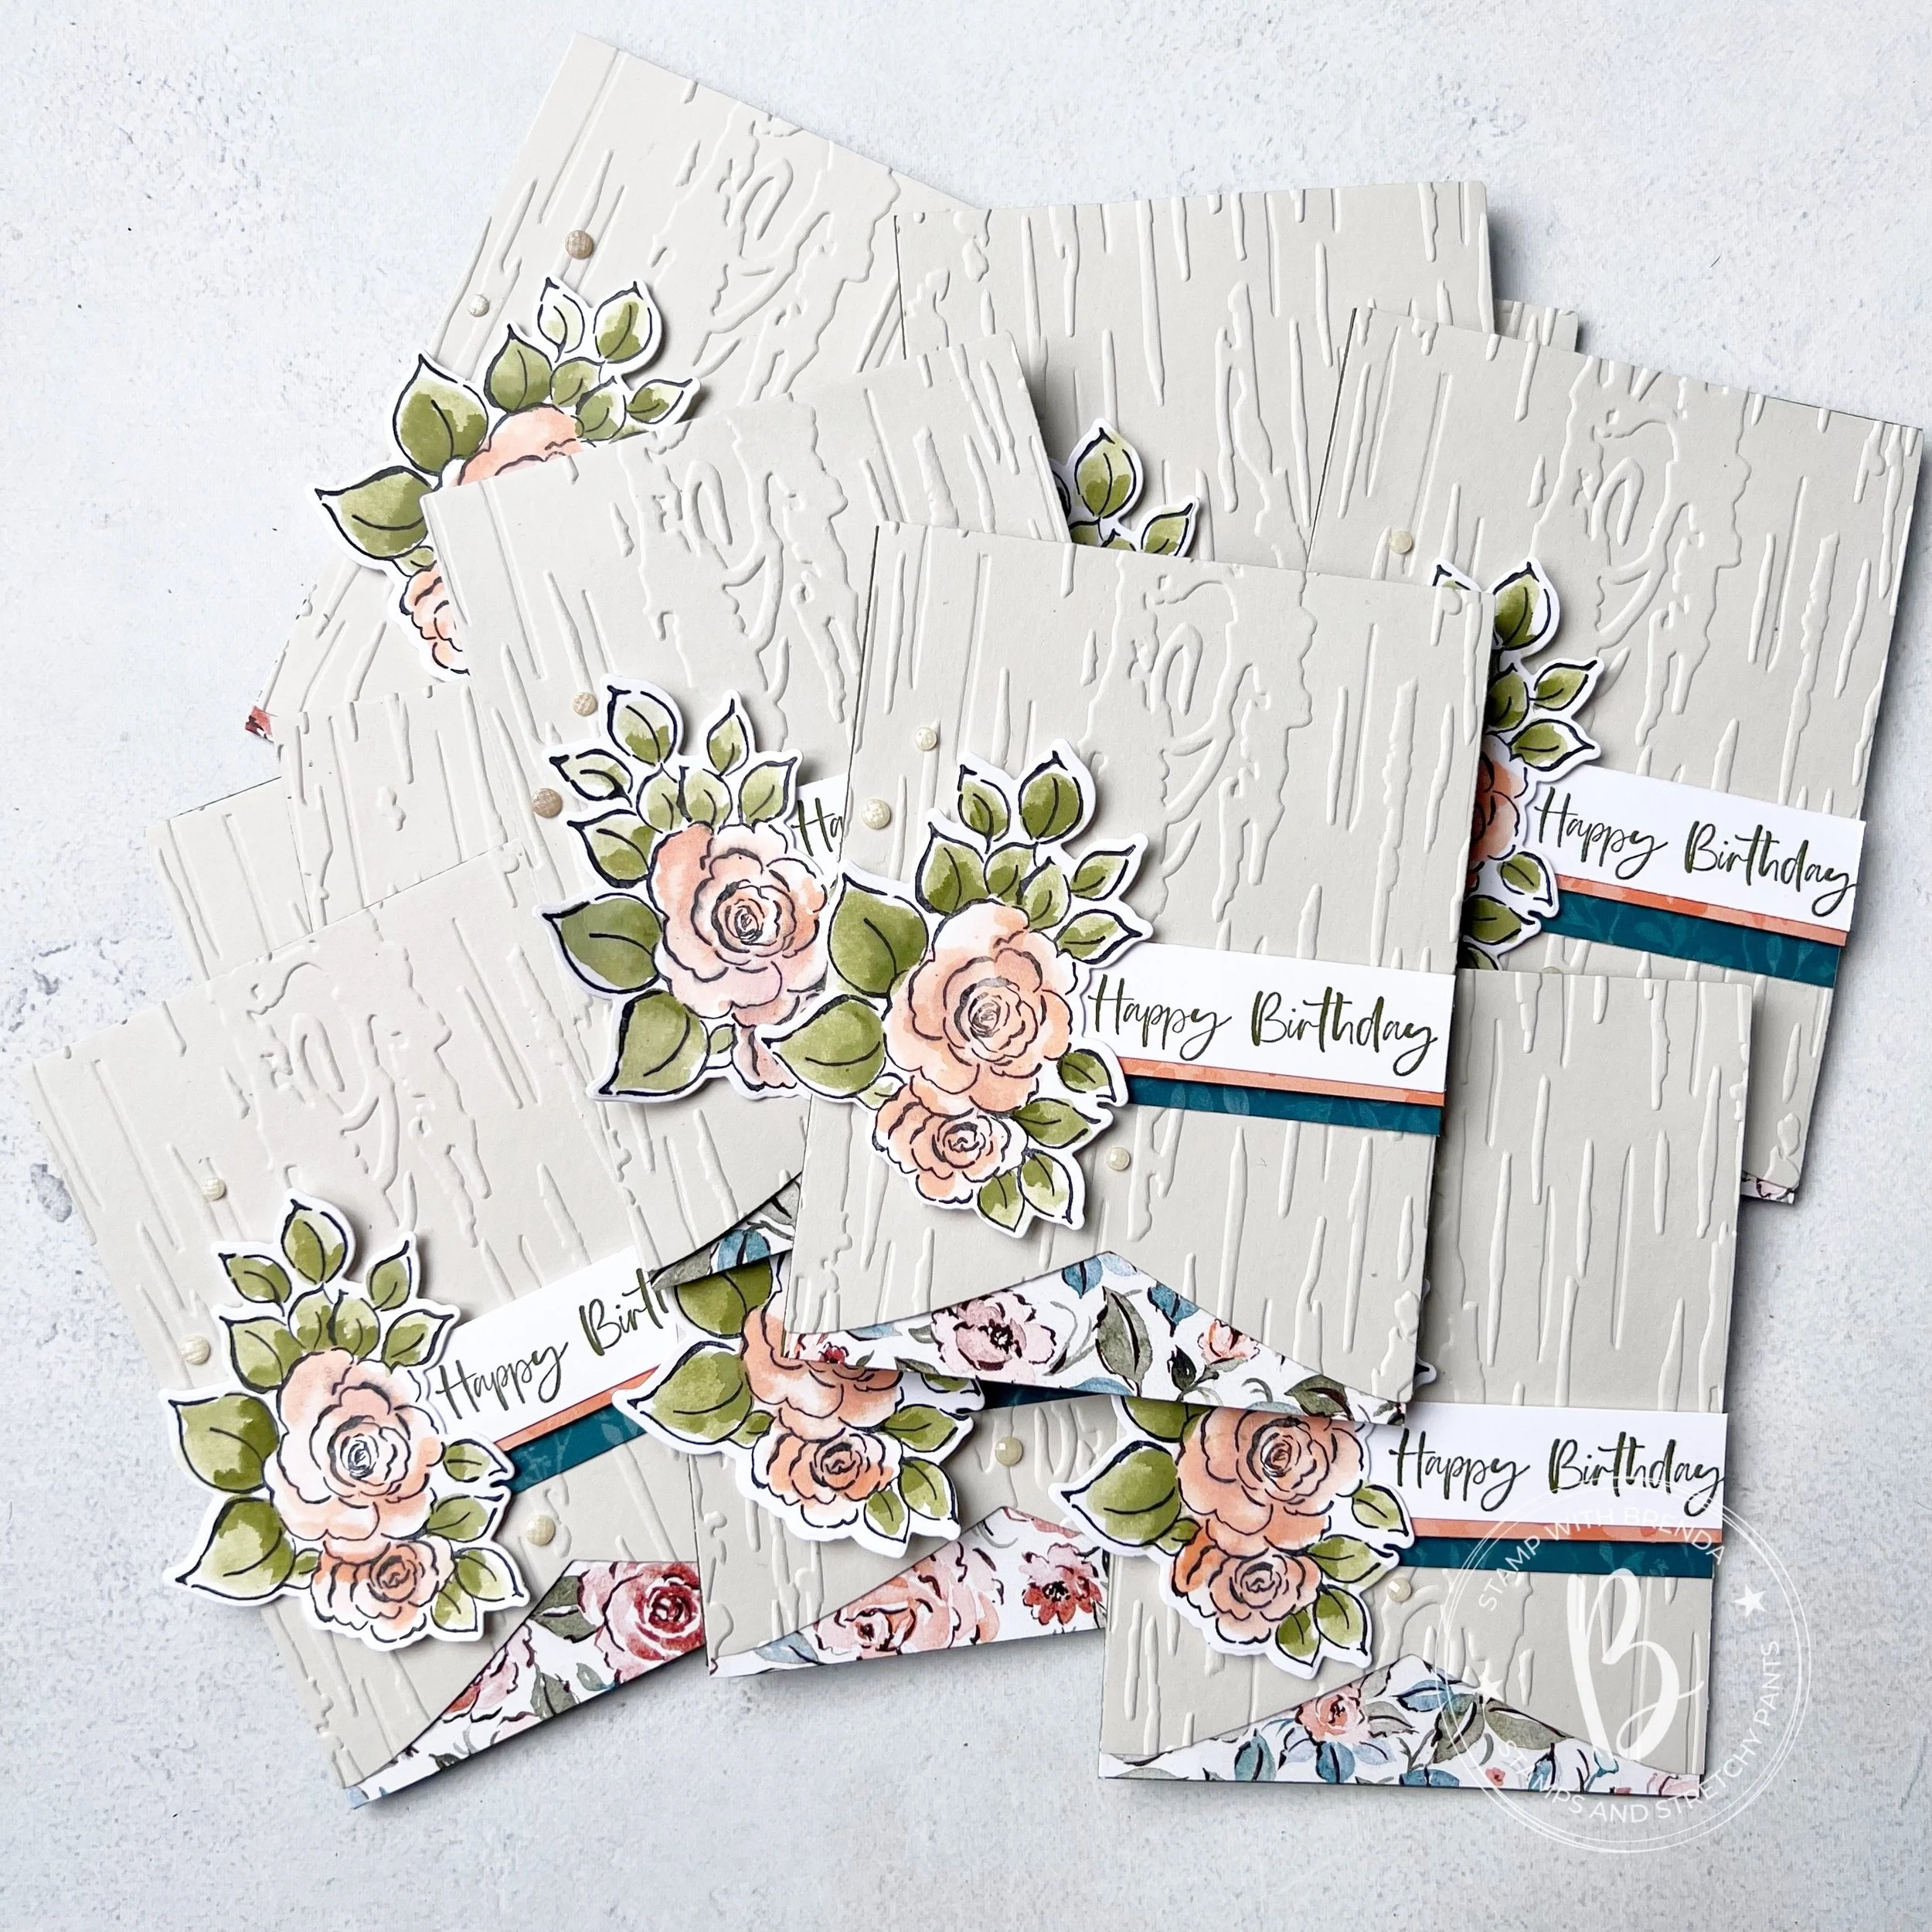
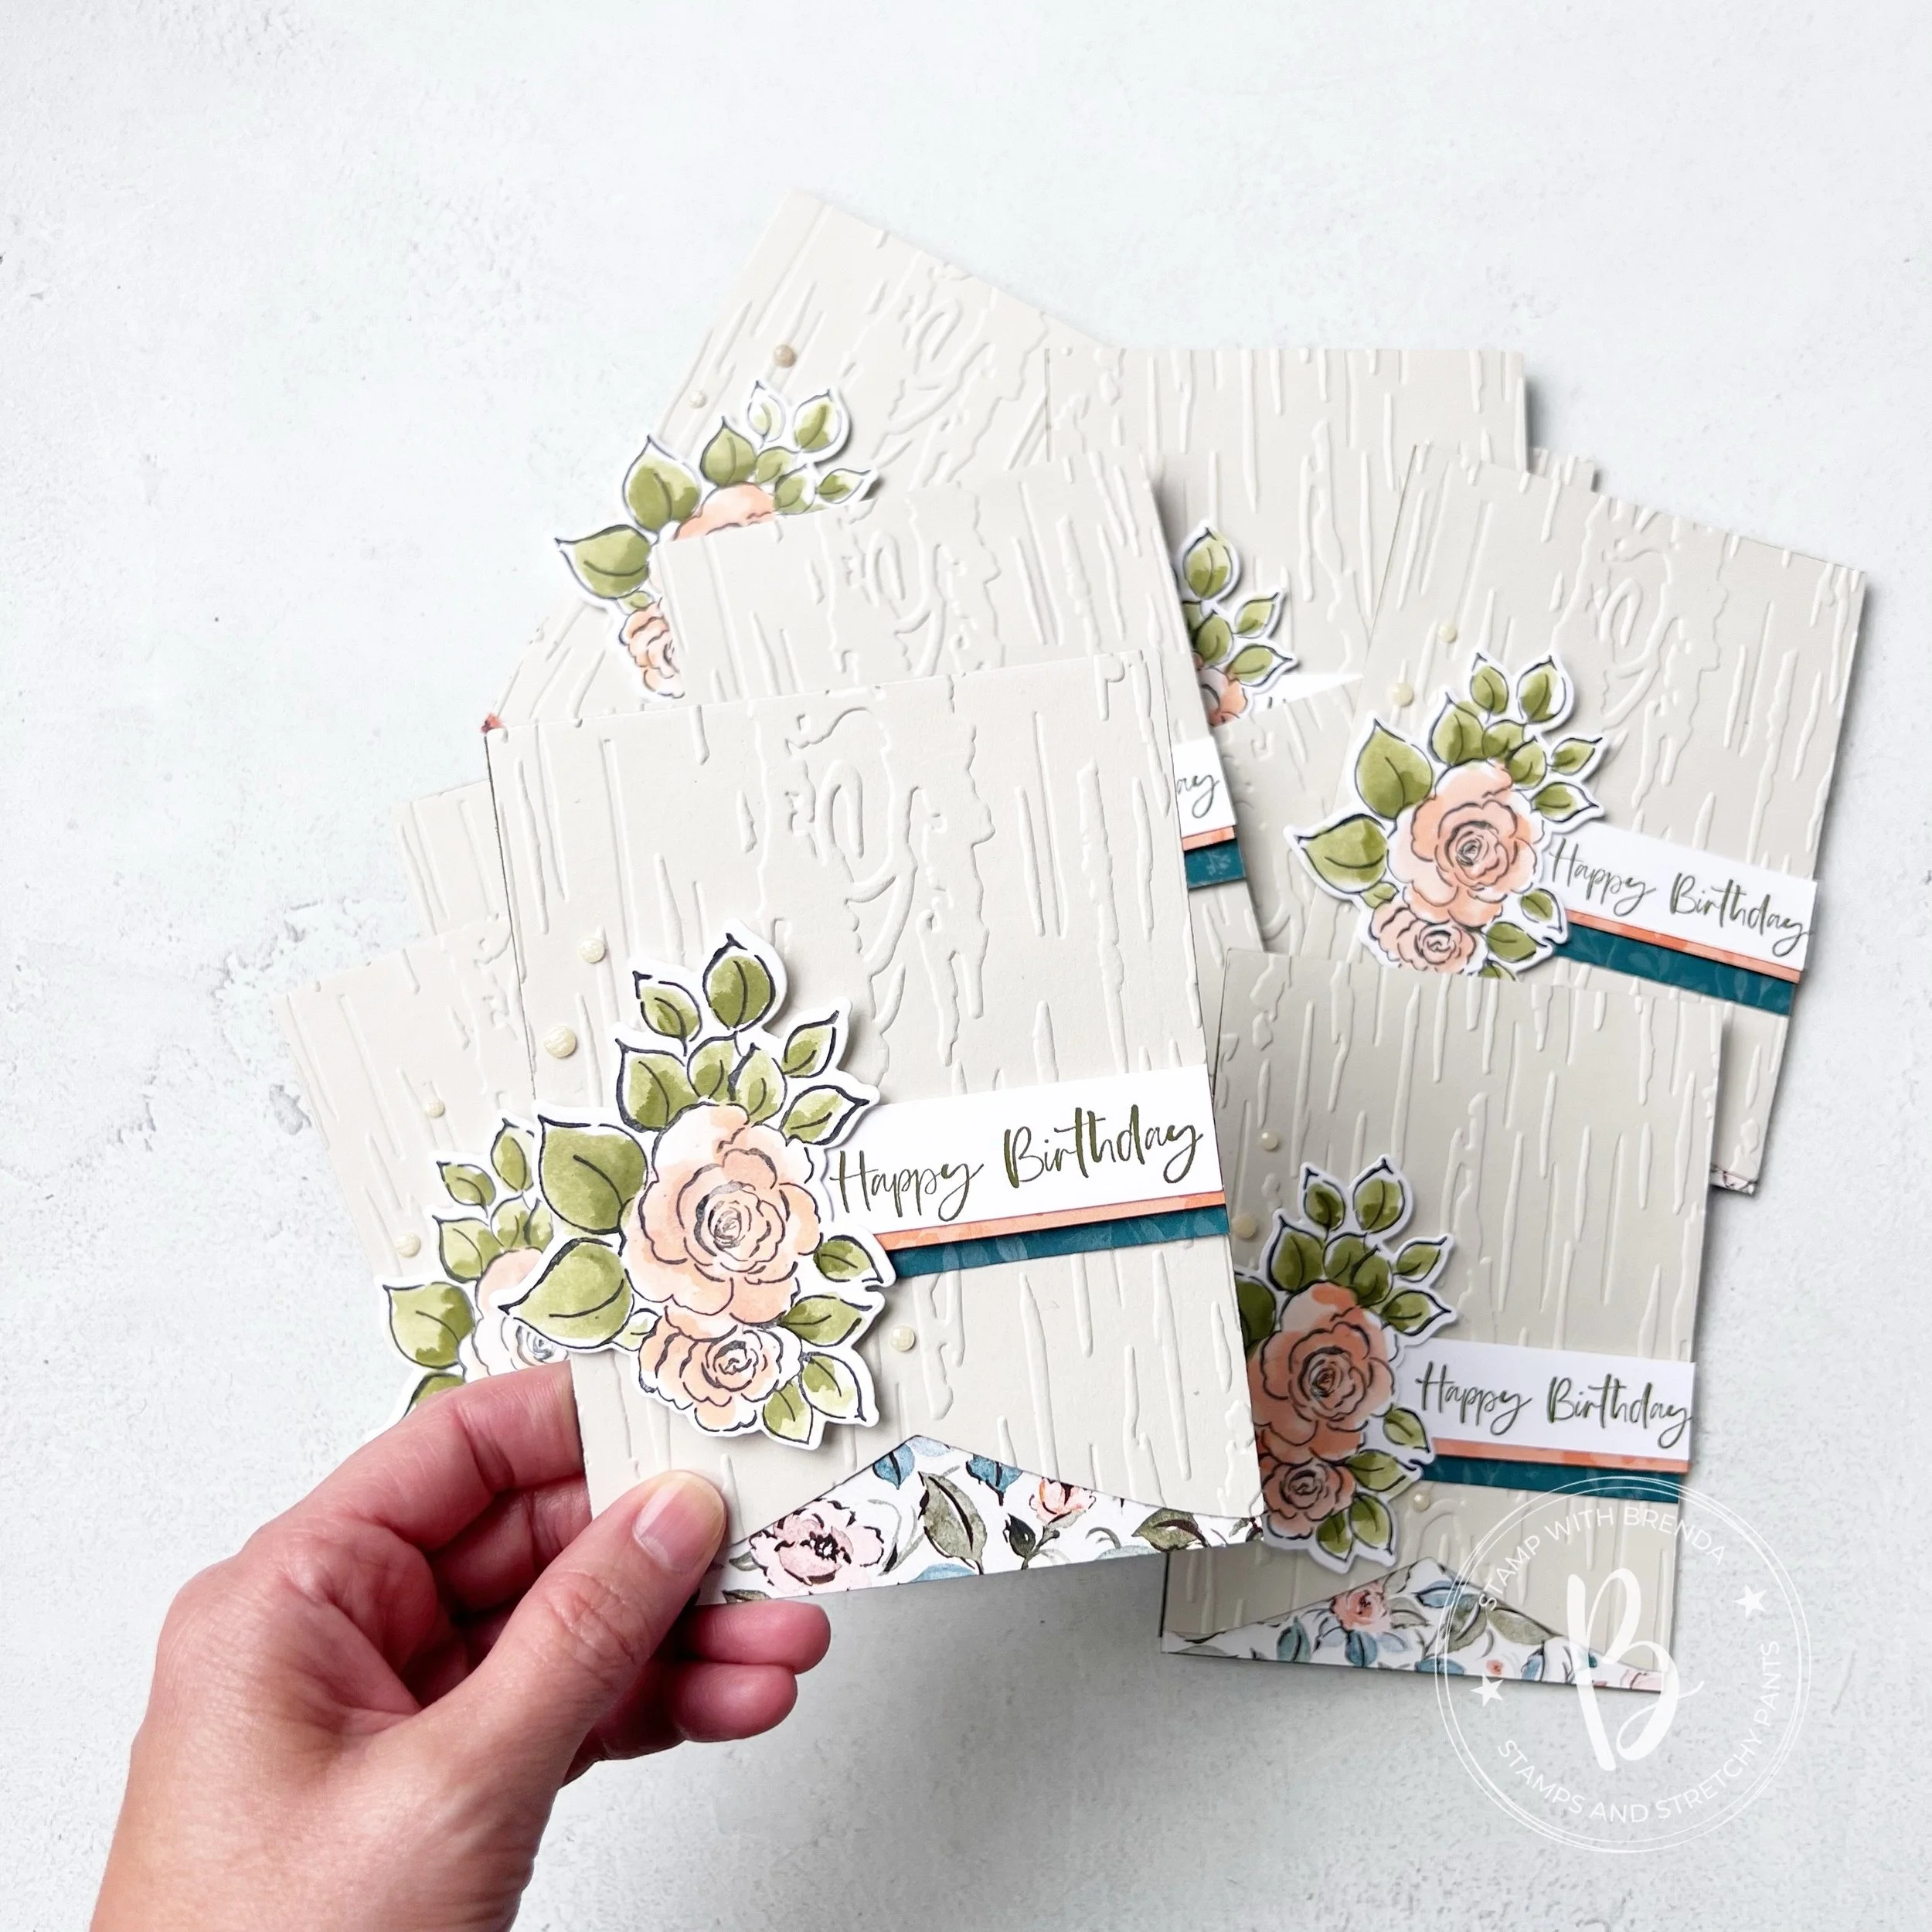
I thought it would be fun to create some mini cards featuring all 5 of our new colors. My favourite addition to the In Color lineup is the 12x12 In Color DSP—in fact, all of the color families now have 12x12 DSP instead of 6x6. I cannot tell you how in love I am with this!
I love the gradient stripped pattern they included in the designs. While I am always a sucker for polka dots, if we can’t have gingham (actually, spoiler alert—it’s coming out in June!) then a good stripe goes a long long way!
As you can see, each card has a strip of DSP flanking the card stock panel in the middle. The strip helps elongate the card, making it feel bigger than 4 x 4.
Barely Blush--Hydrangea Hue--Peaceful Pine--Calypso Coral--Golden Glow
〰️
Barely Blush--Hydrangea Hue--Peaceful Pine--Calypso Coral--Golden Glow 〰️
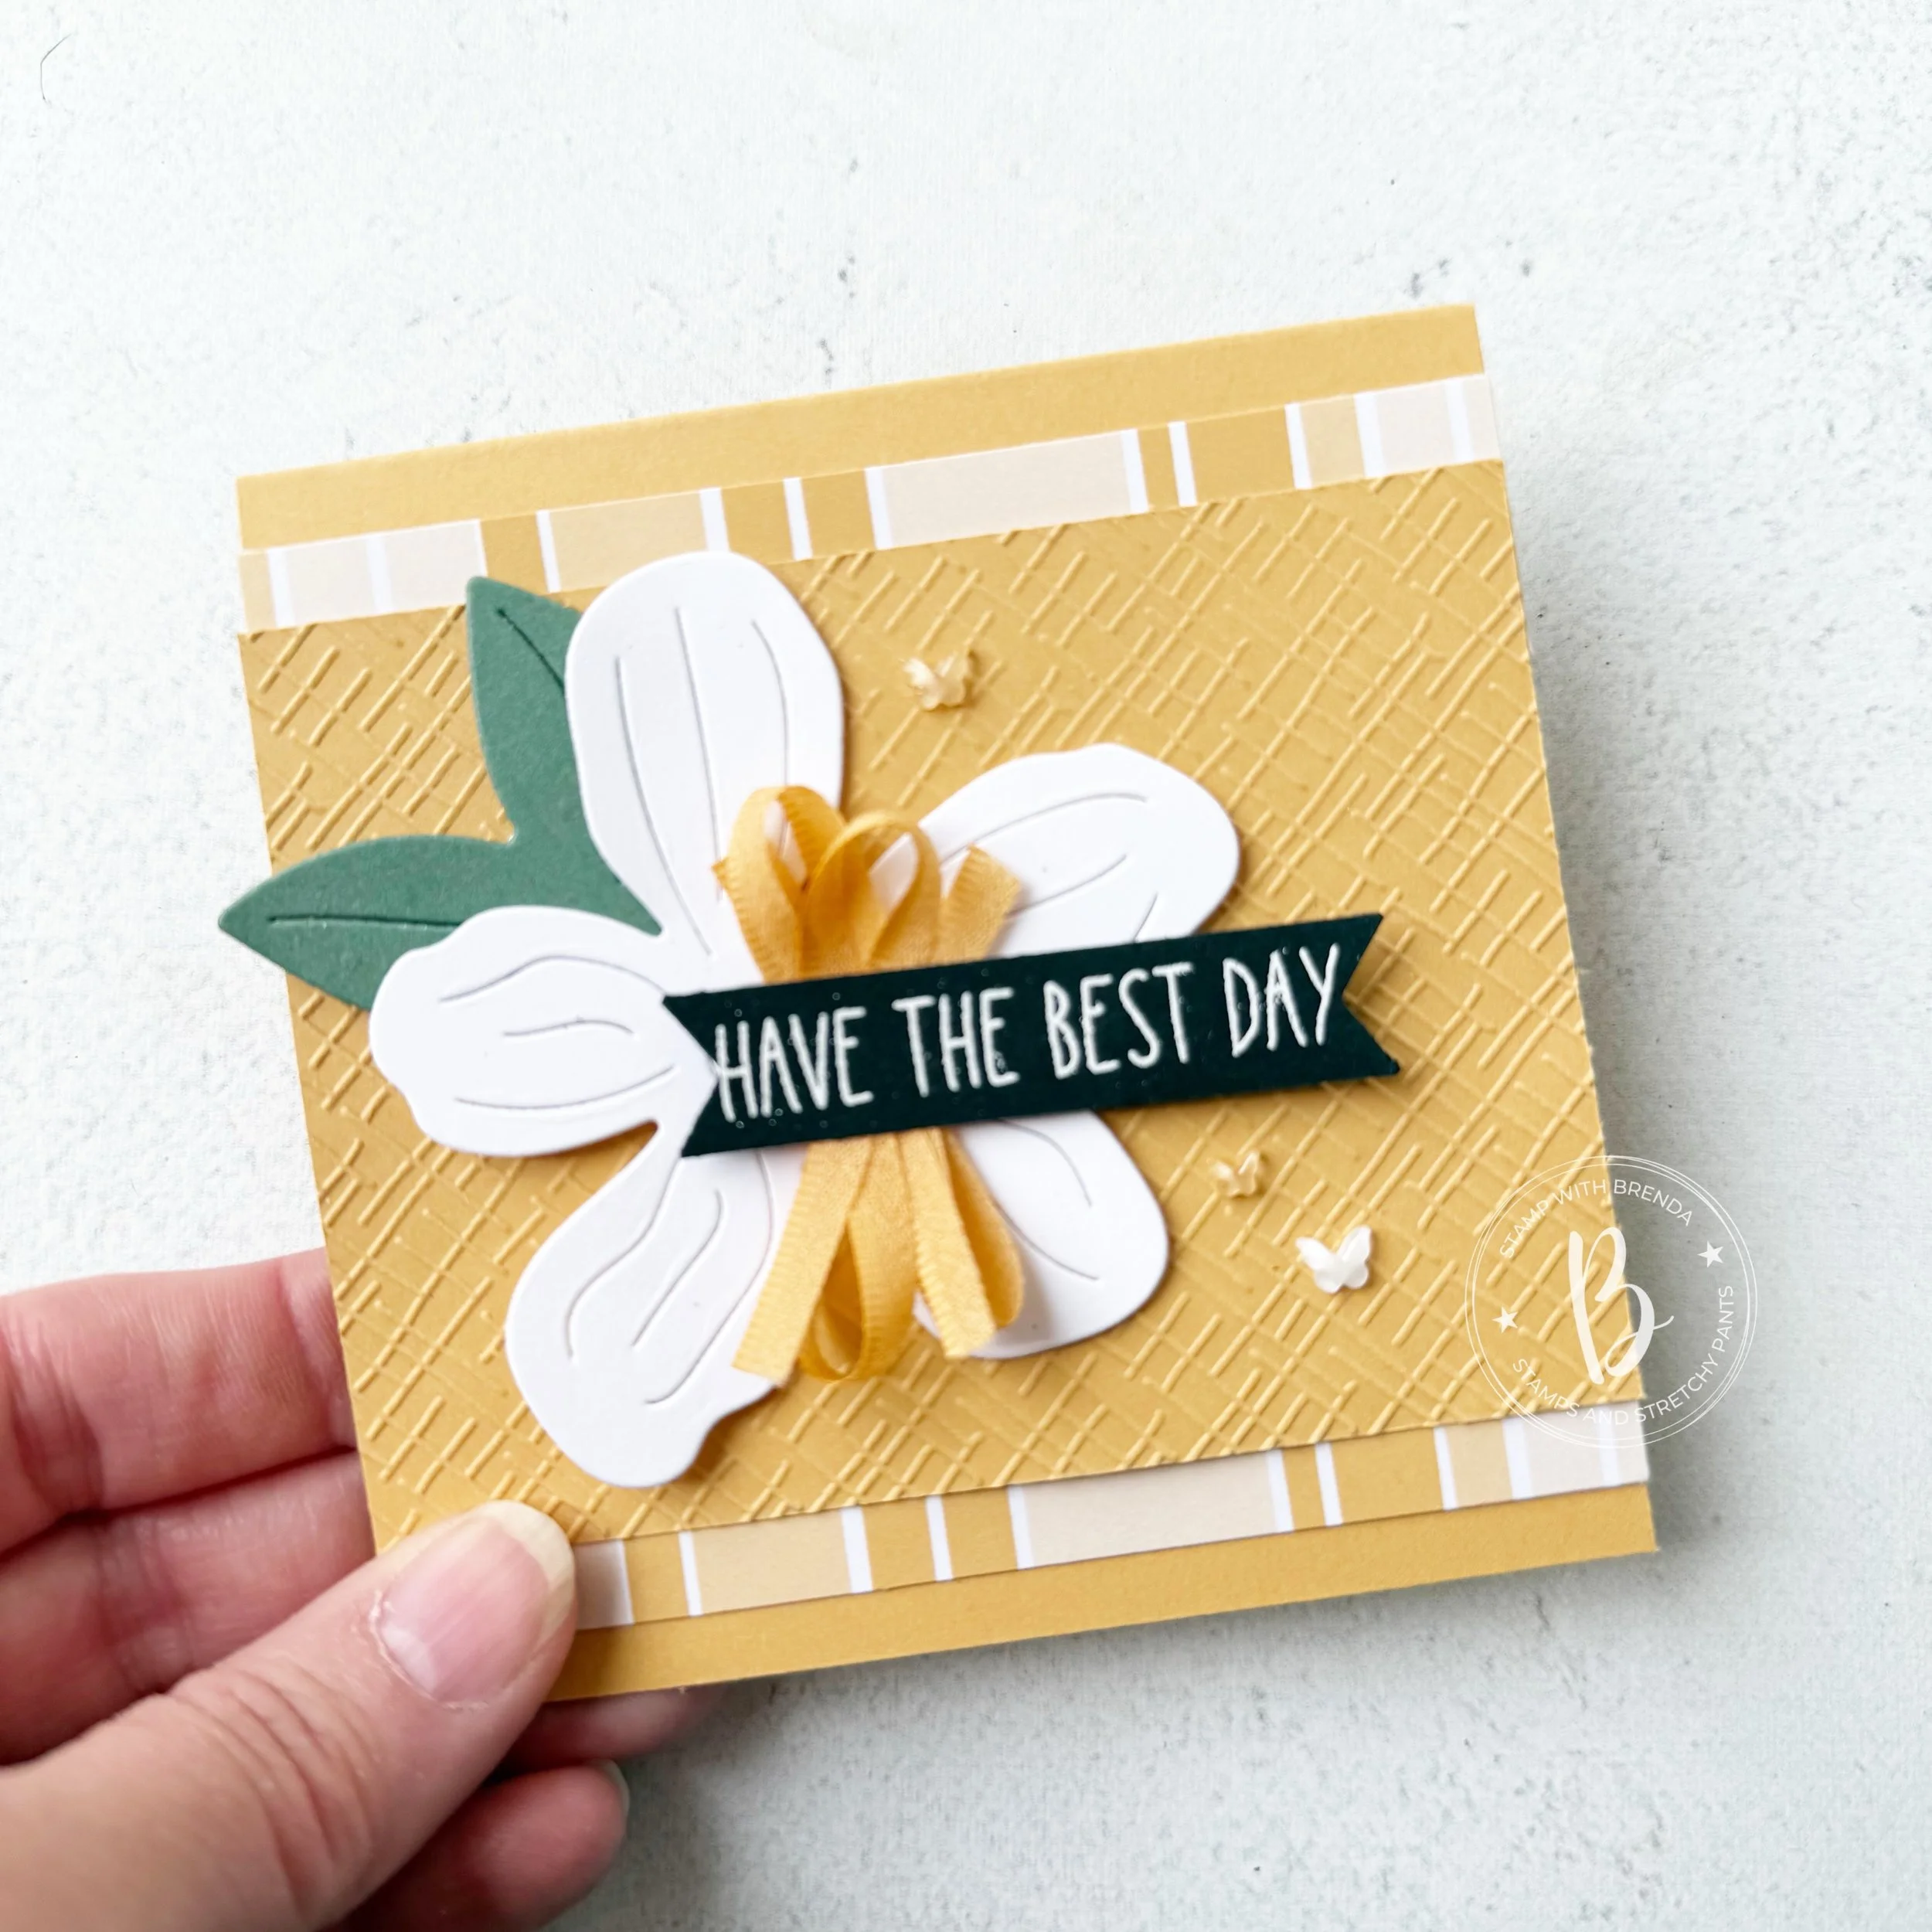
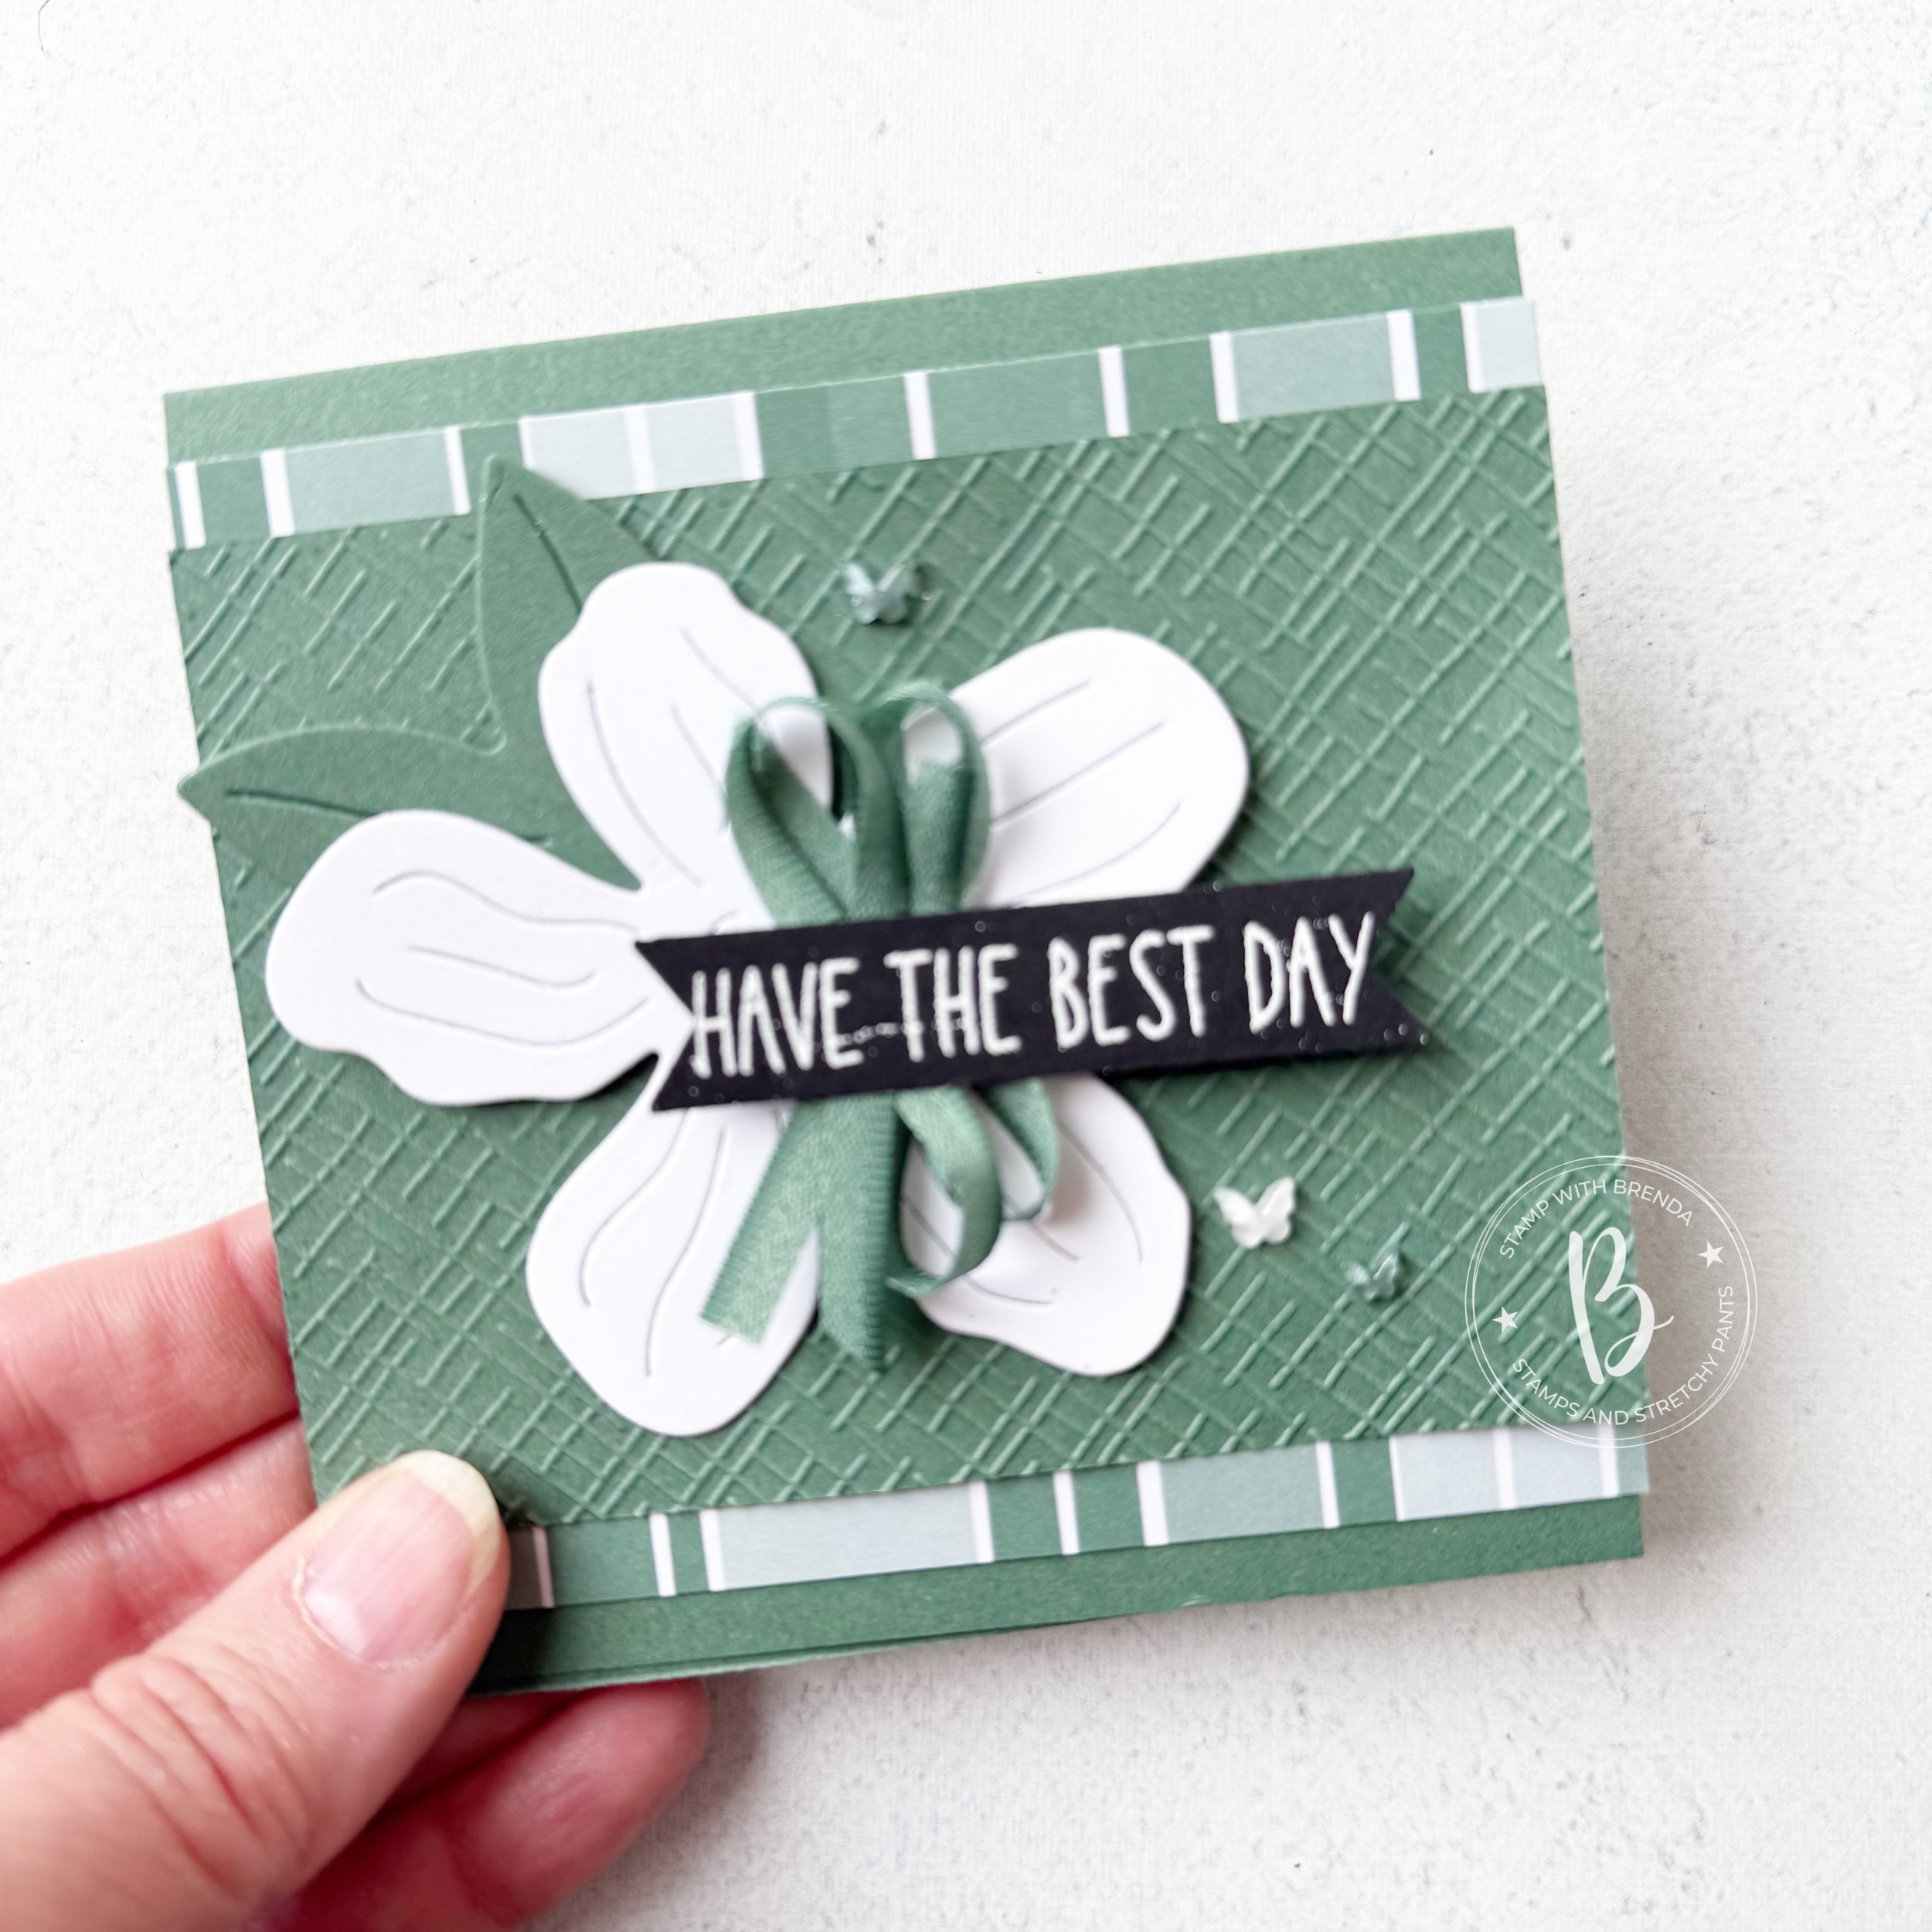

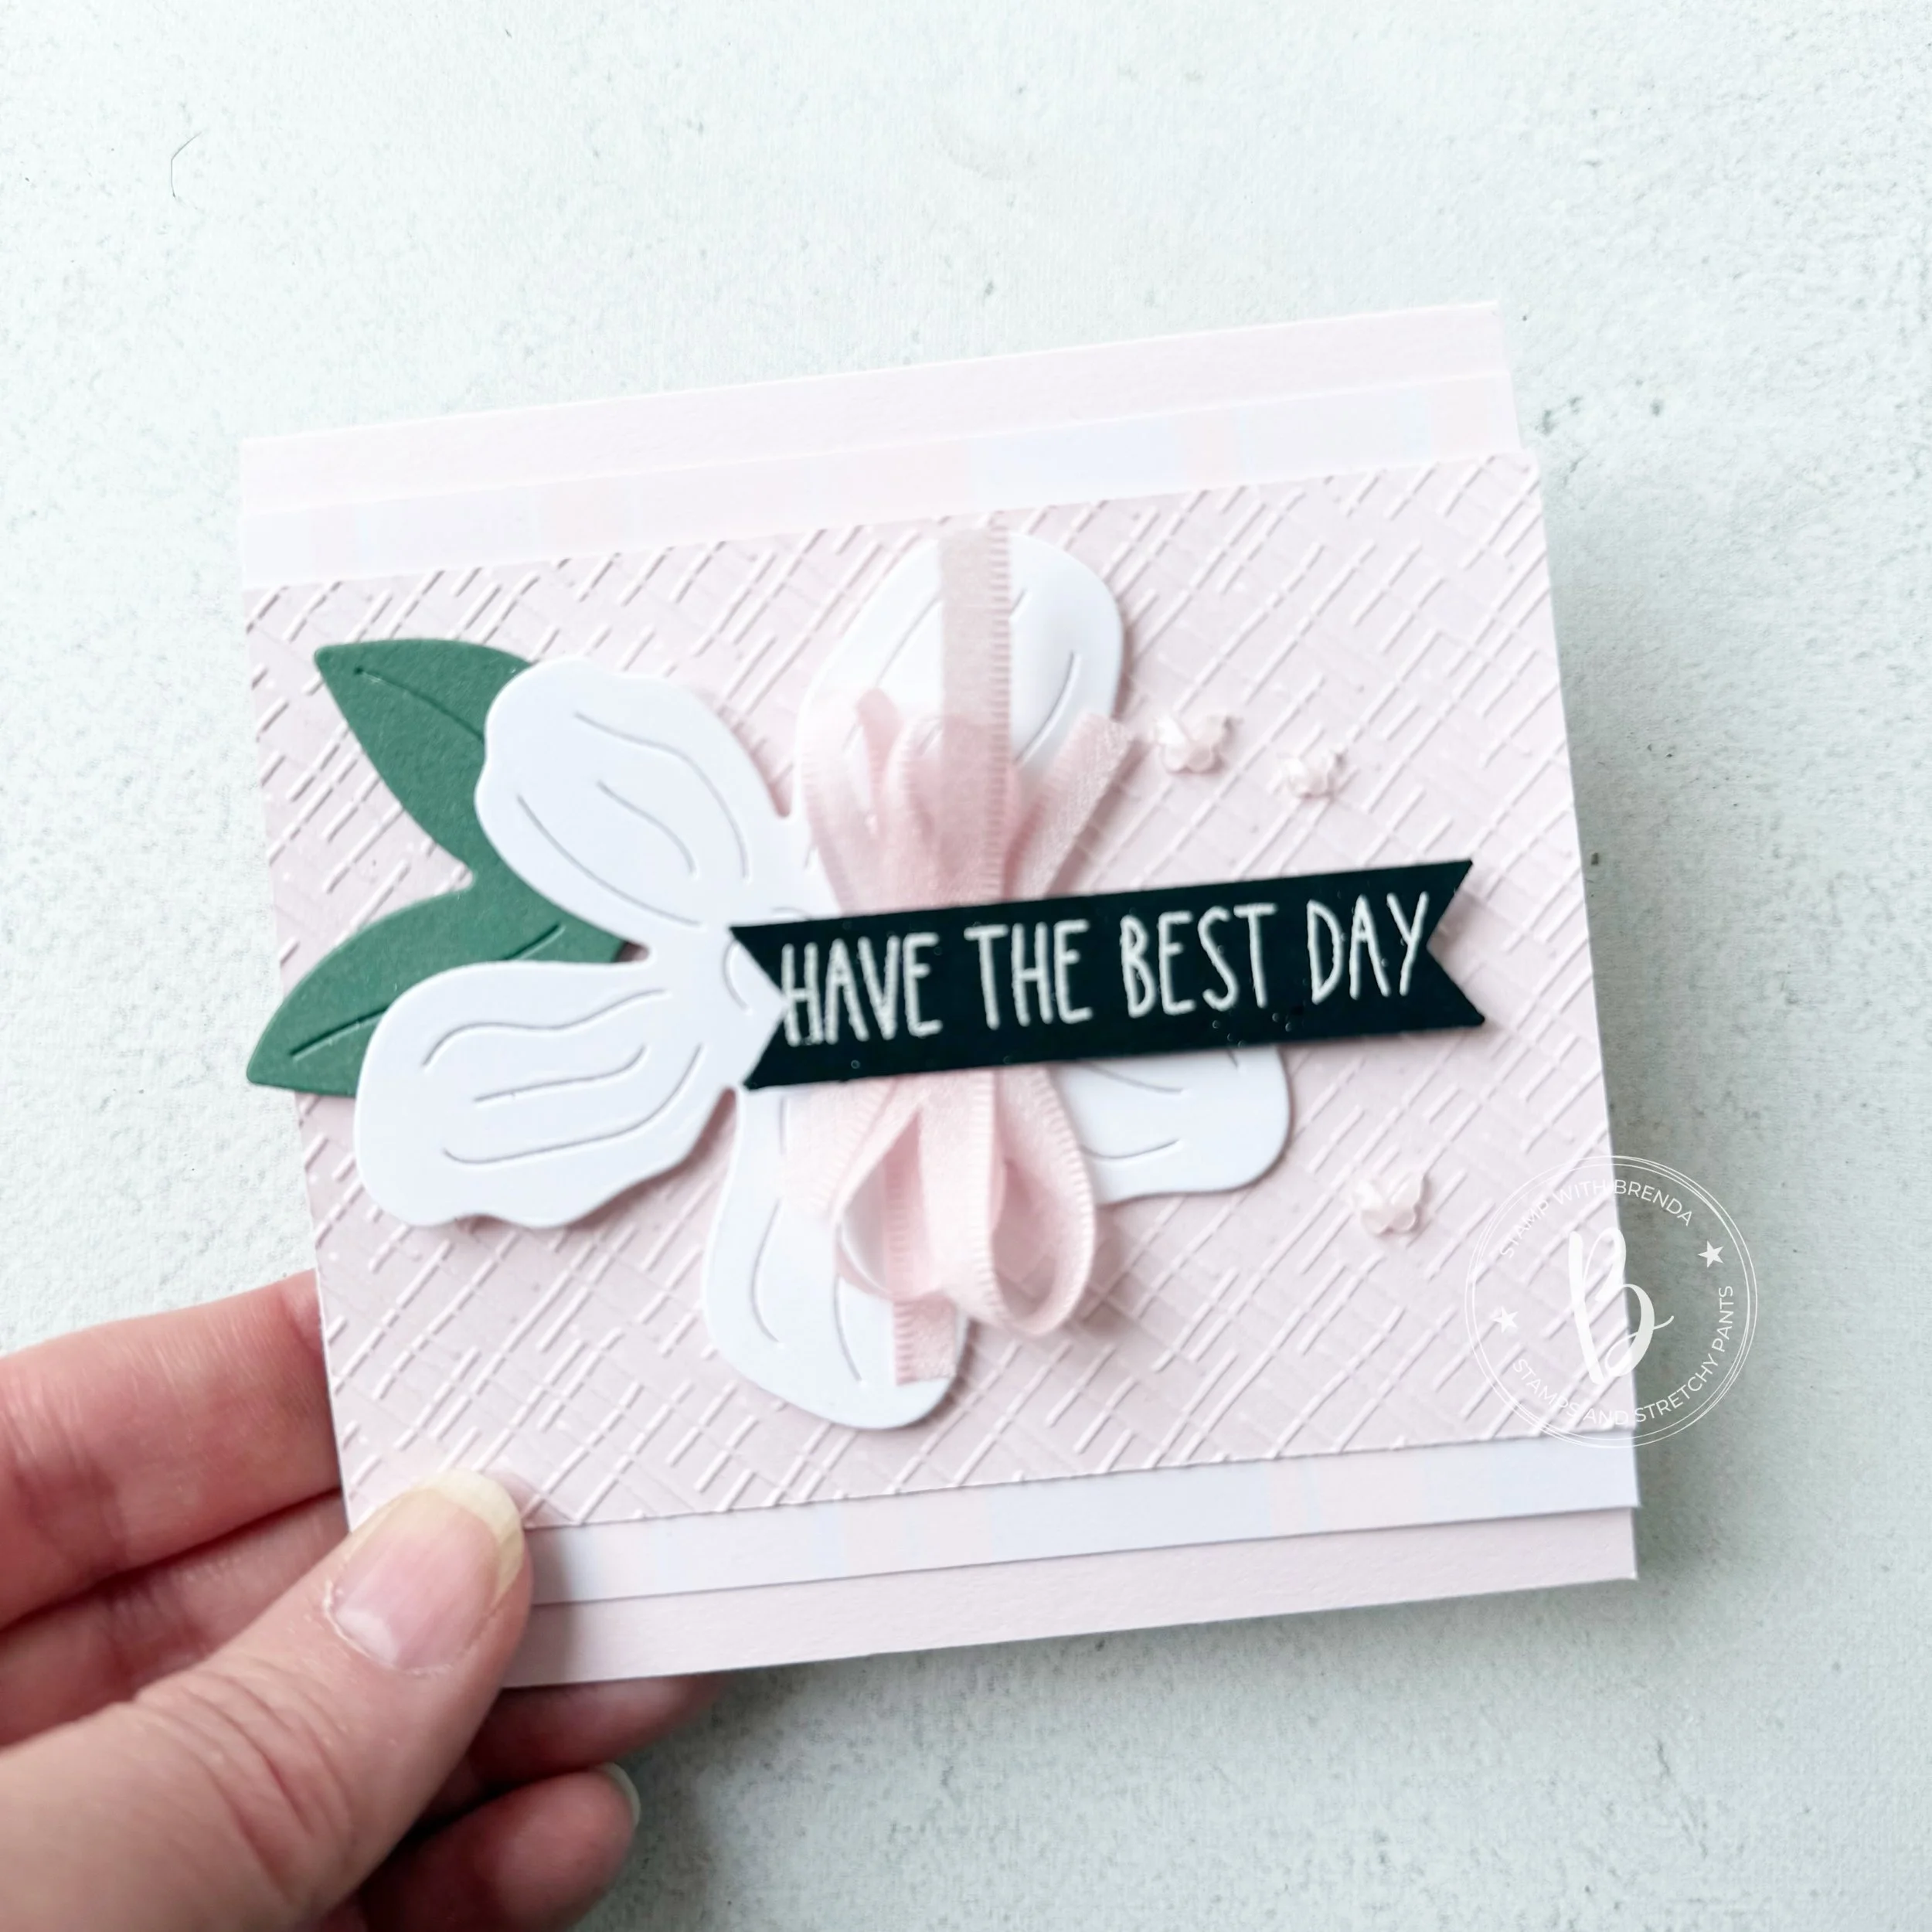

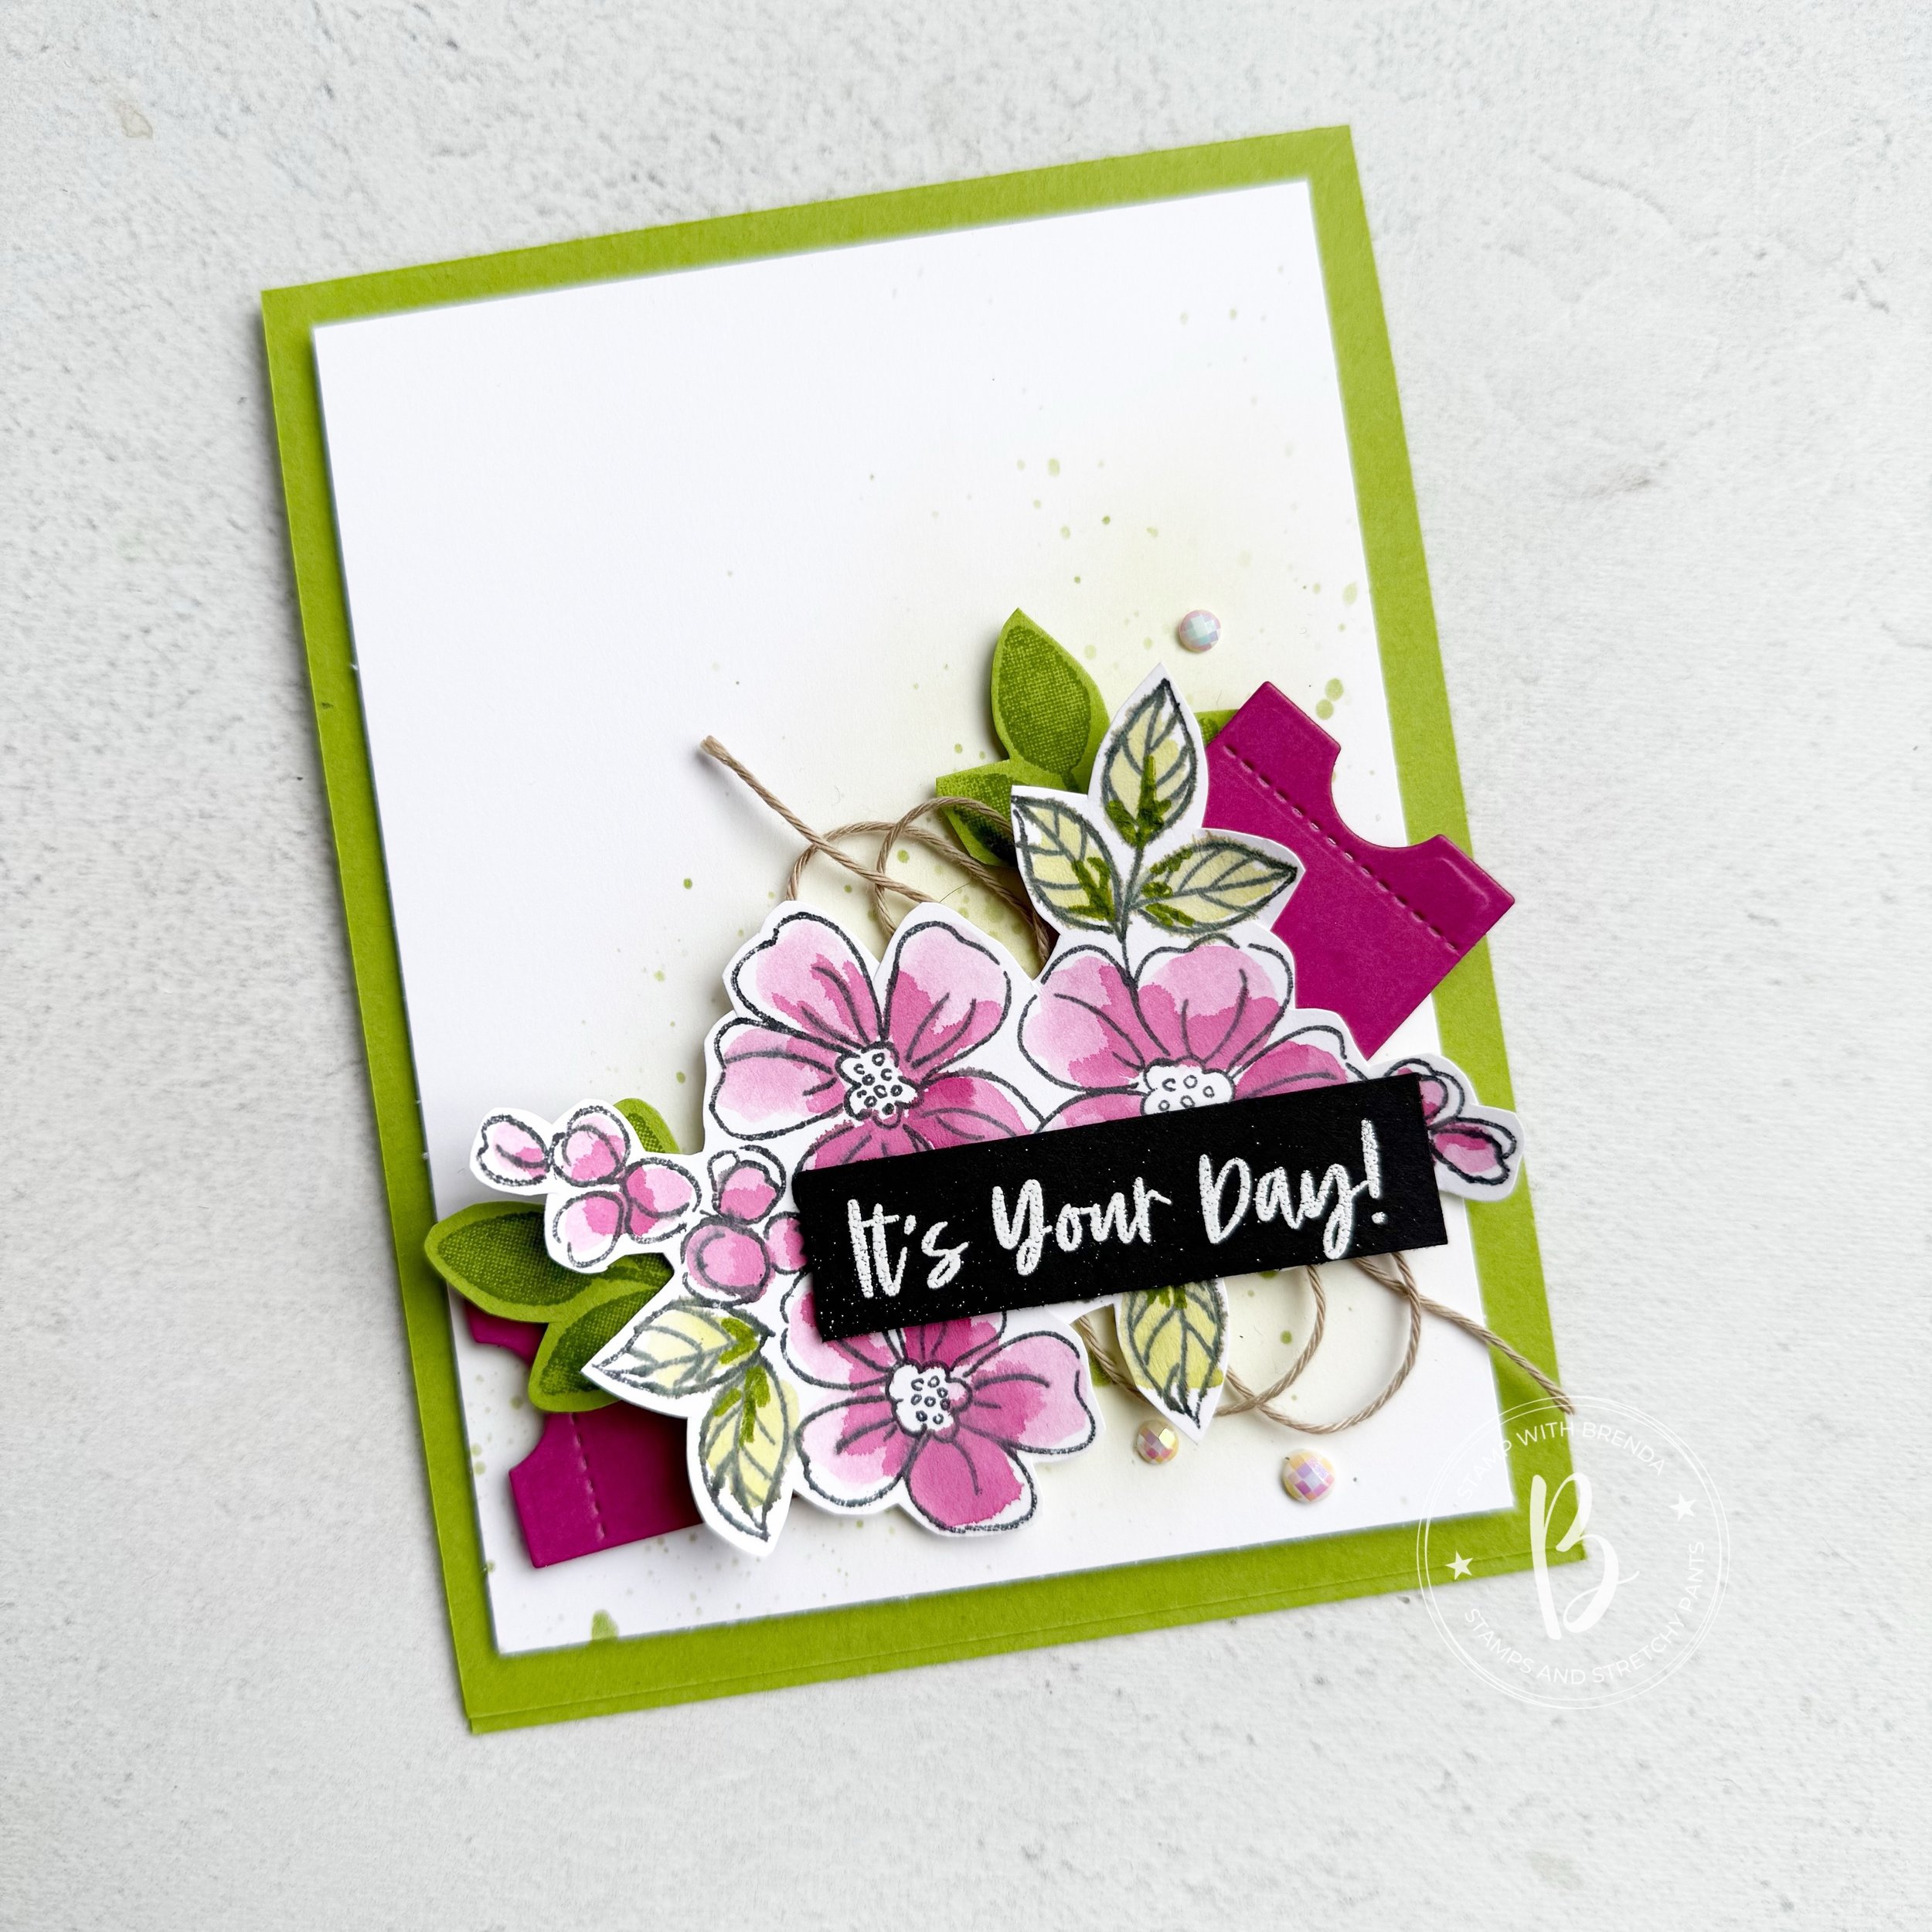
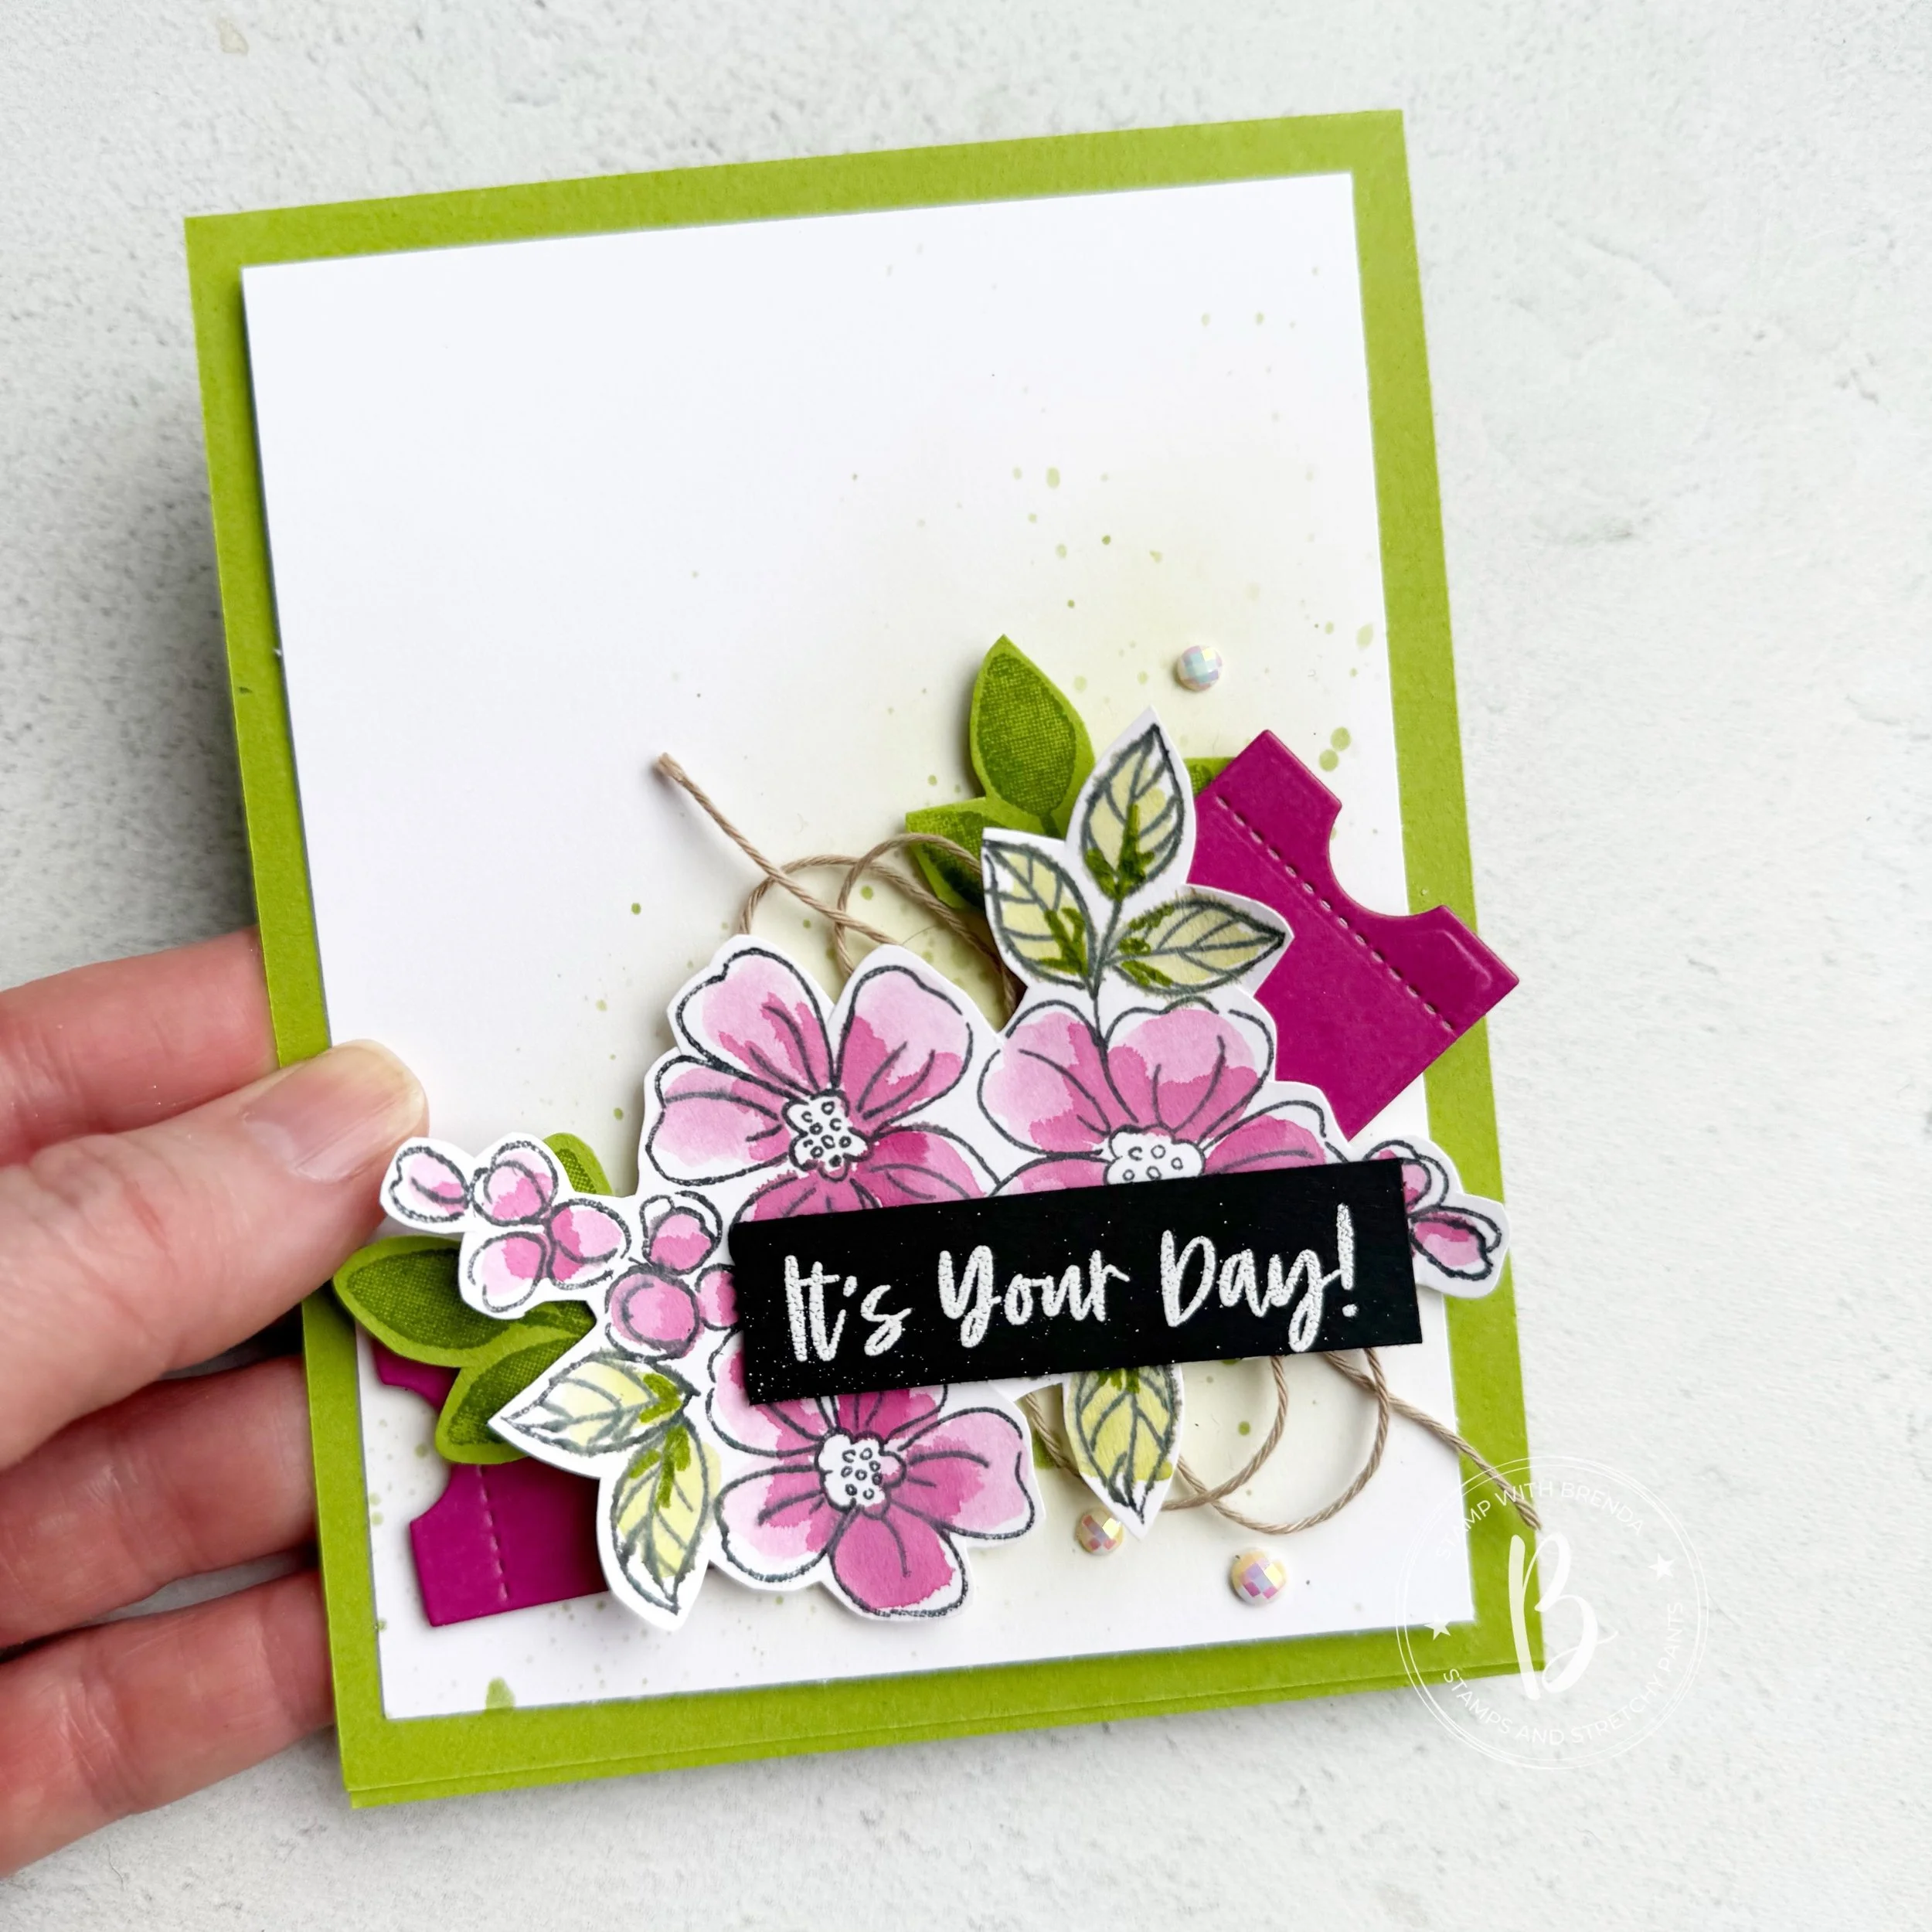
One of my favourite new bundles in the Annual Catalogue is the Heirloom Blooms Bundle. I cannot tell you have much I have used it already—it’s definitely been inspiring me. I love the large oversized flower (one of 4) that comes in the die set. I used it on each card in Basic White, along with a petal die—all cut from Peaceful Pine.
Each card has a length of ribbon that I cut into two to layer and create a really full looking bow.
And I love the In Color Butterly accents. It’s a bonus that they included clear as well!
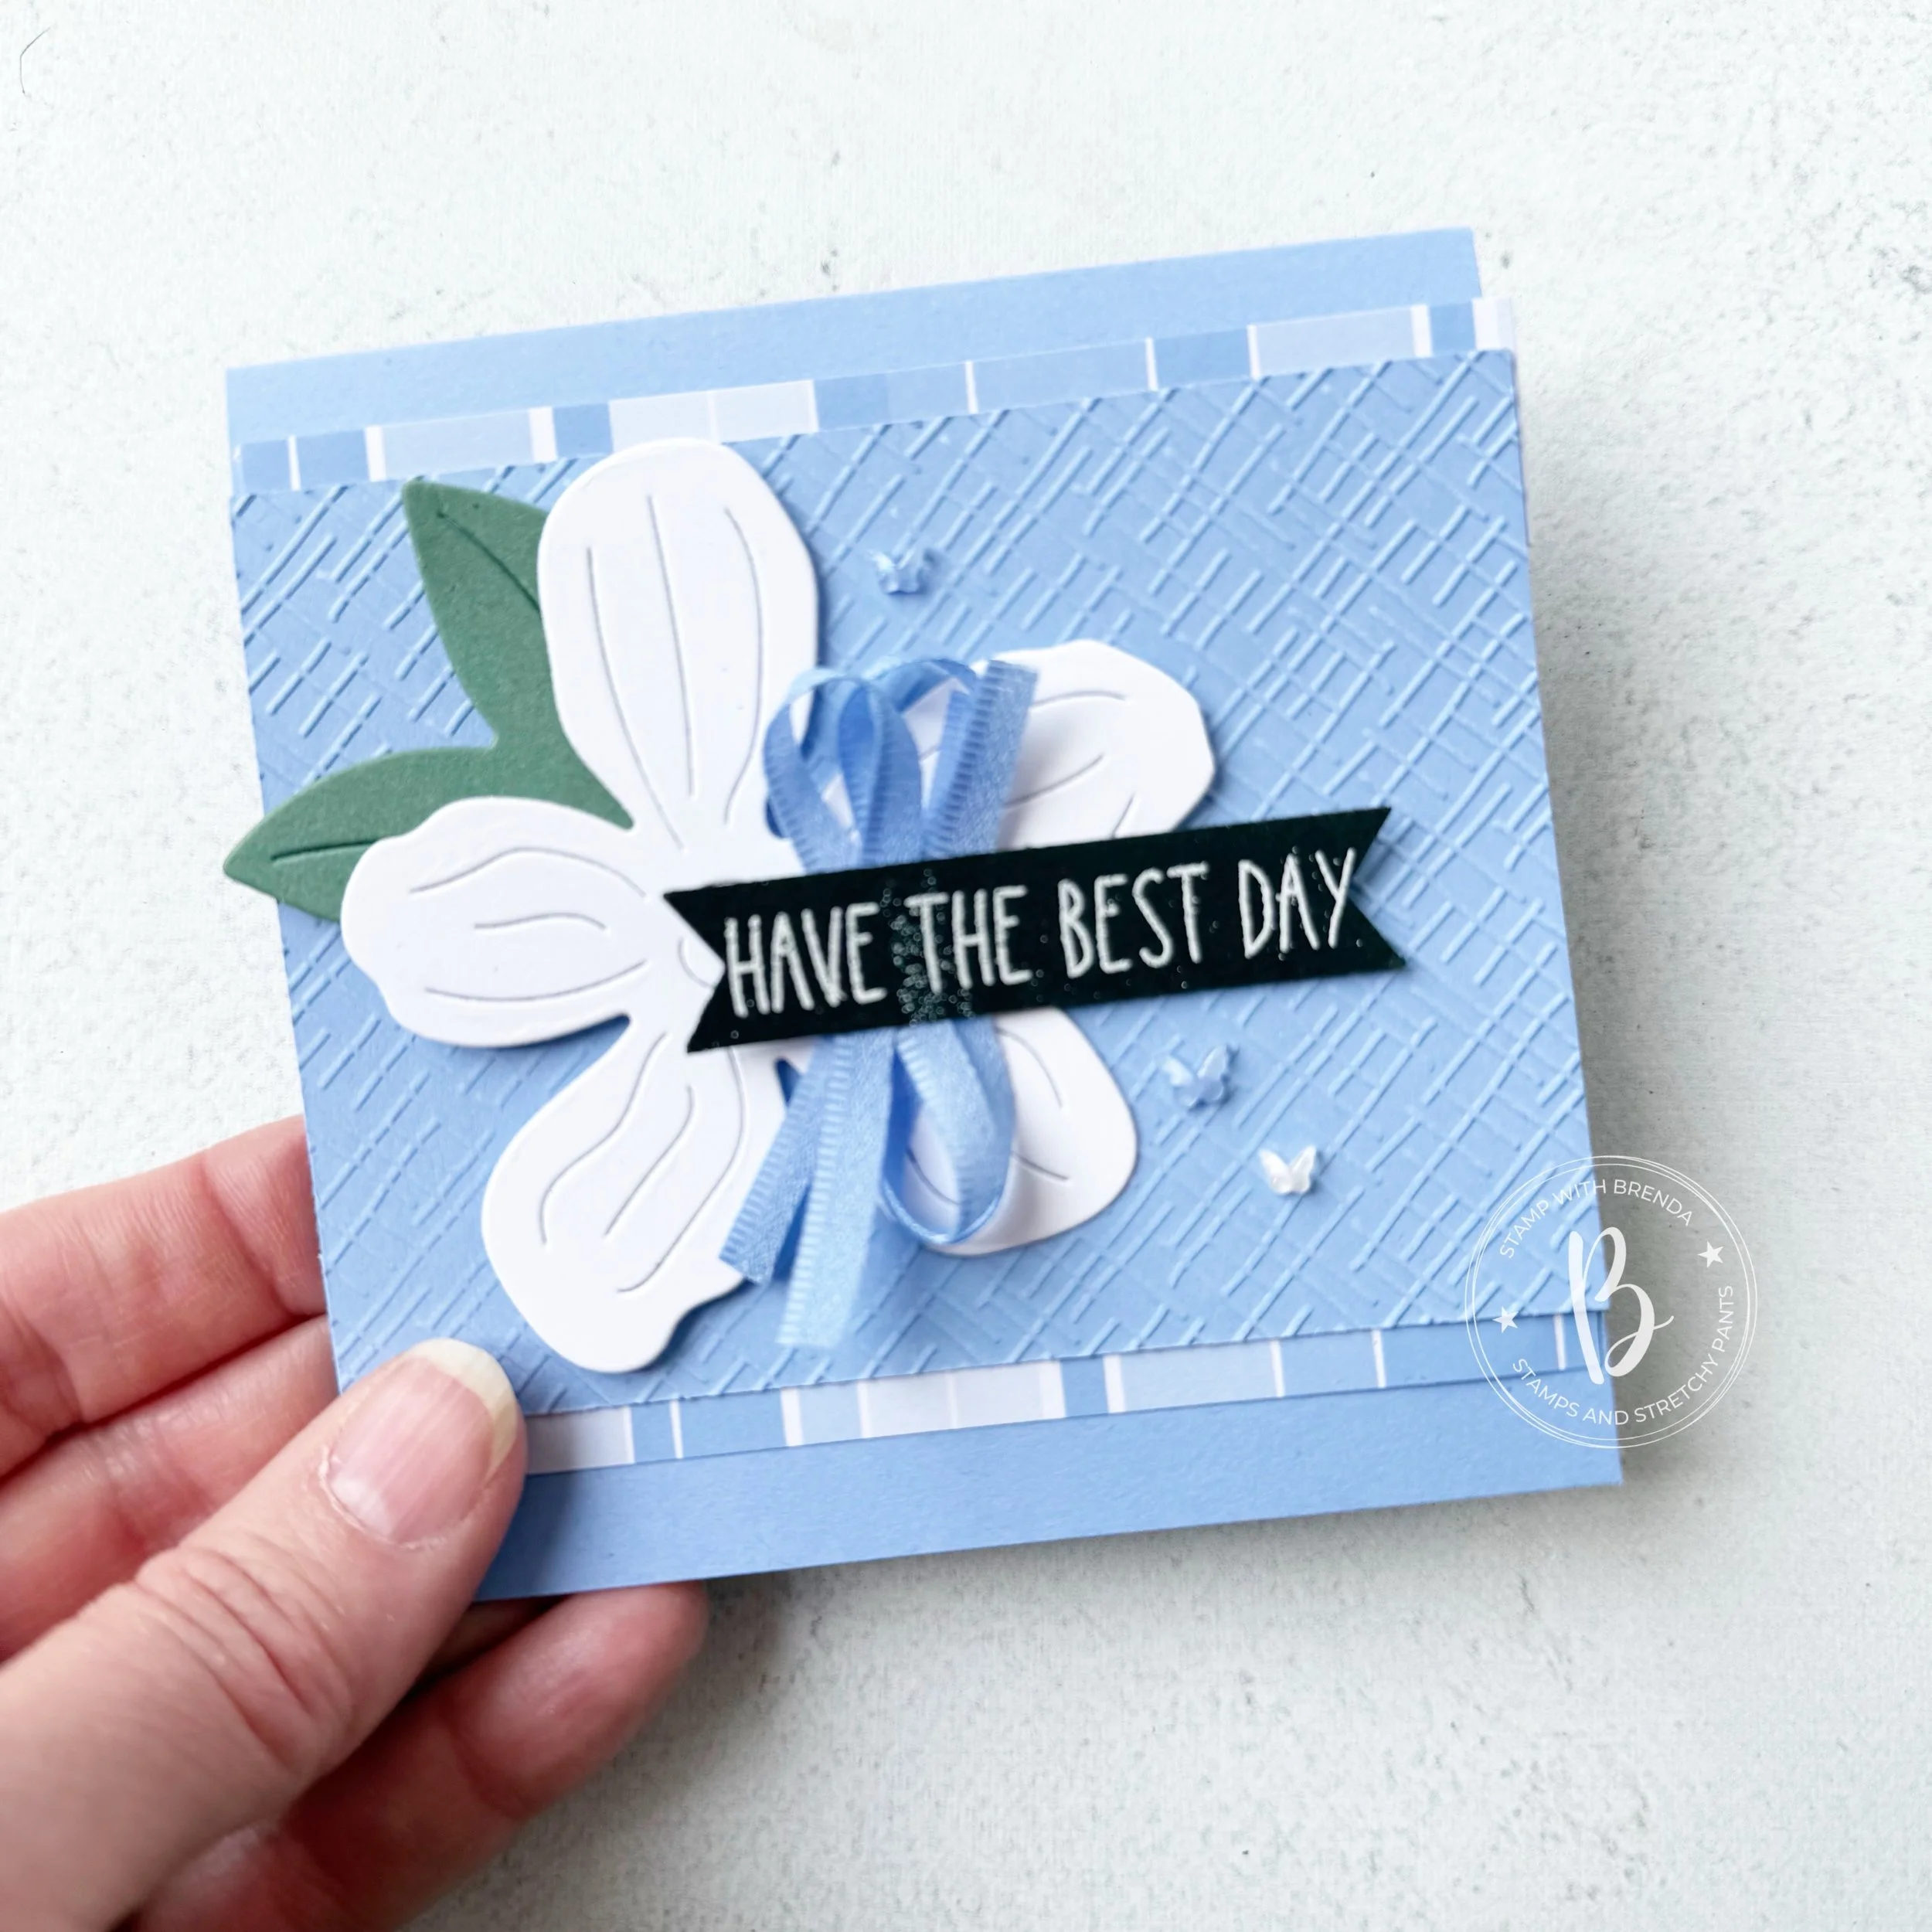
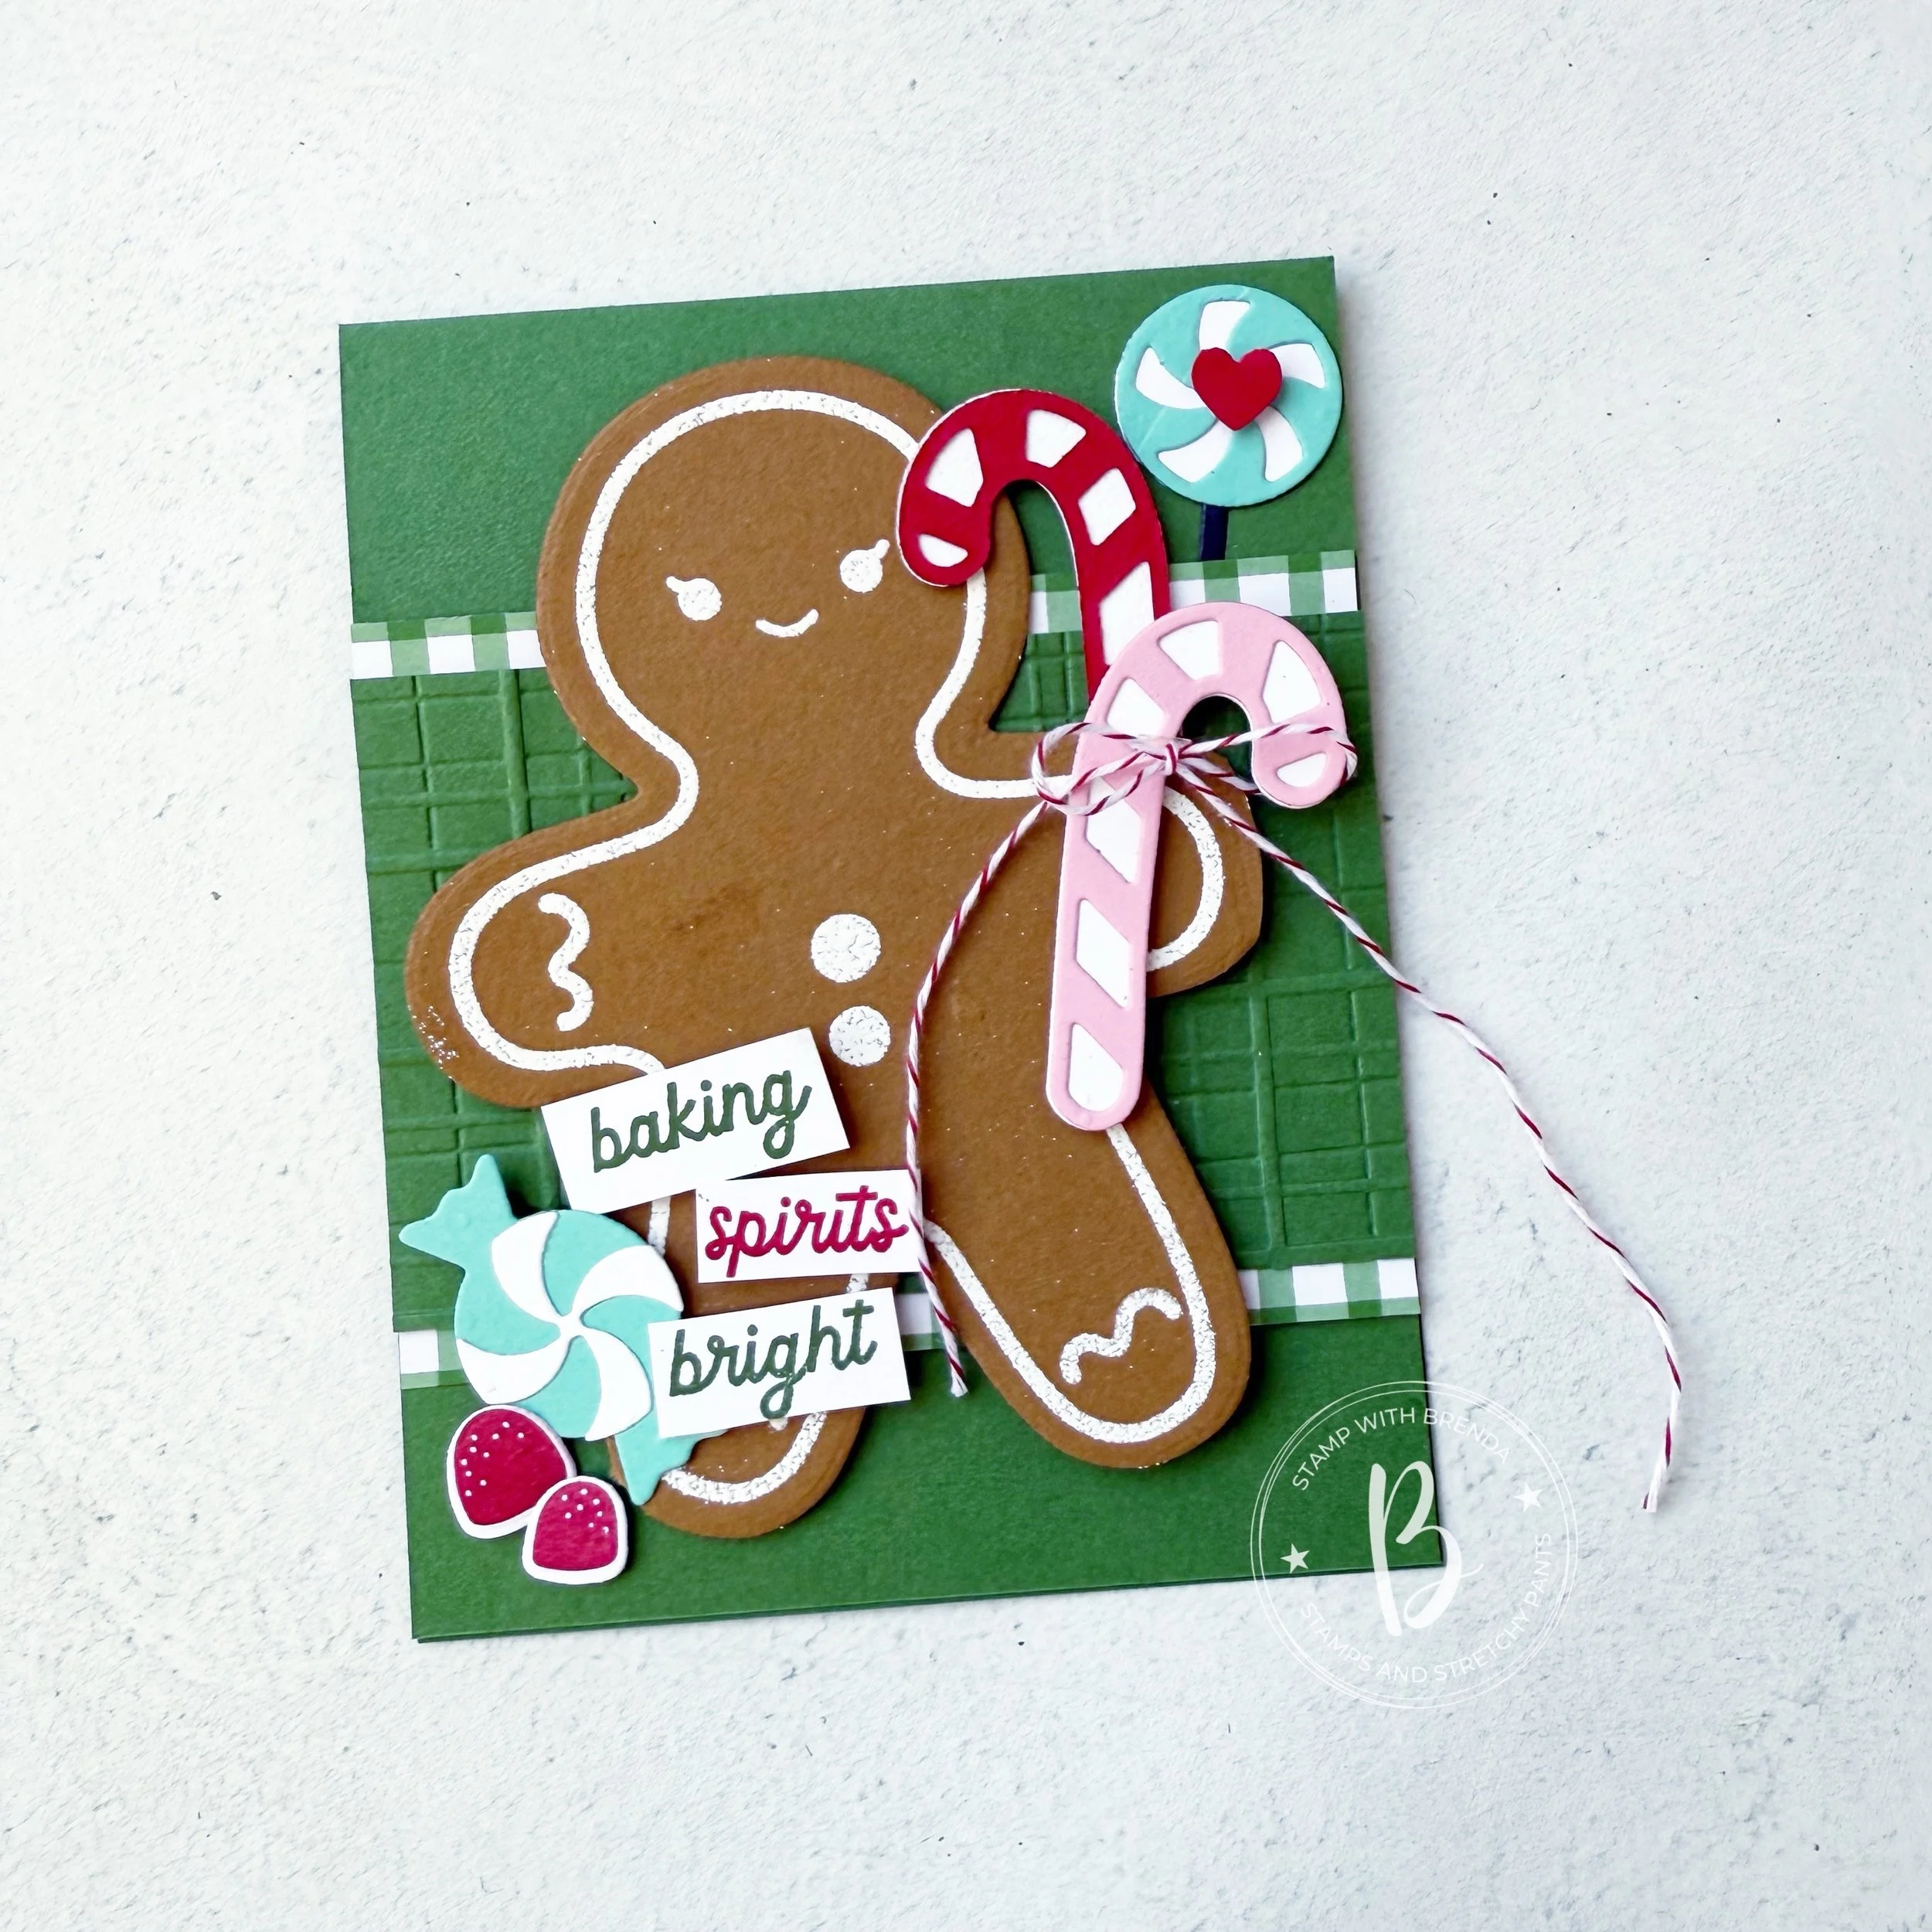
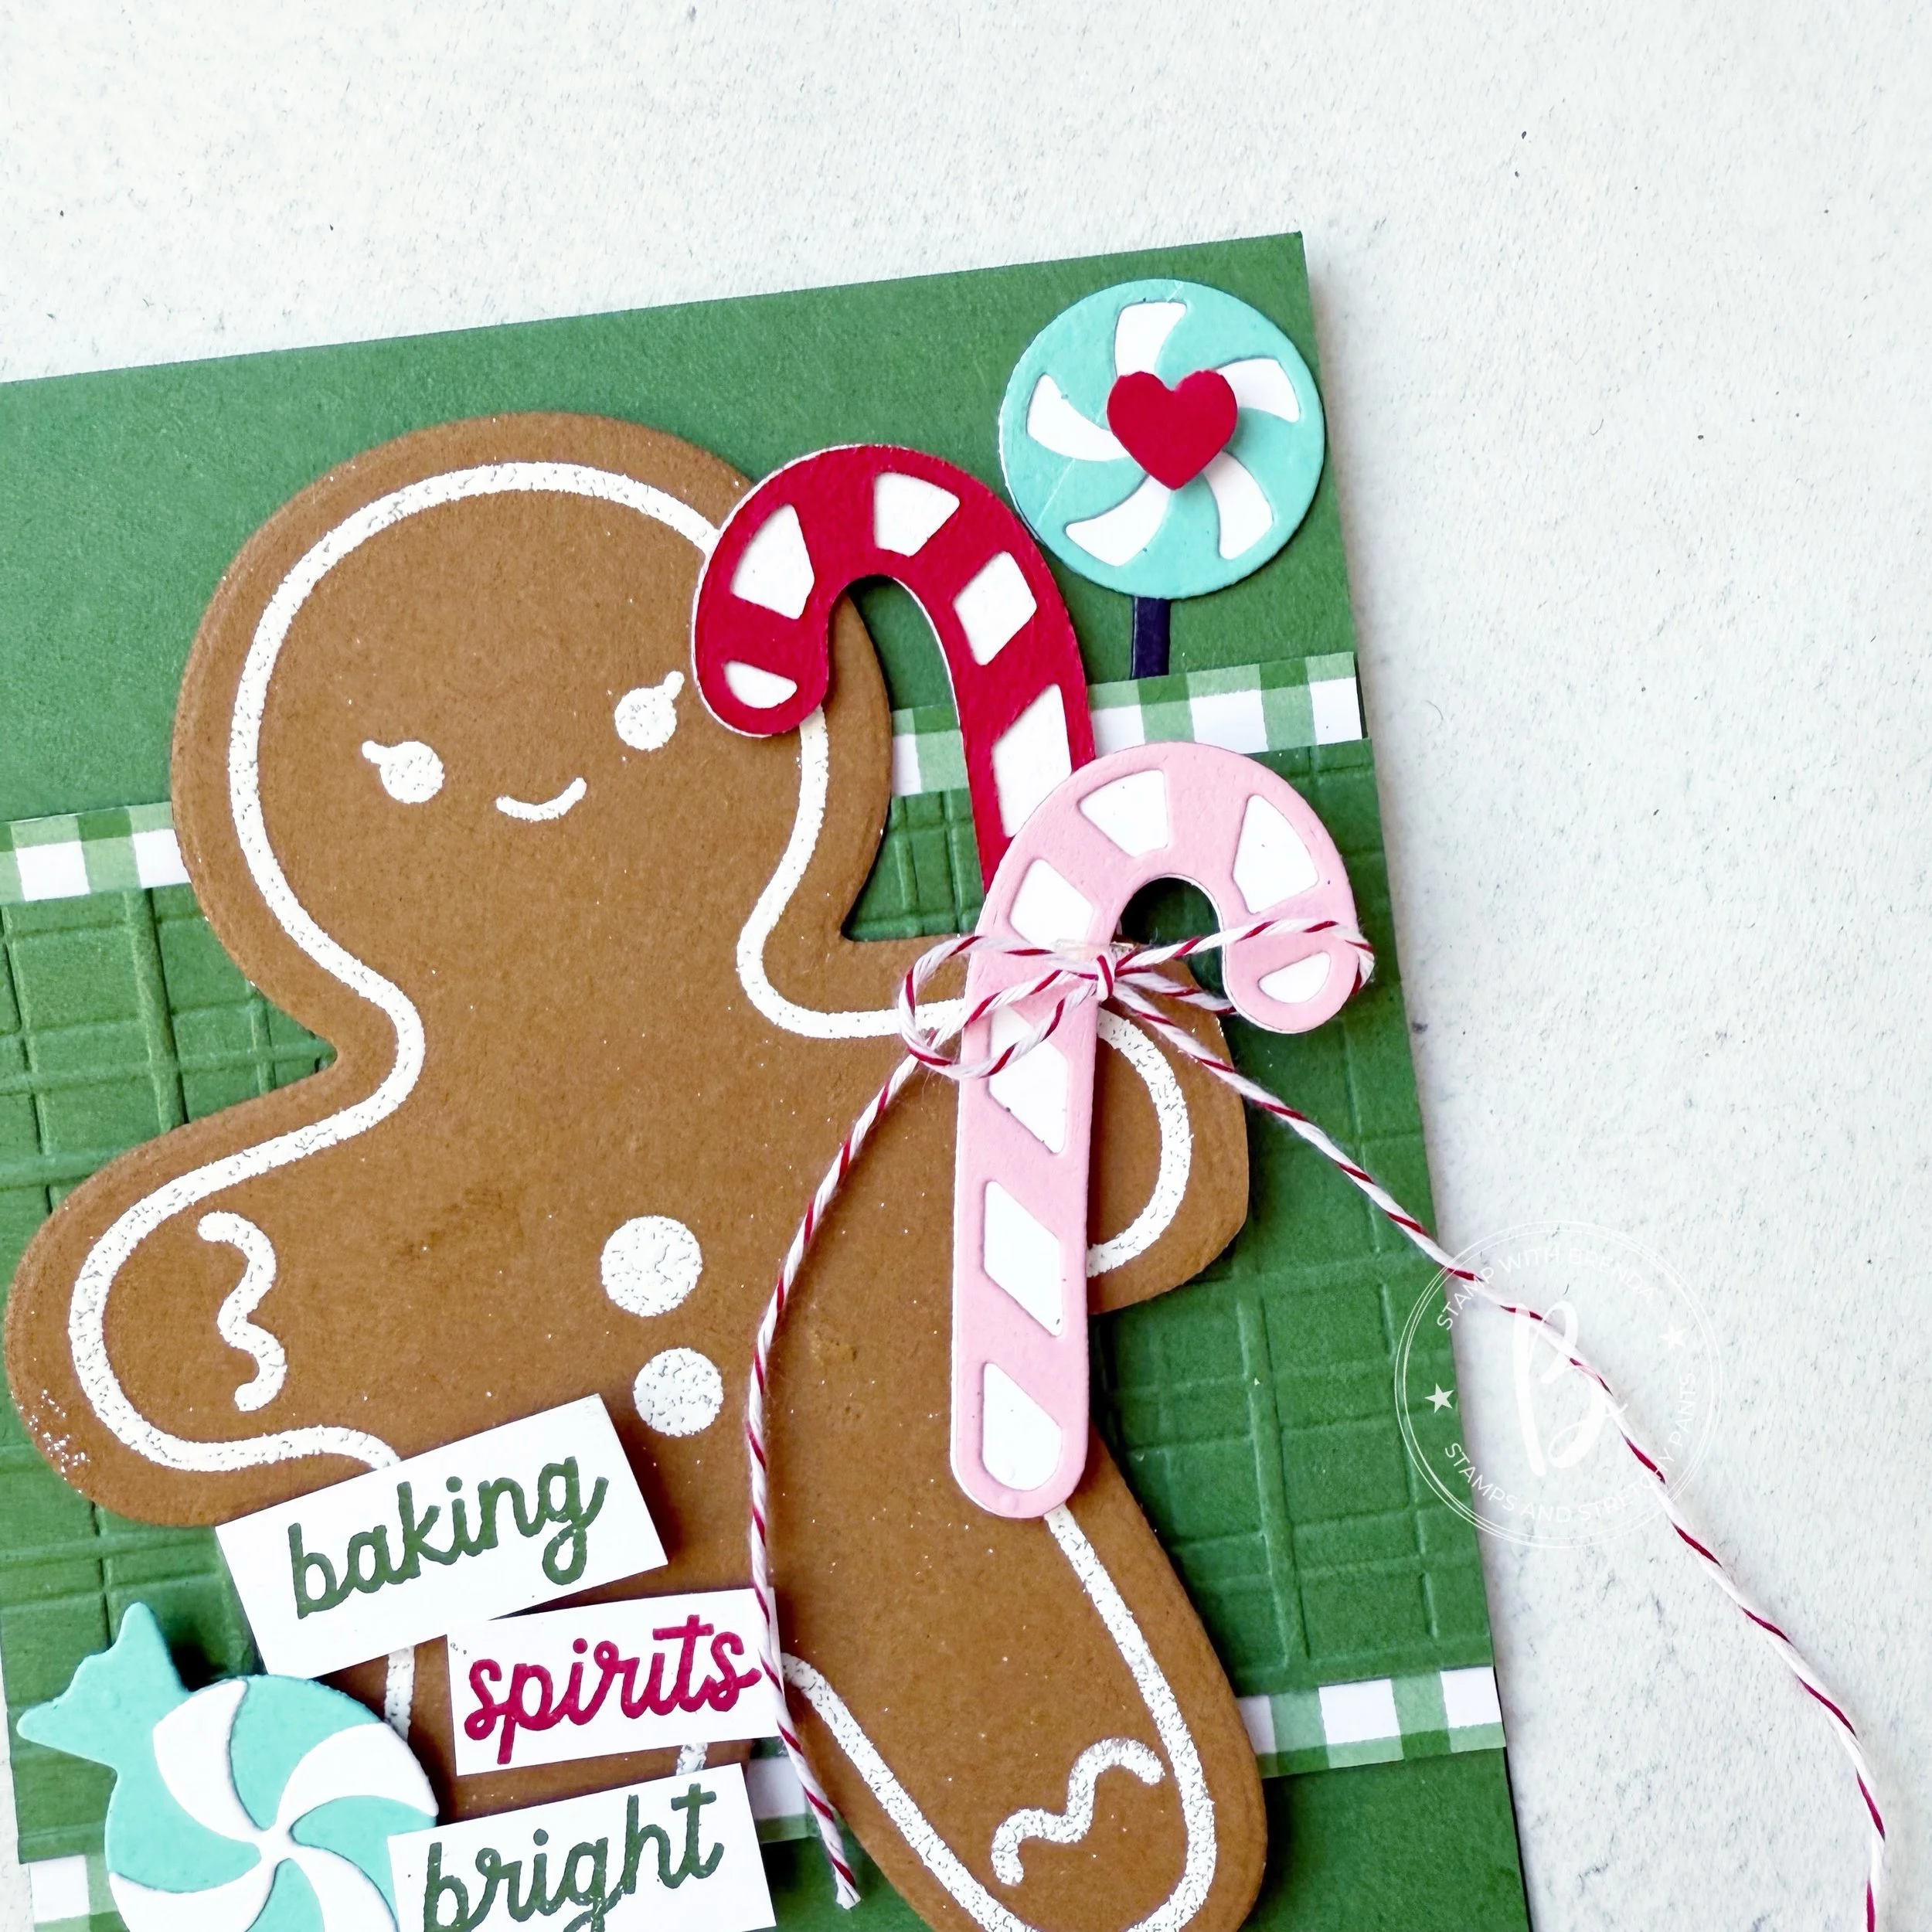
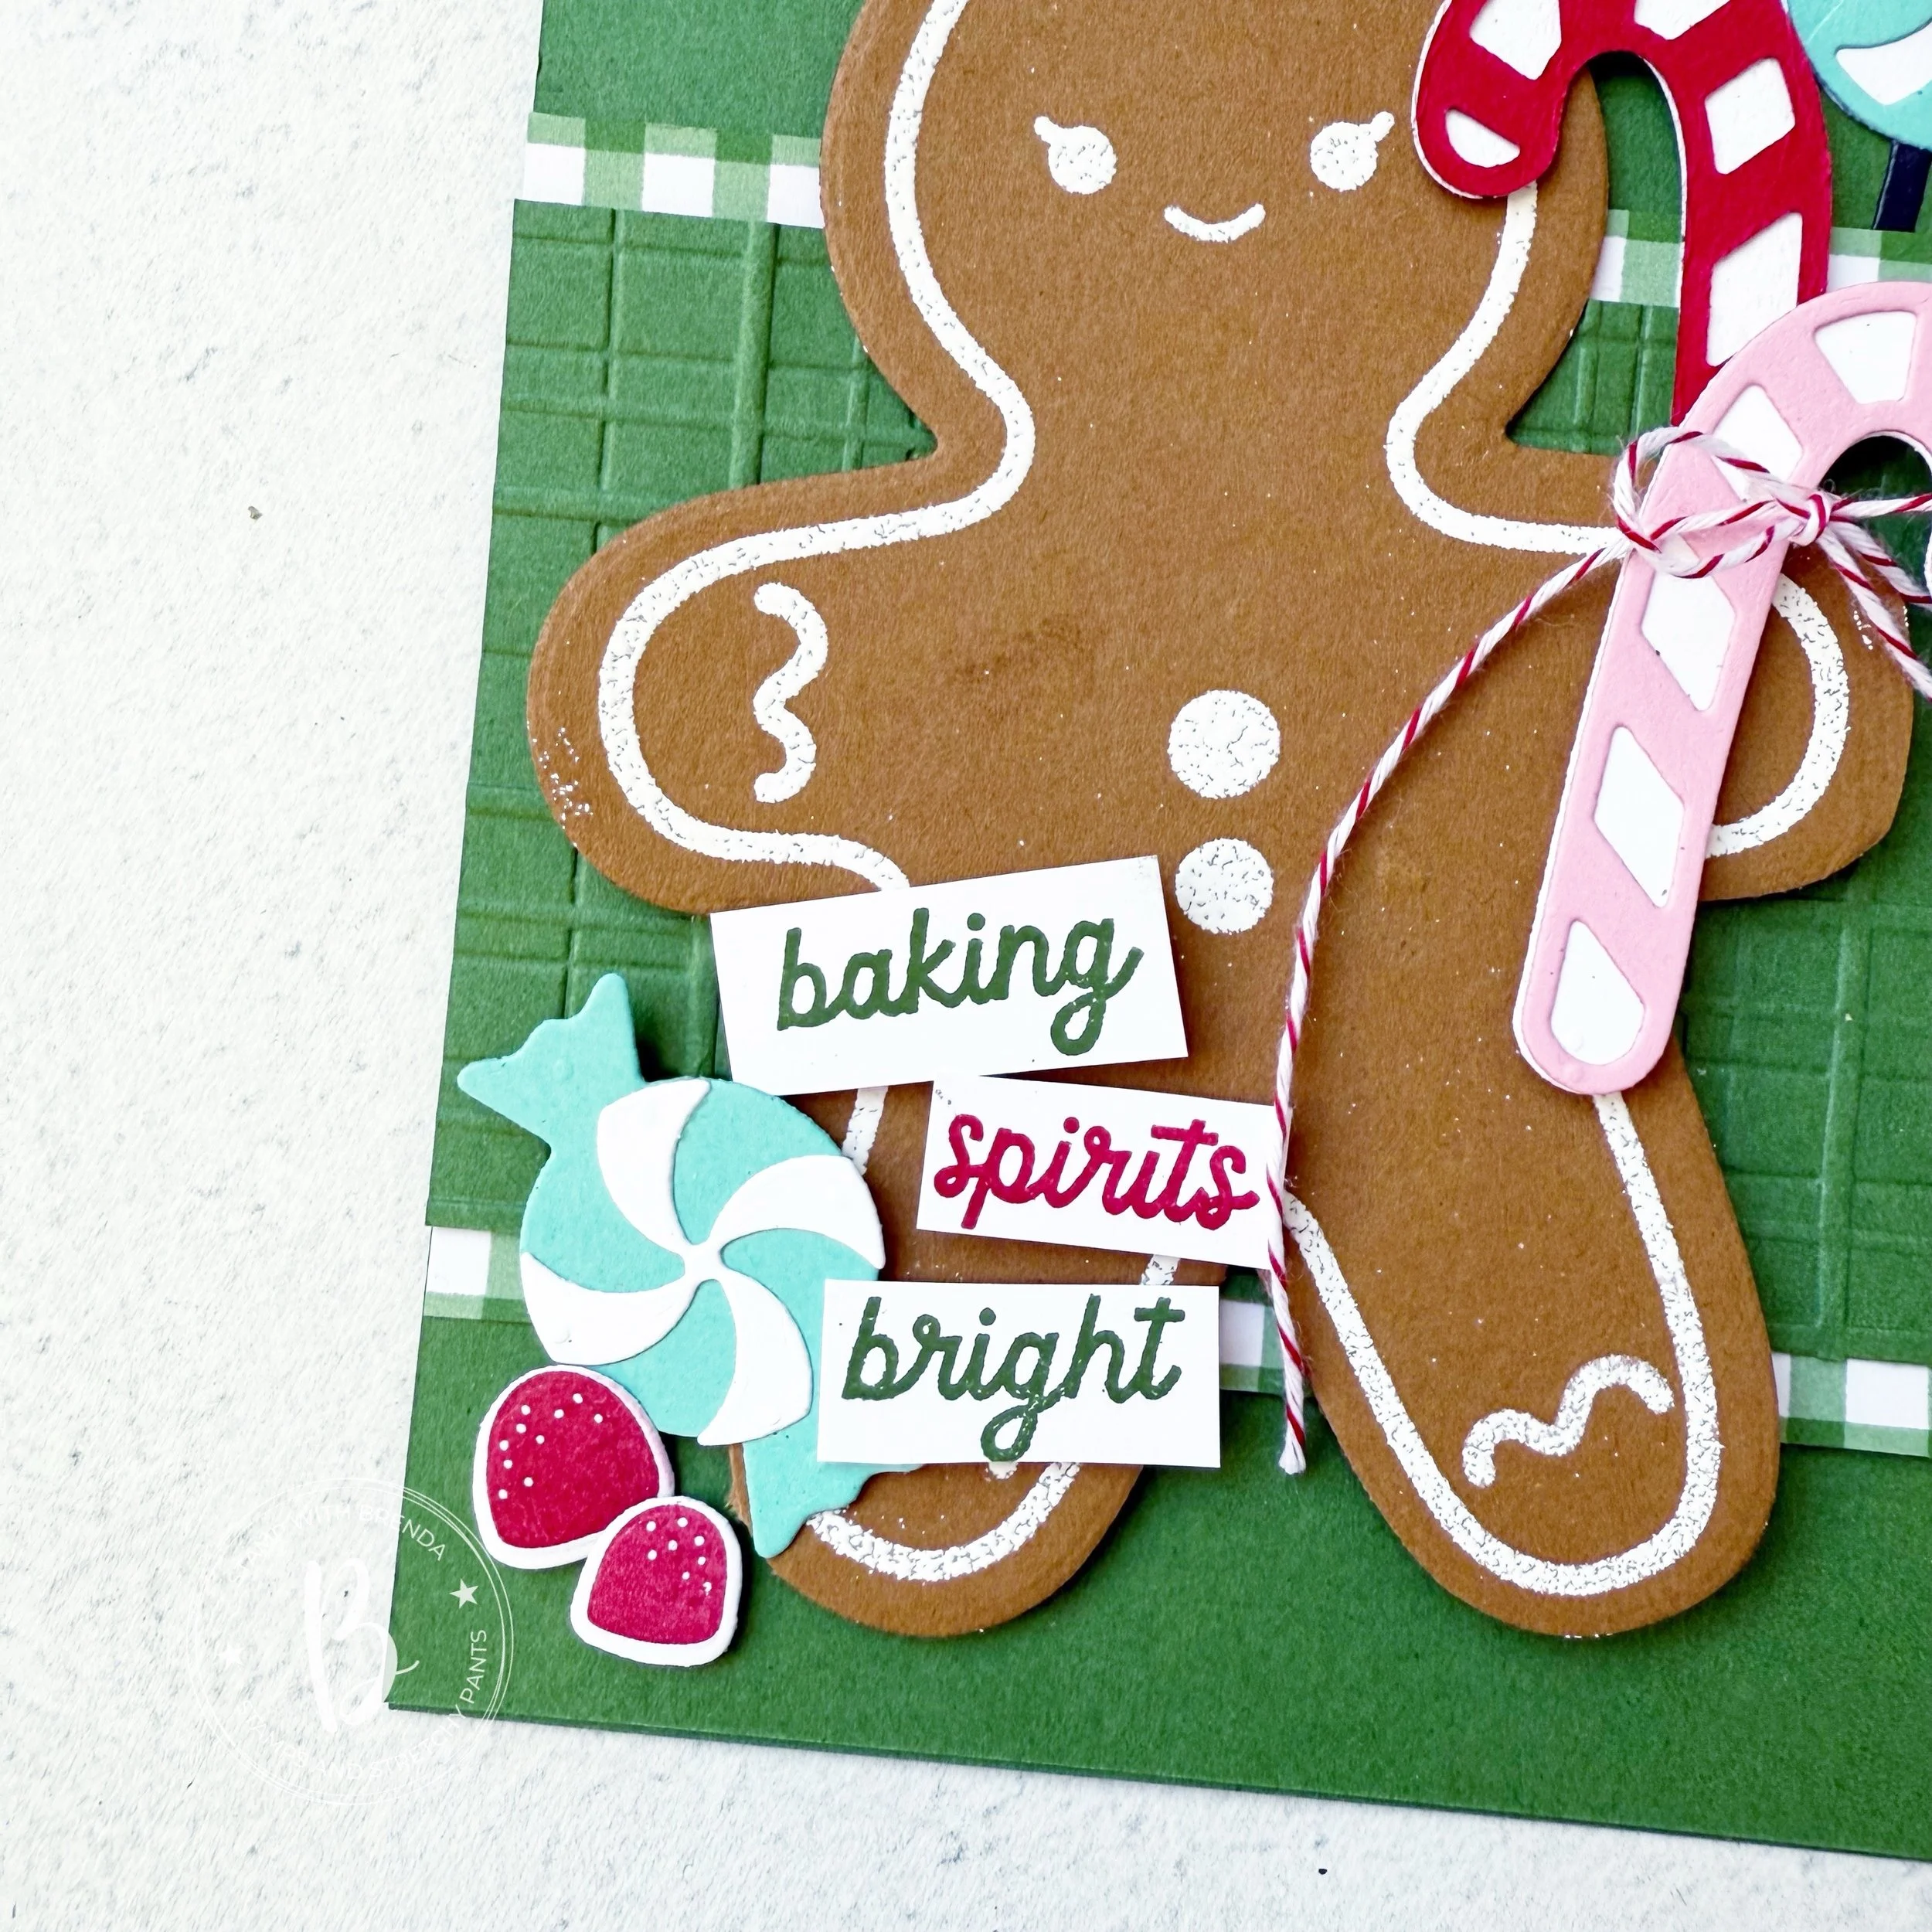
The sentiment is from the Cutest Crew stamp set (love love love) and is embossed on Basic Black with white embossing powder. I used the new banner punch on the sentiment. It just fit perfectly.
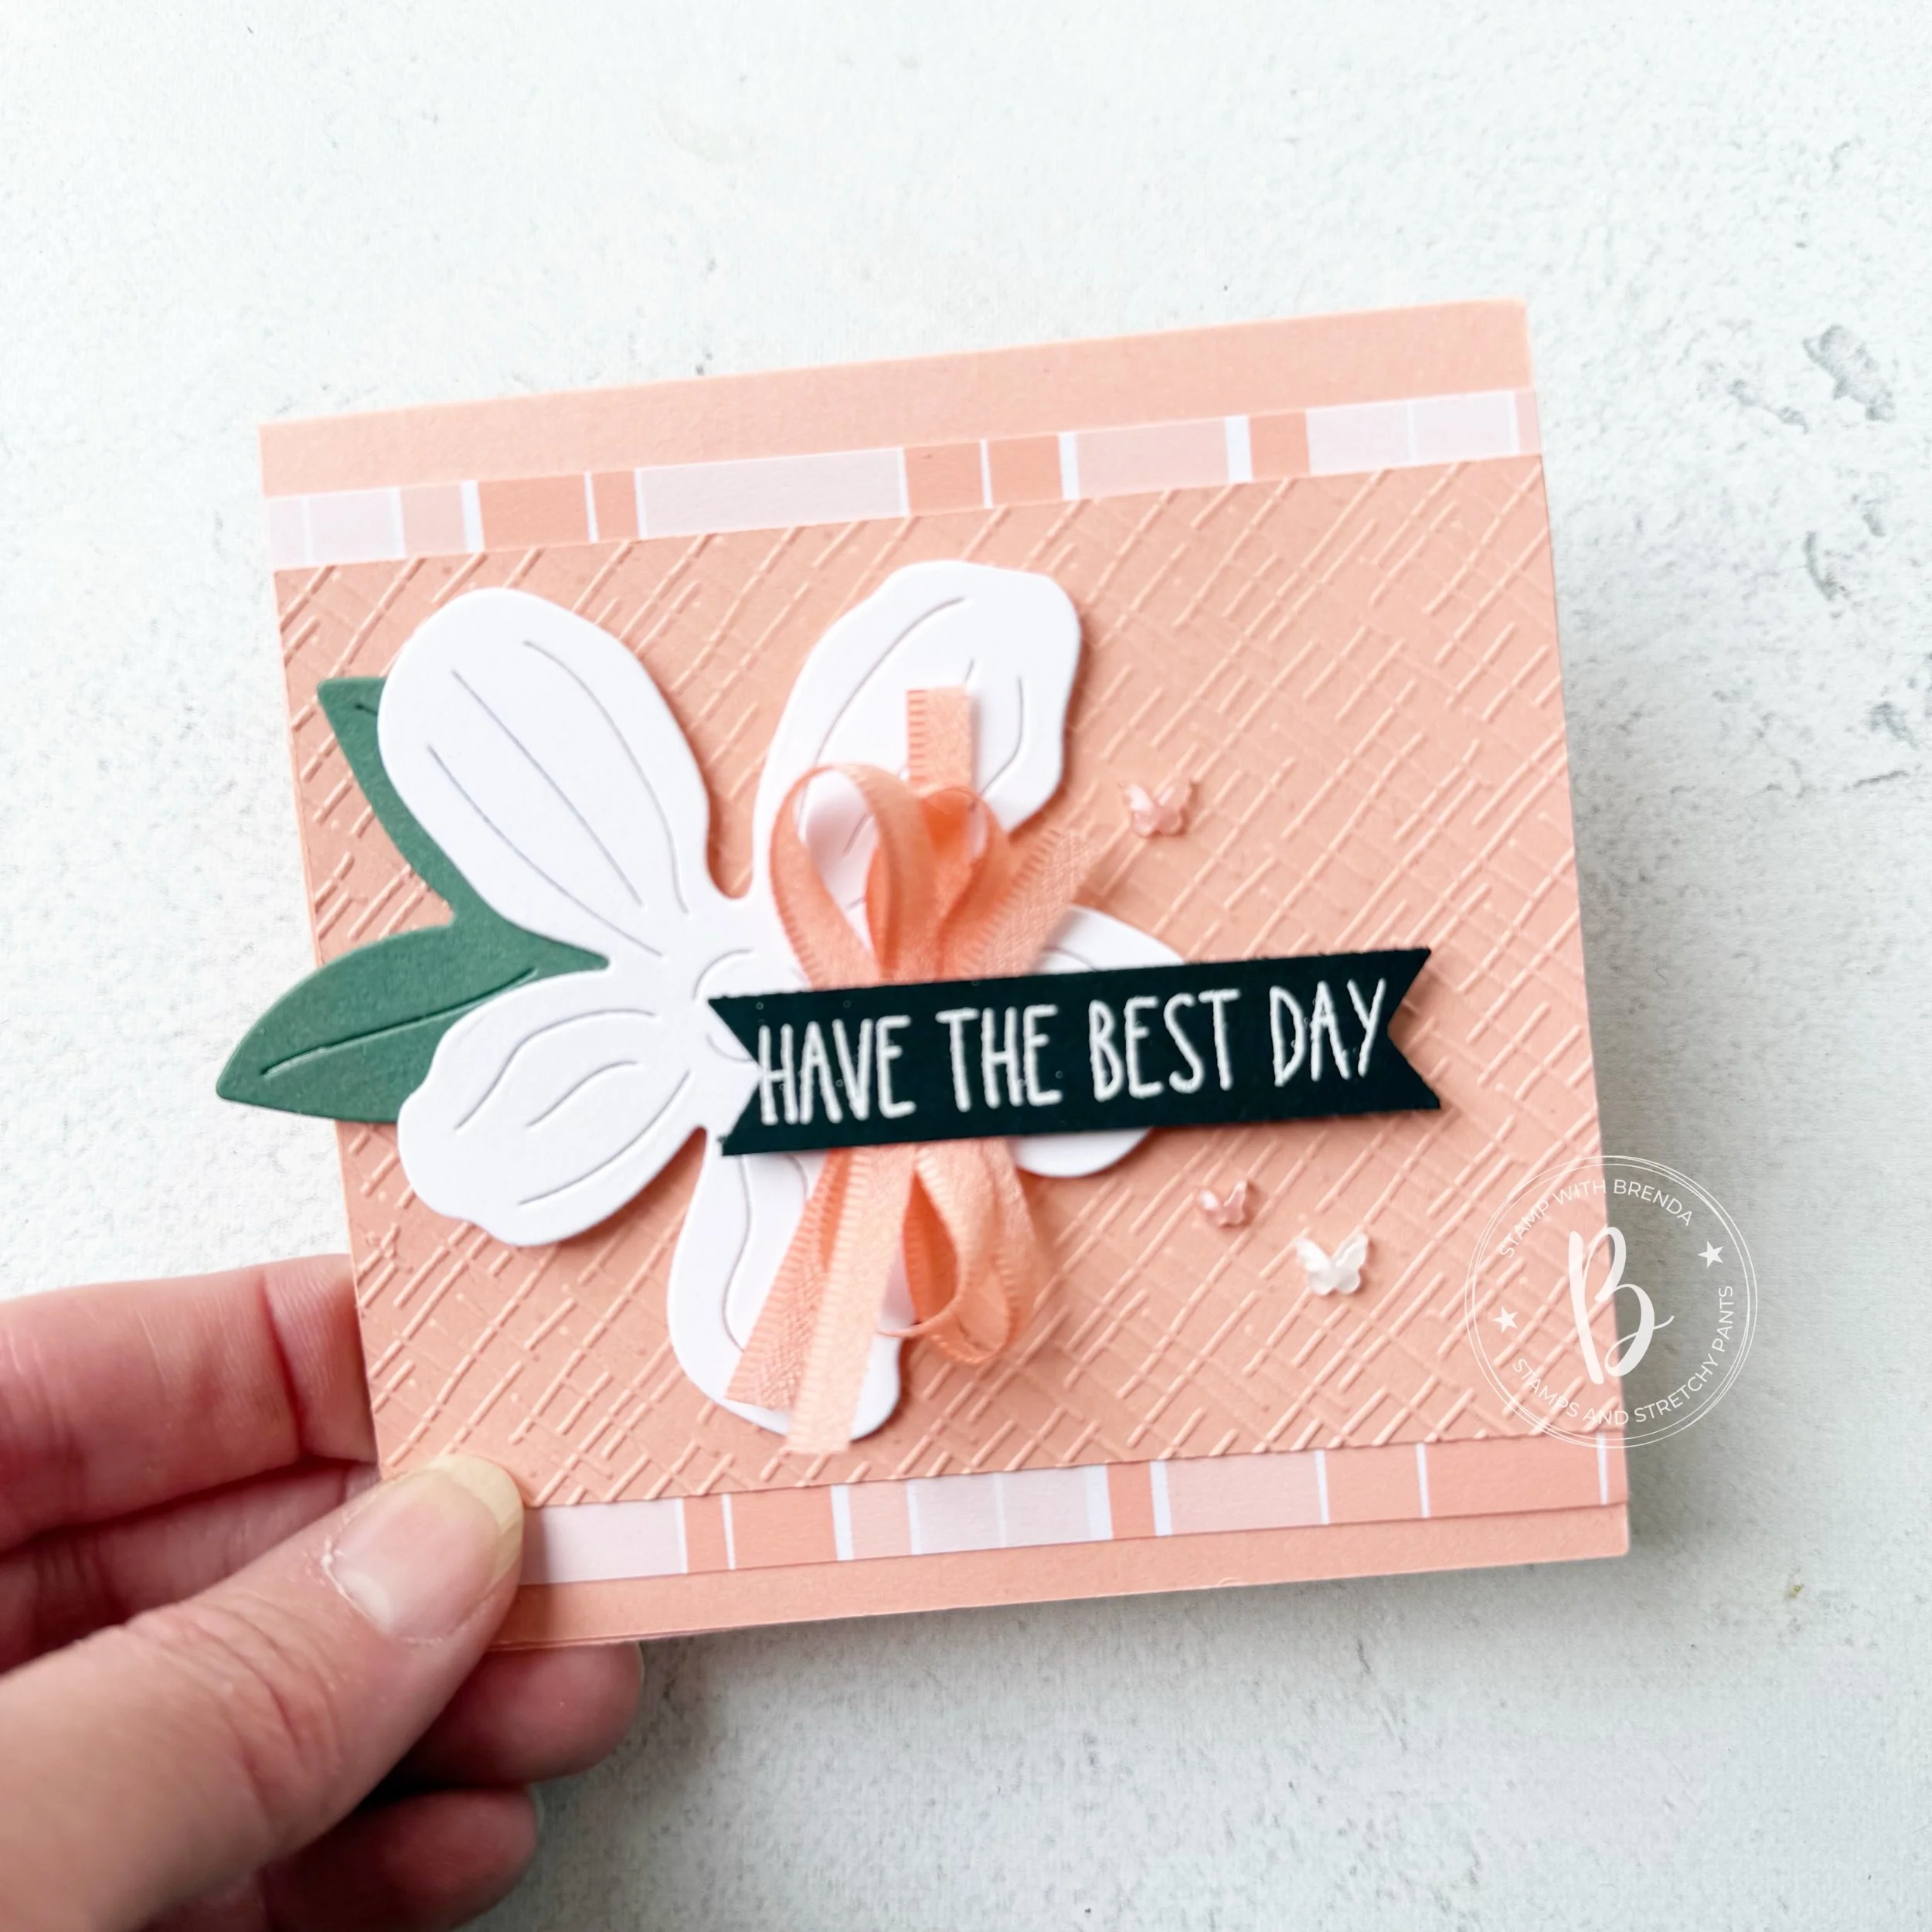
I used a retired embossing folder for the card stock strip/panel in the middle of the card but you can use any basic patterned folder to give your card some texture and interest while not taking over the design.
Next up on the Hop is my friend Tami—we were members of the Artisan team a few years back and I love everything she creates! Just click this button to get to her blog!

If for some reason the hop gets broken, you can also try going in reverse too by visiting Lou Kitzelman as I know you will also enjoy being inspired by her creativity!

No doubt we will be seeing many of these new In Colors as a family or mixed with our other fabulous colors over the next couple of years. I hope you consider adding them to your repertoire! If you are looking for a demonstrator in Canada—please consider shopping with me! I love what I do and hope to continue!
Links to create these cards!
Product List![Heirloom Boutique Dies [ 167730 ]](https://assets1.tamsnetwork.com/images/EC042017NF/167730s.jpg "Heirloom Boutique Dies [ 167730 ]")
![Cutest Crew Photopolymer Stamp Set (English) [ 167146 ]](https://assets1.tamsnetwork.com/images/EC042017NF/167146s.jpg "Cutest Crew Photopolymer Stamp Set (English) [ 167146 ]")
![2026–2028 In Color™ Painted Patterns 12" X 12" (30.5 X 30.5 Cm) Designer Series Paper [ 167755 ]](https://assets1.tamsnetwork.com/images/EC042017NF/167755s.jpg "2026–2028 In Color™ Painted Patterns 12\" X 12\" (30.5 X 30.5 Cm) Designer Series Paper [ 167755 ]")
![Basic White 8 1/2" X 11" Cardstock [ 166780 ]](https://assets1.tamsnetwork.com/images/EC042017NF/166780s.jpg "Basic White 8 1/2\" X 11\" Cardstock [ 166780 ]")
![Hydrangea Hue 8 1/2" X 11" Cardstock [ 167687 ]](https://assets1.tamsnetwork.com/images/EC042017NF/167687s.jpg "Hydrangea Hue 8 1/2\" X 11\" Cardstock [ 167687 ]")
![Peaceful Pine 8 1/2" X 11" Cardstock [ 167691 ]](https://assets1.tamsnetwork.com/images/EC042017NF/167691s.jpg "Peaceful Pine 8 1/2\" X 11\" Cardstock [ 167691 ]")
![Golden Glow 8 1/2" X 11" Cardstock [ 167685 ]](https://assets1.tamsnetwork.com/images/EC042017NF/167685s.jpg "Golden Glow 8 1/2\" X 11\" Cardstock [ 167685 ]")
![Barely Blush 8 1/2" X 11" Cardstock [ 167689 ]](https://assets1.tamsnetwork.com/images/EC042017NF/167689s.jpg "Barely Blush 8 1/2\" X 11\" Cardstock [ 167689 ]")
![Crisp Cantaloupe 8 1/2" X 11" Cardstock [ 167693 ]](https://assets1.tamsnetwork.com/images/EC042017NF/167693s.jpg "Crisp Cantaloupe 8 1/2\" X 11\" Cardstock [ 167693 ]")
![White Stampin' Emboss Powder [ 109132 ]](https://assets1.tamsnetwork.com/images/EC042017NF/109132s.jpg "White Stampin' Emboss Powder [ 109132 ]")
![Three Banner Punch [ 167050 ]](https://assets1.tamsnetwork.com/images/EC042017NF/167050s.jpg "Three Banner Punch [ 167050 ]")
![Barely Blush 3/8" (1 Cm) Bordered Ribbon [ 167550 ]](https://assets1.tamsnetwork.com/images/EC042017NF/167550s.jpg "Barely Blush 3/8\" (1 Cm) Bordered Ribbon [ 167550 ]")
![Crisp Cantaloupe 3/8" (1 Cm) Bordered Ribbon [ 167552 ]](https://assets1.tamsnetwork.com/images/EC042017NF/167552s.jpg "Crisp Cantaloupe 3/8\" (1 Cm) Bordered Ribbon [ 167552 ]")
![Peaceful Pine 3/8" (1 Cm) Bordered Ribbon [ 167551 ]](https://assets1.tamsnetwork.com/images/EC042017NF/167551s.jpg "Peaceful Pine 3/8\" (1 Cm) Bordered Ribbon [ 167551 ]")
![Hydrangea Hue 3/8" (1 Cm) Bordered Ribbon [ 167549 ]](https://assets1.tamsnetwork.com/images/EC042017NF/167549s.jpg "Hydrangea Hue 3/8\" (1 Cm) Bordered Ribbon [ 167549 ]")
![Golden Glow 3/8" (1 Cm) Bordered Ribbon [ 167548 ]](https://assets1.tamsnetwork.com/images/EC042017NF/167548s.jpg "Golden Glow 3/8\" (1 Cm) Bordered Ribbon [ 167548 ]")
![2026–2028 In Color™ Butterflies [ 167656 ]](https://assets1.tamsnetwork.com/images/EC042017NF/167656s.jpg "2026–2028 In Color™ Butterflies [ 167656 ]")


![Fragrant Layers Photopolymer Stamp Set (English) [ 167150 ]](https://assets1.tamsnetwork.com/images/EC042017NF/167150s.jpg "Fragrant Layers Photopolymer Stamp Set (English) [ 167150 ]")
![Boardwalk Fun Dies [ 166828 ]](https://assets1.tamsnetwork.com/images/EC042017NF/166828s.jpg "Boardwalk Fun Dies [ 166828 ]")
![Pearlized Faceted Circles [ 166978 ]](https://assets1.tamsnetwork.com/images/EC042017NF/166978s.jpg "Pearlized Faceted Circles [ 166978 ]")
![Baker's Twine Essentials Pack [ 155475 ]](https://assets1.tamsnetwork.com/images/EC042017NF/155475s.jpg "Baker's Twine Essentials Pack [ 155475 ]")
![Blending Brushes [ 153611 ]](https://assets1.tamsnetwork.com/images/EC042017NF/153611s.jpg "Blending Brushes [ 153611 ]")
![Water Painters [ 168253 ]](https://assets1.tamsnetwork.com/images/EC042017NF/168253s.jpg "Water Painters [ 168253 ]")
![Granny Apple Green 8-1/2" X 11" Cardstock [ 146990 ]](https://assets1.tamsnetwork.com/images/EC042017NF/146990s.jpg "Granny Apple Green 8-1/2\" X 11\" Cardstock [ 146990 ]")
![Basic White 8 1/2" X 11" Cardstock [ 159276 ]](https://assets1.tamsnetwork.com/images/EC042017NF/159276s.jpg "Basic White 8 1/2\" X 11\" Cardstock [ 159276 ]")
![Berry Burst 8-1/2" X 11" Cardstock [ 144243 ]](https://assets1.tamsnetwork.com/images/EC042017NF/144243s.jpg "Berry Burst 8-1/2\" X 11\" Cardstock [ 144243 ]")
![Basic Black 8-1/2" X 11" Cardstock [ 121045 ]](https://assets1.tamsnetwork.com/images/EC042017NF/121045s.jpg "Basic Black 8-1/2\" X 11\" Cardstock [ 121045 ]")
![Tuxedo Black Memento Ink Pad [ 132708 ]](https://assets1.tamsnetwork.com/images/EC042017NF/132708s.jpg "Tuxedo Black Memento Ink Pad [ 132708 ]")
![Lemon Lime Twist Classic Stampin' Pad [ 147145 ]](https://assets1.tamsnetwork.com/images/EC042017NF/147145s.jpg "Lemon Lime Twist Classic Stampin' Pad [ 147145 ]")
![Granny Apple Green Stampin' Pad [ 147095 ]](https://assets1.tamsnetwork.com/images/EC042017NF/147095s.jpg "Granny Apple Green Stampin' Pad [ 147095 ]")
![Berry Burst Classic Stampin' Pad [ 147143 ]](https://assets1.tamsnetwork.com/images/EC042017NF/147143s.jpg "Berry Burst Classic Stampin' Pad [ 147143 ]")
![Granny Apple Green Stampin' Blends Combo Pack [ 154885 ]](https://assets1.tamsnetwork.com/images/EC042017NF/154885s.jpg "Granny Apple Green Stampin' Blends Combo Pack [ 154885 ]")


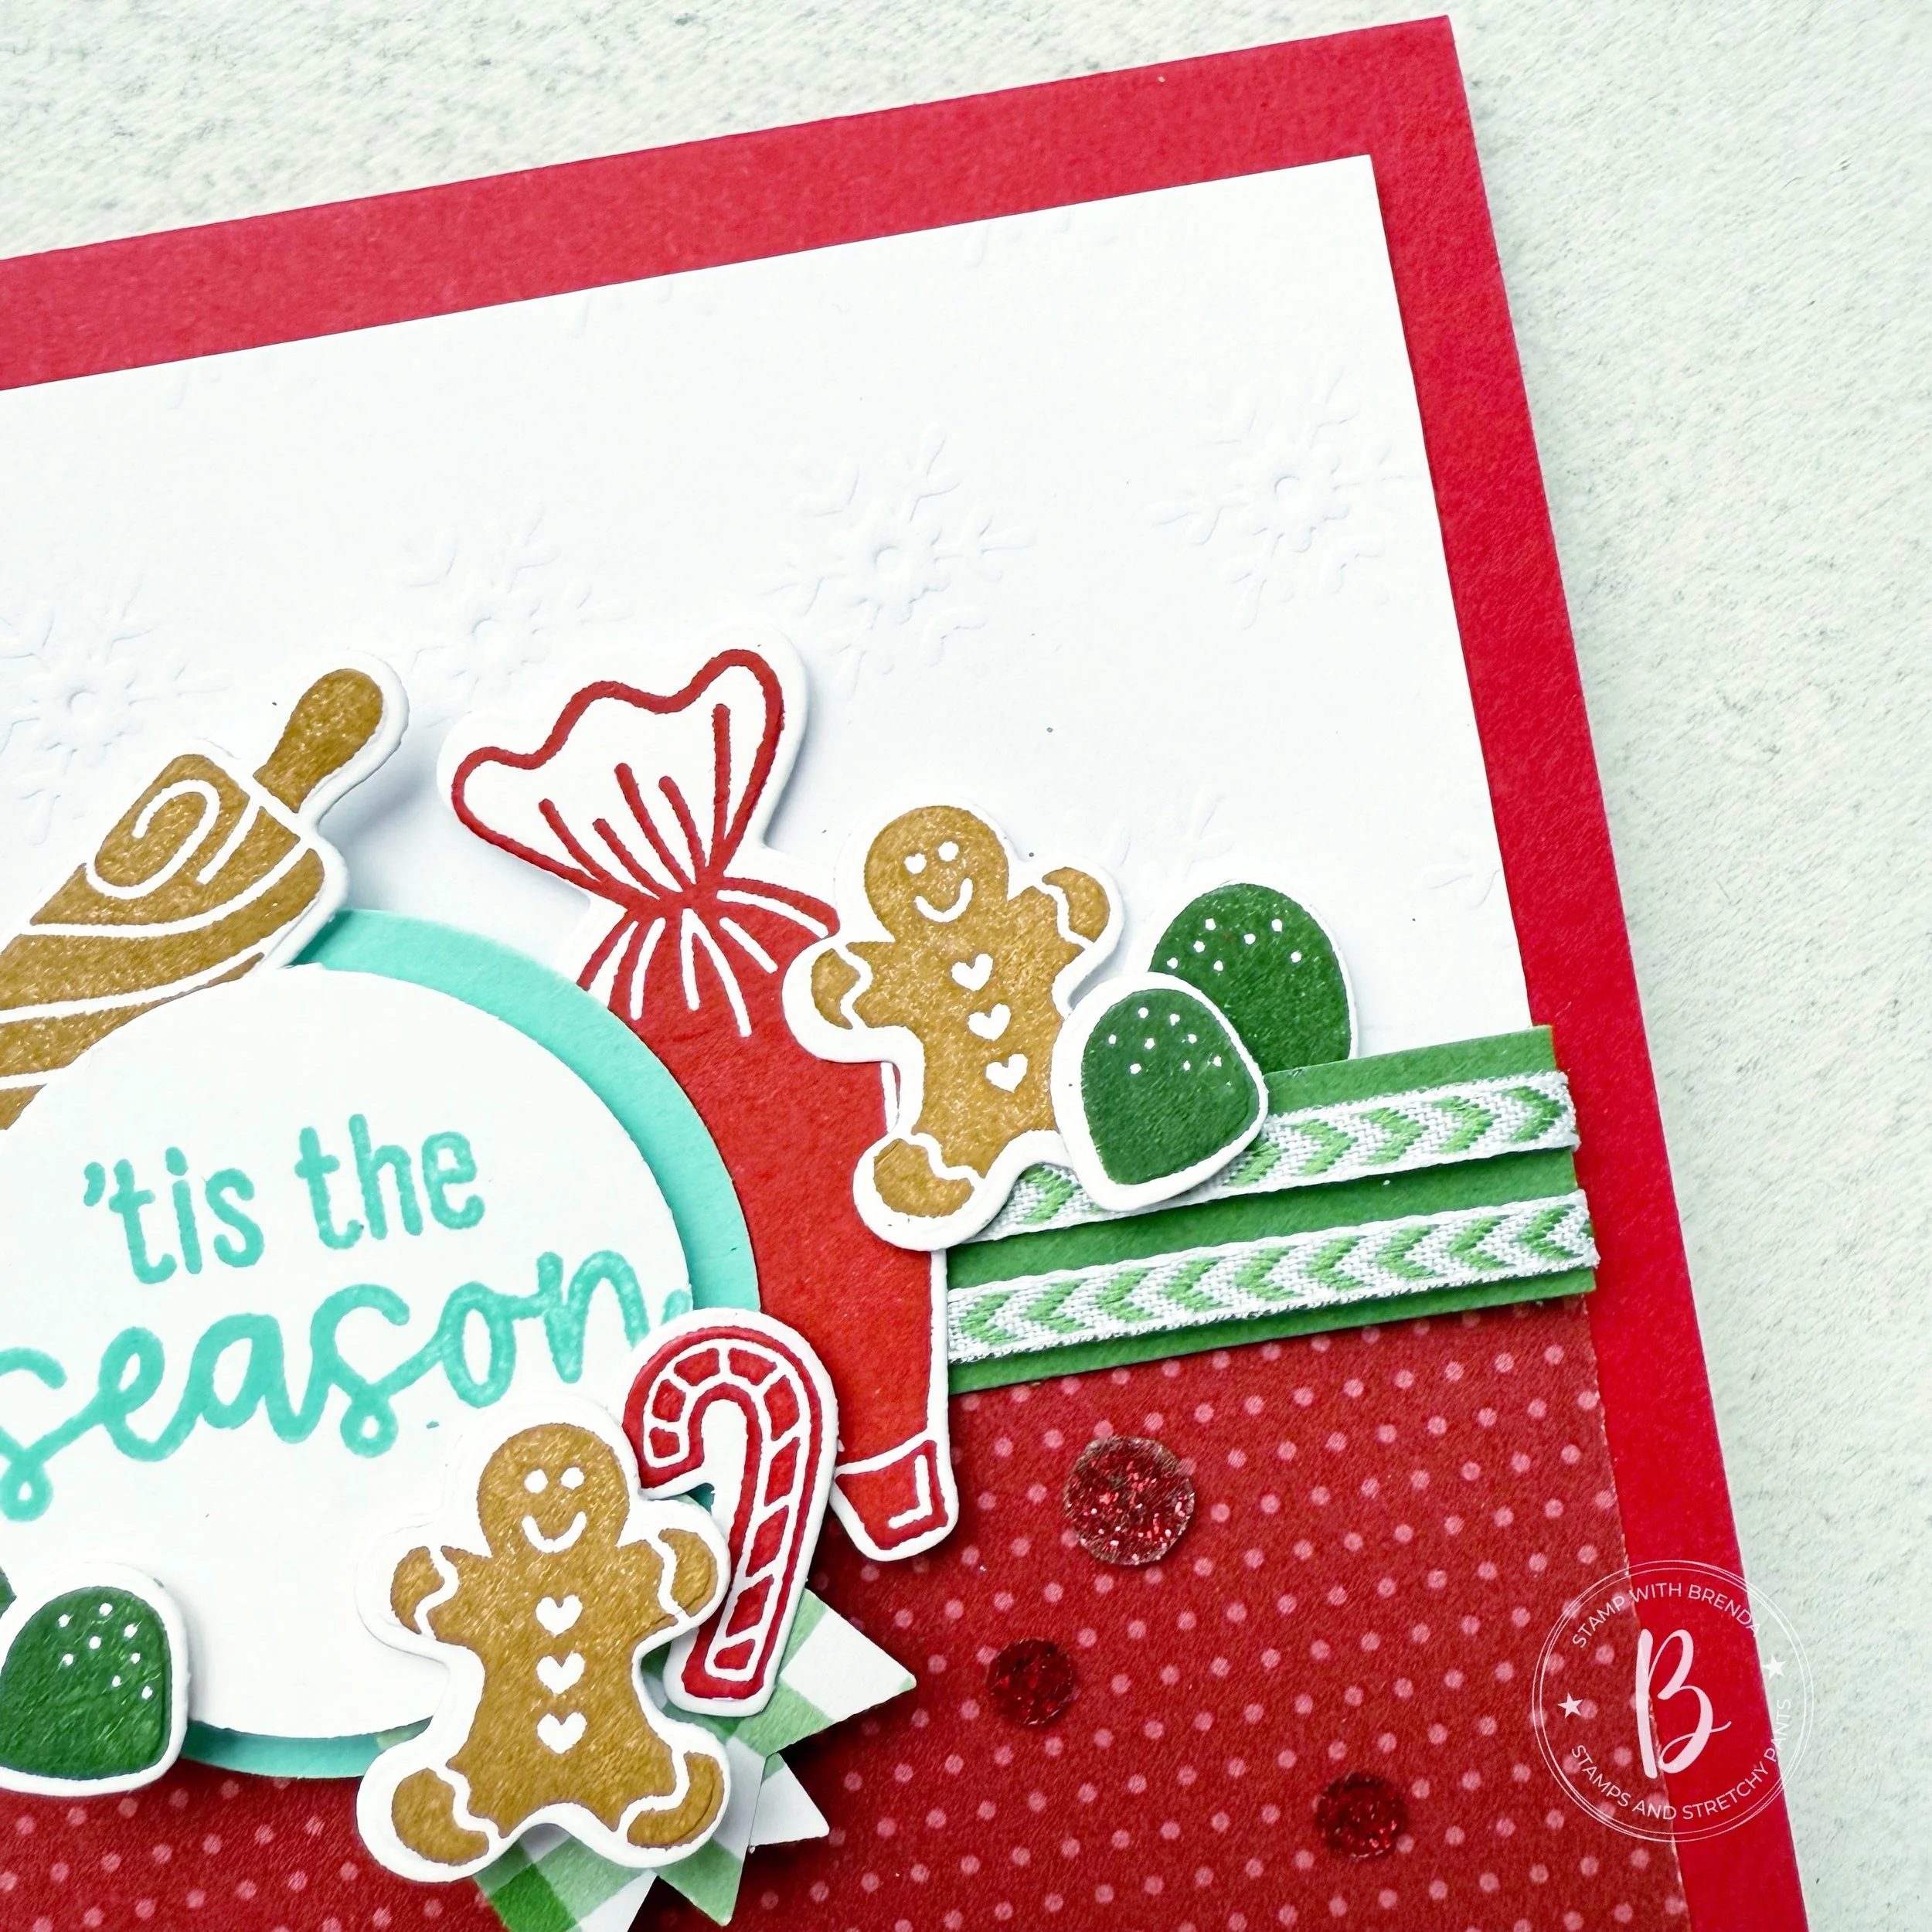
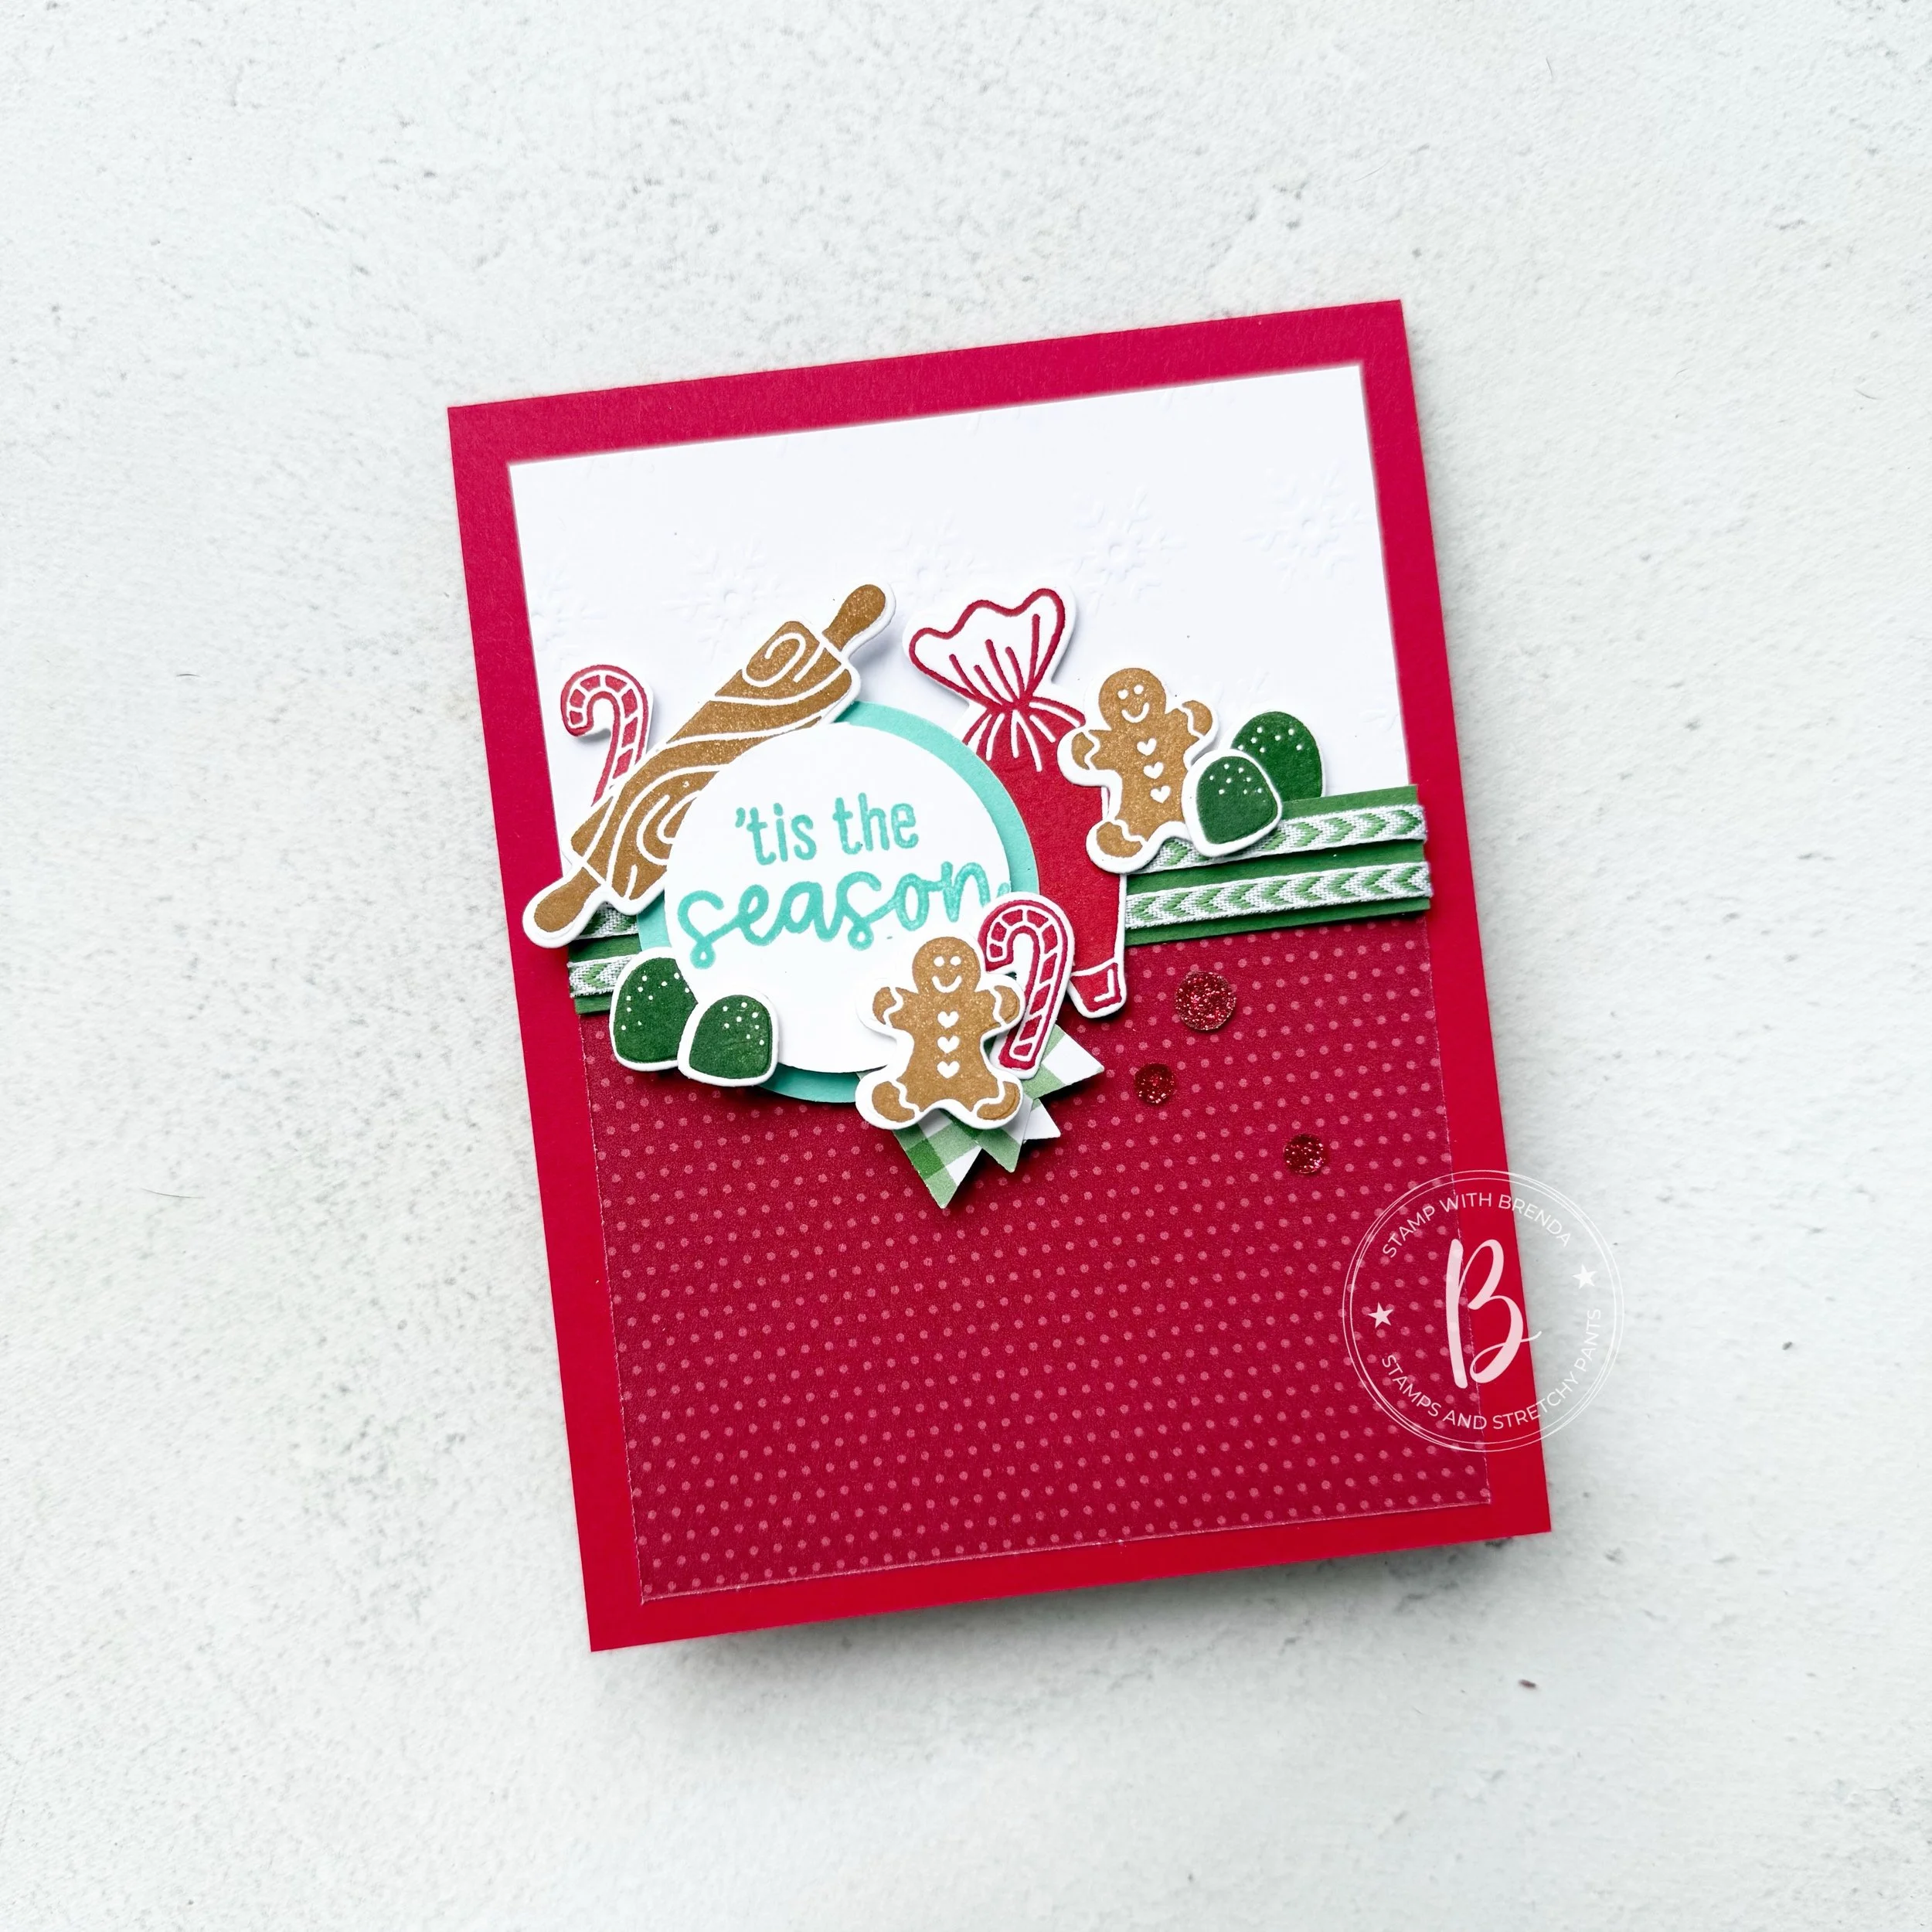
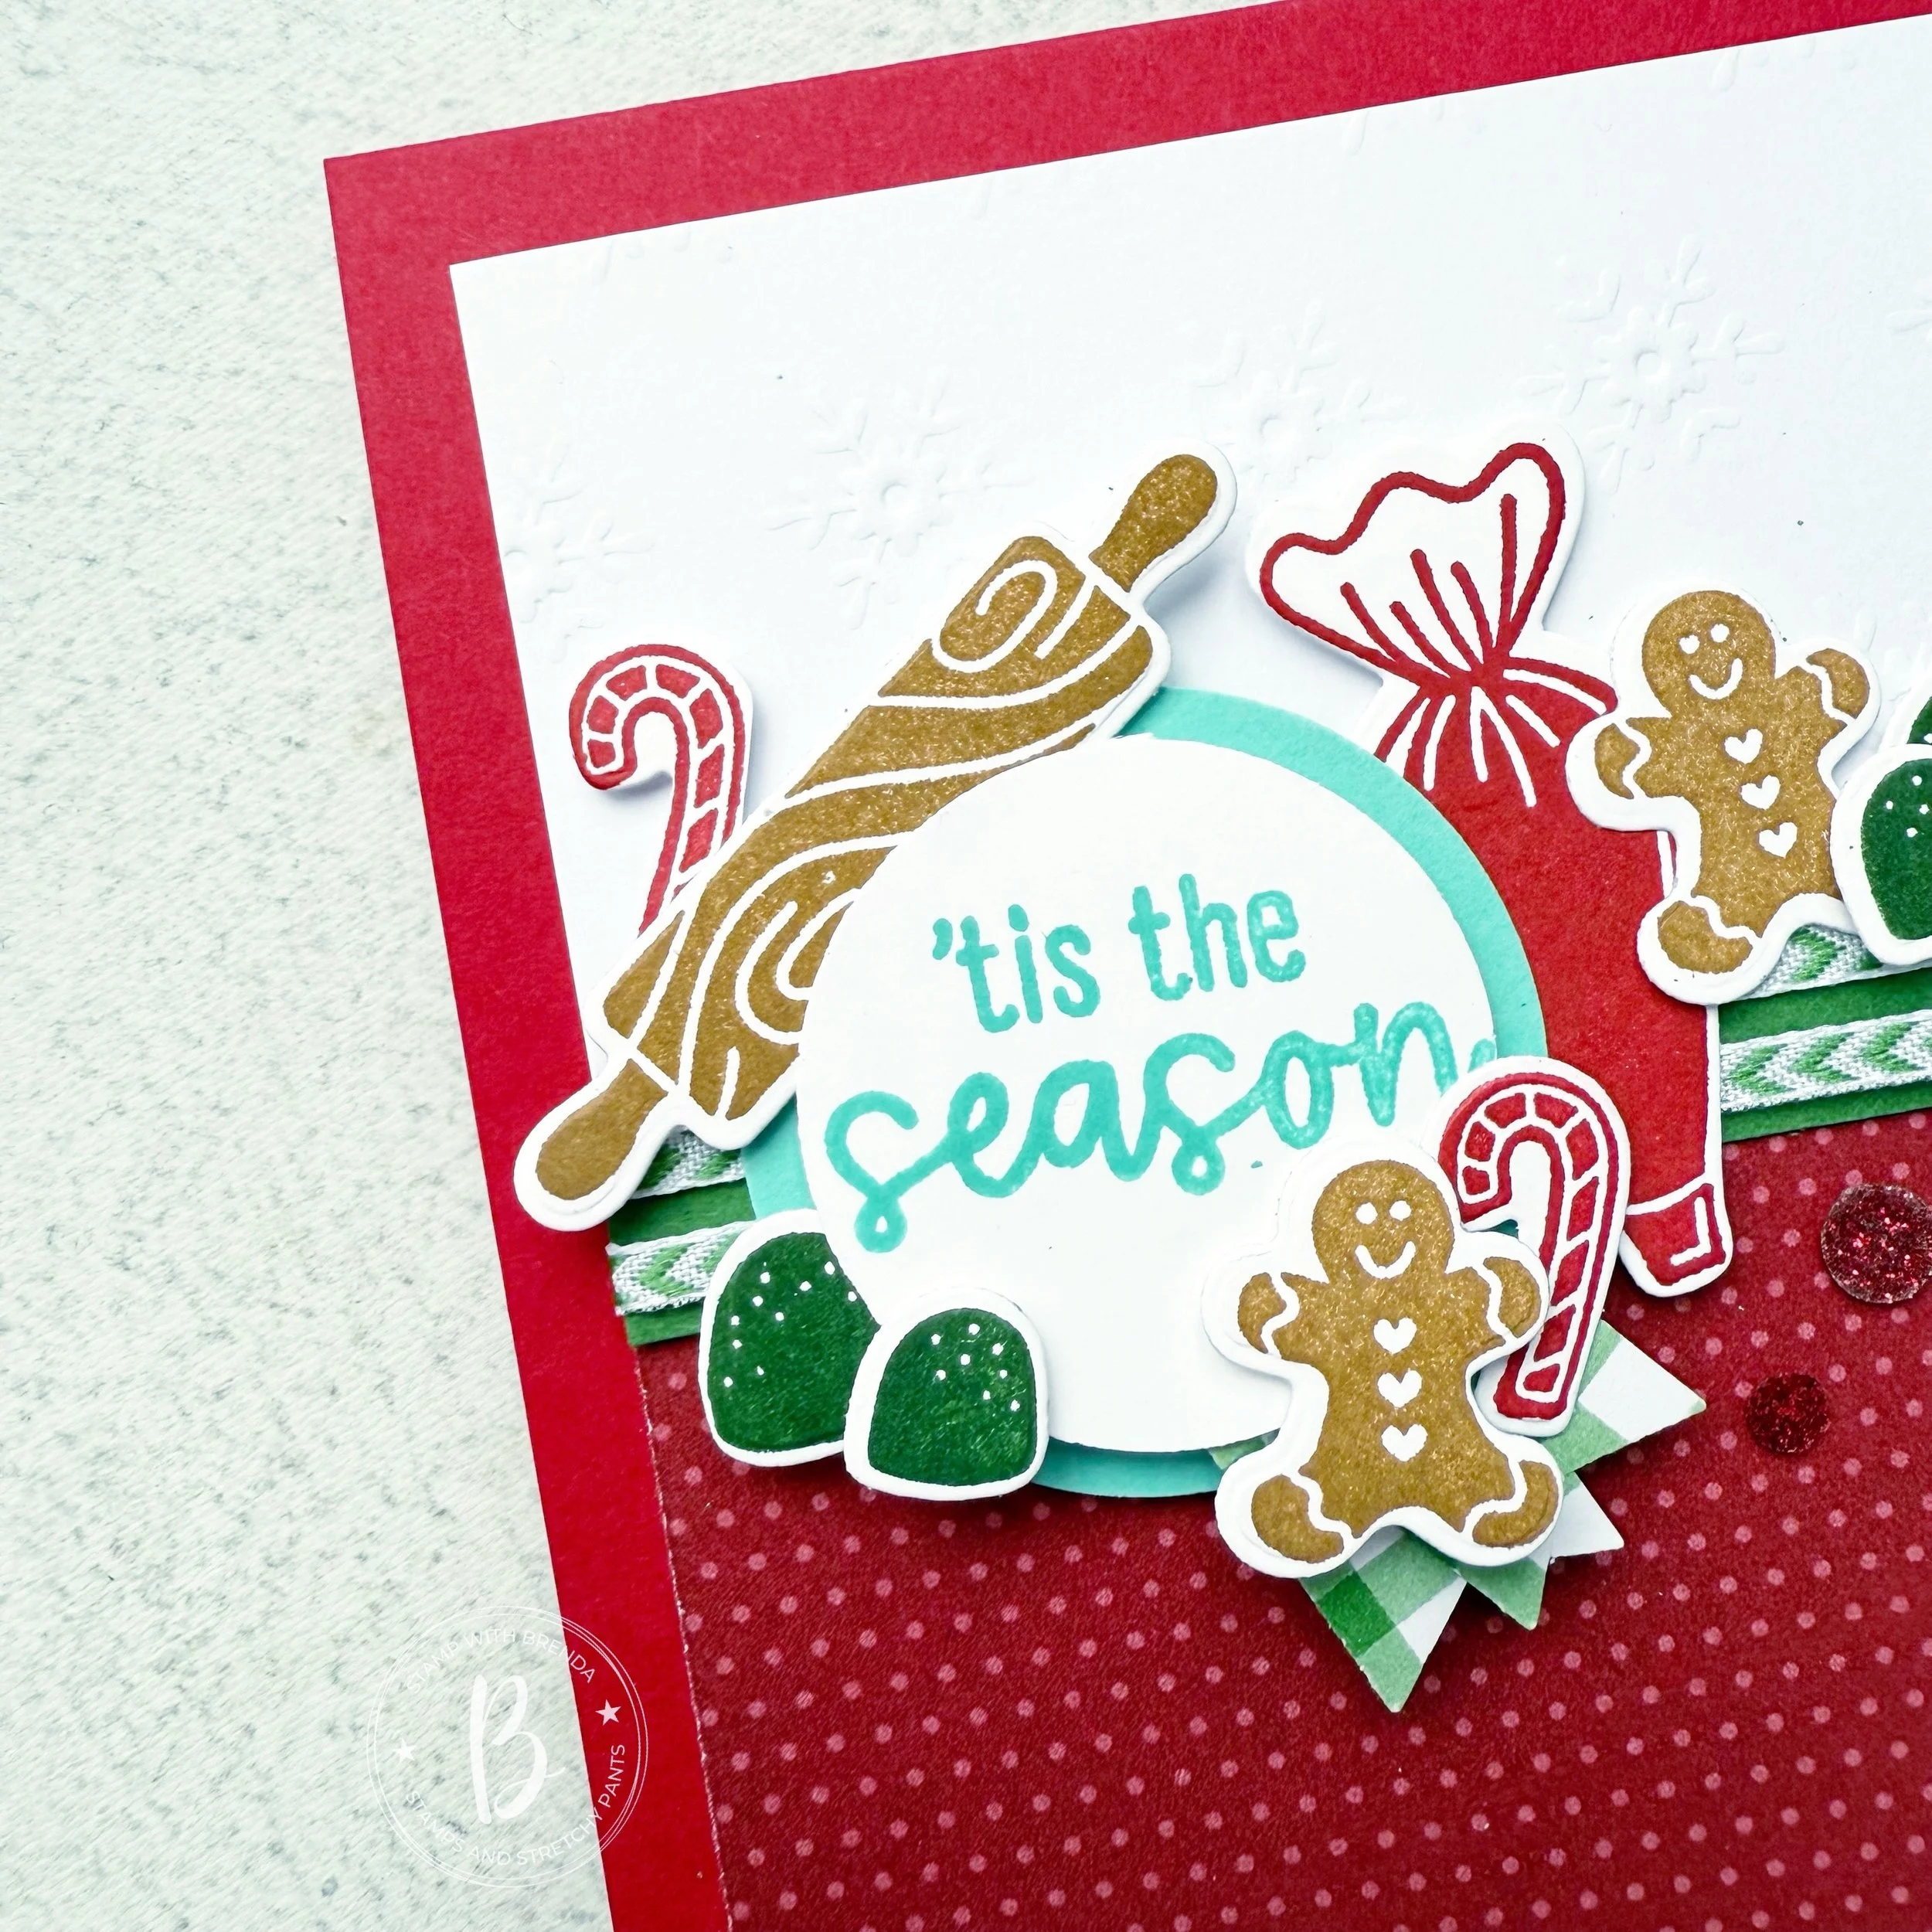
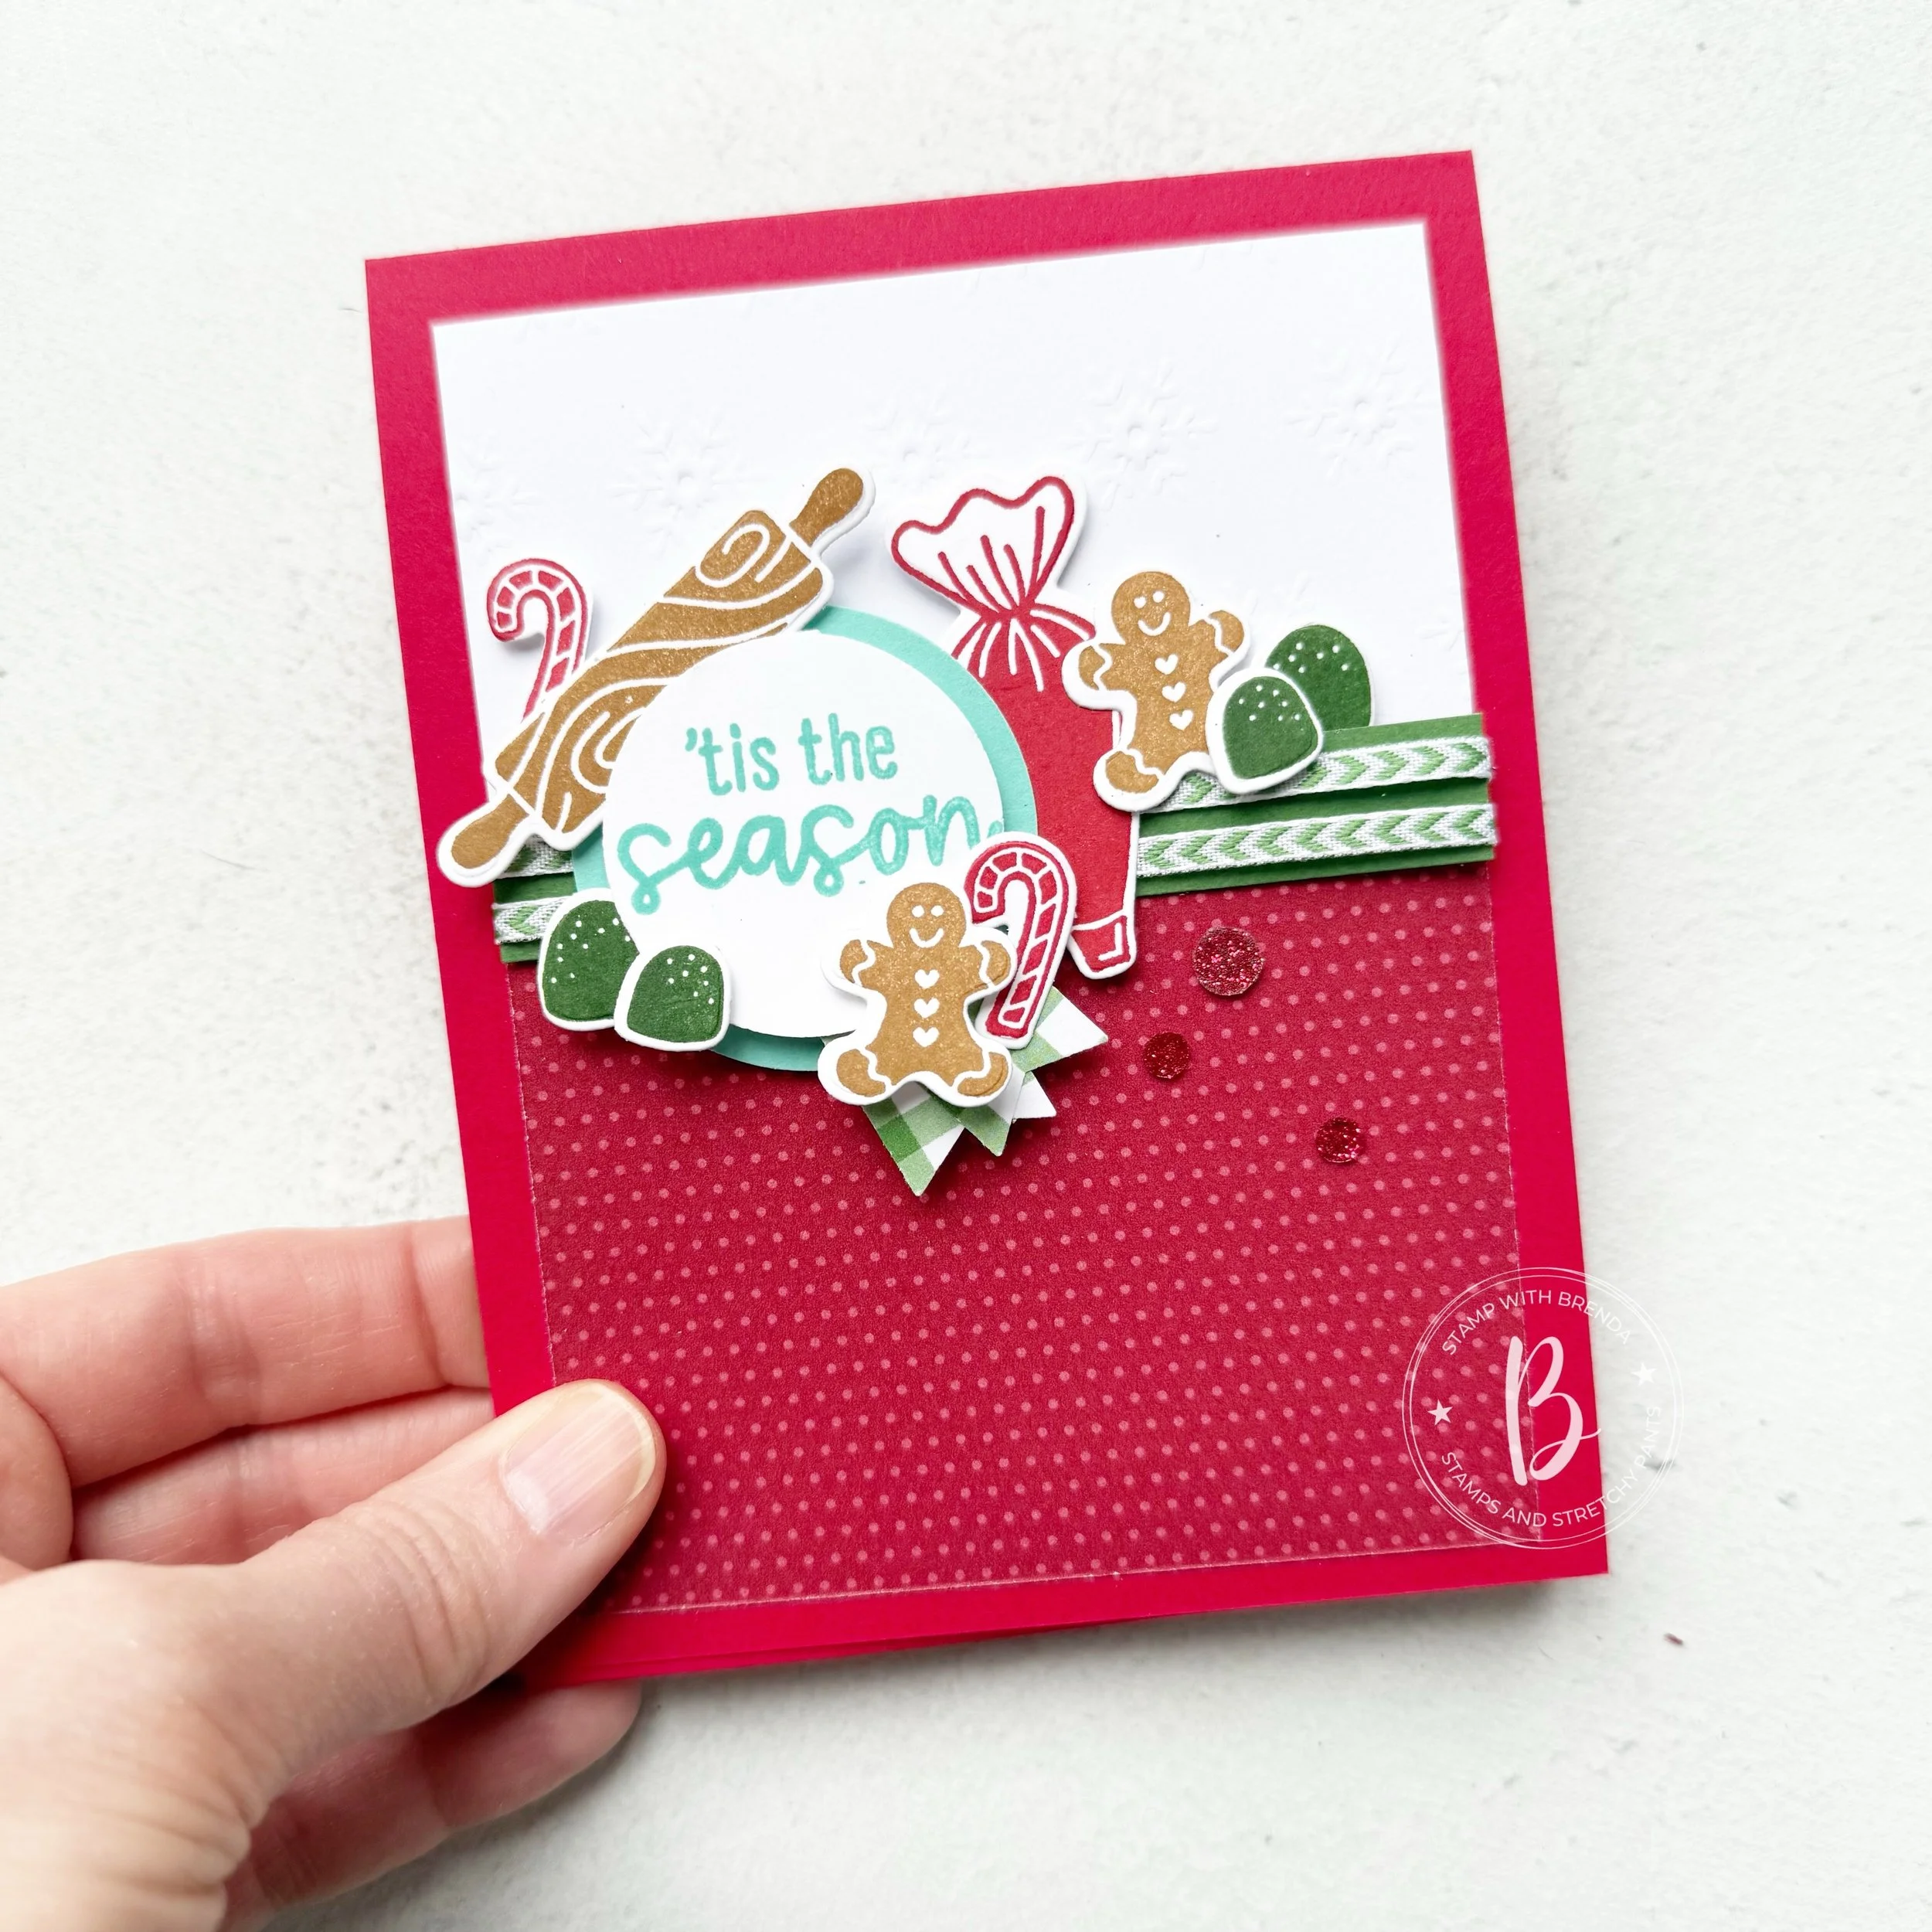

![Homemade Treats Bundle (English) [ 166017 ]](https://assets1.tamsnetwork.com/images/EC042017NF/166017s.jpg "Homemade Treats Bundle (English) [ 166017 ]")
![Gingerbread Man Bundle (English) [ 165785 ]](https://assets1.tamsnetwork.com/images/EC042017NF/165785s.jpg "Gingerbread Man Bundle (English) [ 165785 ]")
![Traditions Of Christmas Specialty Designer Series Paper & Sticker Sheet (English) [ 167364 ]](https://assets1.tamsnetwork.com/images/EC042017NF/167364s.jpg "Traditions Of Christmas Specialty Designer Series Paper & Sticker Sheet (English) [ 167364 ]")
![Christmas Tags & More 6" X 6" (15.2 X 15.2 Cm) Mix & Match Specialty Designer Series Paper [ 165907 ]](https://assets1.tamsnetwork.com/images/EC042017NF/165907s.jpg "Christmas Tags & More 6\" X 6\" (15.2 X 15.2 Cm) Mix & Match Specialty Designer Series Paper [ 165907 ]")
![Silent Snowfall 12" X 12" (30.5 X 30.5 Cm) Specialty Designer Series Paper [ 166062 ]](https://assets1.tamsnetwork.com/images/EC042017NF/166062s.jpg "Silent Snowfall 12\" X 12\" (30.5 X 30.5 Cm) Specialty Designer Series Paper [ 166062 ]")
![Traditional Sparkling Sequins [ 165875 ]](https://assets1.tamsnetwork.com/images/EC042017NF/165875s.jpg "Traditional Sparkling Sequins [ 165875 ]")
![Garden Green 1/8" (3.2 Mm) Chevron Ribbon [ 167212 ]](https://assets1.tamsnetwork.com/images/EC042017NF/167212s.jpg "Garden Green 1/8\" (3.2 Mm) Chevron Ribbon [ 167212 ]")
![Real Red 8-1/2" X 11" Cardstock [ 102482 ]](https://assets1.tamsnetwork.com/images/EC042017NF/102482s.jpg "Real Red 8-1/2\" X 11\" Cardstock [ 102482 ]")
![Coastal Cabana 8-1/2" X 11" Cardstock [ 131297 ]](https://assets1.tamsnetwork.com/images/EC042017NF/131297s.jpg "Coastal Cabana 8-1/2\" X 11\" Cardstock [ 131297 ]")
![Garden Green 8-1/2" X 11" Cardstock [ 102584 ]](https://assets1.tamsnetwork.com/images/EC042017NF/102584s.jpg "Garden Green 8-1/2\" X 11\" Cardstock [ 102584 ]")
![Pecan Pie Classic Stampin' Pad [ 161665 ]](https://assets1.tamsnetwork.com/images/EC042017NF/161665s.jpg "Pecan Pie Classic Stampin' Pad [ 161665 ]")
![Real Red Classic Stampin' Pad [ 147084 ]](https://assets1.tamsnetwork.com/images/EC042017NF/147084s.jpg "Real Red Classic Stampin' Pad [ 147084 ]")
![Garden Green Classic Stampin' Pad [ 147089 ]](https://assets1.tamsnetwork.com/images/EC042017NF/147089s.jpg "Garden Green Classic Stampin' Pad [ 147089 ]")
![Coastal Cabana Classic Stampin' Pad [ 147097 ]](https://assets1.tamsnetwork.com/images/EC042017NF/147097s.jpg "Coastal Cabana Classic Stampin' Pad [ 147097 ]")


![Forever Plaid 3 D Embossing Folder [ 164049 ]](https://assets1.tamsnetwork.com/images/EC042017NF/164049s.jpg "Forever Plaid 3 D Embossing Folder [ 164049 ]")
![Basics Wow! Embossing Powder [ 165679 ]](https://assets1.tamsnetwork.com/images/EC042017NF/165679s.jpg "Basics Wow! Embossing Powder [ 165679 ]")
![Basic Black Stampin' Blends Combo Pack [ 154843 ]](https://assets1.tamsnetwork.com/images/EC042017NF/154843s.jpg "Basic Black Stampin' Blends Combo Pack [ 154843 ]")
![Real Red & White Baker's Twine [ 164051 ]](https://assets1.tamsnetwork.com/images/EC042017NF/164051s.jpg "Real Red & White Baker's Twine [ 164051 ]")
![Pecan Pie 8 1/2" X 11" Cardstock [ 161717 ]](https://assets1.tamsnetwork.com/images/EC042017NF/161717s.jpg "Pecan Pie 8 1/2\" X 11\" Cardstock [ 161717 ]")
![Pretty In Pink 8 1/2" X 11" Cardstock [ 163793 ]](https://assets1.tamsnetwork.com/images/EC042017NF/163793s.jpg "Pretty In Pink 8 1/2\" X 11\" Cardstock [ 163793 ]")


![Charming Day Bundle (English) [ 166136 ]](https://assets1.tamsnetwork.com/images/EC042017NF/166136s.jpg "Charming Day Bundle (English) [ 166136 ]")
![Party Banners Dies [ 165264 ]](https://assets1.tamsnetwork.com/images/EC042017NF/165264s.jpg "Party Banners Dies [ 165264 ]")
![Birch Wood 3 D Embossing Folder [ 164069 ]](https://assets1.tamsnetwork.com/images/EC042017NF/164069s.jpg "Birch Wood 3 D Embossing Folder [ 164069 ]")
![Floral Charm 12" X 12" (30.5 X 30.5 Cm) Designer Series Paper [ 166125 ]](https://assets1.tamsnetwork.com/images/EC042017NF/166125s.jpg "Floral Charm 12\" X 12\" (30.5 X 30.5 Cm) Designer Series Paper [ 166125 ]")
![Basic Beige 8 1/2" X 11" Cardstock [ 164511 ]](https://assets1.tamsnetwork.com/images/EC042017NF/164511s.jpg "Basic Beige 8 1/2\" X 11\" Cardstock [ 164511 ]")
![Neutral Matte Dots [ 165561 ]](https://assets1.tamsnetwork.com/images/EC042017NF/165561s.jpg "Neutral Matte Dots [ 165561 ]")
![Clear Wink Of Stella Glitter Brush [ 141897 ]](https://assets1.tamsnetwork.com/images/EC042017NF/141897s.jpg "Clear Wink Of Stella Glitter Brush [ 141897 ]")
![Water Painters [ 151298 ]](https://assets1.tamsnetwork.com/images/EC042017NF/151298s.jpg "Water Painters [ 151298 ]")
![Old Olive Classic Stampin' Pad [ 147090 ]](https://assets1.tamsnetwork.com/images/EC042017NF/147090s.jpg "Old Olive Classic Stampin' Pad [ 147090 ]")
![Petal Pink Classic Stampin' Pad [ 147108 ]](https://assets1.tamsnetwork.com/images/EC042017NF/147108s.jpg "Petal Pink Classic Stampin' Pad [ 147108 ]")
![Calypso Coral Classic Stampin' Pad [ 147101 ]](https://assets1.tamsnetwork.com/images/EC042017NF/147101s.jpg "Calypso Coral Classic Stampin' Pad [ 147101 ]")
![Mossy Meadow Classic Stampin' Pad [ 147111 ]](https://assets1.tamsnetwork.com/images/EC042017NF/147111s.jpg "Mossy Meadow Classic Stampin' Pad [ 147111 ]")


