12 Days of Christmas--Day 7!
/Have you been enjoying our 12 Days of Christmas Blog Hop so far? I hope you have been inspired by the projects that we have been sharing every day! Don’t forget to check out both of our blogs so that you don’t miss anything!

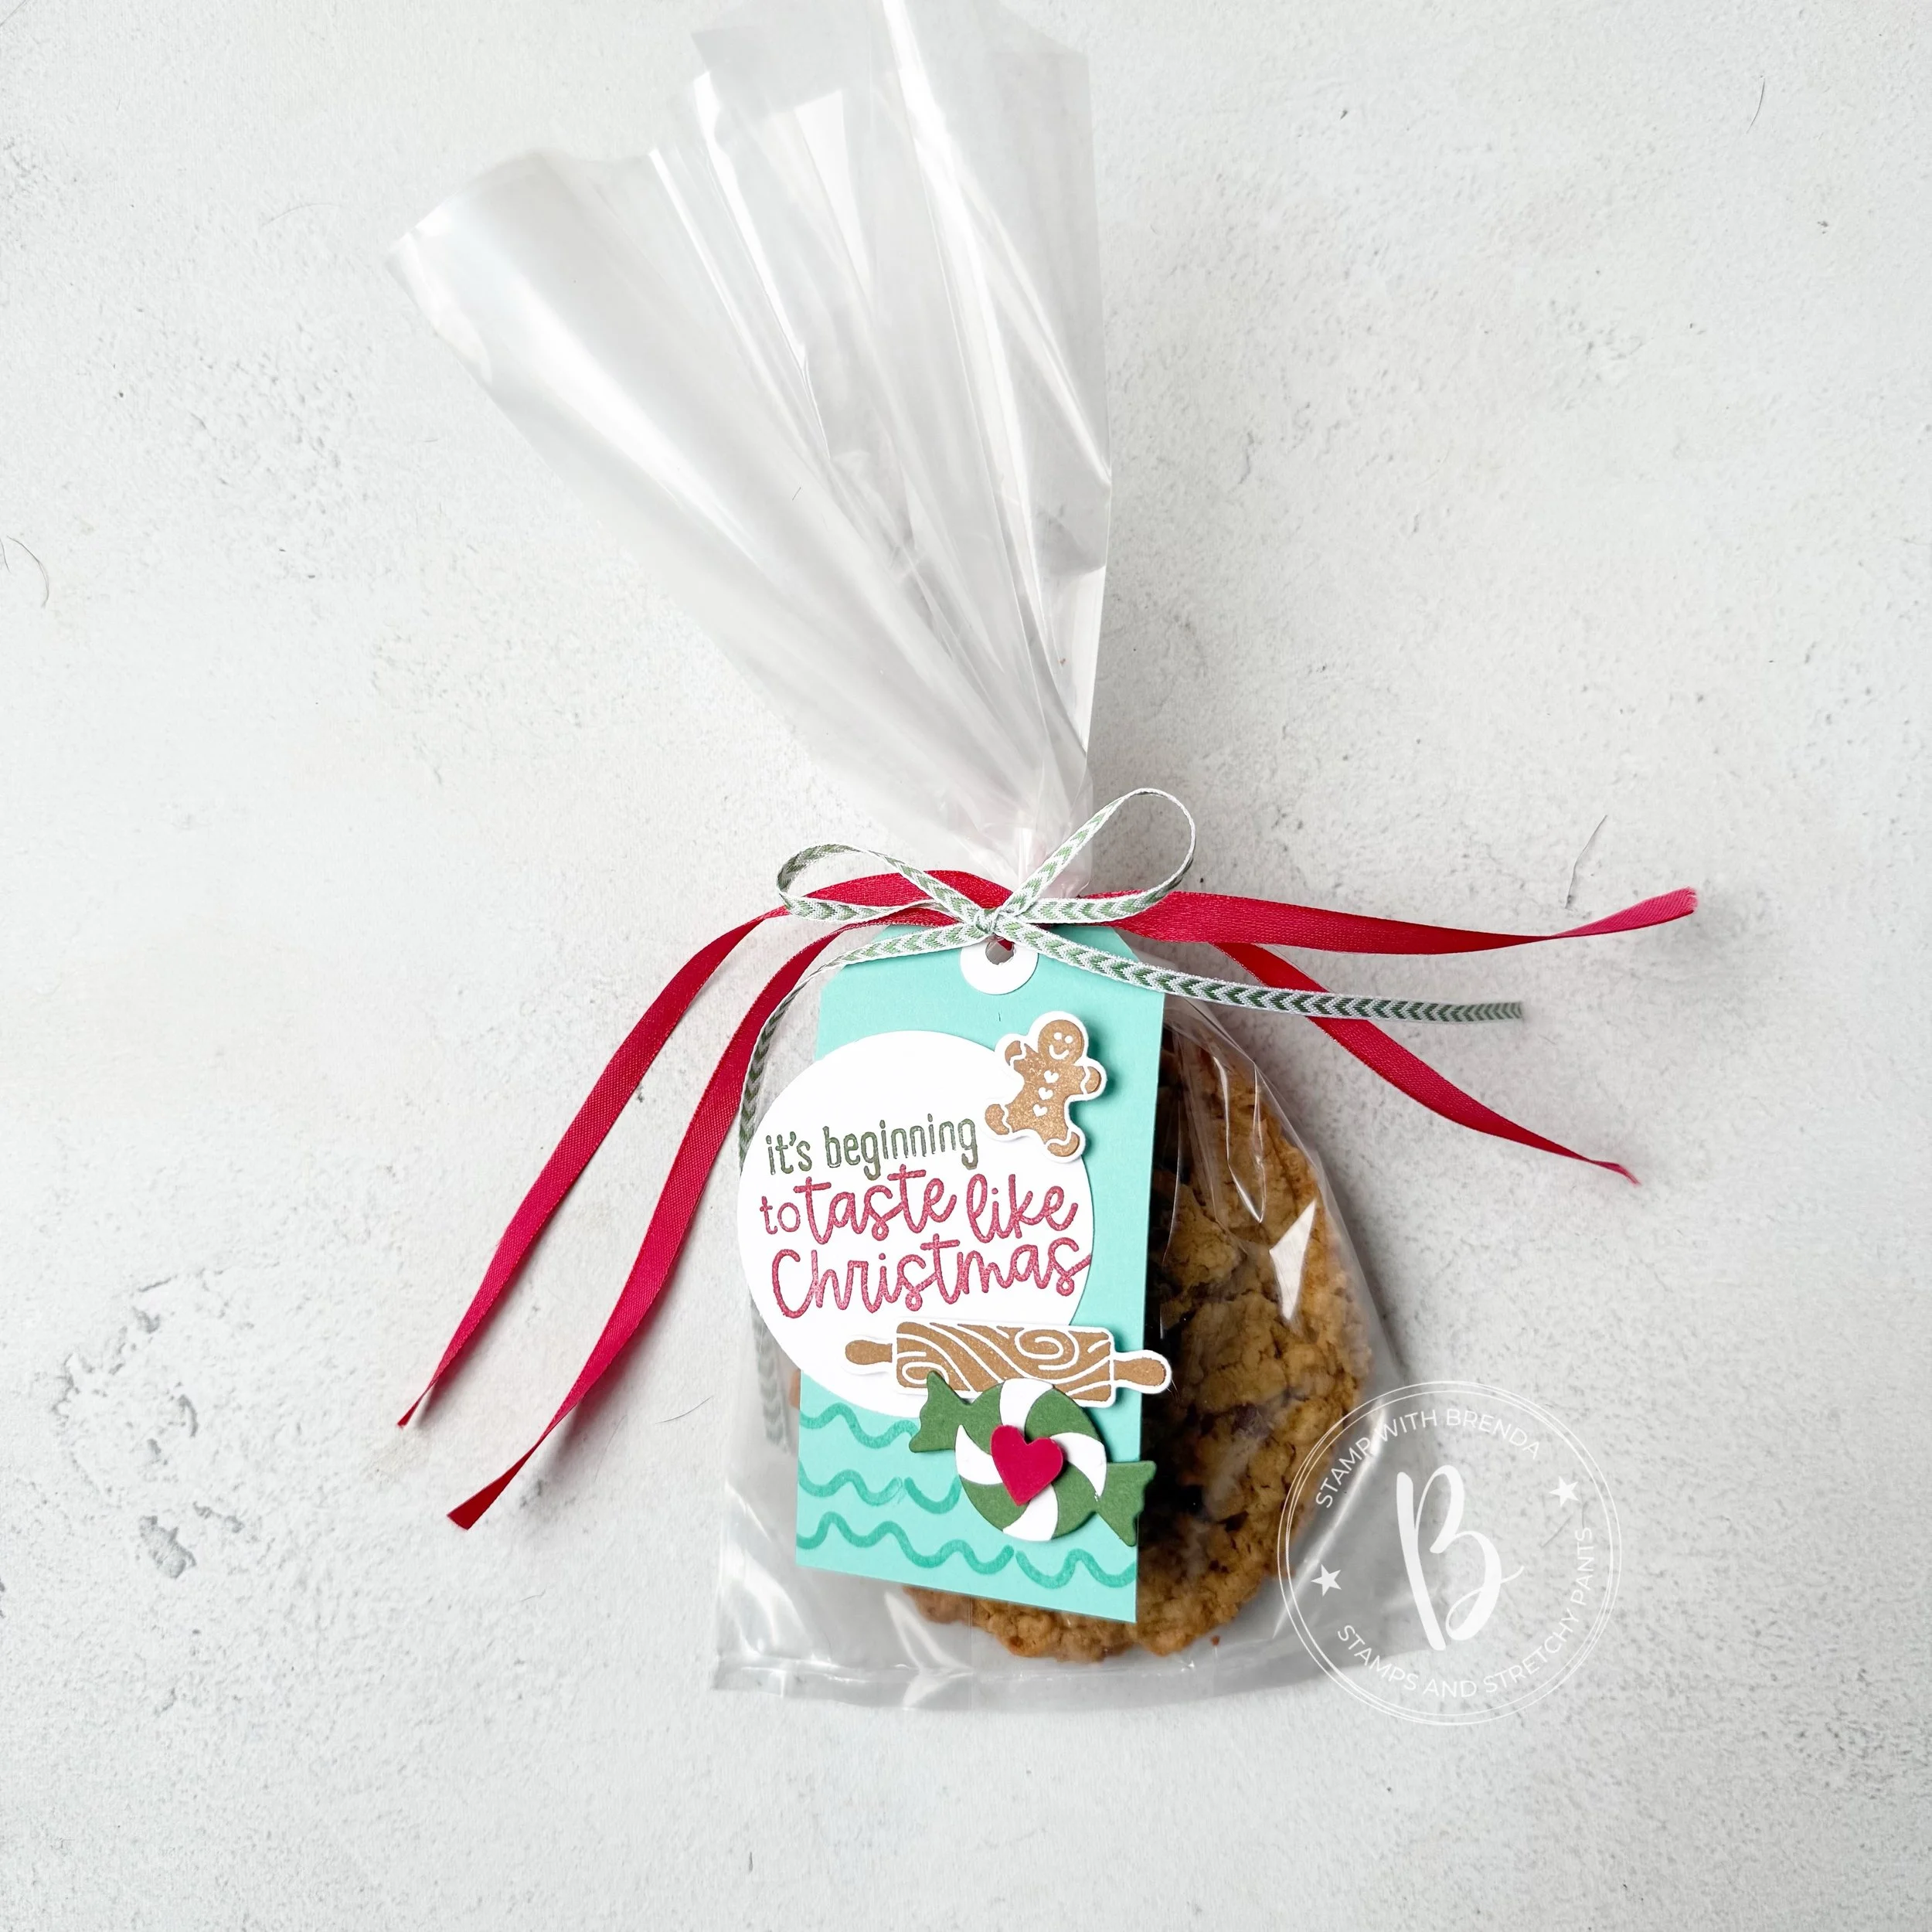
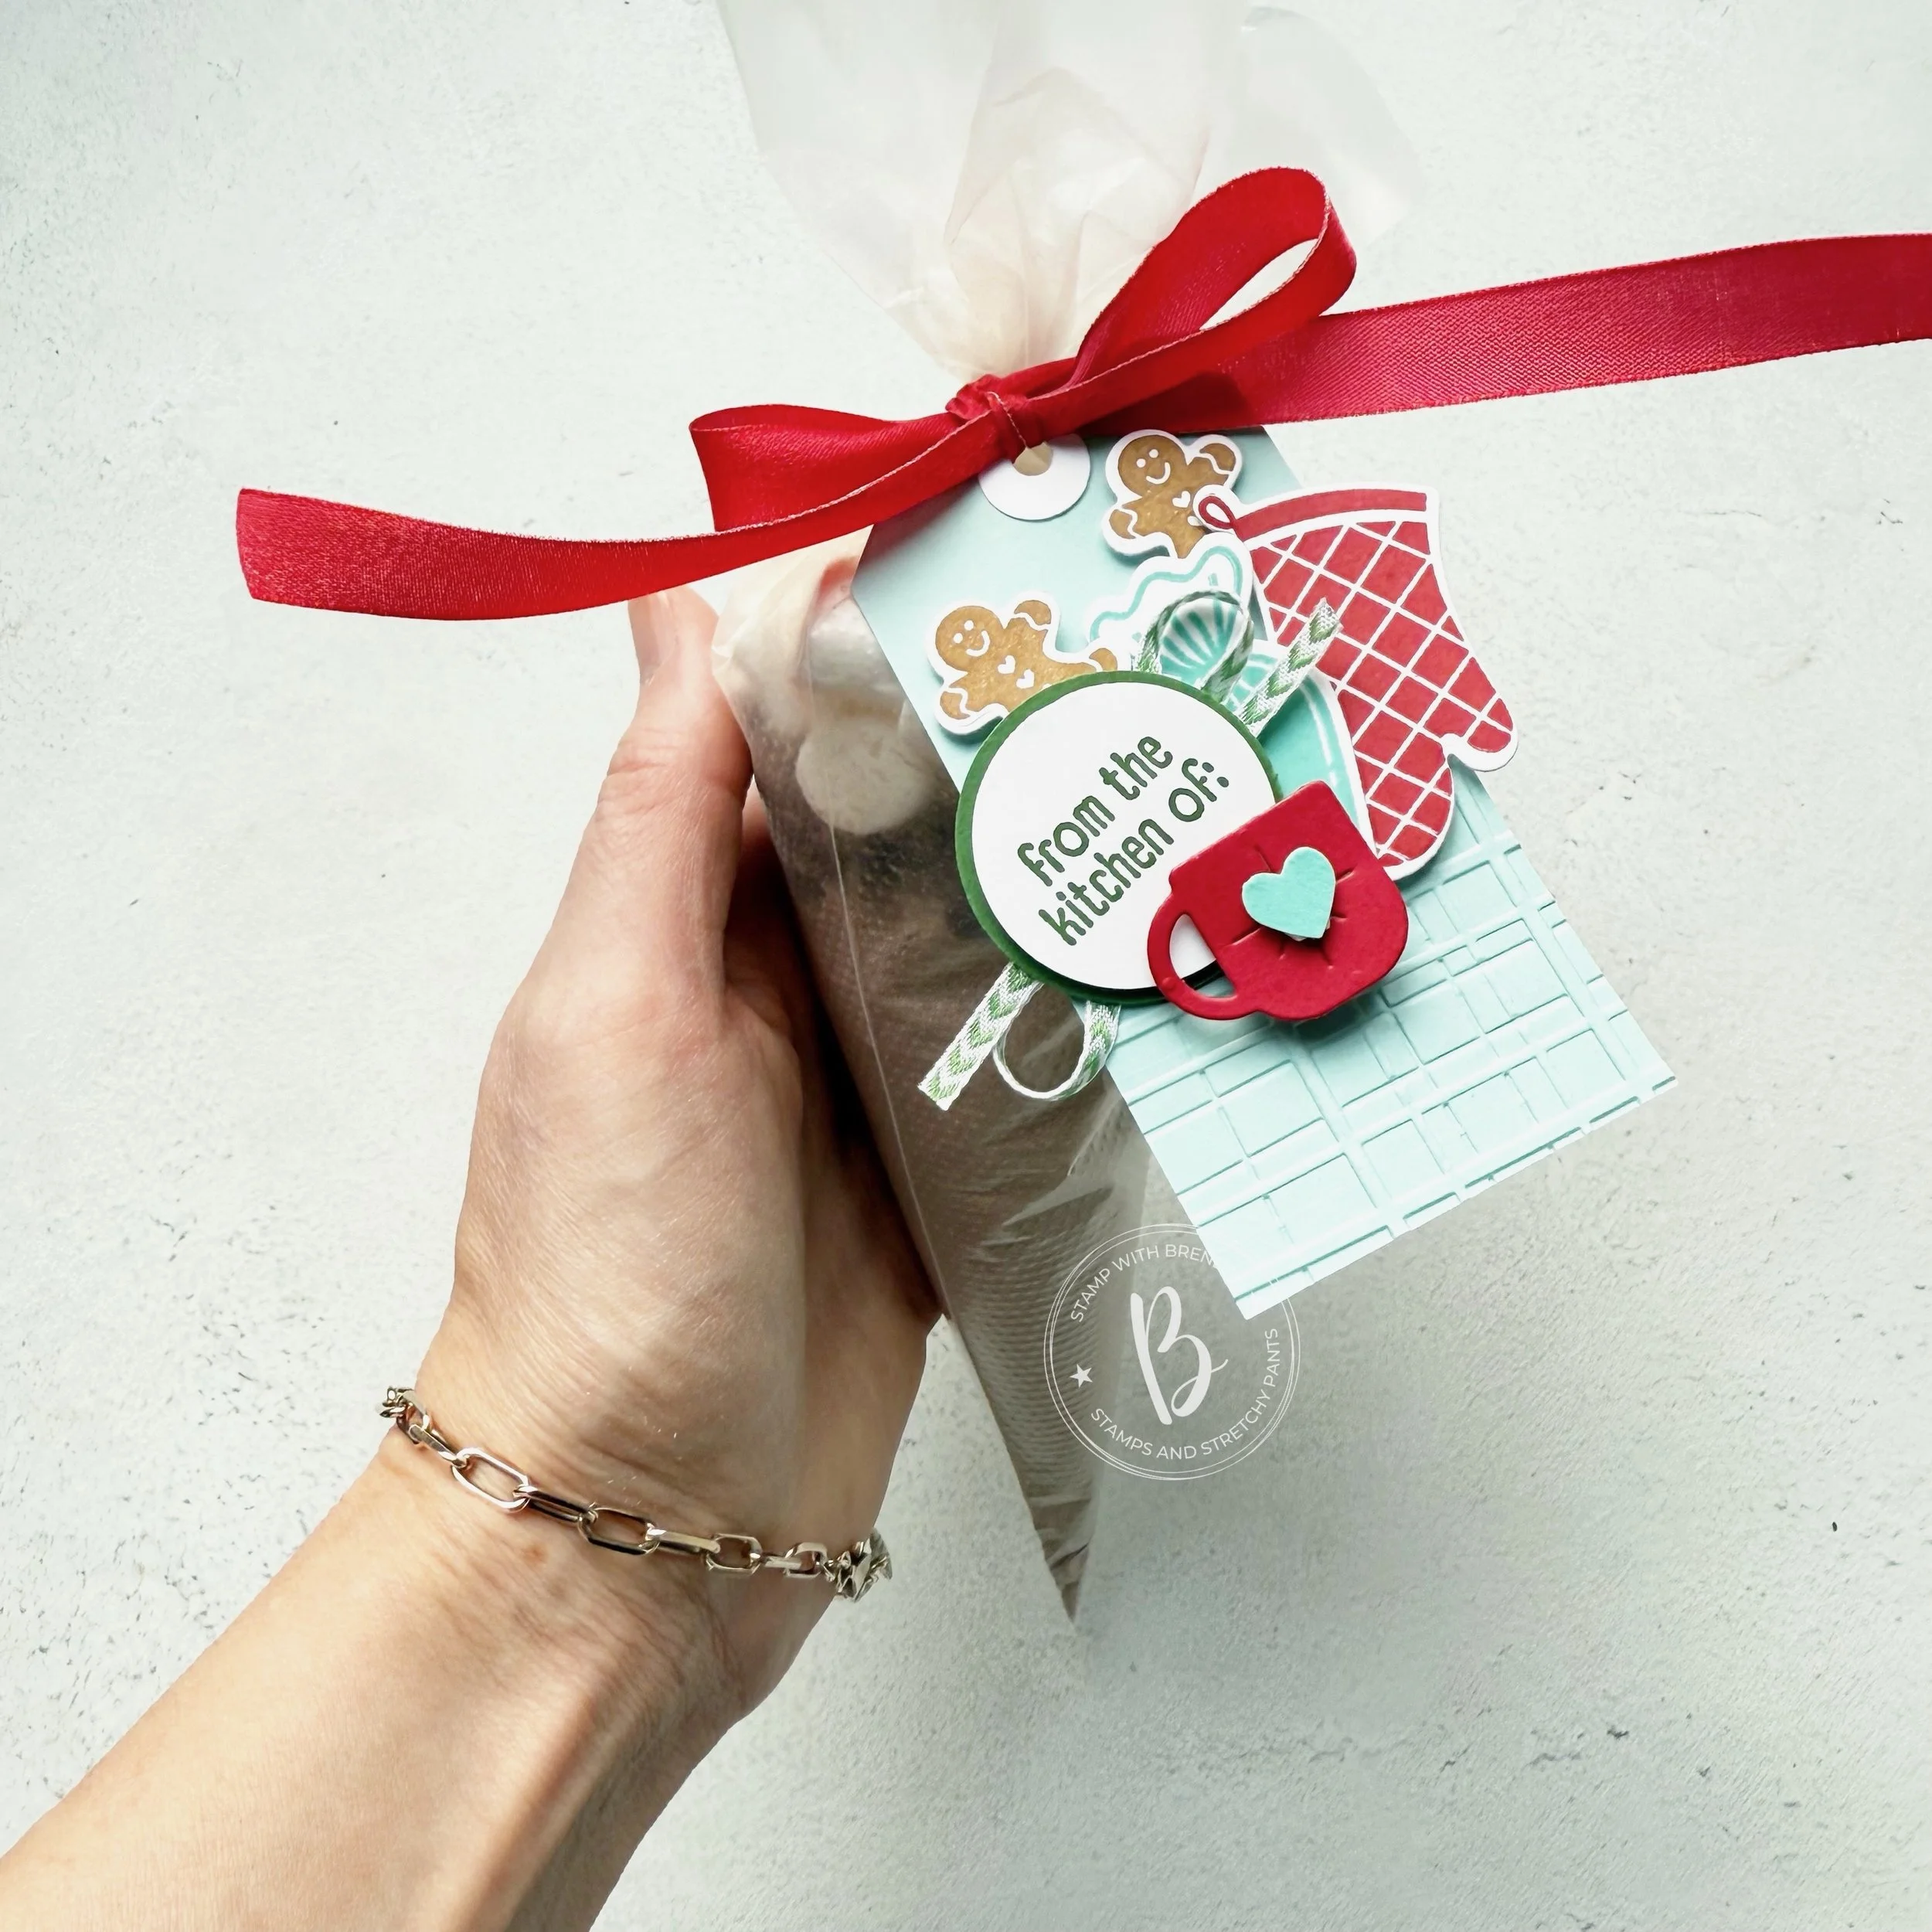
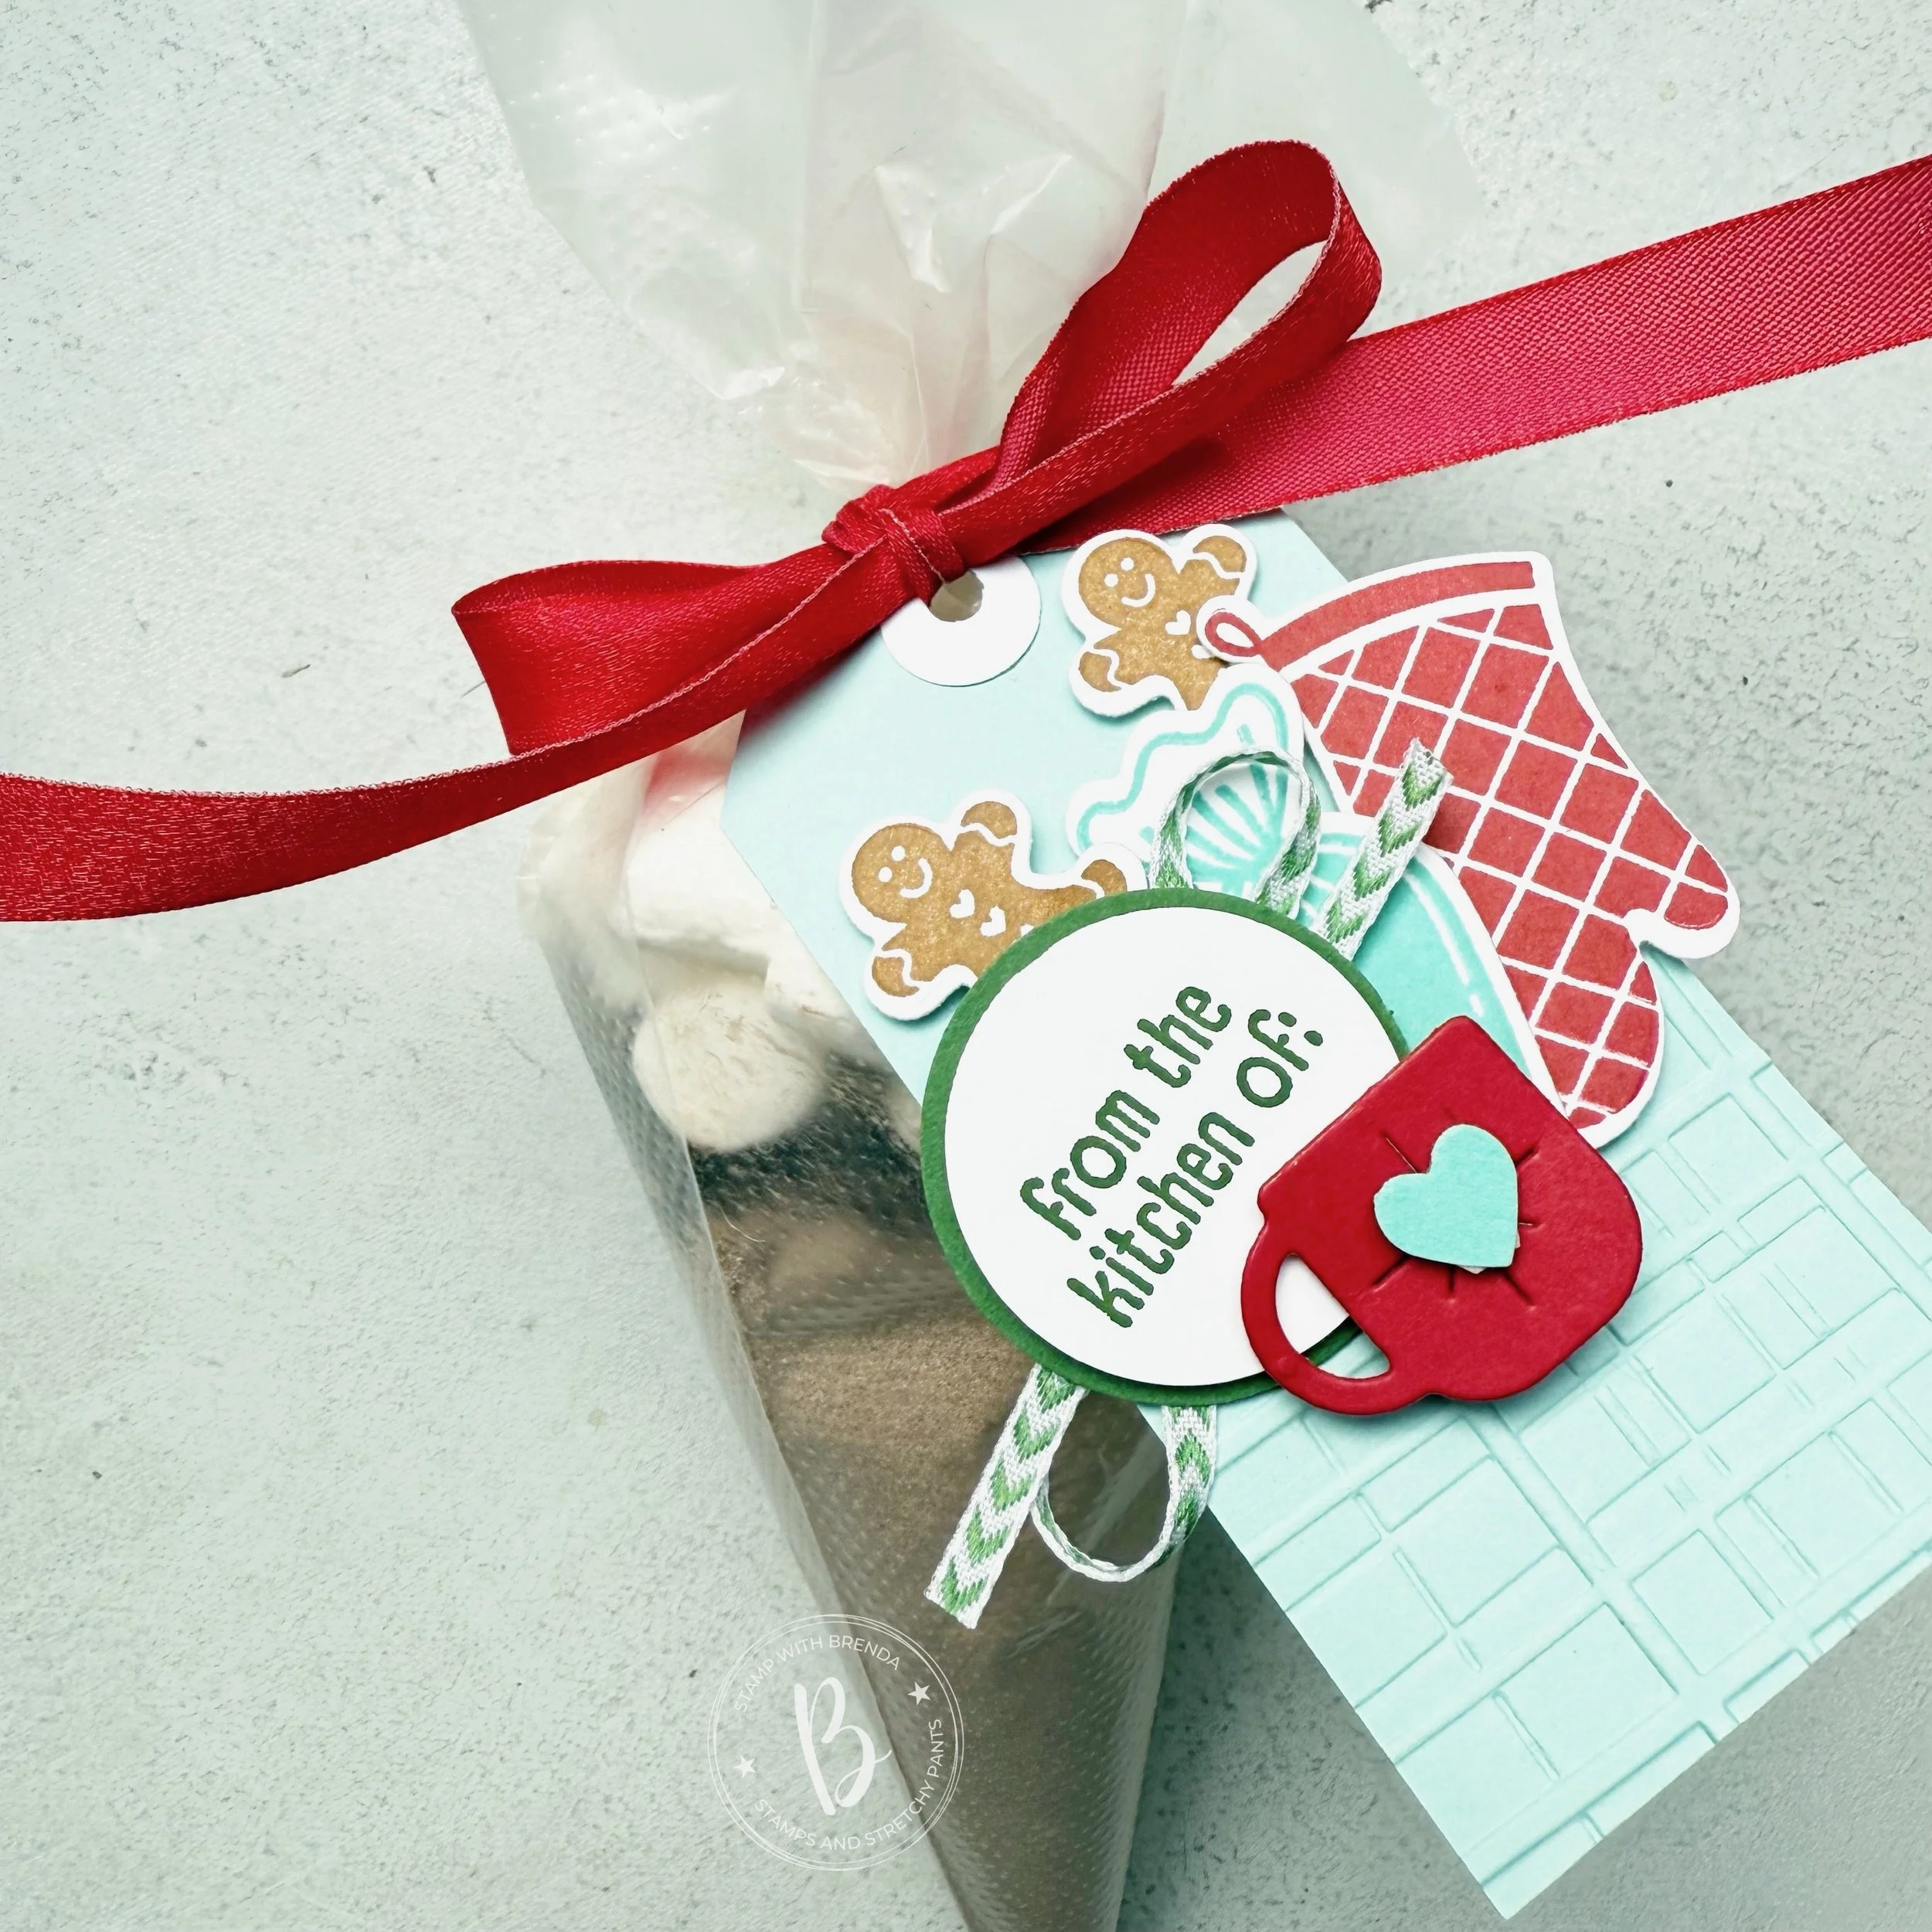
My next project is another tag of sorts! I cam across this adorable mug at a local grocery story and could not resist buying it as I knew I could use the Gingerbread Man Bundle to make a fun tag for some Swiss Miss Cocoa Flavored Popcorn.
TOP TIP: I have a couple good popcorn recipes on my blog!
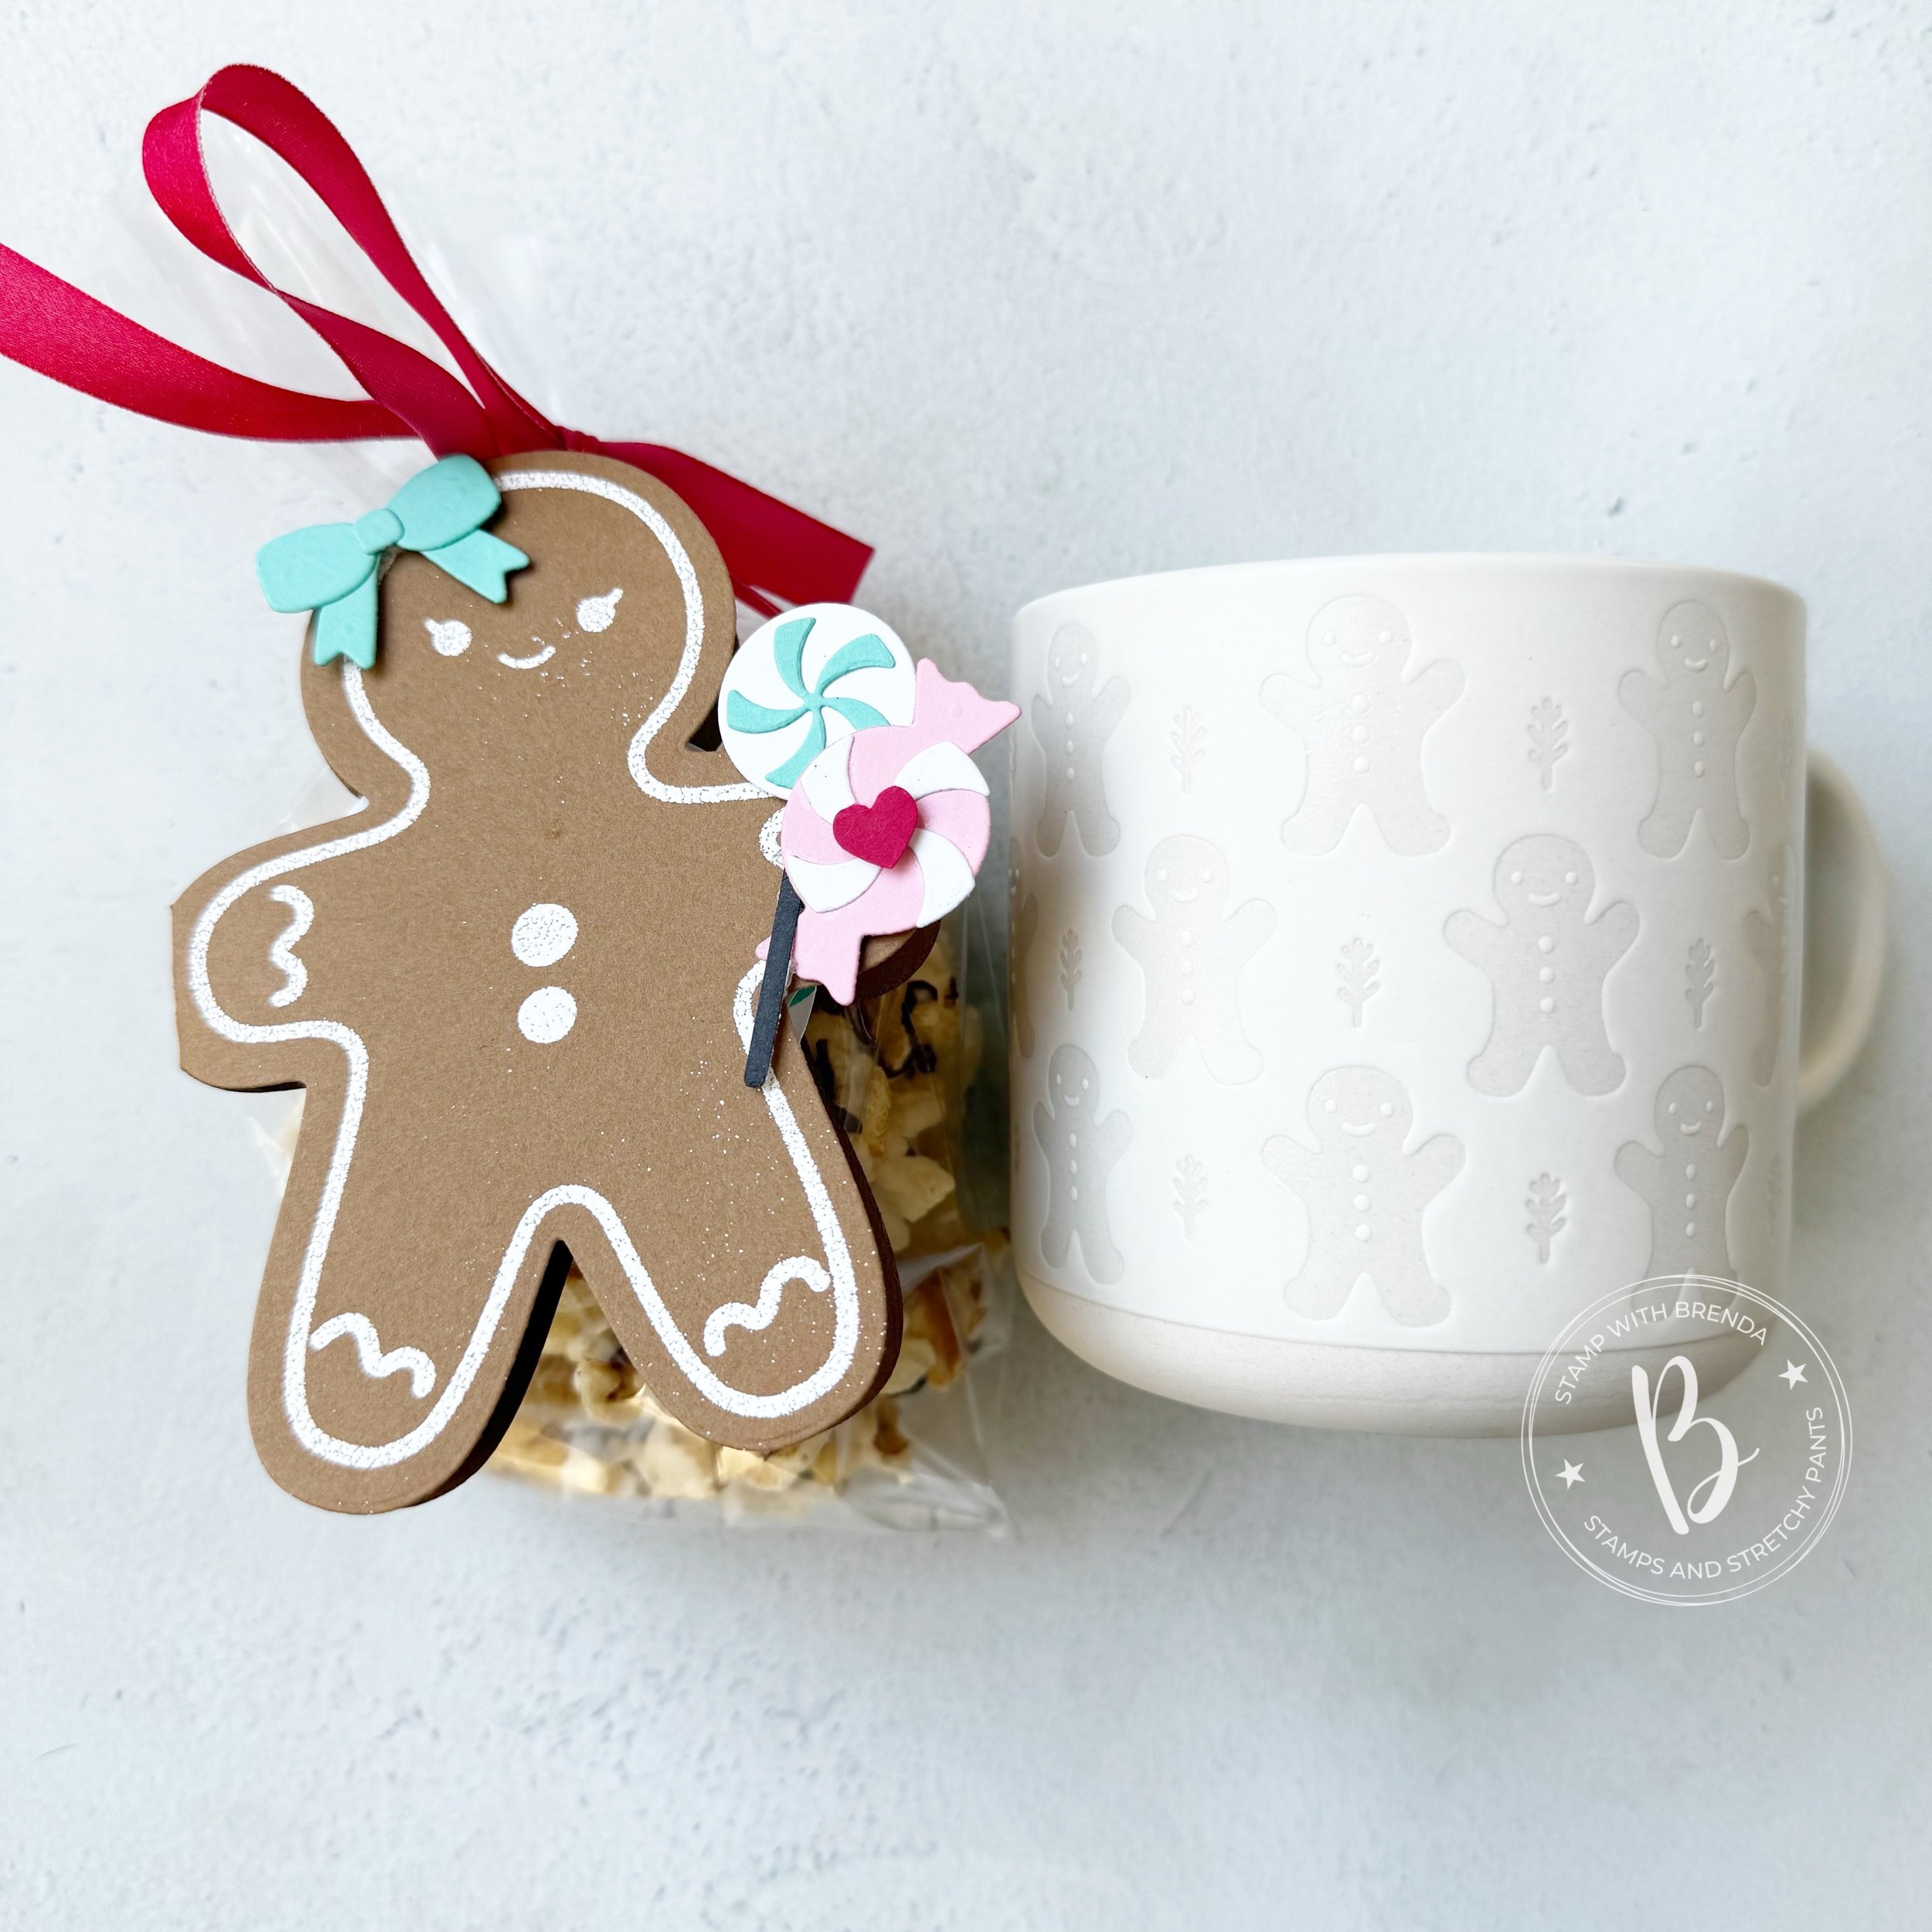
I used a cello bag (found in the party section at the grocery store) to hold my popcorn by adding the empty bag to the mug then scooping in some popcorn and adding some Real Red Shiny Ribbon.
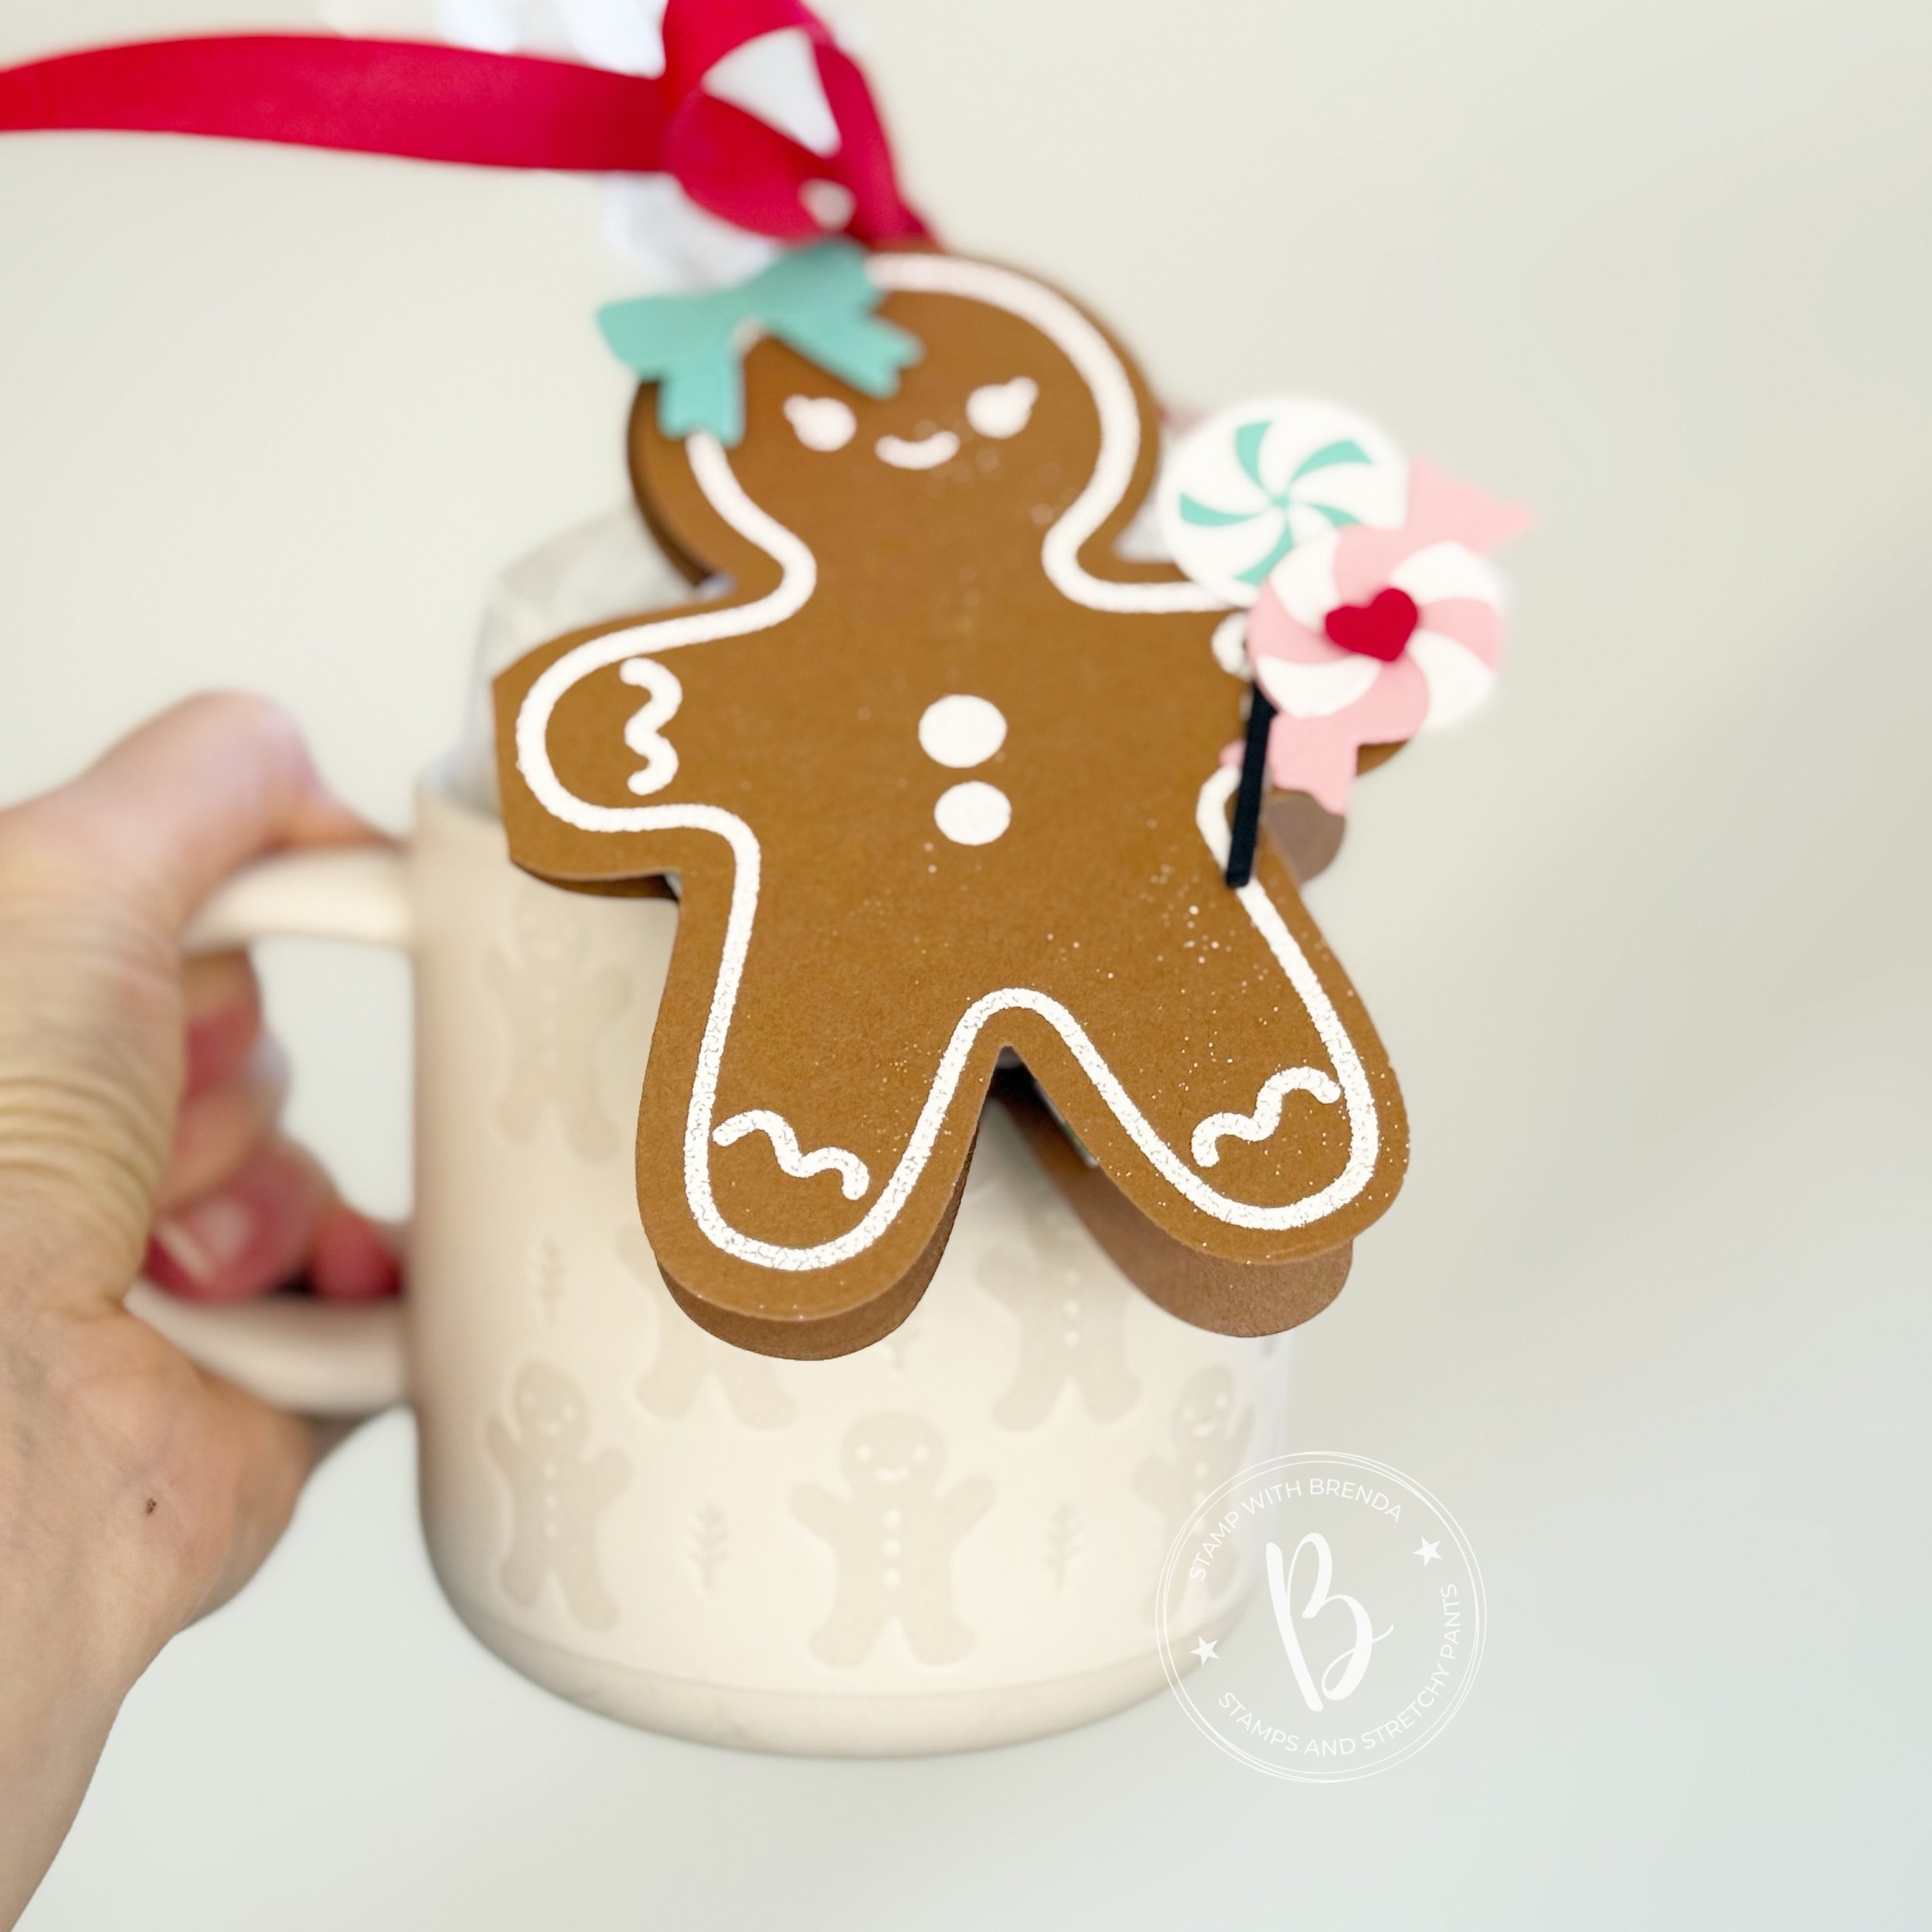
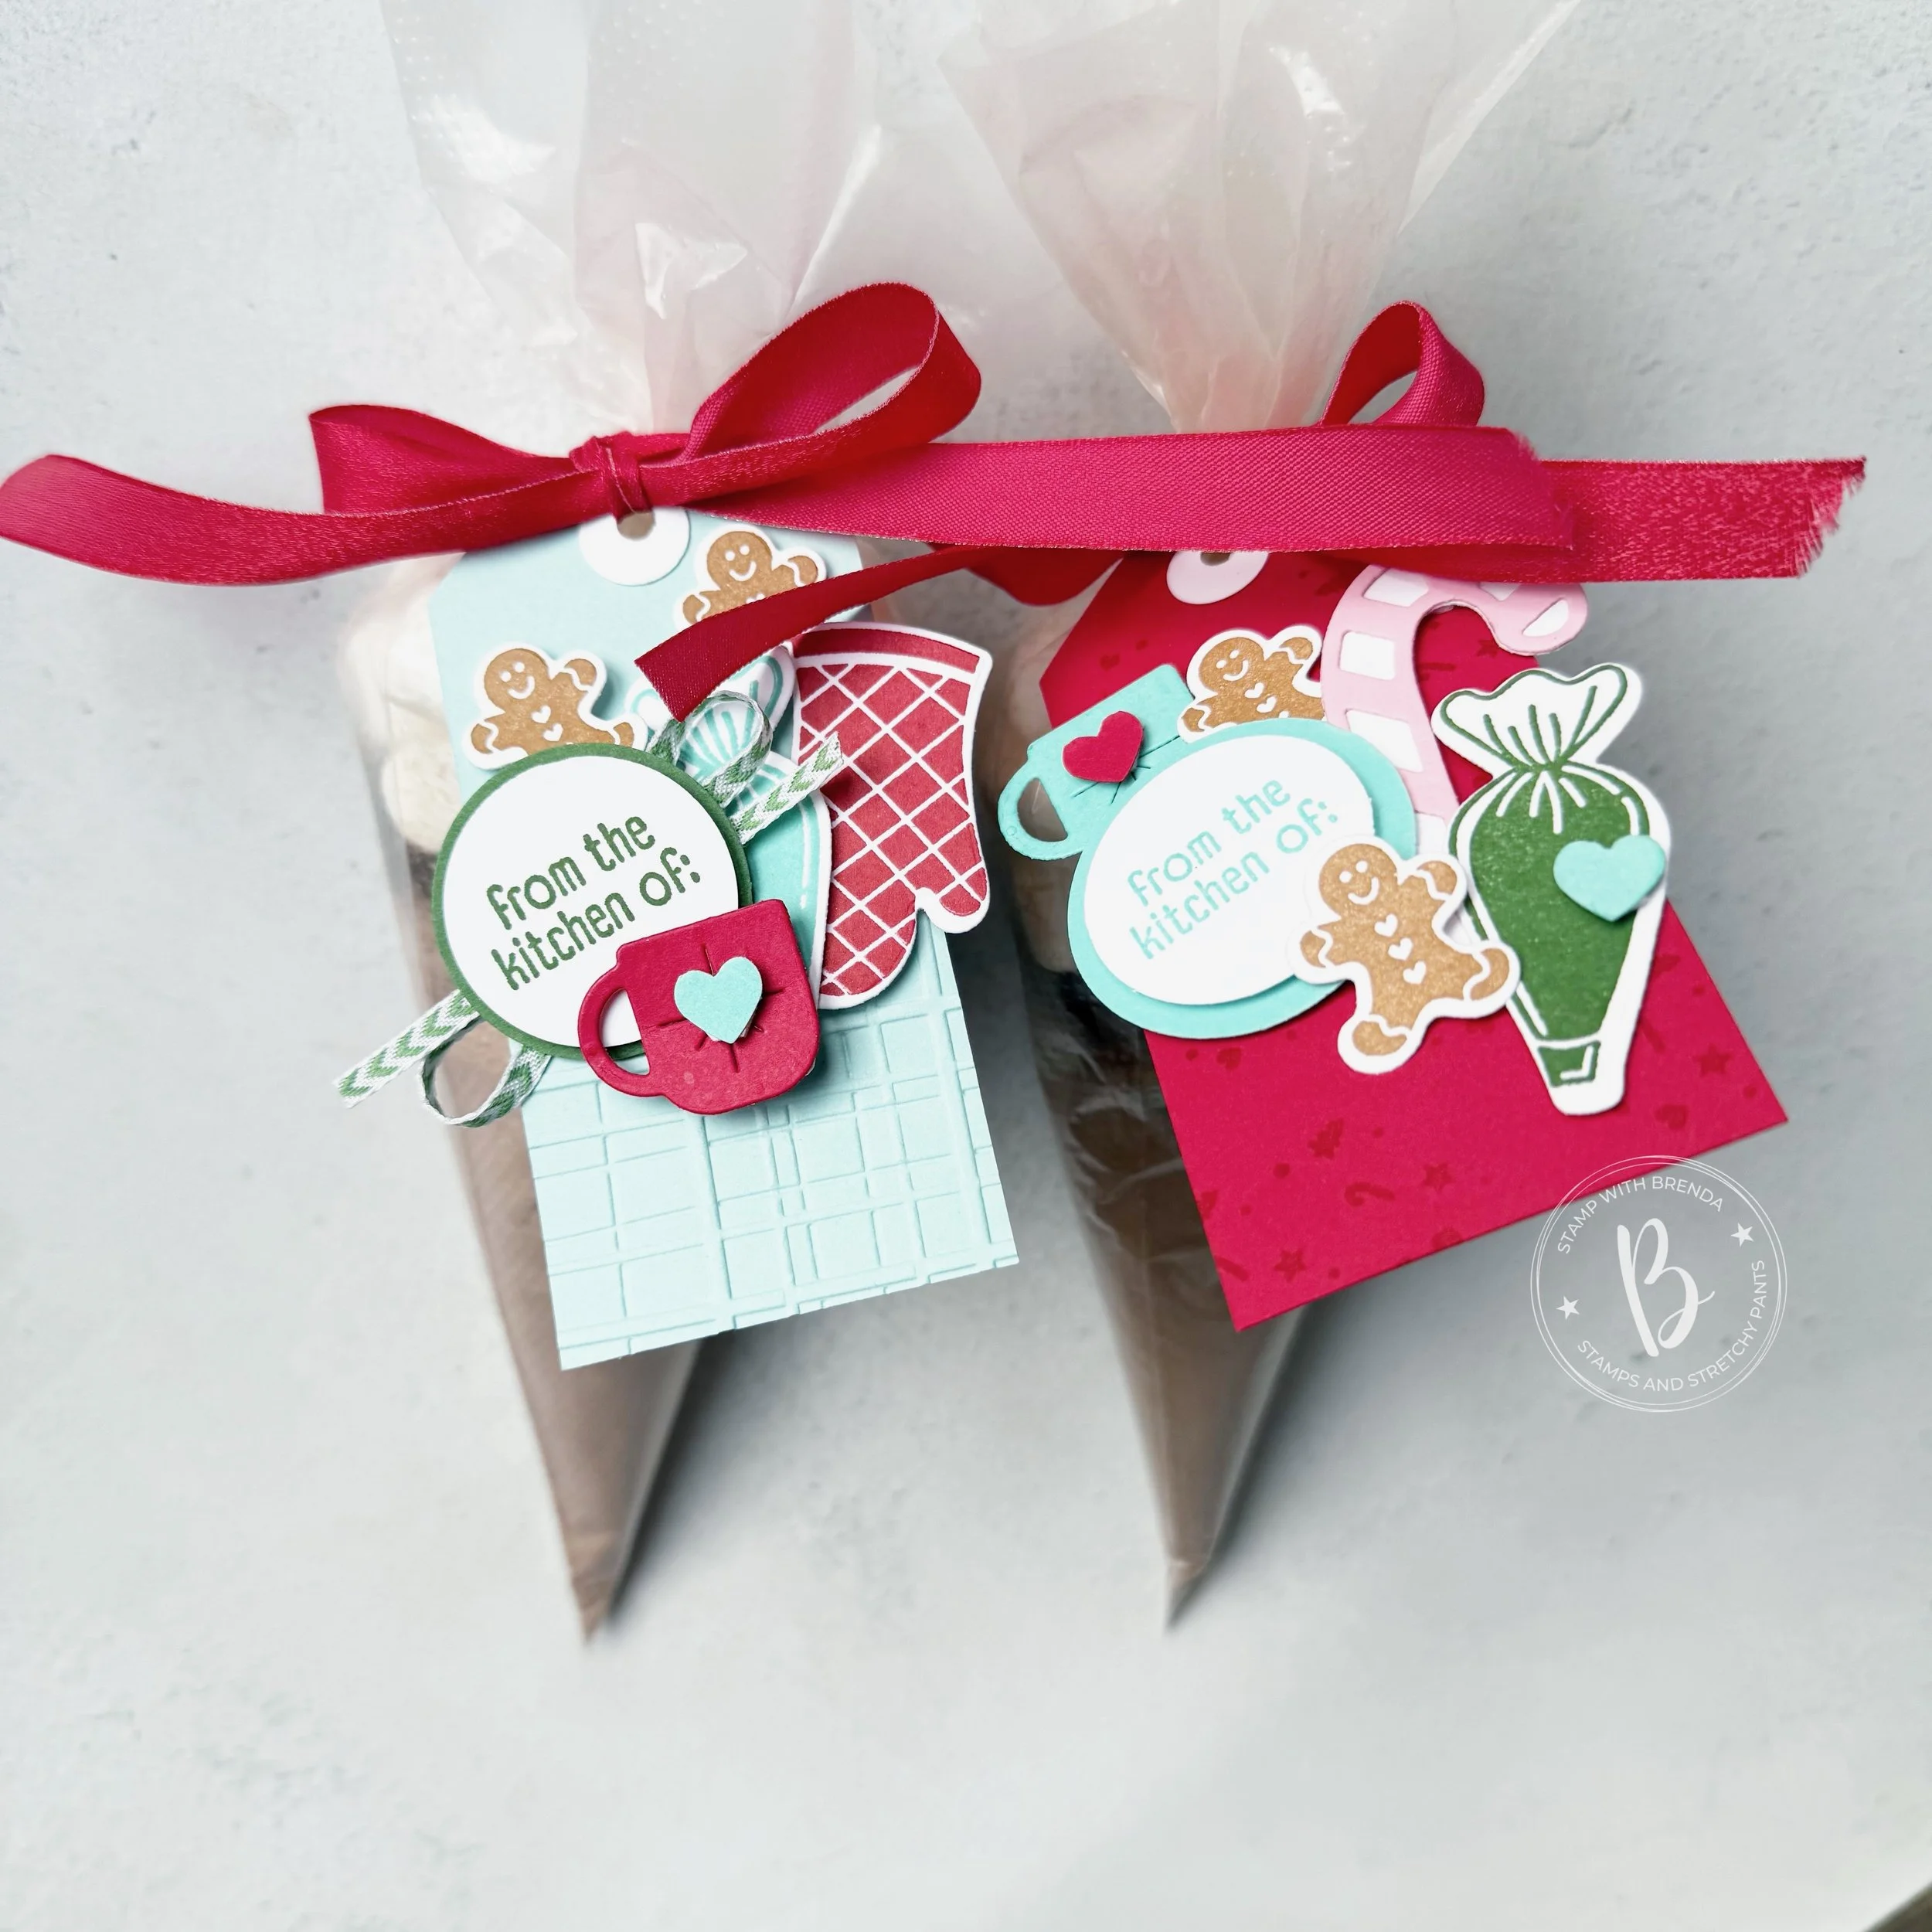
The Gingerbread Man dies are fun because they are designed to open like a tag! Isn’t that fun? So I knew that I needed to use it in the way it was designed and adding a tag to this matching mug was just perfect.
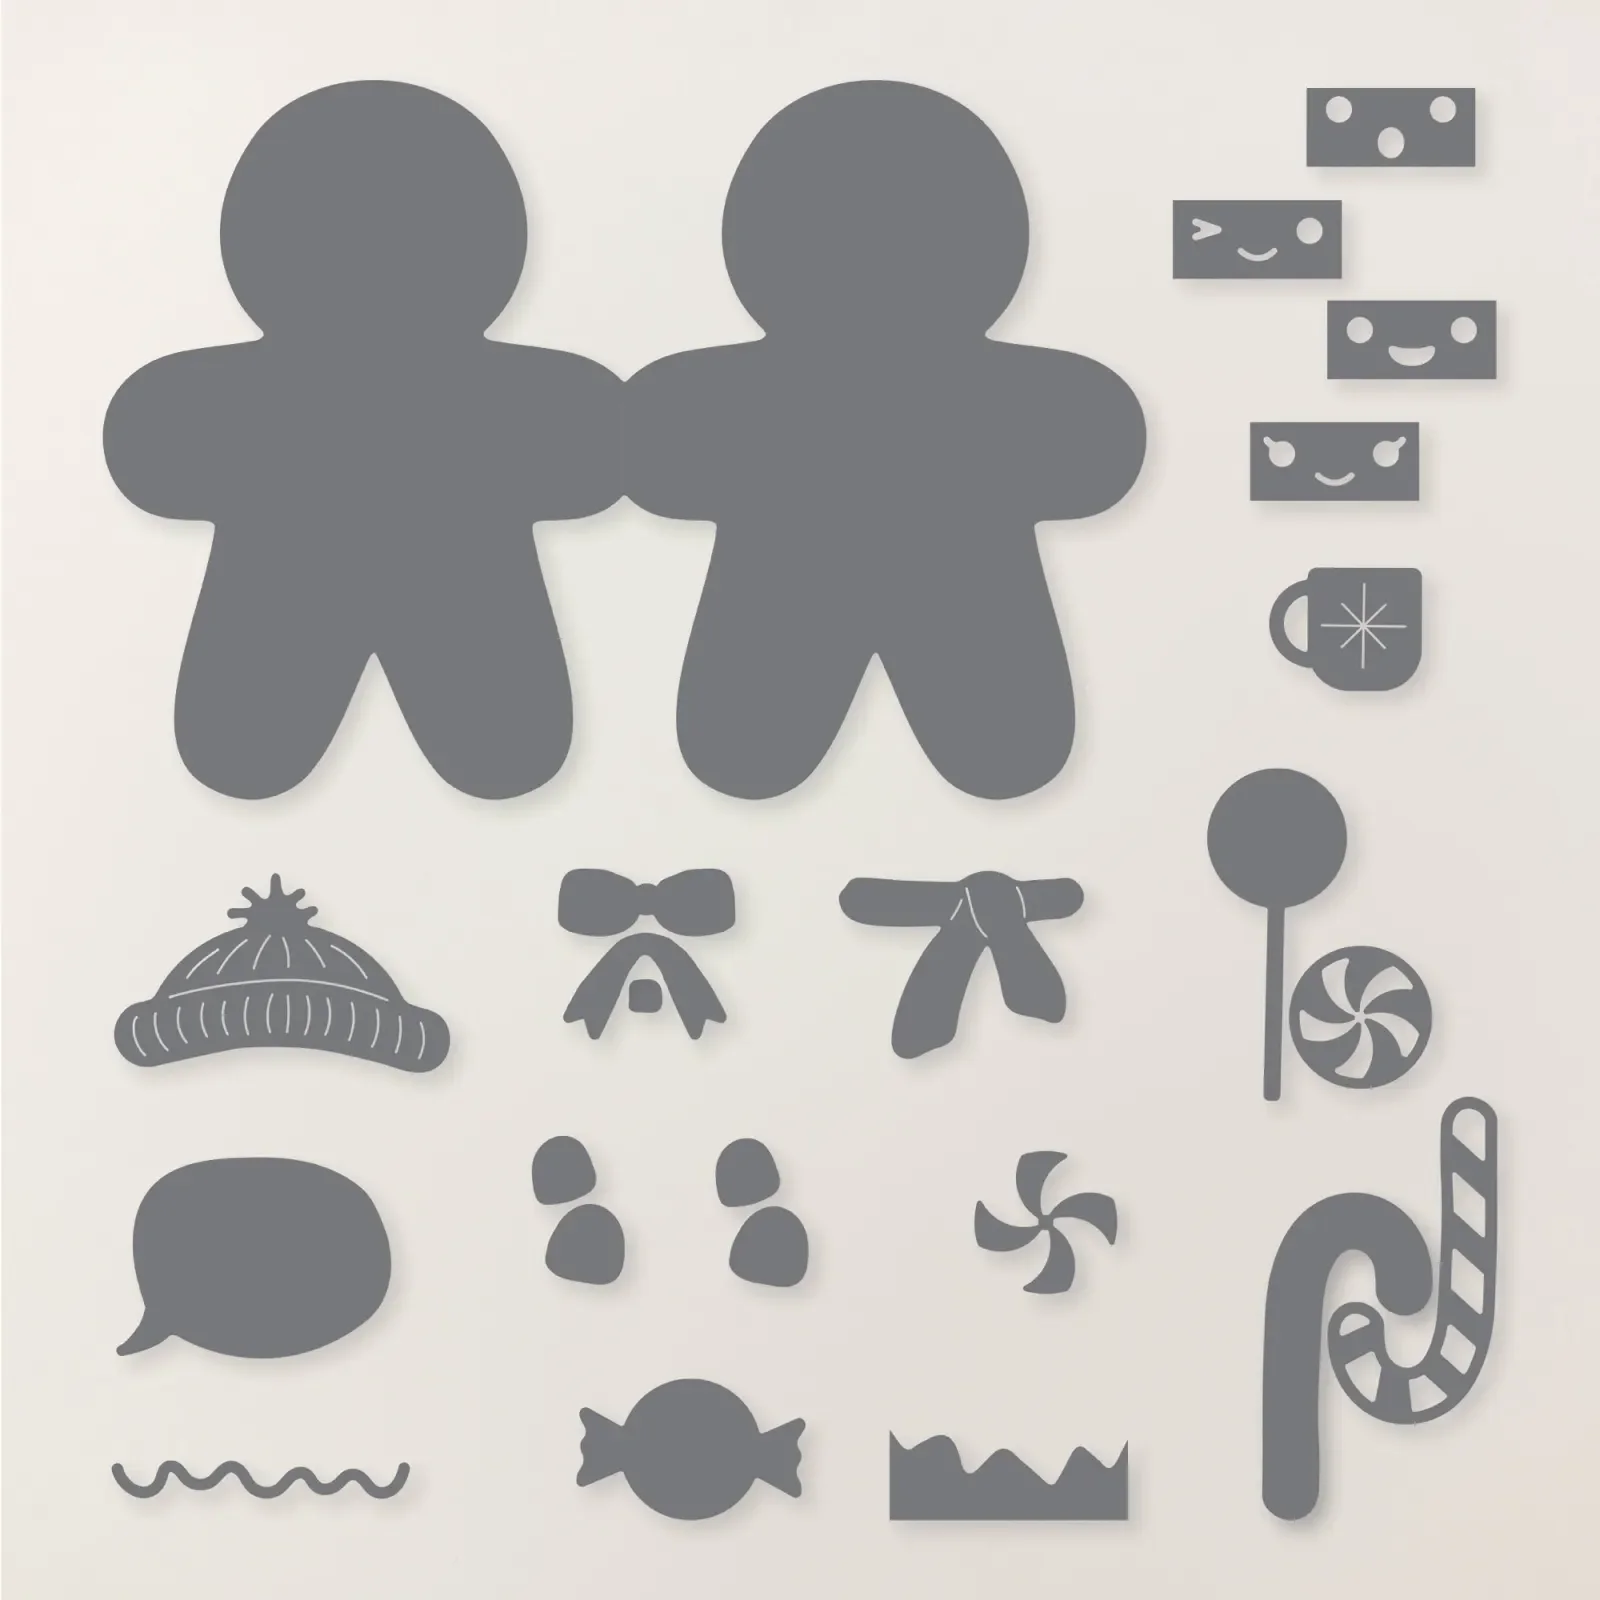
The dies also come with so many fun add ons like the candy cane, wrapped candies, accessories to dress up your gingerbread person and more.
Top Tip: Use a Basic Black Stampin’ Blend to color the handle on your sucker
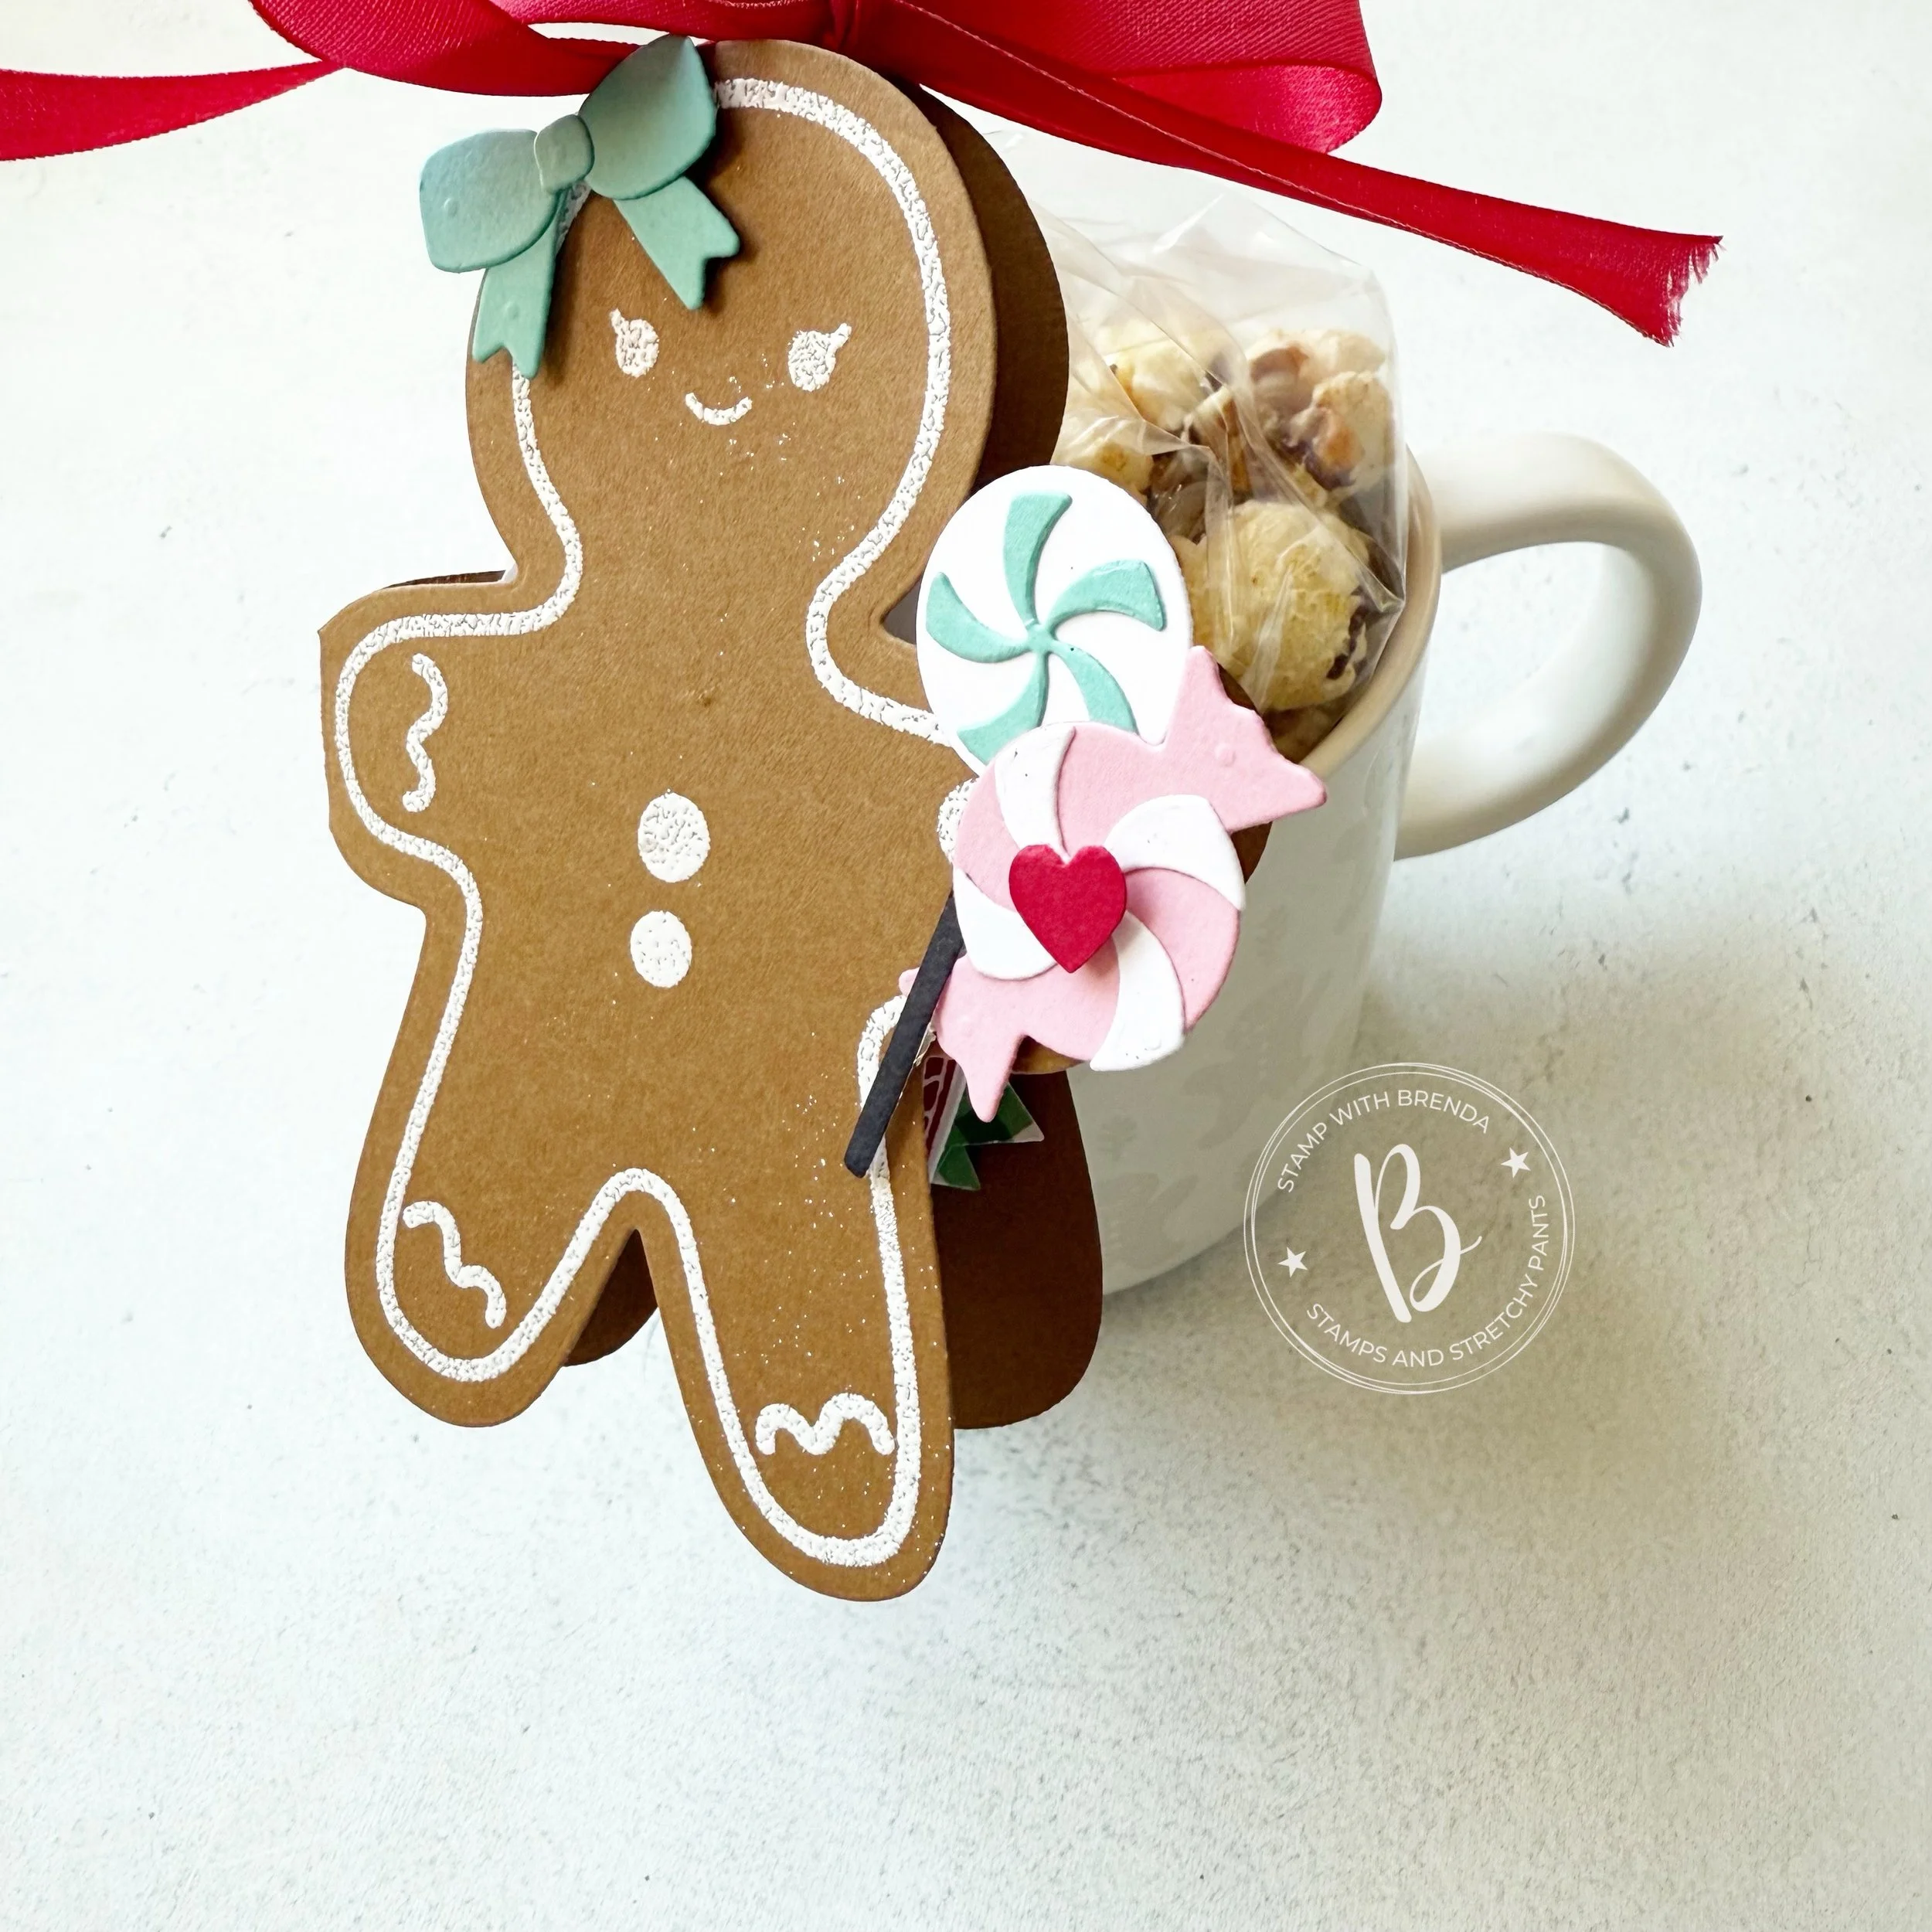
My gingerbread girl is stamped on Pecan Pie card stock using White Craft ink and embossing powder. I then added a couple cute treats to their hand a bow for her hair.
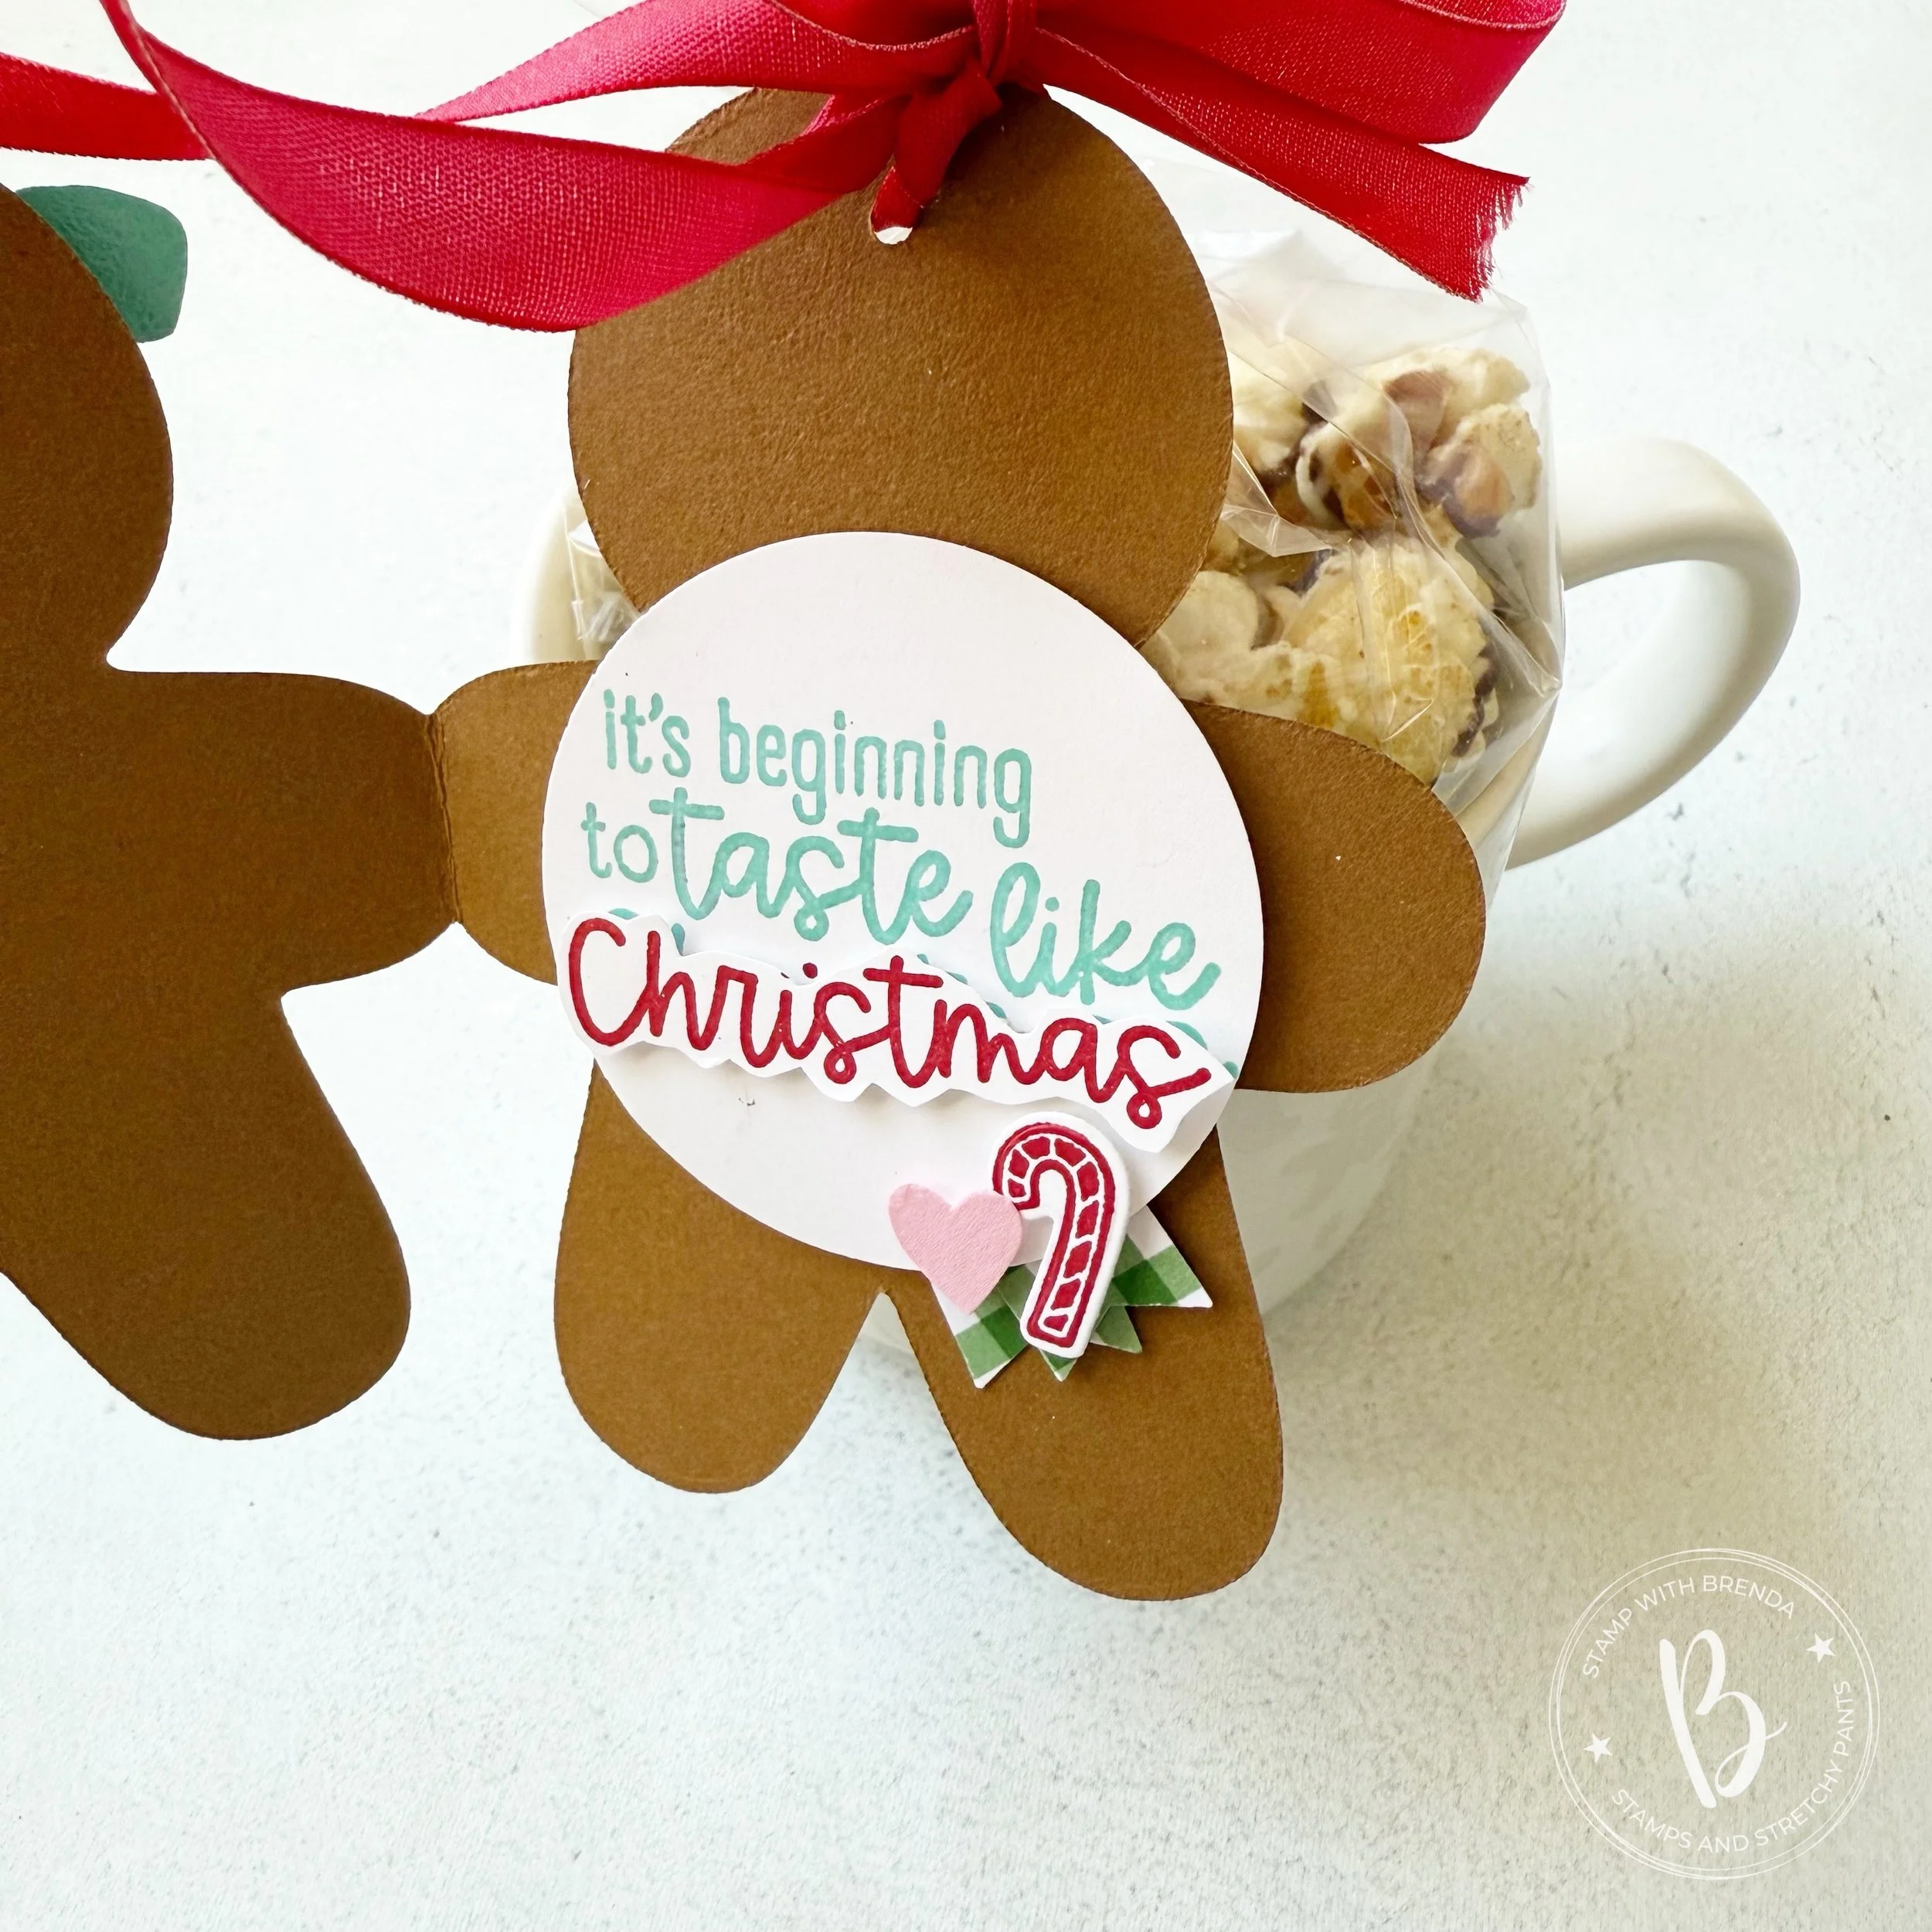
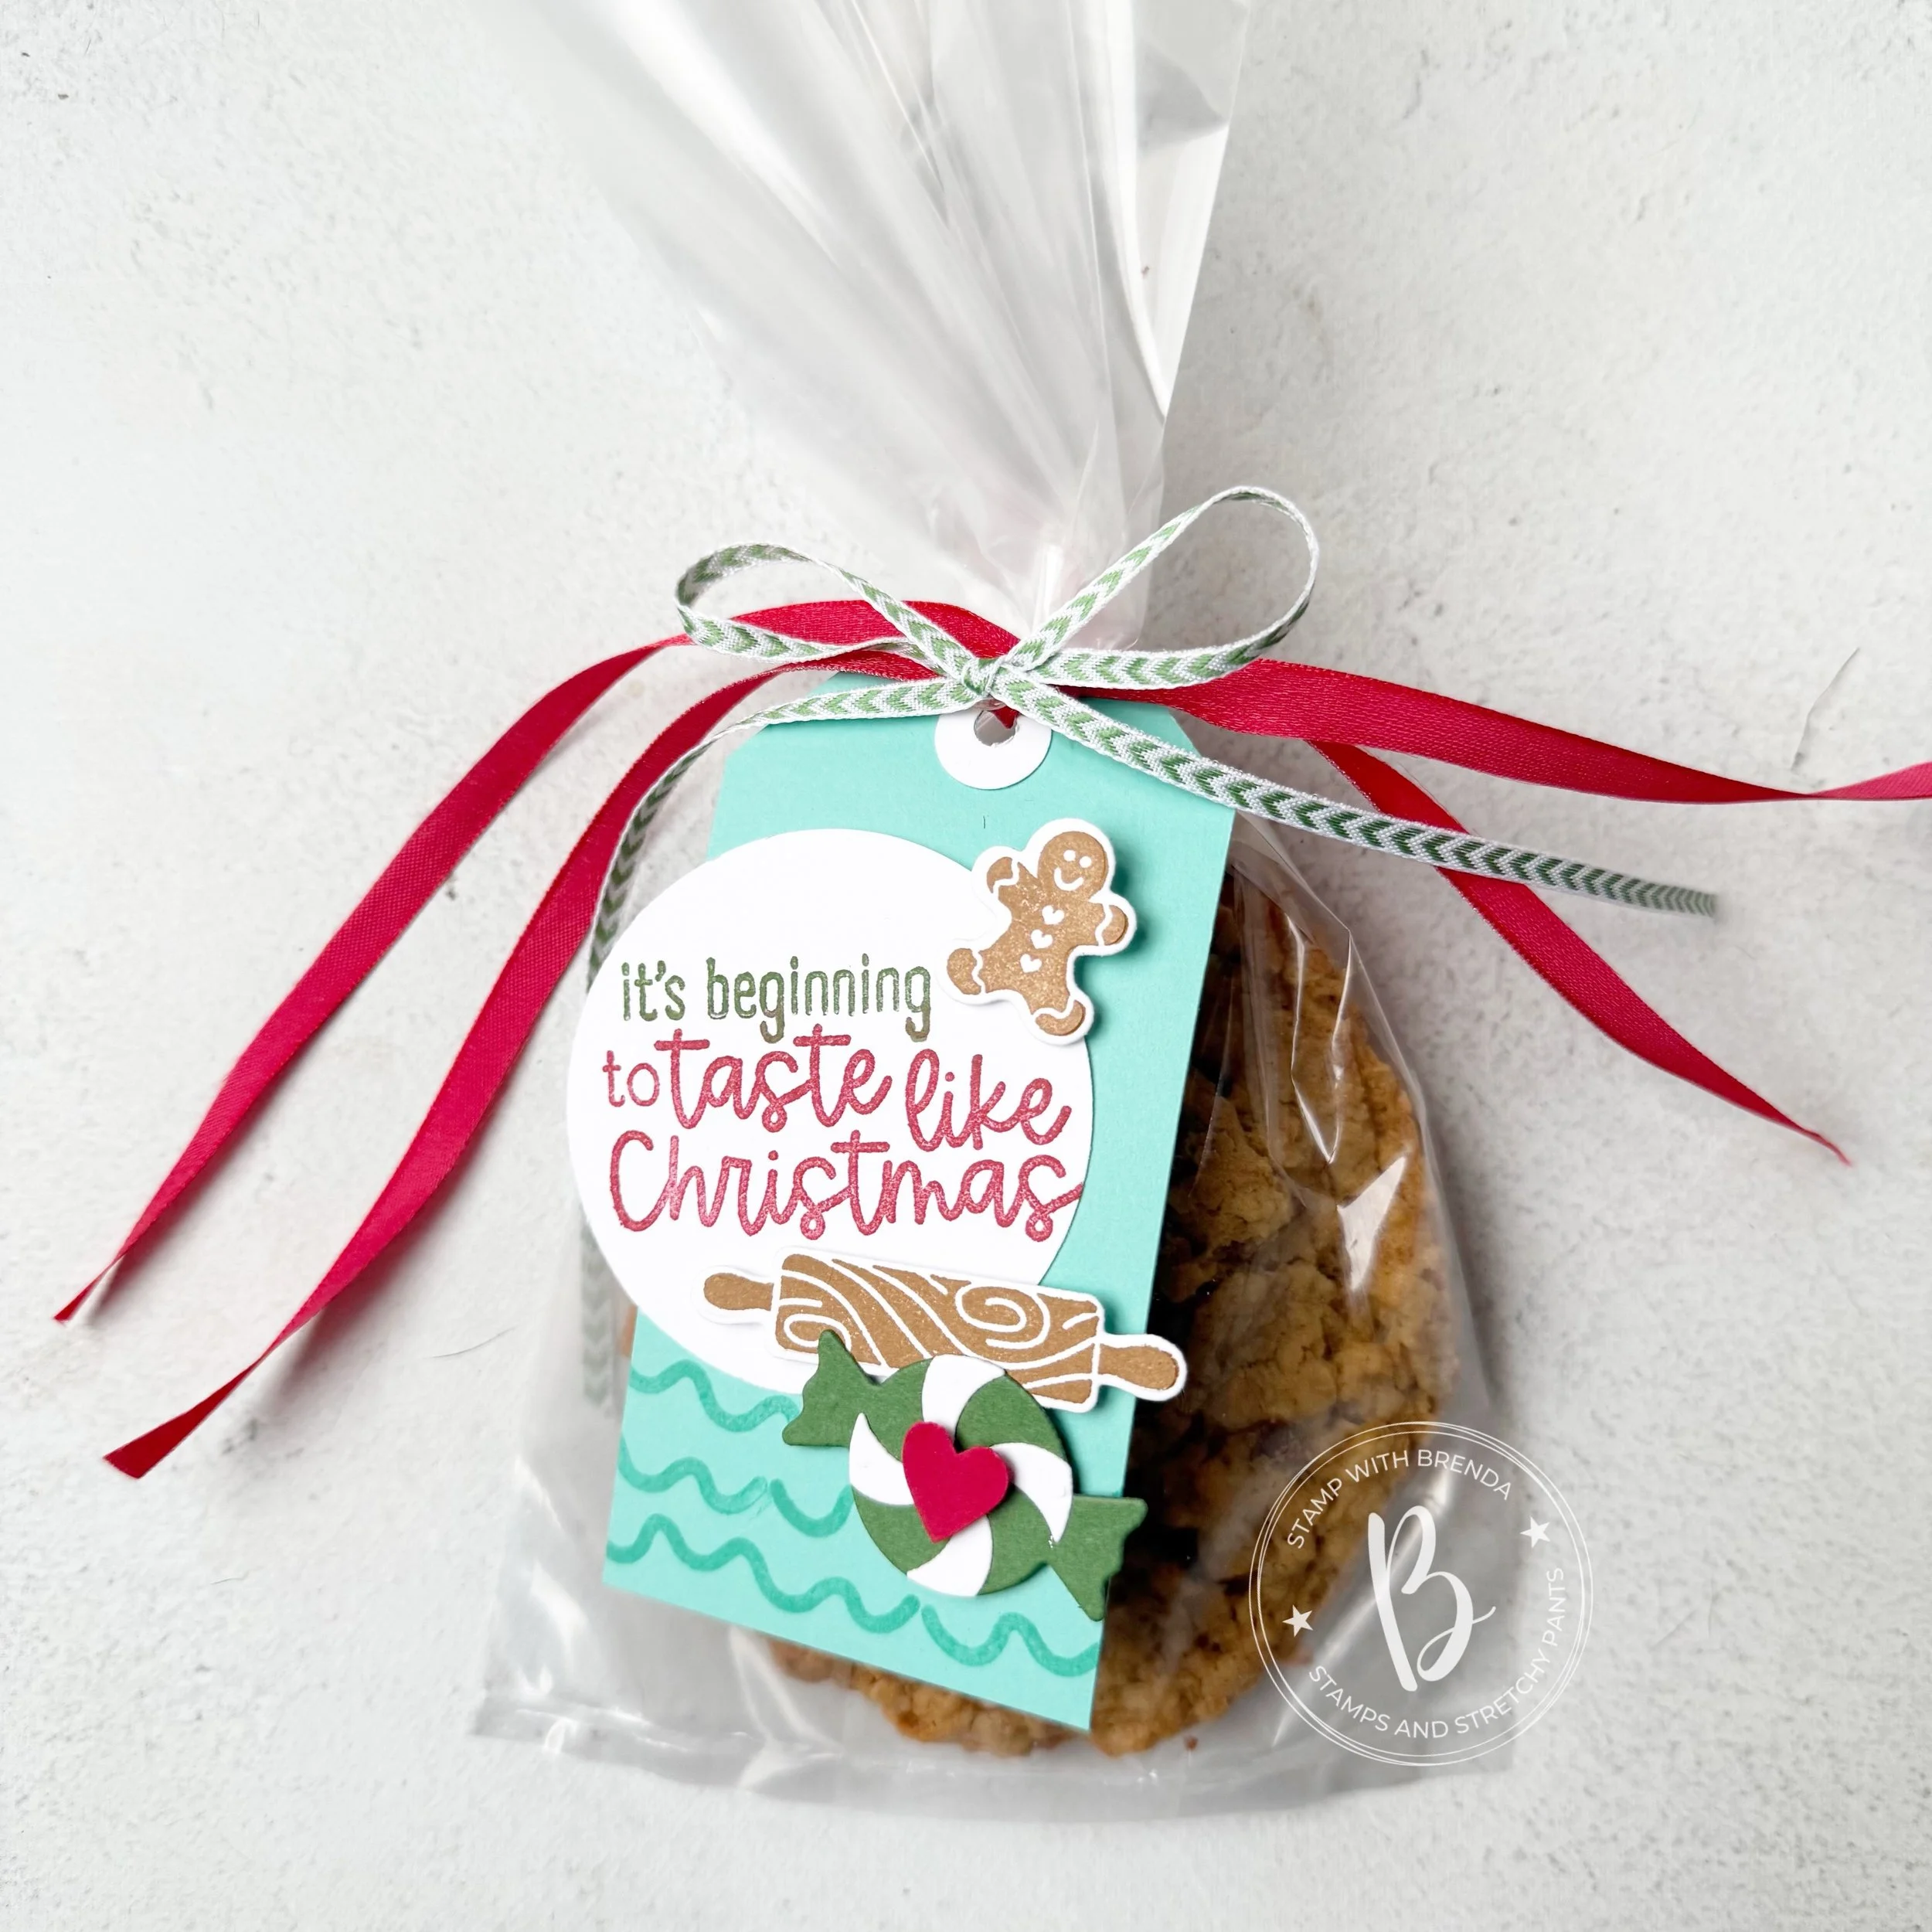
On the inside I decided to combine elements from the Homemade Treats bundle and I was so happy that when the tag is closed, you don’t really see that there is something fun hiding on the inside!
I stamped the sentiment 2x and fussy cut out ‘Christmas’ to pop it up a bit. It is one of my favorite tricks. A cute little candy cane, heart (from the Bee Builder Punch) and a couple banners from the Joy of Christmas DSP and this fun little mug gift was complete.
Make sure to check out what Melanie shared yesterday and hit this button to see what she has in store for tomorrow. Between the 12 of us we are sharing projects every day!
Stampin' Supplies used for the Gingerbread Tag
Product List![Gingerbread Man Bundle (English) [ 165785 ]](https://assets1.tamsnetwork.com/images/EC042017NF/165785s.jpg "Gingerbread Man Bundle (English) [ 165785 ]")
![Homemade Treats Bundle (English) [ 166017 ]](https://assets1.tamsnetwork.com/images/EC042017NF/166017s.jpg "Homemade Treats Bundle (English) [ 166017 ]")
![2 3/8" (6 Cm) Circle Punch [ 161354 ]](https://assets1.tamsnetwork.com/images/EC042017NF/161354s.jpg "2 3/8\" (6 Cm) Circle Punch [ 161354 ]")
![Bee Builder Punch [ 162553 ]](https://assets1.tamsnetwork.com/images/EC042017NF/162553s.jpg "Bee Builder Punch [ 162553 ]")
![Christmas Tags & More 6" X 6" (15.2 X 15.2 Cm) Mix & Match Specialty Designer Series Paper [ 165907 ]](https://assets1.tamsnetwork.com/images/EC042017NF/165907s.jpg "Christmas Tags & More 6\" X 6\" (15.2 X 15.2 Cm) Mix & Match Specialty Designer Series Paper [ 165907 ]")
![Uninked Stampin’ Craft Pad & Whisper White Refill [ 147277 ]](https://assets1.tamsnetwork.com/images/EC042017NF/147277s.jpg "Uninked Stampin’ Craft Pad & Whisper White Refill [ 147277 ]")
![Basics Wow! Embossing Powder [ 165679 ]](https://assets1.tamsnetwork.com/images/EC042017NF/165679s.jpg "Basics Wow! Embossing Powder [ 165679 ]")
![Real Red 1/2" (1.3 Cm) Shiny Ribbon [ 165876 ]](https://assets1.tamsnetwork.com/images/EC042017NF/165876s.jpg "Real Red 1/2\" (1.3 Cm) Shiny Ribbon [ 165876 ]")
![Basic Black Stampin' Blends Combo Pack [ 154843 ]](https://assets1.tamsnetwork.com/images/EC042017NF/154843s.jpg "Basic Black Stampin' Blends Combo Pack [ 154843 ]")
![Real Red Classic Stampin' Pad [ 147084 ]](https://assets1.tamsnetwork.com/images/EC042017NF/147084s.jpg "Real Red Classic Stampin' Pad [ 147084 ]")
![Coastal Cabana Classic Stampin' Pad [ 147097 ]](https://assets1.tamsnetwork.com/images/EC042017NF/147097s.jpg "Coastal Cabana Classic Stampin' Pad [ 147097 ]")
![Pecan Pie 8 1/2" X 11" Cardstock [ 161717 ]](https://assets1.tamsnetwork.com/images/EC042017NF/161717s.jpg "Pecan Pie 8 1/2\" X 11\" Cardstock [ 161717 ]")
![Basic White 8 1/2" X 11" Cardstock [ 159276 ]](https://assets1.tamsnetwork.com/images/EC042017NF/159276s.jpg "Basic White 8 1/2\" X 11\" Cardstock [ 159276 ]")
![Coastal Cabana 8-1/2" X 11" Cardstock [ 131297 ]](https://assets1.tamsnetwork.com/images/EC042017NF/131297s.jpg "Coastal Cabana 8-1/2\" X 11\" Cardstock [ 131297 ]")
![Pretty In Pink 8 1/2" X 11" Cardstock [ 163793 ]](https://assets1.tamsnetwork.com/images/EC042017NF/163793s.jpg "Pretty In Pink 8 1/2\" X 11\" Cardstock [ 163793 ]")
Don’t forget to leave a fun comment or send me an invite into our Stampin’ Fun in the Sun Cruise Facebook group to get more details on our next adventure!


![Regals Stampin' Write Markers [ 161699 ]](https://assets1.tamsnetwork.com/images/EC042017NF/161699s.jpg "Regals Stampin' Write Markers [ 161699 ]")
![Pecan Pie Classic Stampin' Pad [ 161665 ]](https://assets1.tamsnetwork.com/images/EC042017NF/161665s.jpg "Pecan Pie Classic Stampin' Pad [ 161665 ]")
![Basic White 8 1/2" X 11" Cardstock [ 166780 ]](https://assets1.tamsnetwork.com/images/EC042017NF/166780s.jpg "Basic White 8 1/2\" X 11\" Cardstock [ 166780 ]")
![Garden Green 8-1/2" X 11" Cardstock [ 102584 ]](https://assets1.tamsnetwork.com/images/EC042017NF/102584s.jpg "Garden Green 8-1/2\" X 11\" Cardstock [ 102584 ]")
![Real Red 8-1/2" X 11" Cardstock [ 102482 ]](https://assets1.tamsnetwork.com/images/EC042017NF/102482s.jpg "Real Red 8-1/2\" X 11\" Cardstock [ 102482 ]")


![Forever Plaid 3 D Embossing Folder [ 164049 ]](https://assets1.tamsnetwork.com/images/EC042017NF/164049s.jpg "Forever Plaid 3 D Embossing Folder [ 164049 ]")
![Garden Green 1/8" (3.2 Mm) Chevron Ribbon [ 167212 ]](https://assets1.tamsnetwork.com/images/EC042017NF/167212s.jpg "Garden Green 1/8\" (3.2 Mm) Chevron Ribbon [ 167212 ]")
![Garden Green Classic Stampin' Pad [ 147089 ]](https://assets1.tamsnetwork.com/images/EC042017NF/147089s.jpg "Garden Green Classic Stampin' Pad [ 147089 ]")