Color Fusers--July 2021 Blog Hop

Hello friends! I really appreciate you taking the time to pop by and enjoy our Color Fusers Blog Hop! I love color challenges as they help stretch my creativity! This month’s color challenge is amazing and I am so excited with the project I designed using Basic White, Basic Black, Petal Pink and Gold!

IMG_9468.jpg

When I was mentally toying around with this color palette, I had the idea to create something with stripes. I ended up including them but on the diagonal to create a focal point for my scrapbook page!

I also chose this particular picture because my mom and daughter are wearing black and white and call me crazy, but my photos have to coordinate somewhat with my page designs. In fact I hardly EVER create a page without my pictures first. I can make exceptions for specific holidays, like Father’s or Mother’s Day, but typically I always chose my picture first!

I also chose this particular picture because my mom and daughter are wearing black and white and call me crazy, but my photos have to coordinate somewhat with my page designs. In fact I hardly EVER create a page without my pictures first. I can make exceptions for specific holidays, like Father’s or Mother’s Day, but typically I always chose my picture first!

I decided to start off with a Basic White background for my scrapbook page and I added a spray of black using my Stampin’ Blends marker. I flicked the Blend across my page where I was intending to add in some flowers.

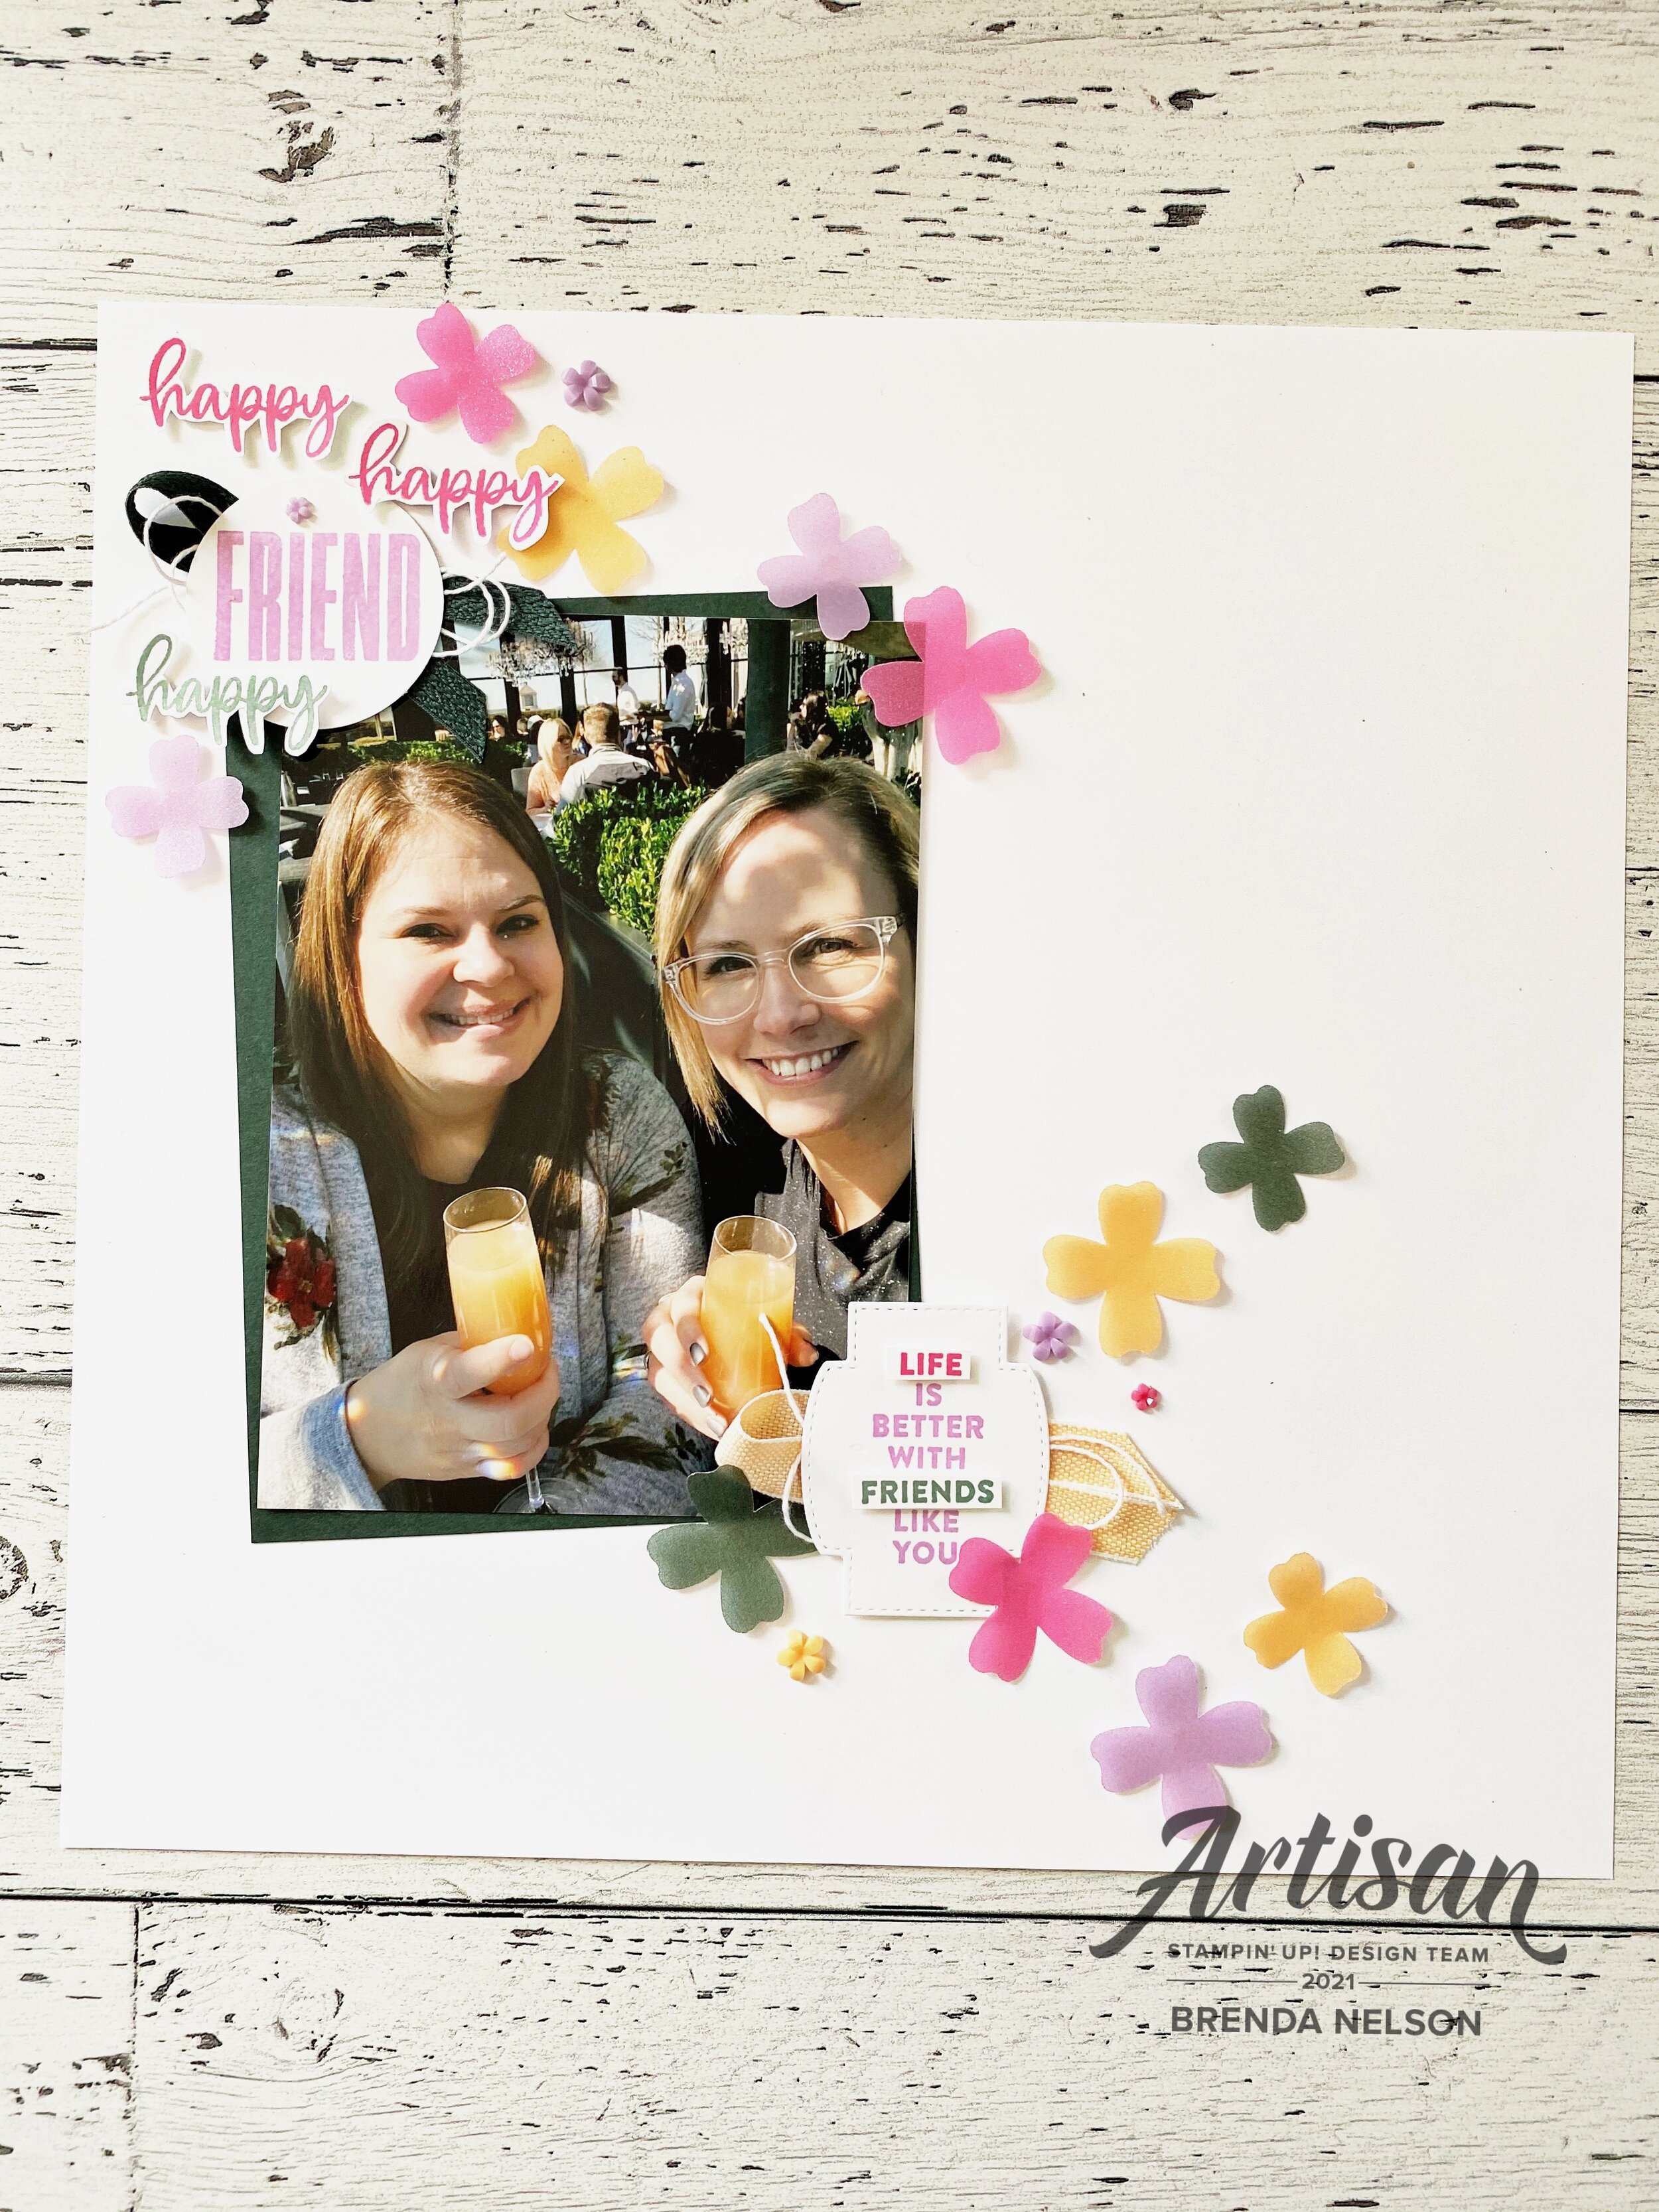
The flowers are from the Blossoms in Bloom stamp set and are stamped in Petal PInk. I pinched up the edges to give them a little more interest and depth. This page is quite minimalist for me but I am so happy with how it turned out!

final (22).jpg

The best part of this whole page is this 4 x 10 diagonal panel that I created to bring in the Basic Black, Petal Pink and Gold colors of this challenge. I cut a separate piece of Basic White card stock to 4 x 10. I then covered it with Tombow Glue—I think this is key, because there is wiggle time with this glue to get things perfect unlike Stampin’ Seal. I added in my strips which are 1 1/4 wide. Once I had them in place, I flipped over the Basic White and trimmed off the excess to create this fun panel.

The sentiment “Love is What Makes Us Family” is from the stamp set Lovely You.

I also added in a few Gilded Gems for a little extra pop of gold.

final (21).jpg

The sentiment “I like you a lot” is from the Blossoms in Bloom stamp set.

I cannot wait to see what the others in the Hop create with this color combo. If I am your first stop make sure you Hop all the way around and leave a comment! If you live in Canada you can shop with me using my Hostess Code or visiting my online store :)

You can go back to see what amazing project Melanie has created by clicking below,

To see what my fellow Artisan Design Team member Tami has designed please click below

Thank you so much and hope you all have an amazing JULY! Happy Stamping!

Artisan Design Team--June Share!

Hello friends! I cannot believe that this month marks the halfway point of this amazing journey and experience! I have learned so much along the way but the best part has been the amazing new friendships I have developed with the other team members!

The Artisan Design Team is broken up into 3 groups as we have the largest team to date and my group was given the assignment of creating with the Art in Bloom bundle which features the new Bloom Hybrid embossing folder!

pictapgo-output (10).jpg

I couldn’t resist the opportunity to create a page with this little cutie’s smiling face, especially because he is now 16! But his eyes have not lost their sparkle and his face still lights up the room. And I also want people to feel ok about scrapbooking their sons, nephews, husbands, etc with flowers and pinks and other bright fun colors!

I started with a 12x12 base on a sheet of DSP from the Expressions in Ink Specialty Designer Series Paper. This gave me the foundation to add in these bright pink accents.

I used this new Hybrid Embossing Folder in two ways on this page—-one is the traditional way in the sense of I ran some Basic White card stock through the Stamp Cut & Emboss Machine to create two accent panels to flank my photo. The second way is that I used some Gold Foil Paper to emboss and cut the flowers out. This is what makes this folder so unique—it does both at the same time!! You place your paper in the folder and add the dies on top (they will nestle inside).

I also stamped out some flowers and colored them with the Pale Papaya Stampin’ Blends and then used the dies to cut out the flowers.

pictapgo-output (11).jpg

My favorite element in the Bloom Dies is the shape that cuts out the ‘ticket’…I just love it and think its a great way to add interest or to cut out with a sentiment. On my card I used it as an accent piece.

My tip to accompany this project is a classic one—using your Stampin’ Write Marker to isolate specific words to change how a sentiment is presented. You can see here that the sentiment in its original form is ‘long’ and I wanted something that would fit into a circle. So I just used the marker to isolate the words and stamp them in the shape I wanted.

Notice the ink spray in the background? One of my favorite things of all time—-use your Stampin’ Write Marker or even a Stampin’ Blend to flick or spray ink across your project. I do this ALL THE TIME. It just helps take away the ‘white’ space on a project.

If my projects have inspired you in any way and you would like to place an order you can hit the button below that will take you directly to my online store. Or you can use the HOST code on the main sidebar on my page. I truly appreciate it as I hope to keep loving what I do for as long as possible!

Create with Connie and Mary--Borders and Tags!

Hello and happy Saturday (orr whichever weekday it is when you are reading this!) and welcome to this weeks Hop! Our theme is borders and tags…so I used tags to make a fun border on a scrapbook page! I am absolutely in love with the new Tailor Made Tags dies (in fact they have become a permanent friend beside my Stampin’ Cut & Emboss Machine) and I think I have used them in a unique way!

21SUSatHopWelcome.png

As soon as I saw this design theme I knew I wanted to create a ‘border’ using ‘tags’…and with Father’s Day coming up I couldn’t resist the idea of creating yet another Father’s Day page. I have started a scrapbook gallery here on my blog so feel free to check it out if scrapbooking is your jam!

final (4) 22.jpg

I started my page on a base of Basic White because I knew I wanted the ‘tags’ to really pop off the page and I added a layer of Basic White over top that I trimmed to 9x12. I wanted to be able to slip my tags underneath this piece.

I chose the colors of Calypso Coral, Crumb Cake, So Saffron, Soft Succulent and Night of Navy to cut the largest tag from the die set.

I was also intrigued by the Hats off Bundle to create something without the ‘hat’ and I found this bundle has some really really awesome sentiments! I am so happy that I recently ordered this set as it really made this page come alive. I wanted everything to feel crisp so I did all of my stamping on Basic White.

final (19).jpg
 

Because the focus of this design challenge was on borders and tags which I nailed with the border of tags, I wanted to make sure that I had a few ‘tags’ on my layout too.

For the top of the page I cut a mid sized tag from Soft Succulent and then I stamped the phrase “You’re the Best” and layered it over the tag for a bit of a different look.

final 80.jpg

It is easy to chance up the look of your stamps by eliminating certain things—-for example the outline on the #1. I also like to keep some shapes flat to the page and pop some up on Dimensionals for a little bit of interest. I also love that this is just a ‘DAD’ page so it doesn’t have to be Father’s Day or a birthday, it’s just a great page to celebrate dad.

I am excited to see what the rest of the team comes up with this week! You can go BACK to see what Melissa has created or NEXT to see what Connie has made. And remember to check out my scrapbook gallery or previous blog posts for more memory keeping inspiration.

Color Fusers--June 2021 Blog Hop

Hello friends! Welcome back to another fun blog hop featuring the new amazing In Colors 2021-2023. Now, I have been stamping with Stampin’ Up! for a quite a while, coming on 15 years actually! And I have to say that this new lineup of colors is probably some of my all time favorites. Remember that year they released Coastal Cabana…me neither but its probably at the top and this new collection just might kick it out of first place!

June 2021.jpg

If you are a total newbie to Stampin’ Up! then this might be one of your first peeks at these colors or experience with the In Color collections. If you are a seasoned stamper than you have been seeing this colors ALL OVER THE PLACE because demonstrators like myself, cannot get enough!

I wanted to make a scrapbook page and showcase these colors with another new amazing product— the Shimmer Vellum. Now this ain’t your regular old vellum friends, this is shimmery and awesome in all the right ways and it comes in 12x12! Yay! You can expect to see me using this alot during this catalogue period.

This is my awesome friend Jessica and I on our last girls trip together in March of 2020! Look at us, so smiley and happy.  The day after this trip ended to Ohio—guess what happened? Covid.

This is my awesome friend Jessica and I on our last girls trip together in March of 2020! Look at us, so smiley and happy. The day after this trip ended to Ohio—guess what happened? Covid.

I used the Flowers of Friendship bundle and the Biggest Wish stamp set as the features on this layout. The crisp Basic White base really helped these flowers pop right off of the page. Now vellum can be tricky to adhere because you can usually see the adhesive through the vellum, but would you believe there is a Mini Dimensional behind these flowers? This vellum is just thick enough they disappear on the white page base.

final (4) 4.jpg

One of my favorite new embellishments are the Loose Flower Flourishes which I have also added onto this page as they are available in Pale Papaya, Polished Pink and Fresh Freesia. They work so well with the Flowers of Friendship bundle too as the flowers have a similar look to them. And they are a flat backed embellishmentt so they attach easily with a Glue Dot.

I stamped out the sentiment in Fresh Freesia and die cut it with a shape from the Stitched So Sweetly Dies. I then stamped it again in Polished Pink and Soft Succulent so I could trim out a couple of the words to pop up on a Mini Dimensional.

I added some of the new Pale Papaya & White ribbon behind the sentiment with some white twine. I can’t help myself, I love my embellishments and almost always had some ribbon or twine, or both, behind my sentiments.

final (7) 3.jpg

I wanted to incorporate the Biggest Wish stamp set into this page as I loved the fact that it had the word Friend in it. I am always on the lookout for that. I stamped it with Fresh Freesia and punched it into a circle. I used one of the mini flower embellishments for the dot of the ‘i’.

Behind the ‘Friend’ I added the new Evening Evergreen 3/8 Chevron Weave ribbon which is so nice in person! And of course a little more white twine.

I stamped ‘happy’ twice in Polished Pink and once in Soft Succulent and hand trimmed them out to add to the page with a Mini Dimensional. How did we survive before Mini Dimensionals…these are the thoughts that keep me awake at night! hahaha!

I hope this page inspires you and if you have not added the Shimmer Vellum to your cart than do so! You can shop with me by clicking the Hostess Code link on the side of my page.

I can’t wait to see what the rest of the team creates with these fantastic new In Colors! You can hop NEXT to see what Melanie has designed for us!

Or if you want to head backwards you can do that too! Either way go all the way around so you don’t miss any awesome inspiration. By clicking Previous you will be heading to visit Bonnie! Have a lovely June and we will see you back again in July!

Flowers of Friendship Artisan Design Team Project

Hello friends! Thank you so much for stopping by today! I really wanted to create a blog post to showcase these 2 projects I created for the Artisan Design Team for the month of May. Each month the whole team releases a bunch of projects to the Stampin’ Up! Facebook page and then over the course of a couple of weeks they are shared individually on Instagram—so today is my day! It never gets old seeing your creations being featured by Stampin’ Up! Its been truly a dream come true and awesome learning experience to be a part of the team for 2021 :)

My assignment was to create two projects with the Flowers of Friendship Bundle. I LOVE a fantastic punch like this one that creates flowers that look great stamped or on their own.

IMG_7565.jpg

For my projects I wanted to share a different way to think about using your Flowers and Leaves Punch. I decided to create a stencil with one of our Window Sheets. Now I only wanted to highlight the flowers so I used a bit of tape to cover and block off the leaves.

I then placed my stencil over the card and scrapbook page Basic White layer and used the spatula and Embossing Paste to create a unique textured background.

To create a random placement of flowers you will need to allow some drying time in between applying each flower with the paste as you do not want to inadvertently cover or touch one that is already there and not dry as this will lead to smudging. So patience is your friend with this project but it is truly worth it in the end.

BrendaNelsonCloseUpMay2021.jpg

You will notice that my flowers have a soft feel to them and that is because they are stamped in Grey Granite ink. Black just felt like too harsh of an outline with the softer color pallette of this page. I colored my flowers in with the Stampin’ Blends in Pale Papaya and Fresh Freesia.

On the card I added the sentiment from the Flowers of Friendship stamp set in Grey Granite ink as well and looped some twine from the Baker’s Twine Essentials Pack behind along with an accent using the Loose Flower Flourishes (LOVE—in fact you should check out my Top Ten List for my new catty favorites).

I also incorporated the Tailored Made Tags dies into both of my projects and they have become a staple item these past few weeks! I can’t get enough of them as my have been noticing on some of my latest projects shared here on my blog or on my Instagram feed @stampwithbrenda.

I hope these projects inspire you to think outside the box when playing with this awesome bundle! If you do not have it already you can add it to your cart and shop with me by following this link!