Around the World on Wednesday--Just Sketch It!

Hello friends! It has been so so so long since I have been able to participate in the Around the World on Wednesday Blog Hop! I am so excited that I was able to prioritize the time to create something and participate in this fabulous blog hop!

This month the theme was a sketch—our fabulous hop organizer, Angie, gave us a few to choose from. Once I selected mine, I knew right away I wanted to use it to help design a scrapbook page!

This is the sketch that I selected. I liked the idea of using strips of paper—either card stock or Designer Series Paper.

And I interpreted the 3 shapes to represent a photo mat and supportive shapes to tell the story of my scrapbook page.


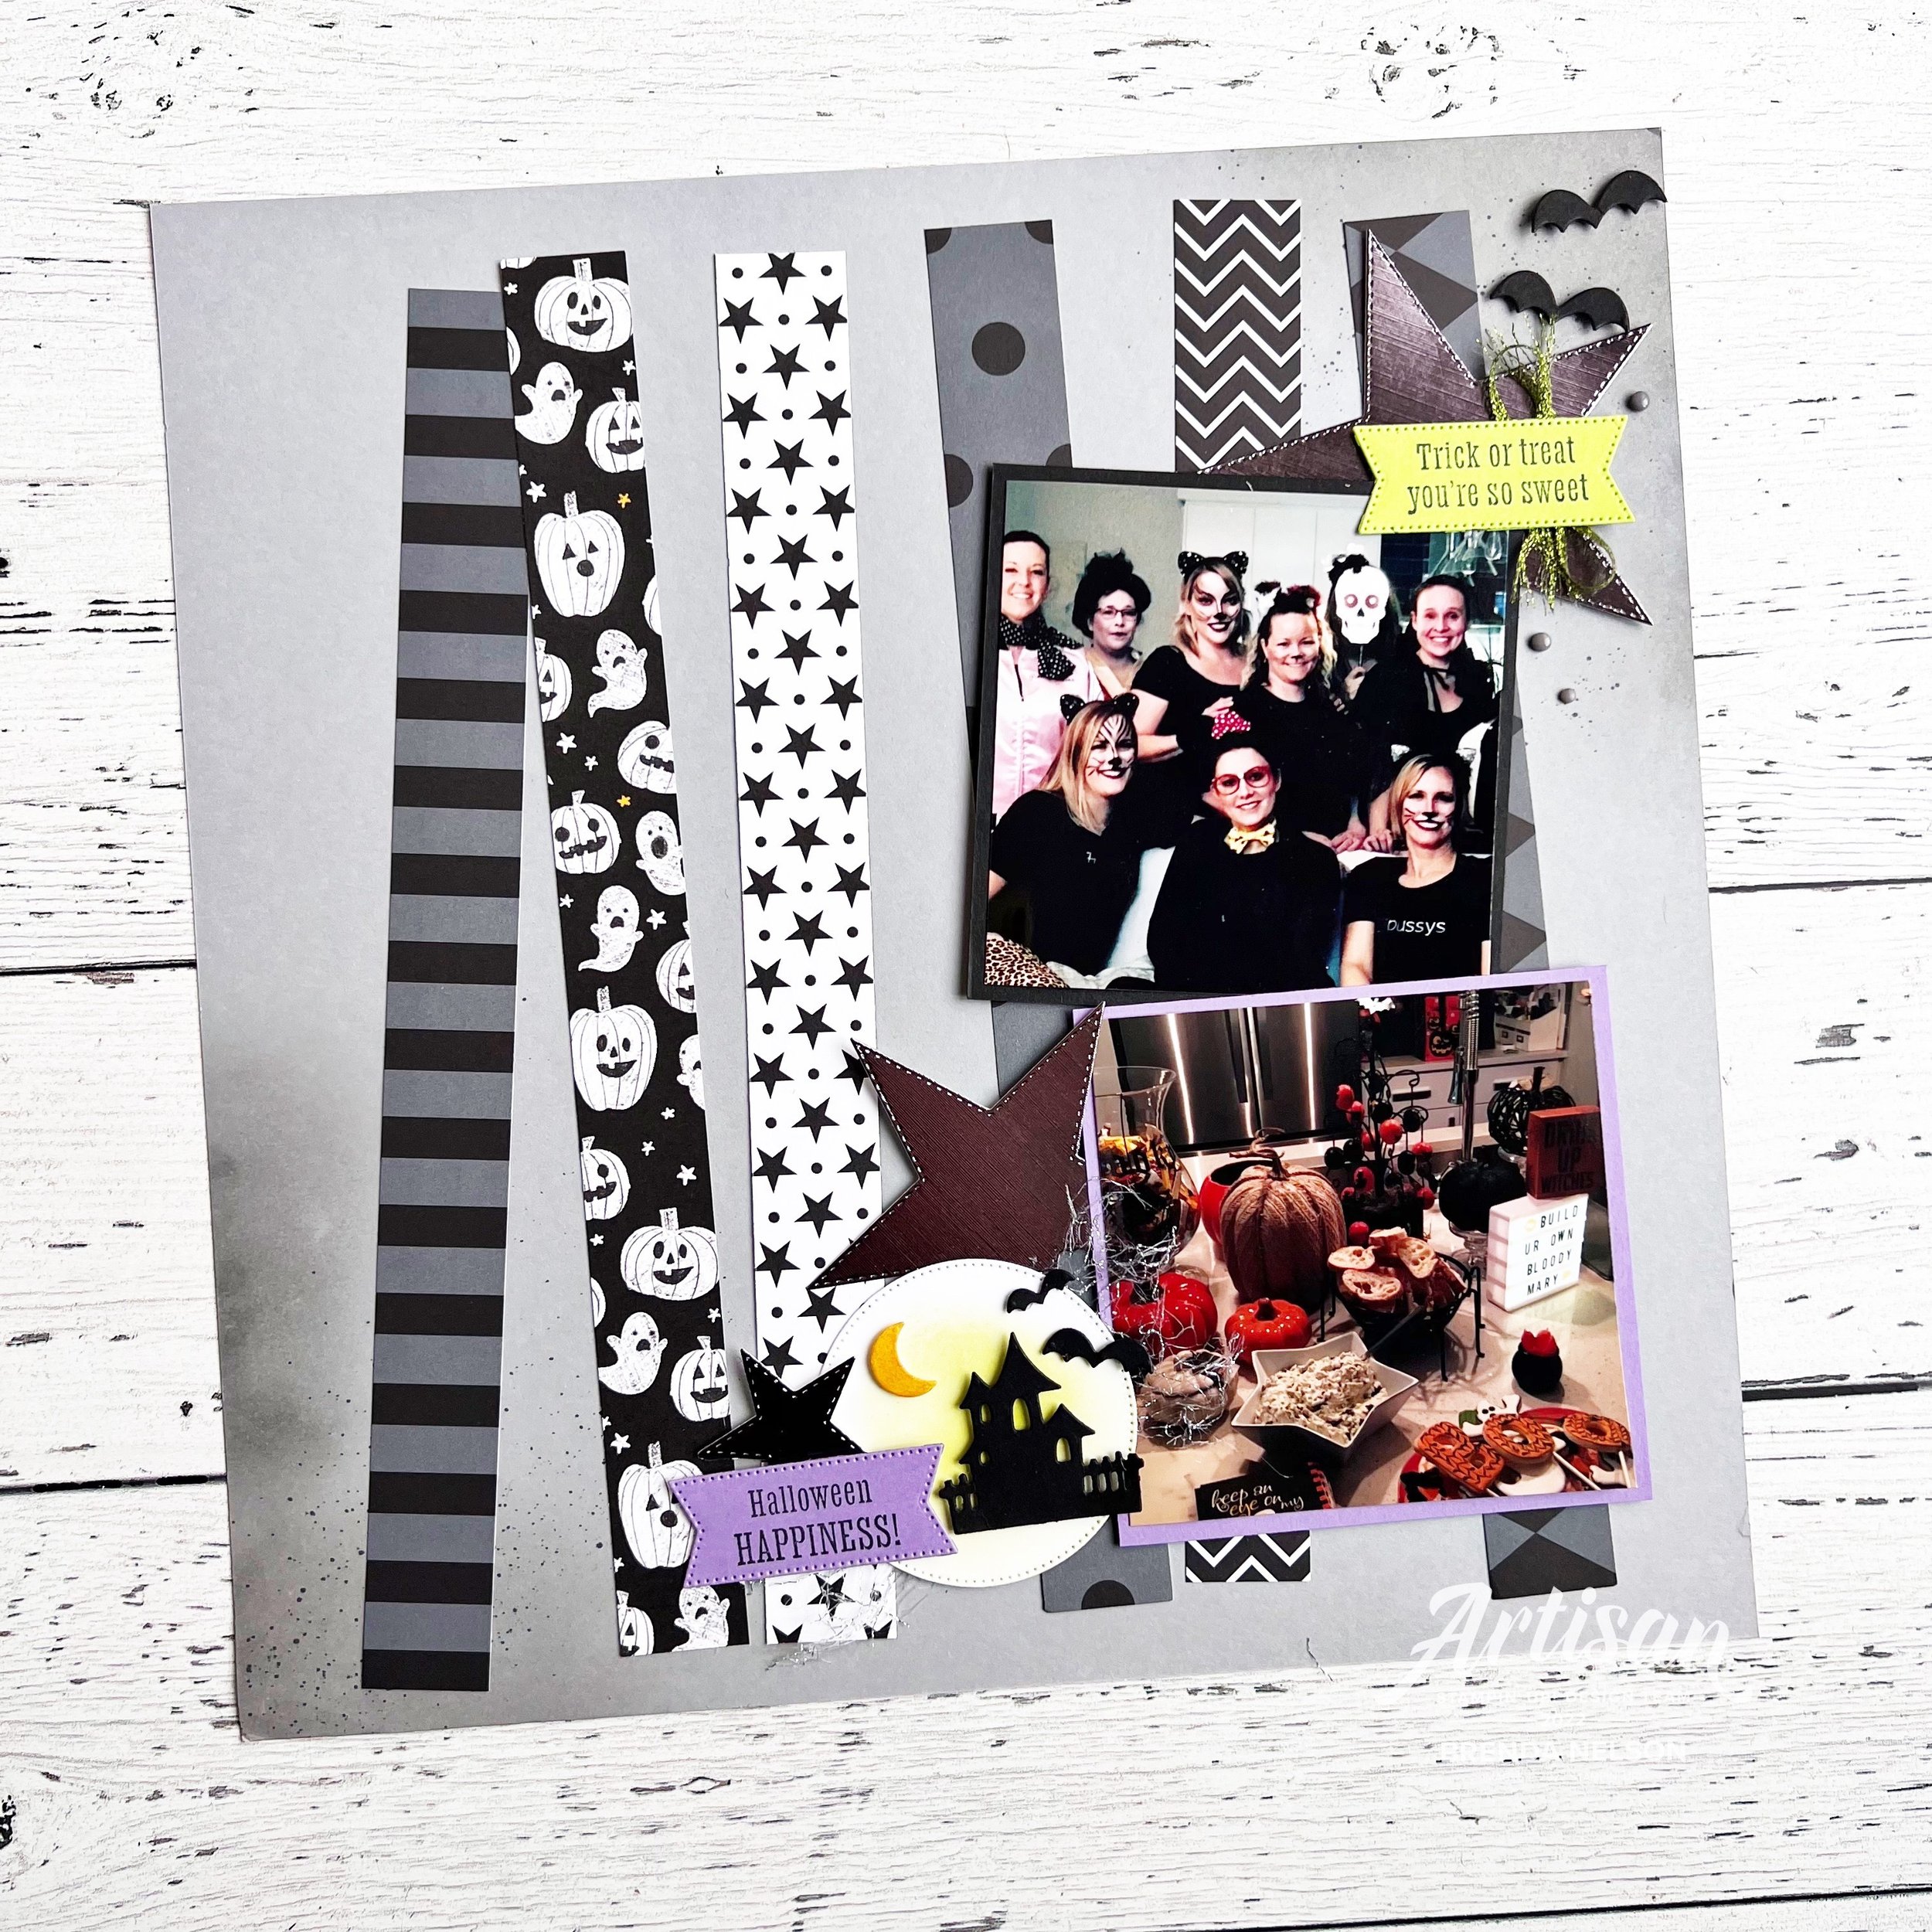
I started with a base of Smoky Slate card stock and decided to make it feel a little grungy to go with the spooky theme of Halloween. I used my Blending Brush on the edges and then flicked my Basic Black Stampin’ Blend over top.

I cut 6 strips of DSP—all except the pumpkin pattern are from the Black & White Designs collection. The pumpkins are from the Celebrate Everything hostess stack. I added the DSP strips and wonky angles as it also felt like the spirit of Halloween.

I decided to play up the stars from the DSP by added them to my design using a retired die set. Some sets though I just can’t part with as I find I do still reach for them. I cut them out using the Silver Foil Specialty Pack.

My two photo mats are cut to 4 1/4 x 4 1/4 which are perfect for adding 4x4 photos. I also wanted to get two pictures on this layout and this size works really well when you want to stack pictures. I felt that adding two pictures didn’t take away from the page design too much.

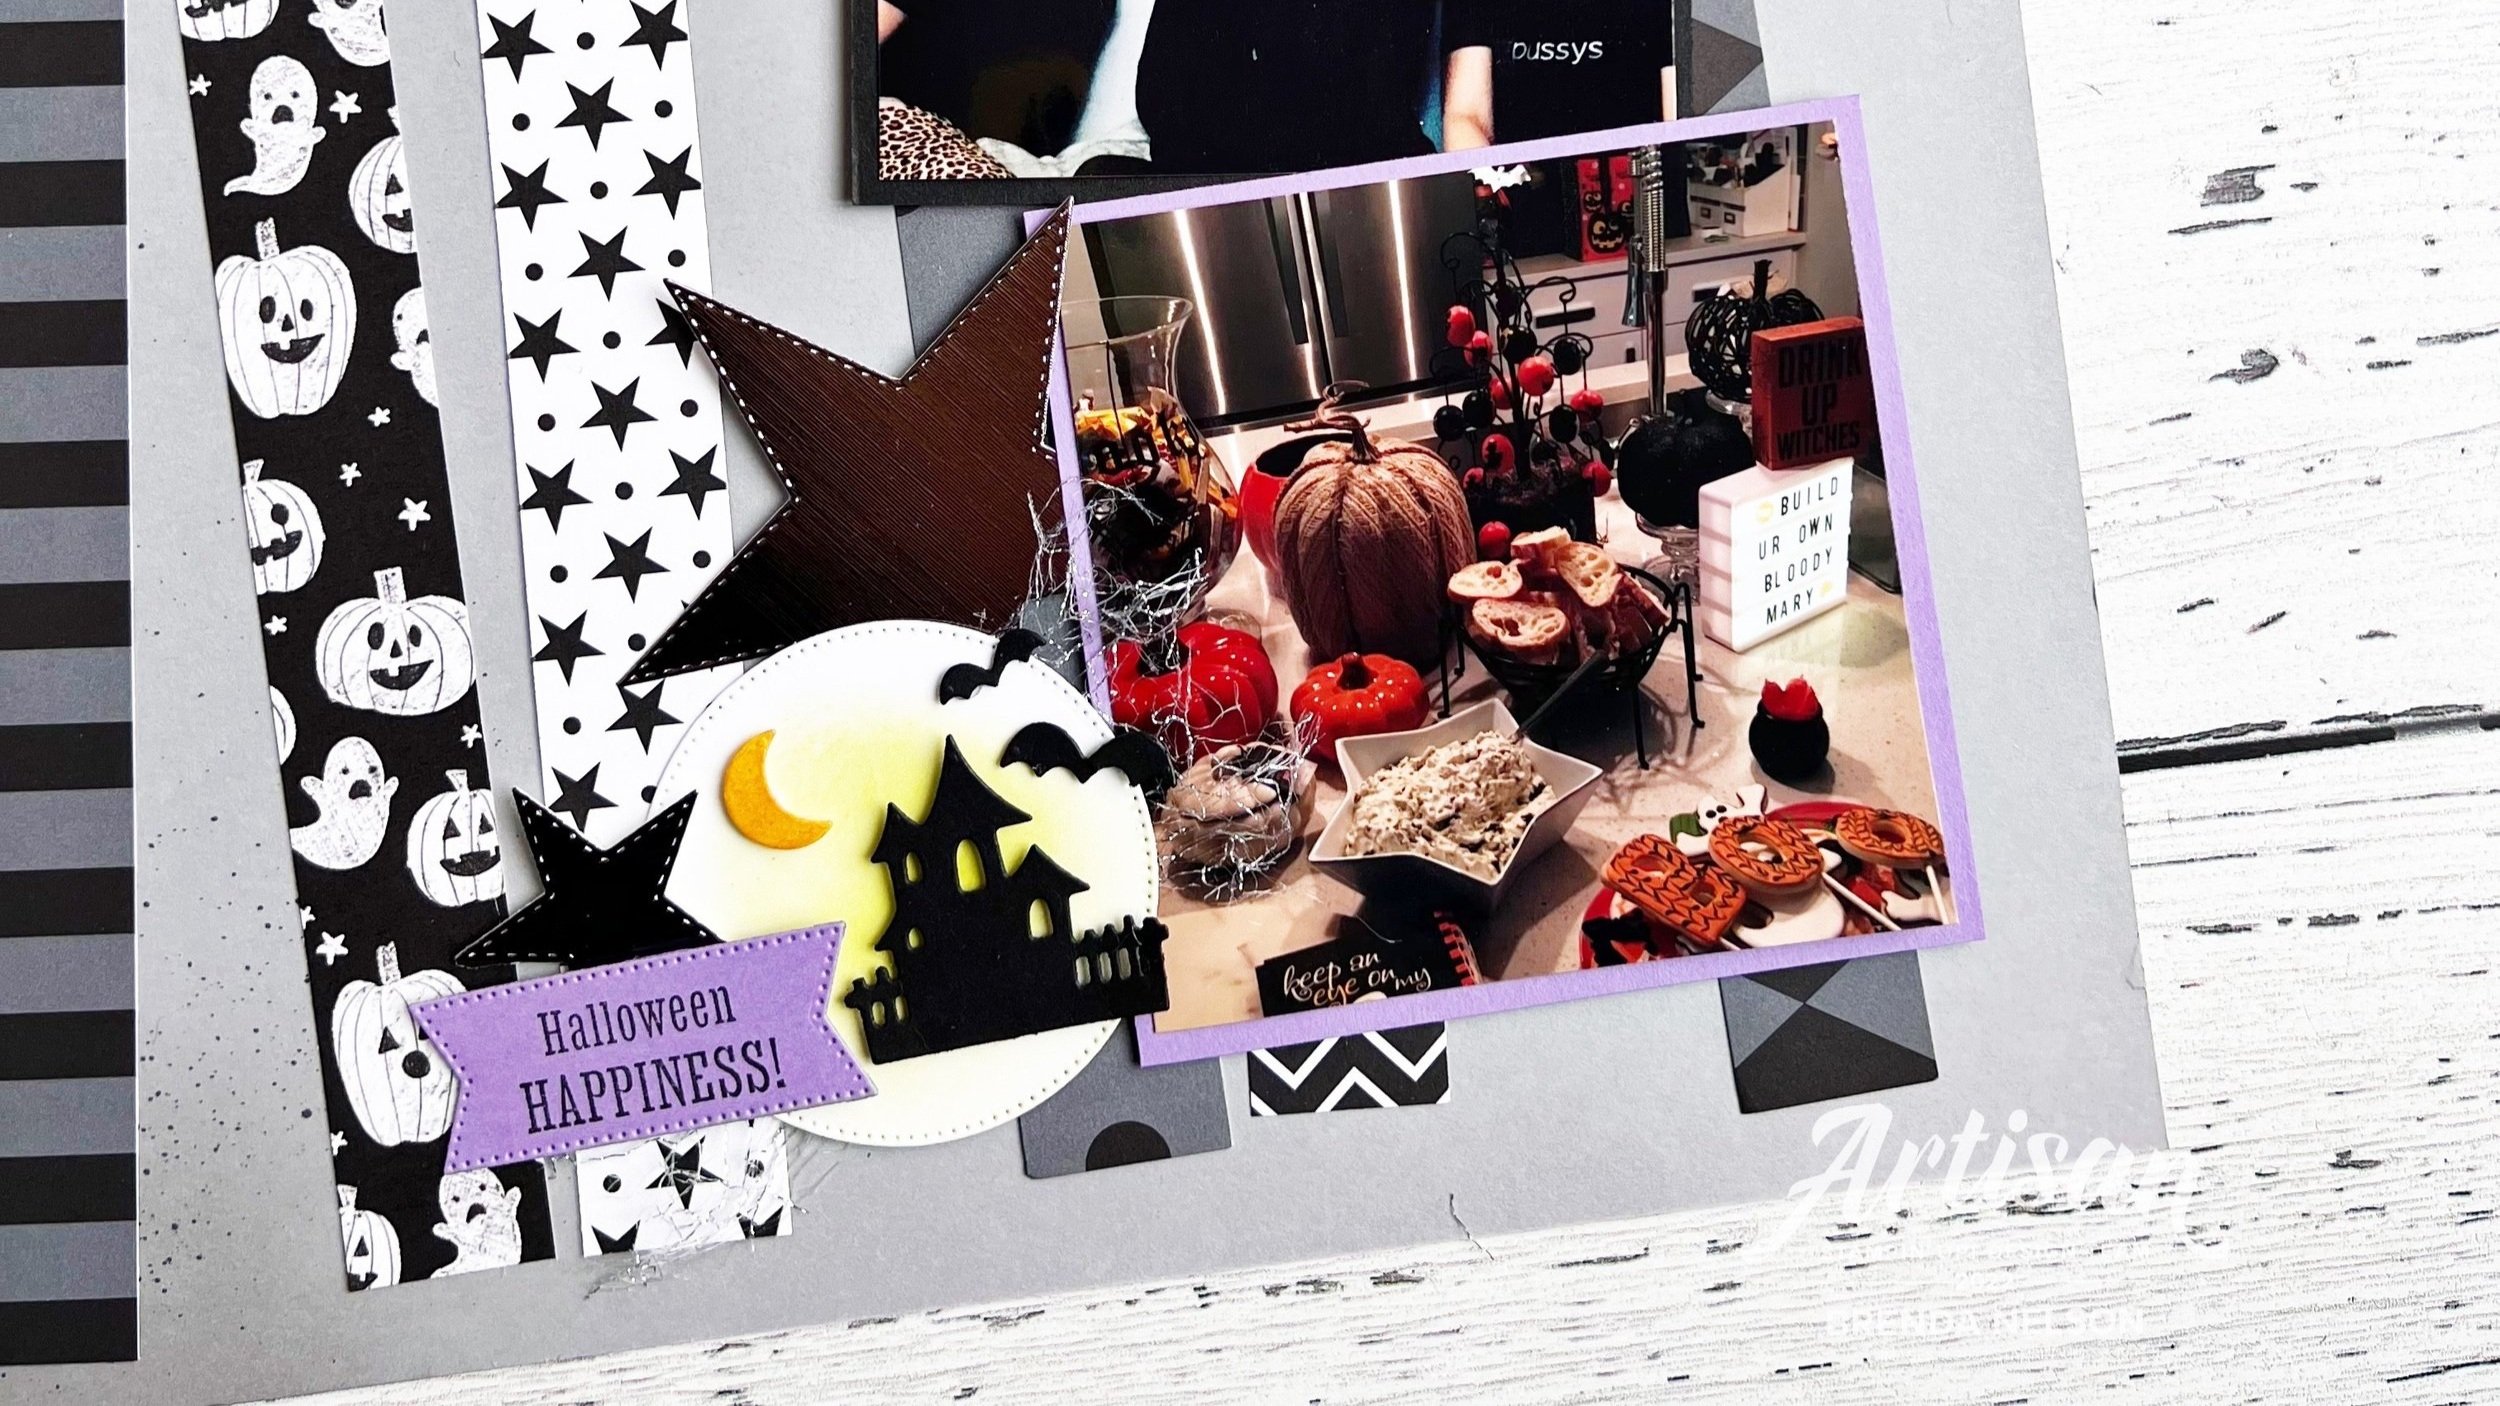
I cut a stitched circle from the Stylish Shapes Dies and then gave it a little yellow hue using my Crushed Curry ink pad and Blending Brush. The Scary Silhouette Dies were perfect for this page. I love the spooky little house, moon and bats die shapes.

Both of the sentiments on this page are from the Scary Cute stamp set and are die cut with the Stylish Shapes Dies. I added some of the Parakeet Party Ribbon and frayed the edges a bit too. A few of the Classic Matte Dots added to the design as well.

This sketch was perfect for coming up with this scrapbook page. You could switch out the elements to do a Christmas page, birthday page, a summer holiday page. There are so many options with this sketch. I hope you will give it a try!


Click the NEXT BLOG button to see what Tricia Butts from the USA has created to share with us this month. And hopefully you can go all the way around the world with us as we share creativity and inspiration from around the world!

If my project has inspired you in any way and you find yourself needing some supplies, please shop my online store by clicking any of the product images or by visiting my store!

Color Fusers--October Blog Hop!

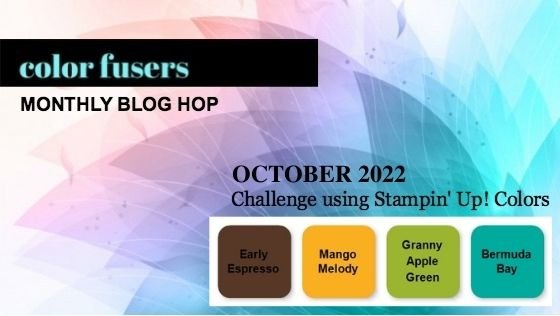
Hello my lovely friends! Thank you so much for joining us on our ‘color inspiration’ hop—that is what I like to think of our monthly color challenge. And to be frank, this month’s 4 color combo was a challenge for me!

I really wanted to make a scrapbook page of our last family photo—not last as in forever, but for a while as in September we moved my son into Millar College of the Bible— 8 hours away! So this picture of the 5 of us has some special meaning to me.

I also felt like these colors had a bit of a fall vibe and September is the start of fall after all!

This was such an exciting day for my son! He was so happy to be getting settled in to Bible College that his eyes were just sparkling and you could just feel the happiness coming off of him. I am so proud of him for making such a big decision to leave home!

I actually laid my photo out on all 4 of the colors to see which one suited it the best and I landed on Early Espresso. I cut out a photo mat of the same color and then the real hunt began as I wanted to incorporate some current designer series paper into my design. I finally found this fun pattern from the Celebrate Everything DSP stack that you can get as a host reward in the JJ catty! I absolutely LOVE this DSP stack! So I added a nice wide piece of it to my design to brighten up the base of the page!

To add some texture and interest to the base of the page, I decided to stamp one of the splotch images from the Perched in a Tree stamp set in the same color ink, Early Espresso. I stamped this on a diagonal axis as well so that your eye follows a natural path across the page.

I then die cut a bunch of leaves from the Aspen Tree Dies. I love that these dies cut and dry emboss the veining of the leaves! It really makes them feel more realistic!

The sentiment can be found in the Honeybee Home stamp set and I used one of the dies from the Seasonal Labels Dies to cut it out. Then I just trimmed the right edge to be straight instead of decorative. I added some gold and white twine that I had laying around on my desk—I don’t even know where it originated from!


Sometimes when you are working on such a dark canvas it can be hard to make it have interest. So I decided to cut some flowers and sprigs out in Early Espresso to play off the tone on tone look.

The little sprigs are from the Christmas Banner Dies and they look great die cut in Early Espresso, Bermuda Bay and Mango Melody.

The sentiment “Best of Luck” is also from Honeybee Home and I thought it was sort of fitting as we left my son behind! I know he will work hard but I do wish him the best of luck trying to learn time management and new responsibilities—hello laundry!! haha!

Truthfully, once I got going this page didn’t take too long to put together. Not every event you want to capture needs to be a massive process to complete. Otherwise, you will never get those memories scrapbooked! I also think that this is a “Go To” layout design of mine. It incorporates everything, card stock, DSP, background stamping, and die cuts. You could easily swap out the elements for any occasion—flowers for summer, snowflakes for winter, greenery for Christmas and so forth. If you do use this page for inspiration, please let me know, I would love to see what you create!

Please make sure you go all the way around the Hop and see what the other creatives in the group have shared this month!

NEXT on the hop is my amazing friend Melanie! We often share texts and stampin’ inspiration with each other and I always look forward to her designs!

If you would like to go in reverse and go BACK you will be taken to my fellow Artisan Tami Hewlett. Tami is an absolute gem and such a kind and giving soul. She is a true master and creating water color backgrounds and elements and I am always in awe of her creations!

Thank you so much for popping by the Blog today and checking out our Hop! I really look forward to this each month as these color combinations do get me thinking outside of the box. I hope they leave you feeling inspired as well.

If you want to shop with me in Canada you can click on the button below or any of the product images to shop my online store. Thank you in advance!

Seven Days of Scrapbooking--Day 7!!

Hey I did it! I shared 7 scrapbook pages in a row! YAY! I hope you have enjoyed following along and seeing what everyone has created using the #sevendaysofscrapbooking!

My last page features two of my kids (my younger two who are 19 months apart) back in the good ole days I like to say. When they were besties! Now they are at the age of constant disagreeing and competition with each other (which is great when it comes to besting each other with their school marks).

I created this page to celebrate that moment in time when they truly were besties. I really hope it comes back around again—someone reassure me this tween thing is a stage!

The base of this page is my current fav In Color—Starry Sky! I used the stamp set Framed Occasions and Butterfly Kisses to bring this page to life. I used 3 of the fun patterns from the DSP and used the color palette to dictate the colors in my sentiments and the flowers. And my Paper Snips definitely got a workout this month!


I stamped some of the dotted circles on the left side of the page for a little texture that is tone on tone.

And I brought in the Beautiful Shapes Dies as this stamp set was designed to coordinate with these dies. I love when SU gives us another reason to use something!

I also used the Fun Flower Resin Shapes as an accent to this page as they work with my hand cut flowers as well. And really, they are just super cute!

I love everything about this page and how easy it was to create with this stamp set! I hope you don’t over look it in the Annual Catalogue!
Make sure to check my Instagram Stories to see the last set of pages being shared using the tag #sevendaysofscrapbooking

And if I can help you in any way, getting started on scrapbooking or ordering any products, please shop my store with the biggest appreciation!

Color Fusers June 2022--Day 6 of Seven Days!

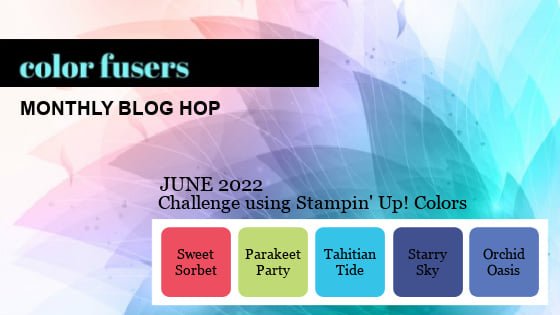
Today is really a double whammy! The Color Fusers Team is creating with the NEW In Colors and some of my Artisan Alumni friends are spending a week sharing scrapbooking projects so of course I combined these two concepts into ONE project!

Each month this awesome design team created projects featuring a color scheme, of course this month we are featuring our 5 new In Colors—Parakeet Party, Sweet Sorbet, Orchid Oasis, Starry Sky and Tahitian Tide!

My current favorite new In Color is Starry Sky? What is yours?

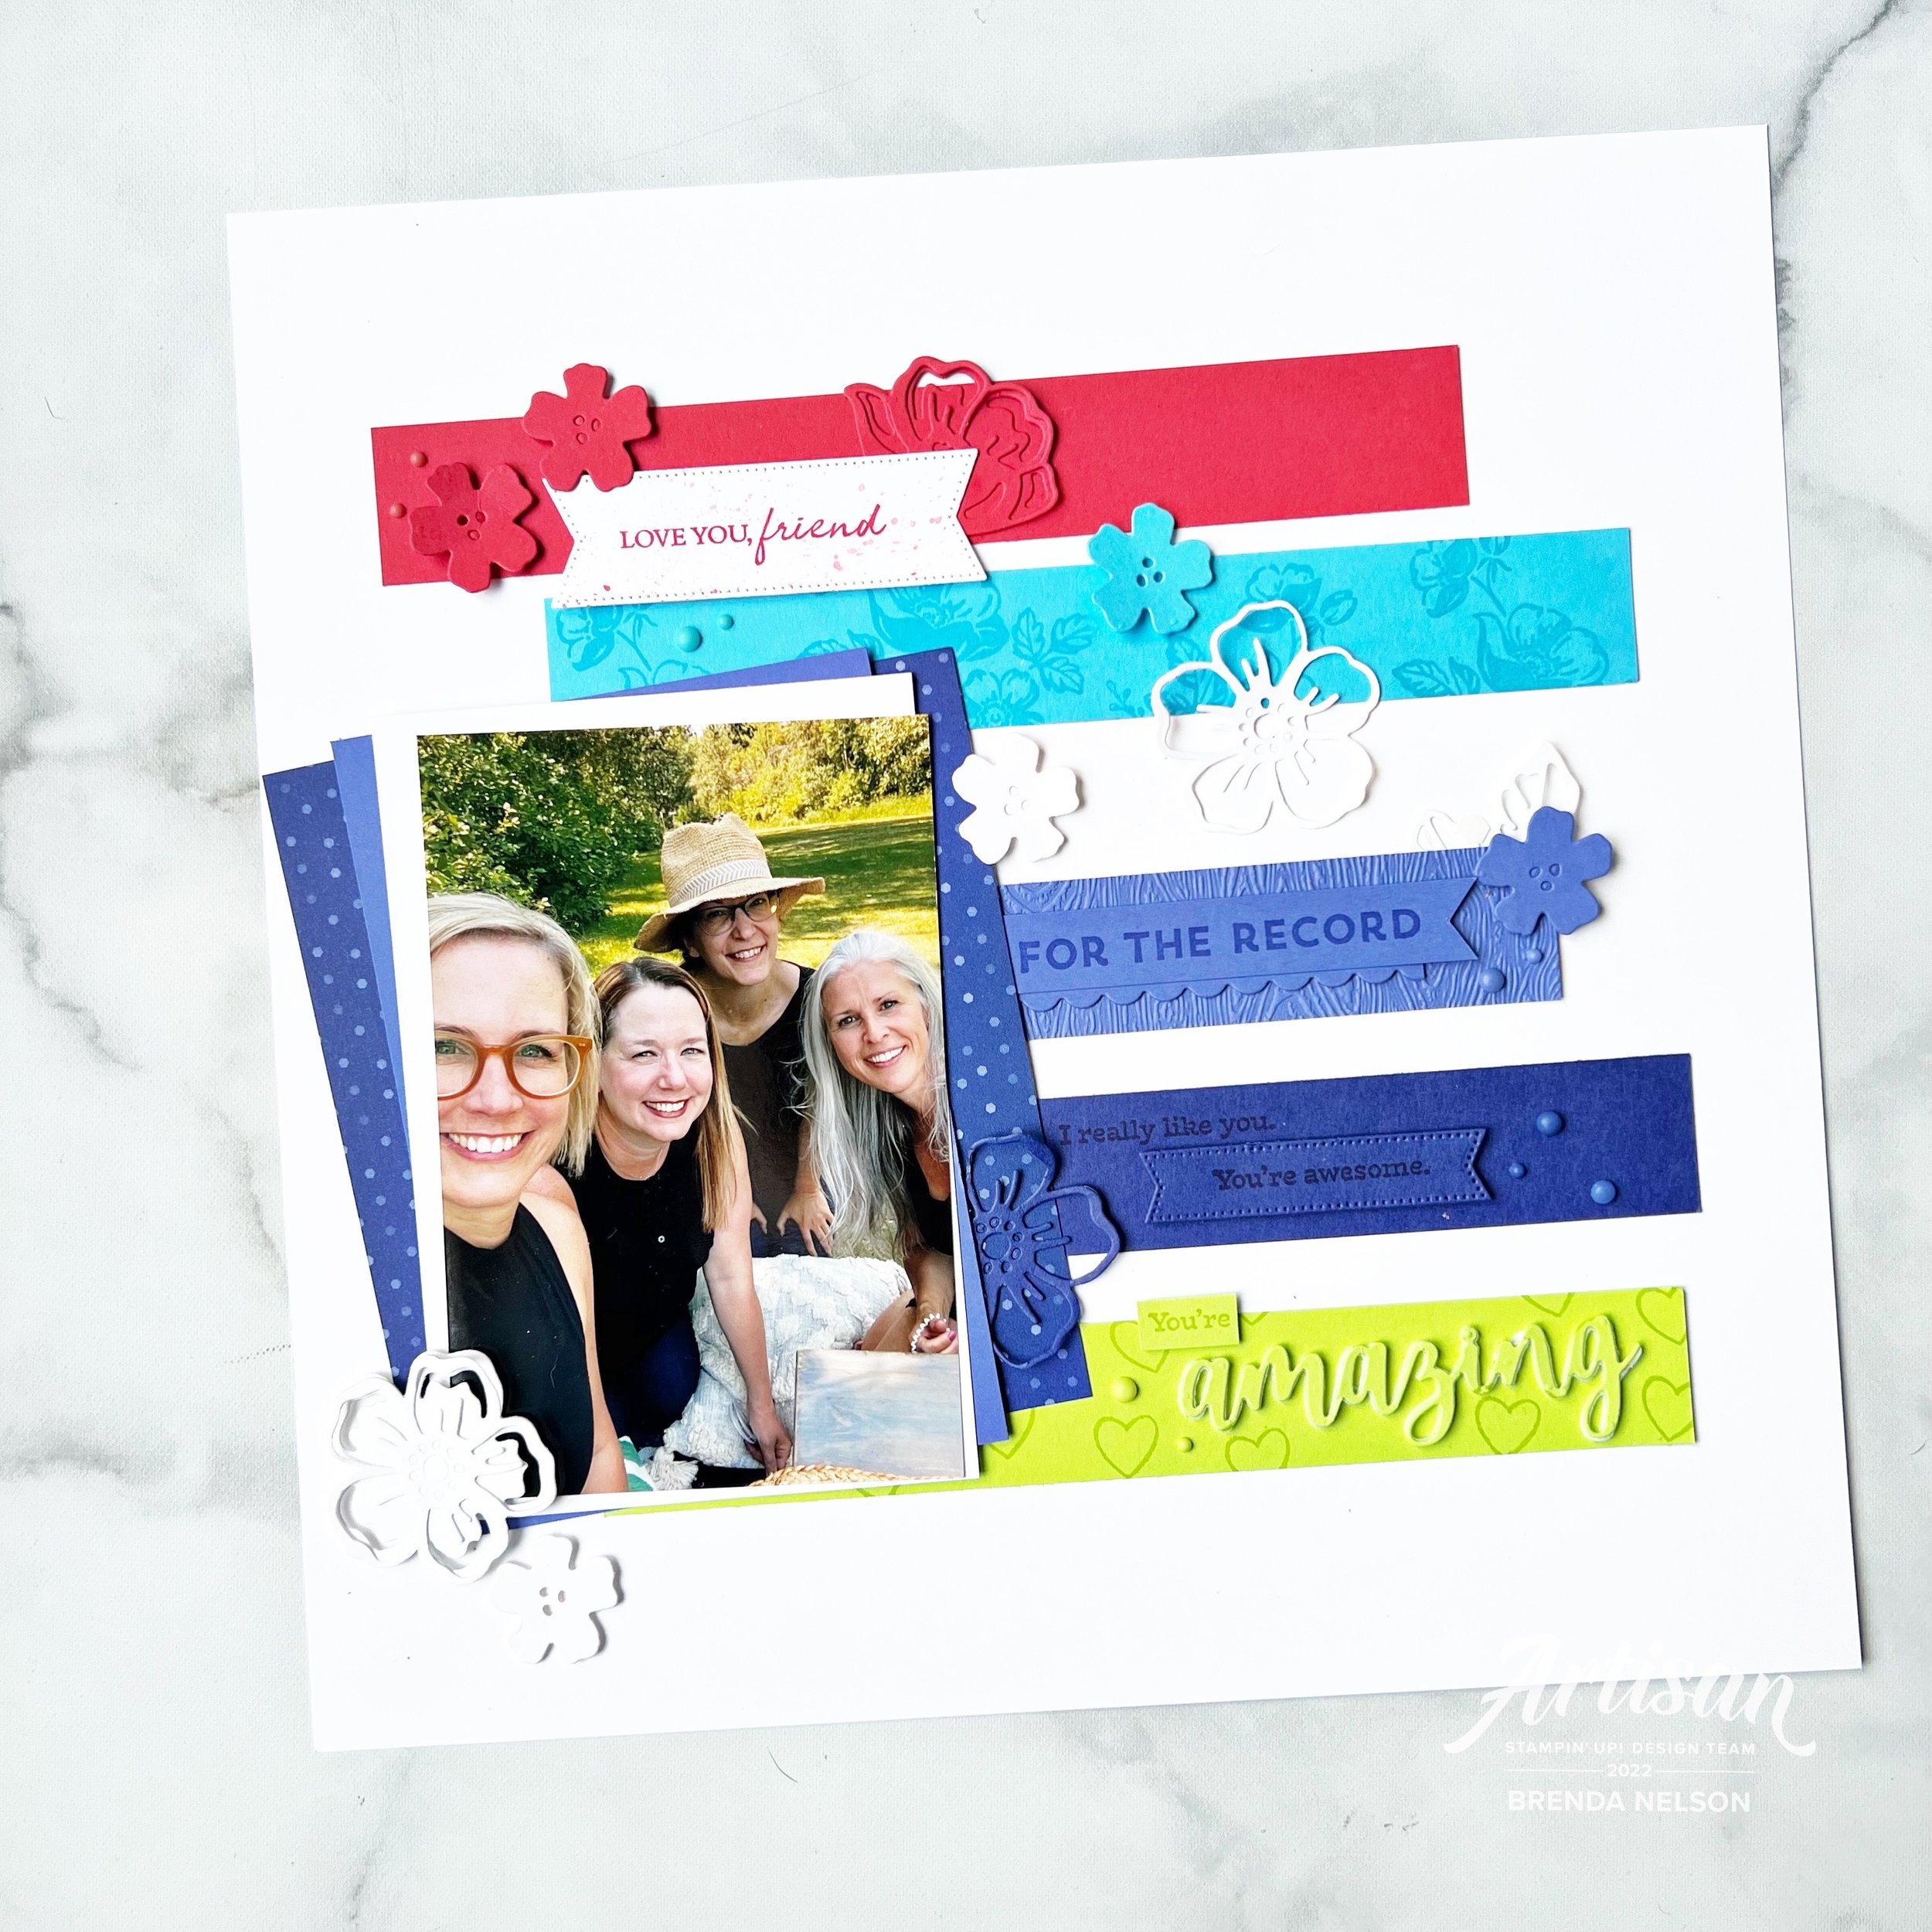
This is my project featuring all 5 of the new In Colors—I love how it turned out! Each year I do try and create a scrapbook page that incorporates all the new colors together. Sometimes its a challenge and sometimes its easy and in this case, its easy as these 5 new colors look absolutely spectacular together! What do you think?

I started with a base of Basic White and used Basic white elements along with the new colors. I feel like they really pop on this crisp base. Last summer a couple of my long time bestie’s and I got together for a girls weekend and besties photo shoot. Our awesome photographer is also a friend so of course I had to snap my own girlfriends selfie and I thought it was a fun picture to add to this page. I layered our picture on Basic White, Orchid Oasis and a piece of the Starry Sky DSP from the In Color 6x6 stack.

I have known these amazing gals for over 20 years. It is a blessing to have such fantastic lifelong friends!

I mashed up a whole bunch of products on this page! That is my favorite thing to do! I used the For the Record stamp set, Summer Shadows Dies, Shaded Summer stamp set, Stylish Shapes Dies and the Amazing Thanks Dies. I even ran the Orchid Oasis card stock through the TImber 3D folder.

Each row of color has a stamped and die cut element to bring it to life along with some of the Matte In Color dots. And each row of color is working to build the story of this page, starting with the sentiment ‘Love You, Friend’.

and ending with “For the Record, I really like you, You’re Awesome and You’re Amazing”. I love taking a bunch of individual sentiments and building them into a broader more encompassing phrase.

I can’t wait to see what every one else on the Color Fusers team has created this month using one or all of the new In Colors—and if you are following along with #sevendaysofscrapbooking then you know you are going to see some amazing projects shared today! Make sure to check things out in my Instagram Stories.

The keep going with our Blog Hop you can go NEXT to see what my awesome former Artisan Design Teammate (#artisanalumni) Janneke has created. And if you want to go in reverse you can see what my current Artisan teammate, Tami, has designed. Make sure to hop all the way around and see what everyone has designed using our amazing new In Colors!

Thanks so much for following along on this Blog Hop and make sure you scroll back through my blog for some scrapbooking and card inspiration!

Seven Days of Scrapbooking--Day #5

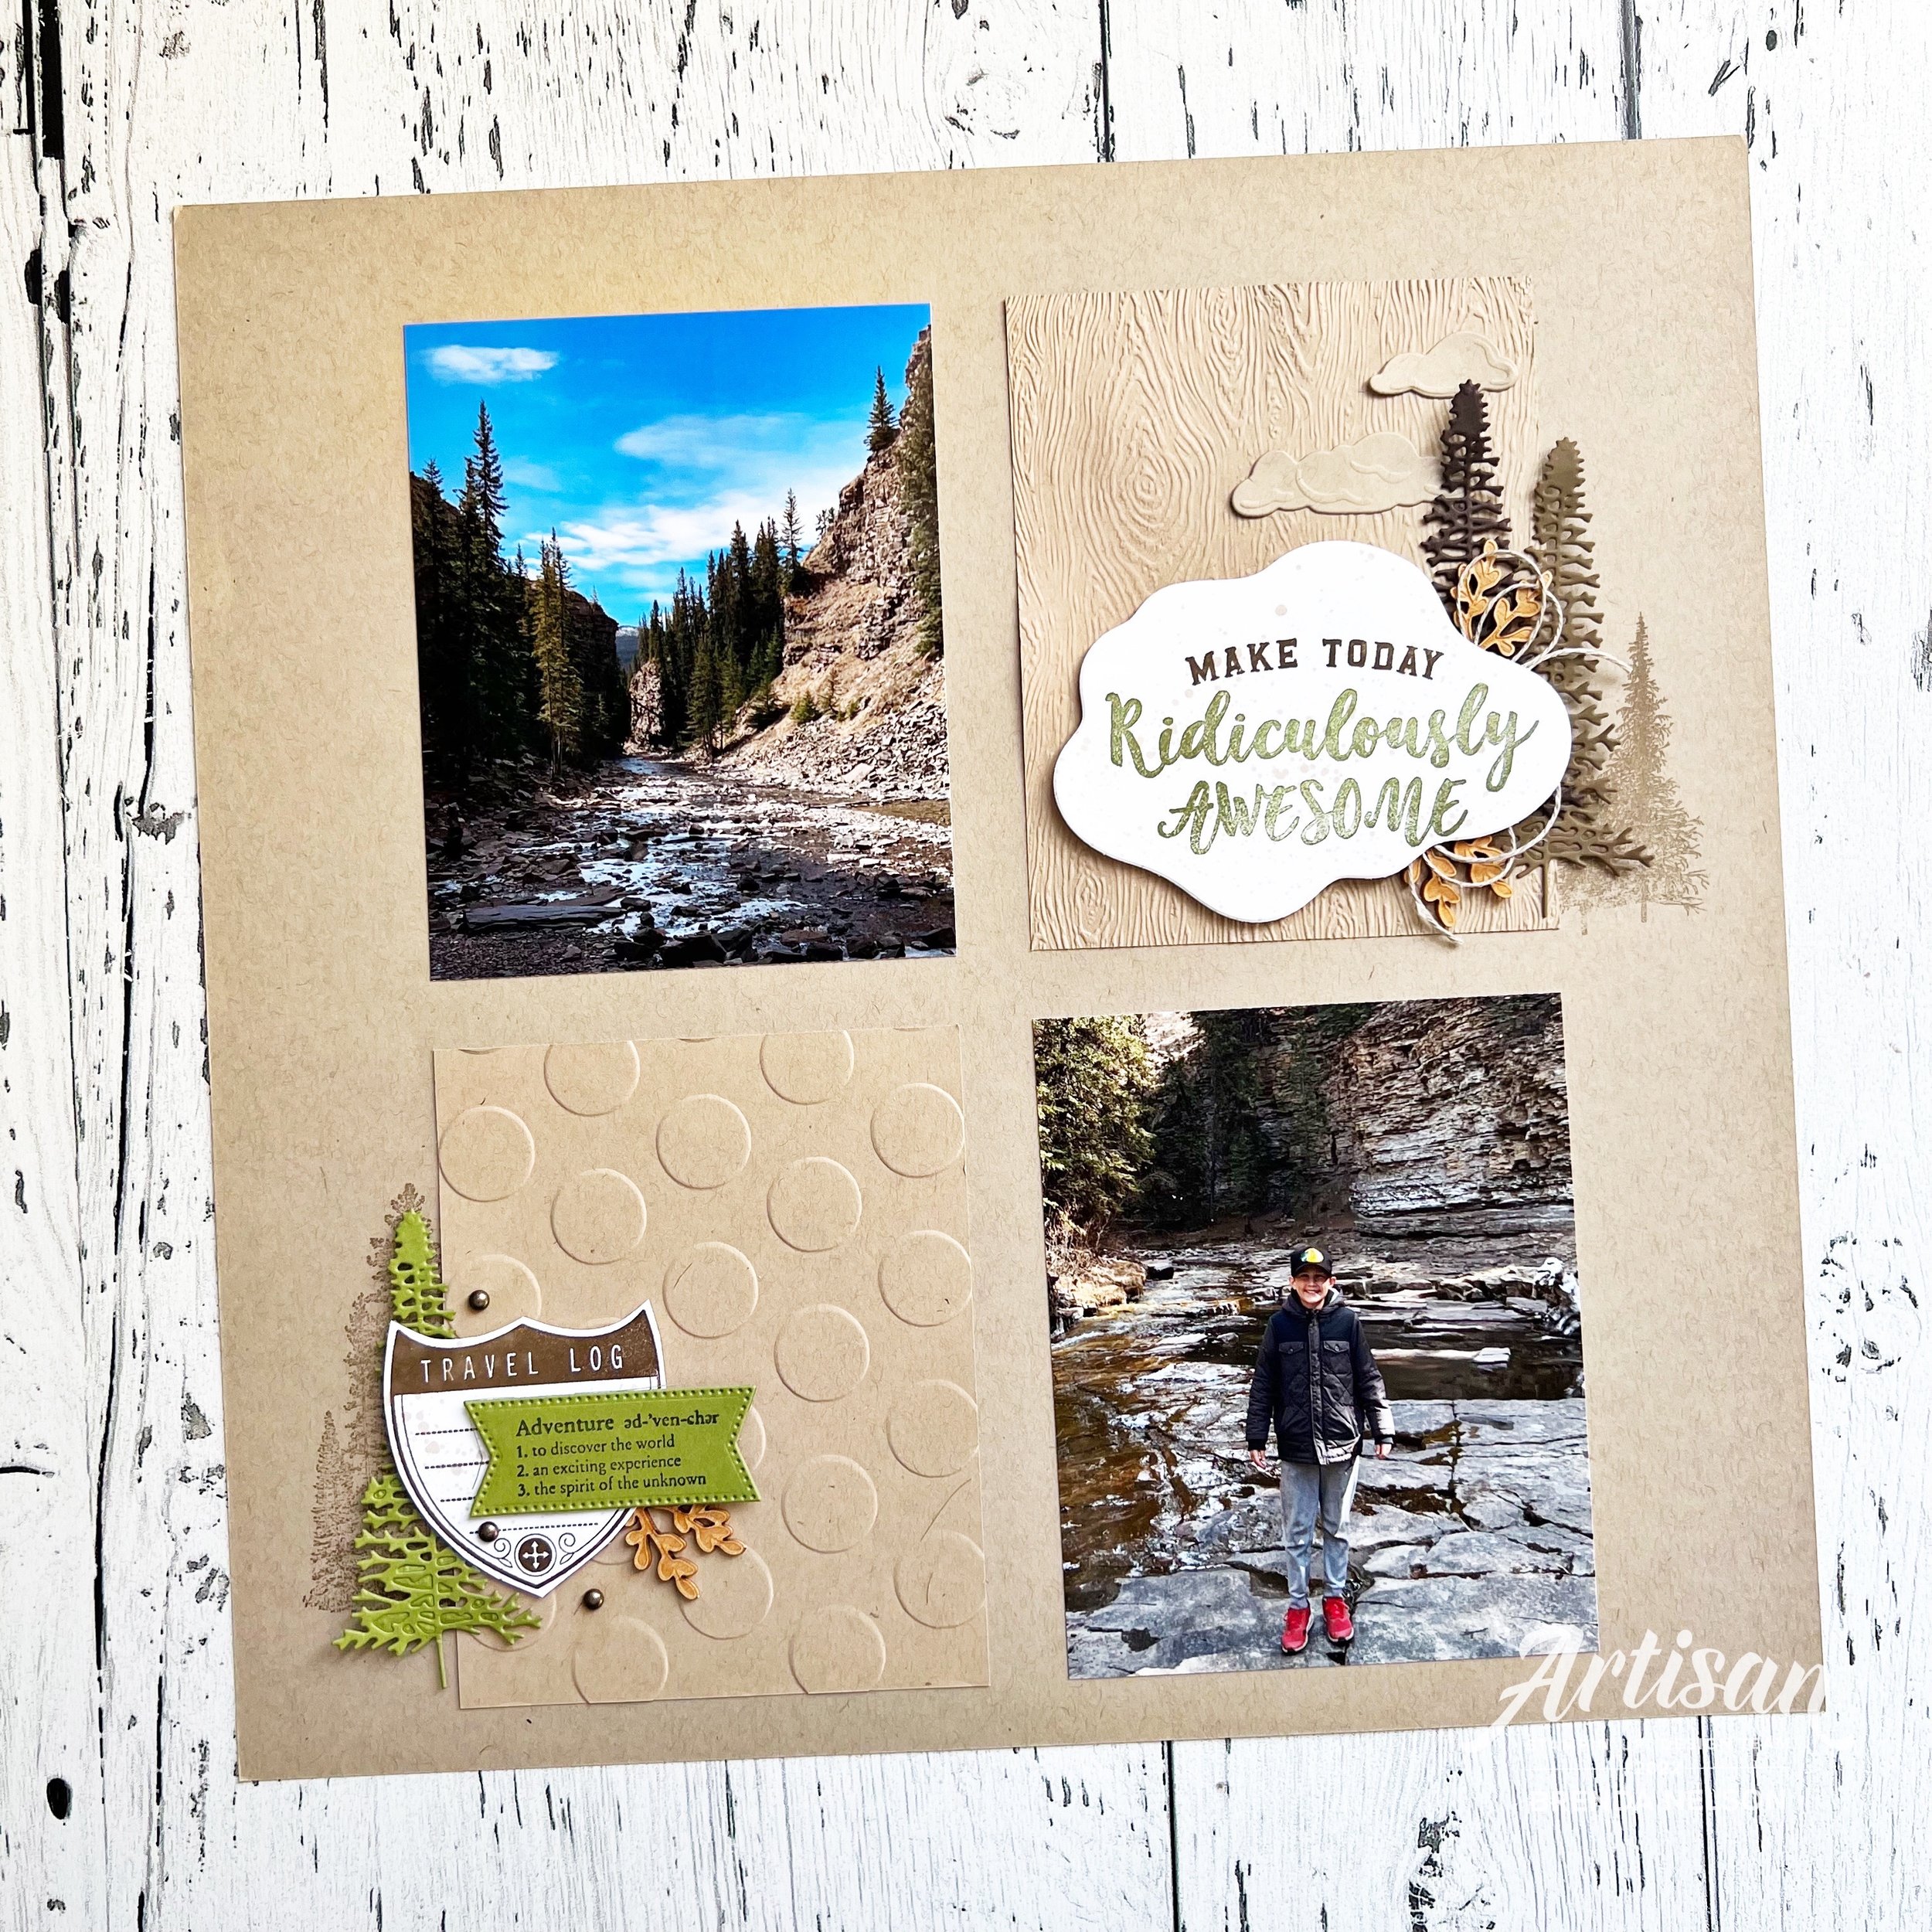
Hello friends! Today I am sharing a fun page I made using some of my favorite RETIRED and current things! In fact, there are more retired items on this page than current! And remember I said I would try and make a page with more than once picture? Well I can now say I did!

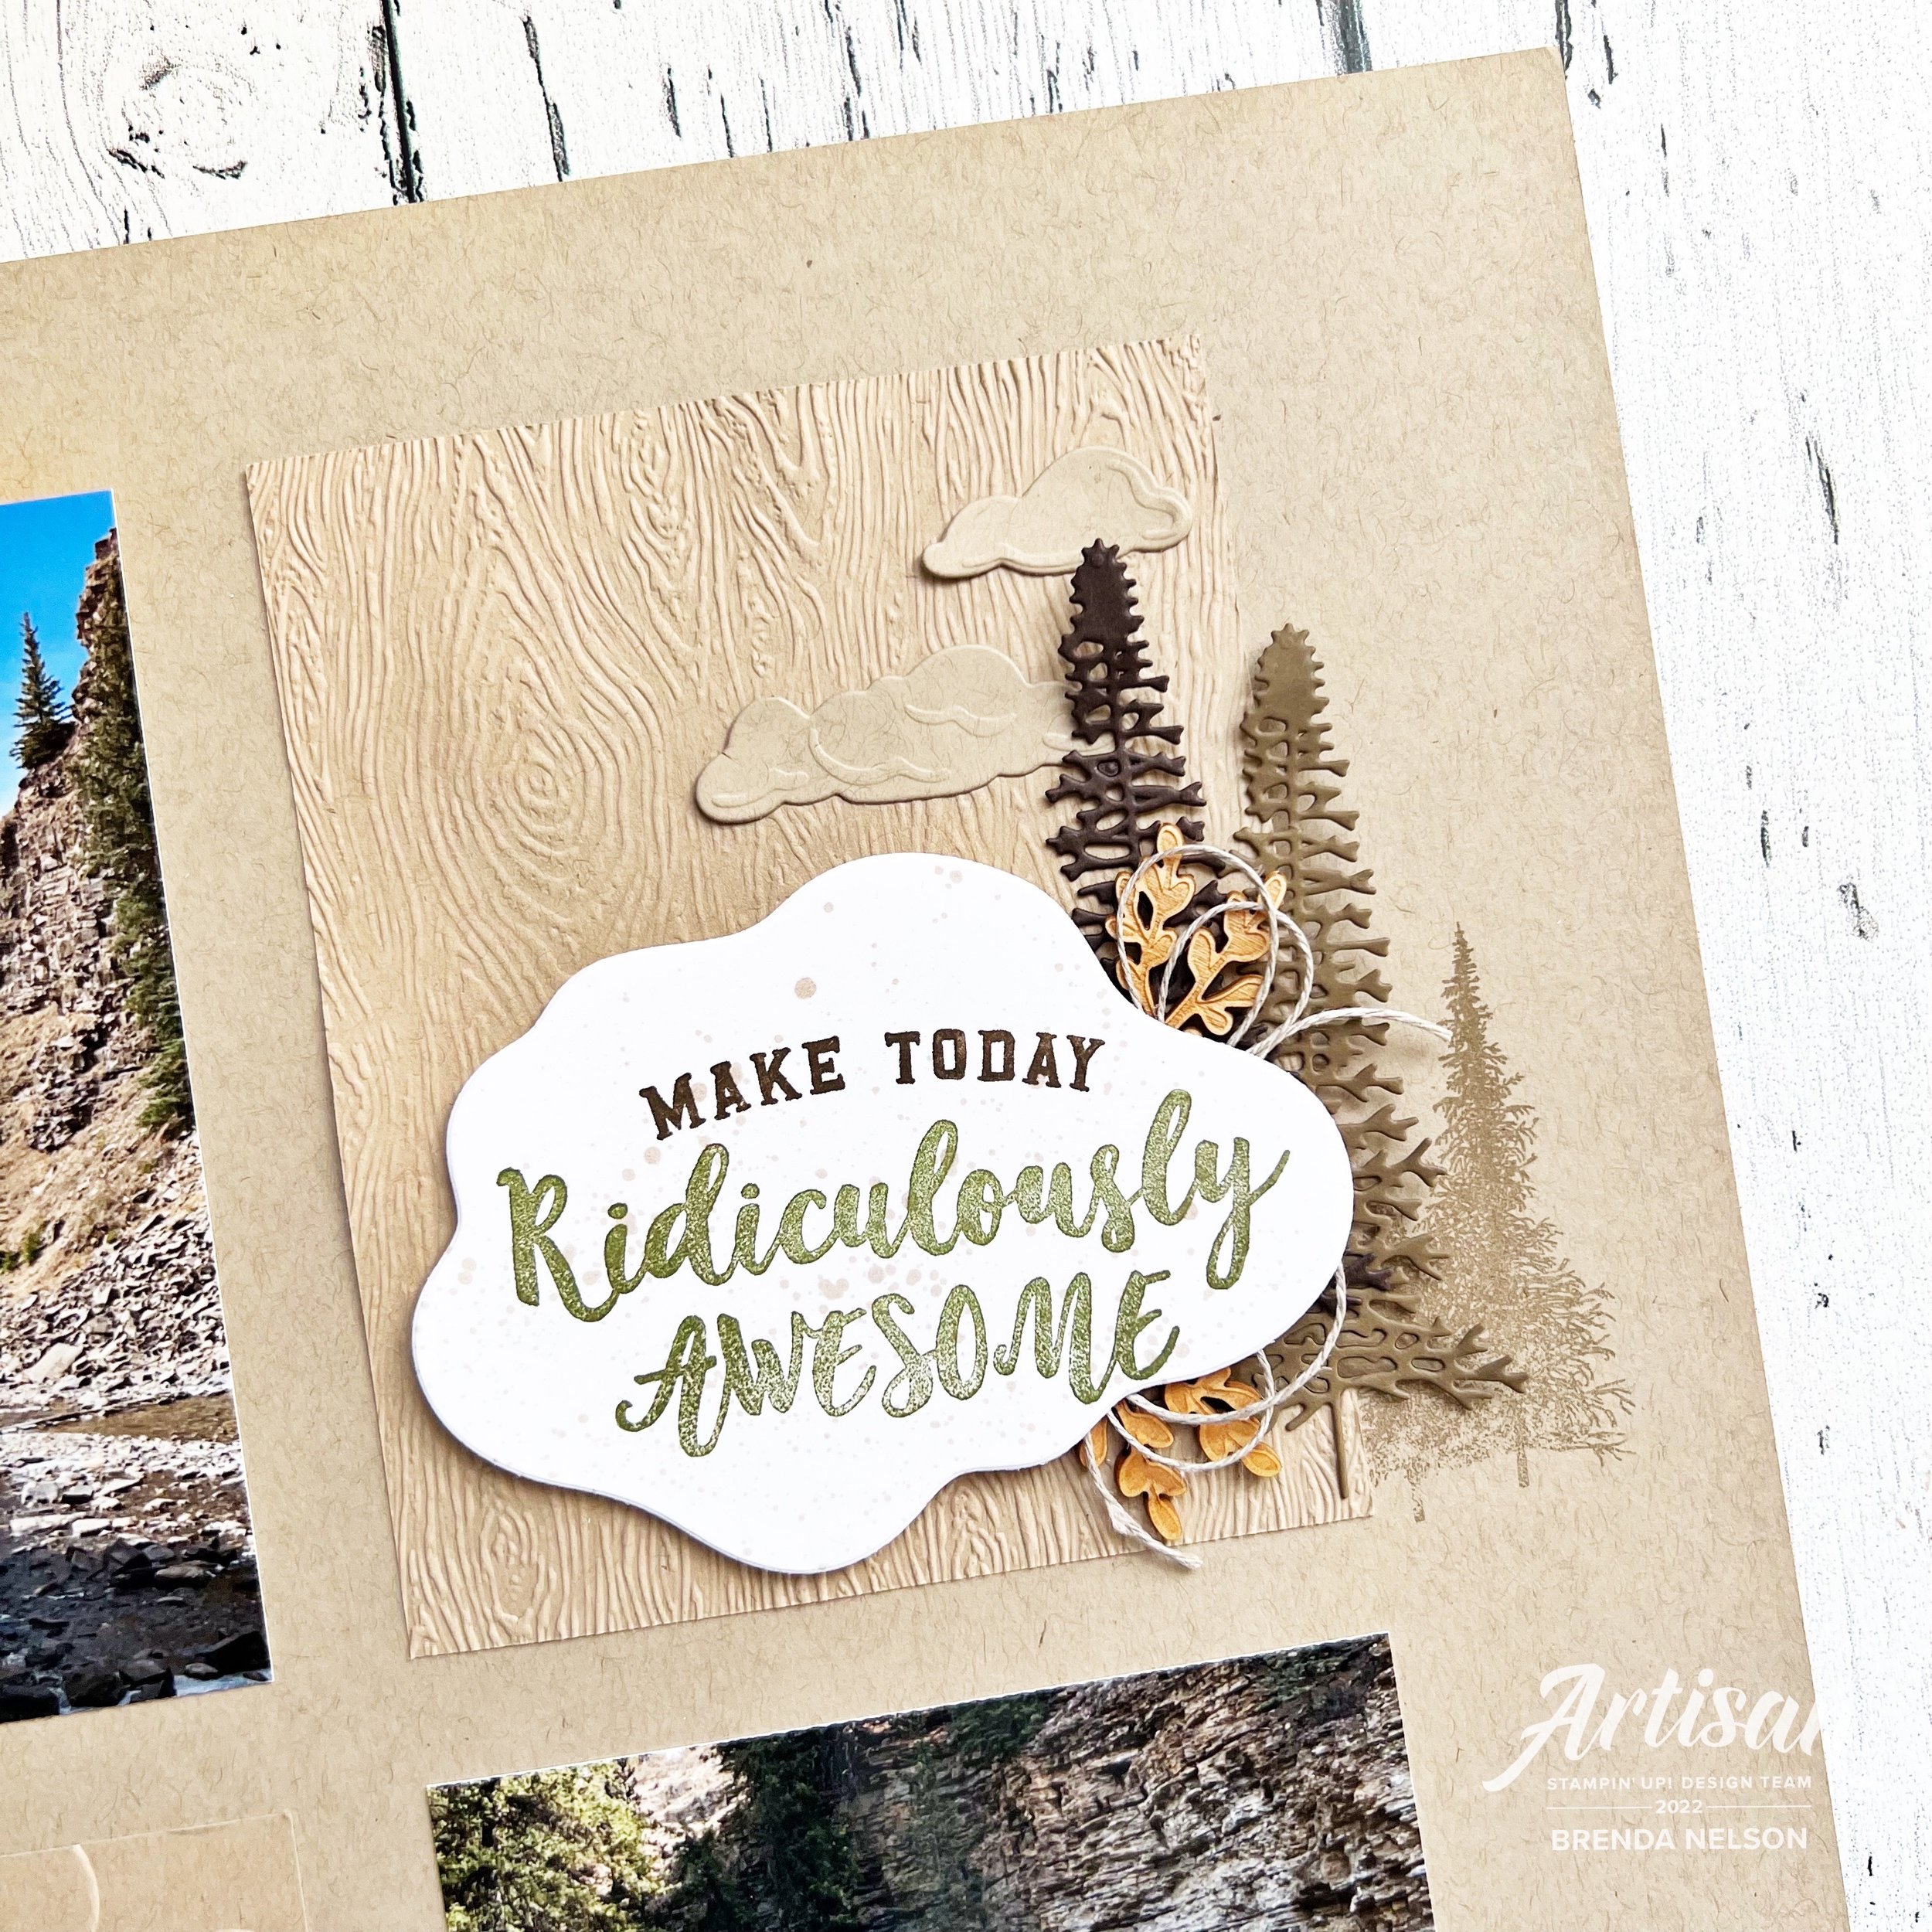
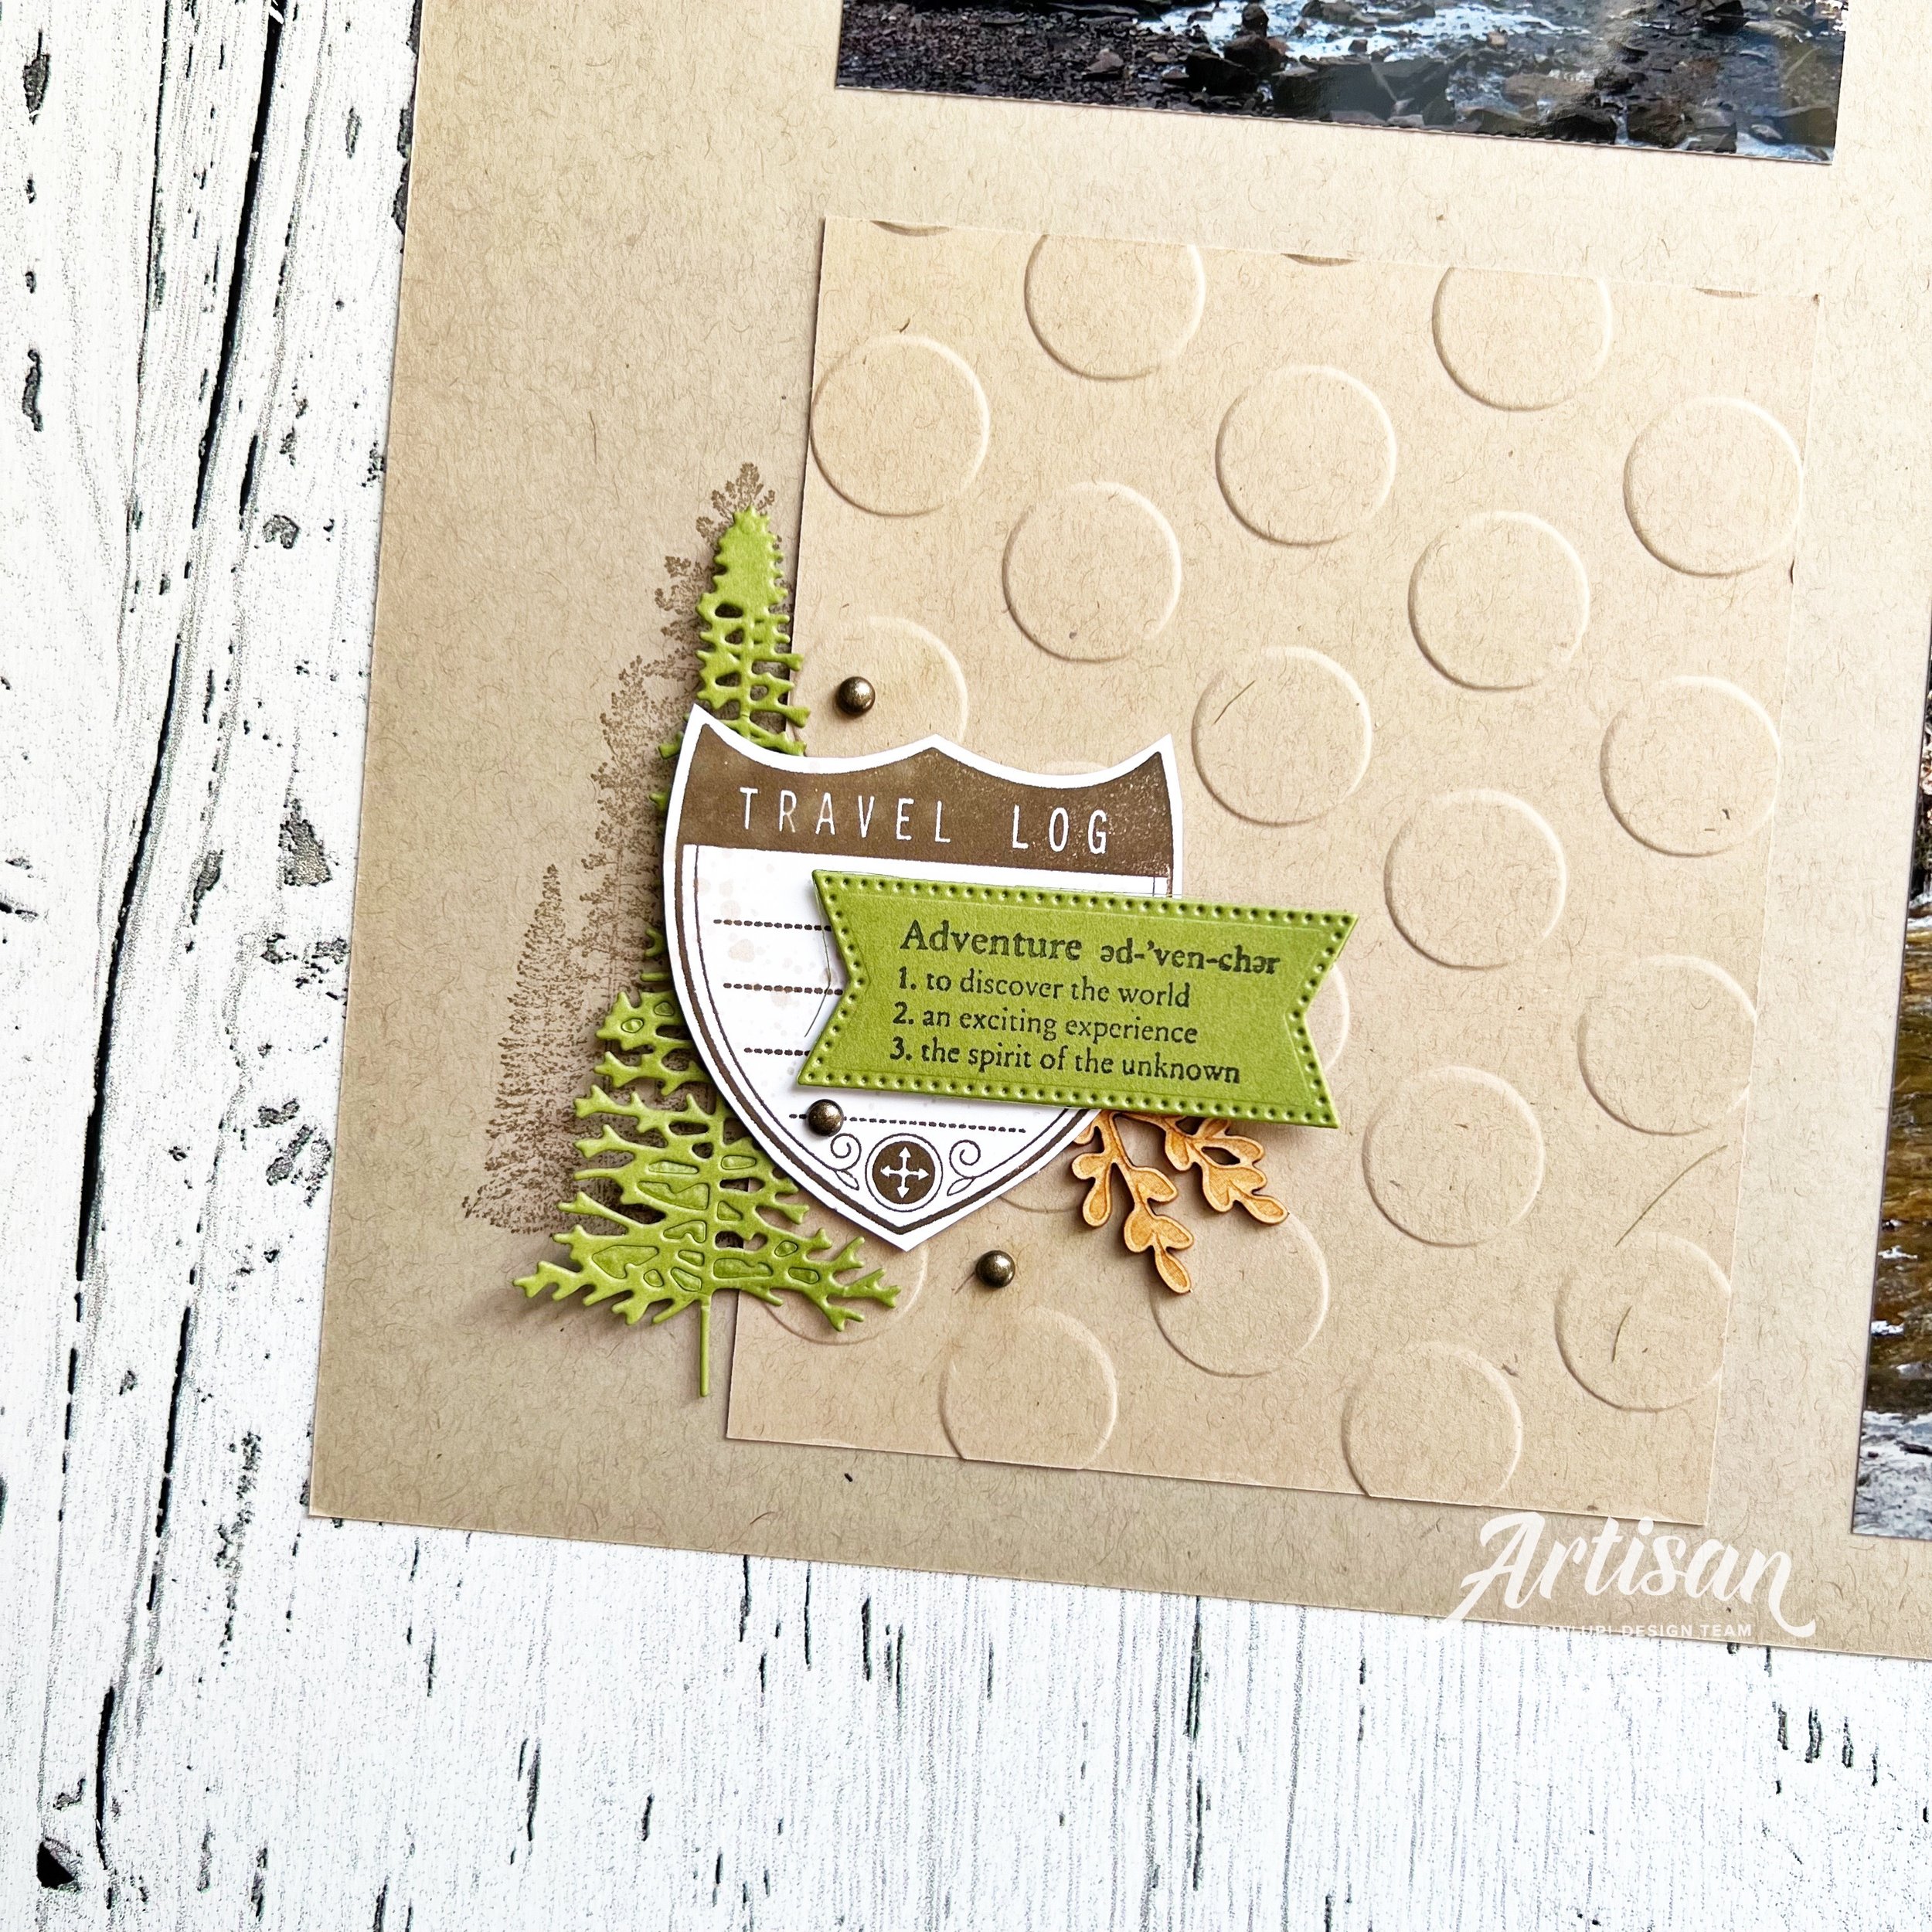
This page is on a base of Crumb Cake card stock with the two embossed panels also being Crumb Cake. I used the Timber 3D folder that is current and a really old polkadot folder for the other. Polka dots have really nothing to do with camping or nature…but I like them!

My youngest son and husband recently took a tent camping trip to the mountains in Alberta :)

Ridiculously Awesome was one of my FAV stamp sets so I still have it in my collection and I was so happy to pull it off the shelf for this page! I think the sentiment is absolutely perfect for this page and looks so good cut out using the Diorama Dies! I added a little Linen Thread behind as well.

The little clouds added above the trees are from the Waves Dies. I like how these clouds have an embossed design to them versus some of the other cloud shaped dies we have.

Another one of my fav sets is Mountain Air and I am so happy it gets another turn in our Annual Catalogue. It is actually a set I will hang onto no matter what. I love the accompanying Majestic Mountain Dies as I have use the tree dies on so many camping/nature projects! These are cut using Early Espresso and Soft Suede card stock.

I think the little wooden accents were from In Good Taste and I had just enough in my massive stash to add them to this page!

The trees that are stamped just behind the Timber 3D panel are from the Campology set that is also getting another run in the Annual Catalogue. I stamped it tone on tone in Crumb Cake ink.

I used another retired set on this page too called Travel Log. Basically I keep any sets that have to do with travel and adventure as we don’t always have a current option so I like to have them in my stash for projects like this.

I stamped the trees from Campology again behind the polkadot panel and this time I cut out the fun travel log image by hand. It was stamped with Soft Suede ink and both of my sentiment areas got a flicking of ink using a Crumb Cake Stampin’ Blend. The ‘adventure’ definition is stamped w Mossy Meadow ink on Old Olive paper and is cut using the Stylish Shapes Dies. I also decided to add a wooden element, Metallic Dots and an Old Olive tree to this side.

I really really love how this page came together especially because I made it just for myself! Its not for a class or event display or anything. Just for me and that makes my heart happy as its actually a luxury for me at this point!

I would love to share my passion for scrapbooking with you at one of my many classes! Please reach out!