Be Inspired Blog Hop--Friends & Family!

Hello friends! I am so happy to be back after taking a little creative break last month! I could not resist this awesome theme of Friends & Family!

Do you ever find that you are using a color or color palette on repeat? For me the past few weeks its been Fresh Freesia—I mean, seriously, the color goes with EVERYTHING! I even found myself buying some Fresh Freesia inspired running shoes!
I decided to make a scrapbook page that features a picture of one of my fav friends who was up in Canada for a visit this past summer. The last time I saw her was when I went to visit right before Covid! I flew home to Canada on a Monday and on Wednesday they made the announcement that if you arrived back that day you would have to quarantine for 2 weeks. Doesn’t this all seem like a million years ago? So its been a LONG TIME coming for a visit and I am happy we got to have one this summer! So of course I had to make a scrapbook page for our Friends & Family themed blog hop this month!

This is my and my buddy Brett enjoying a coffee together and a canadian coffee house!

Was I the only one who stockpiled the Dandy Designs 12x12 paper? I absolutely LOVED the color palette of that paper collection and its perfect for scrapbooking!

I started with a Fresh Freesia pattern and then added a layer of Fresh Freesia card stock over top that is trimmed to 11 1/2 x 11 1/2. I had recently made a different card project with some triangles and that inspired me to cut our 6x6 DSP (here I used 4 colors from the Subtles Family—Highland Heather, Fresh Freesia, Petal Pink and Bubble Bath) into a triangle. Its such a cool way to layer DSP on a page and to think about using this paper size in your scrapbook designs!

I love the flowers in the Darling Details stamp set. I stamped them here with Pebbled Path ink (a nice alternative to Momento) and colored them with coordinating Stampin’ Blend colors. I used the Darling Details dies to cut out some floral images from the set with the Vellum Basics. I love to use vellum on scrapbooking projects. I decided to use Highland Heather as my photo mat as its the color furthest away from where I was placing my photo and it helps to tie in the DSP and the photo mat by anchoring them on each side of the layout.

You can find the sentiment “Fabulous Friend” in the Bold Bouquet stamp set. I trimmed it down from its original format and added a bit of Linen Thread behind. I added a few retired gems as well, because, Why Not? Why am I hoarding things…

One of my favorite dies is the heart from the Radiating Stitches Dies—these are an Online Exclusive. You definitely need #addtocart if you do not have these dies! The little tiny ‘love’ is from the Best Family Ever stamp set. It has such a great collection of descriptive words, it is really a set worth having in your long term collection.

‘Oh, Happy Day!’ can be found in the Kindest Expressions stamp set. This is a fabulous set for memory keeping because the sentiments are oversized which I love. I cut it out with the Stylish Shapes Dies—another craft room must have!

I hope this page encourages you to pull out some of your 6x6 paper in your favorite color combination or give this one a try:

Highland Heather, Fresh Freesia, Petal Pink and Bubble Bath!

I would love to see what you can come up with and I am excited to see what the rest of the team created with our them of Family & Friends. Make sure to ‘hop’ all the way around and please leave me a comment! I really look forward to them. And if I have inspired you to order anything, please consider using this button to shop with me!

Up next on the Hop we have my amazing former Artisan teammate Janneke! I know you will love what they have created!
I hope you visit everyone on our blog hop and please feel free to leave us some encouraging comments! I love to know what you think of my projects! And if you are not following me on Instagram, please do @stampwithbrenda

Creative Convention--Day 6!

Welcome back friends! I hope you are enjoying everything I am sharing so far! I have had some much fun preparing all of these “Creative Convention” project ideas for you in anticipation of the new upcoming Holiday Catalogue! We are getting so close to the happiest time of year (which is my world is Sept-Dec!)

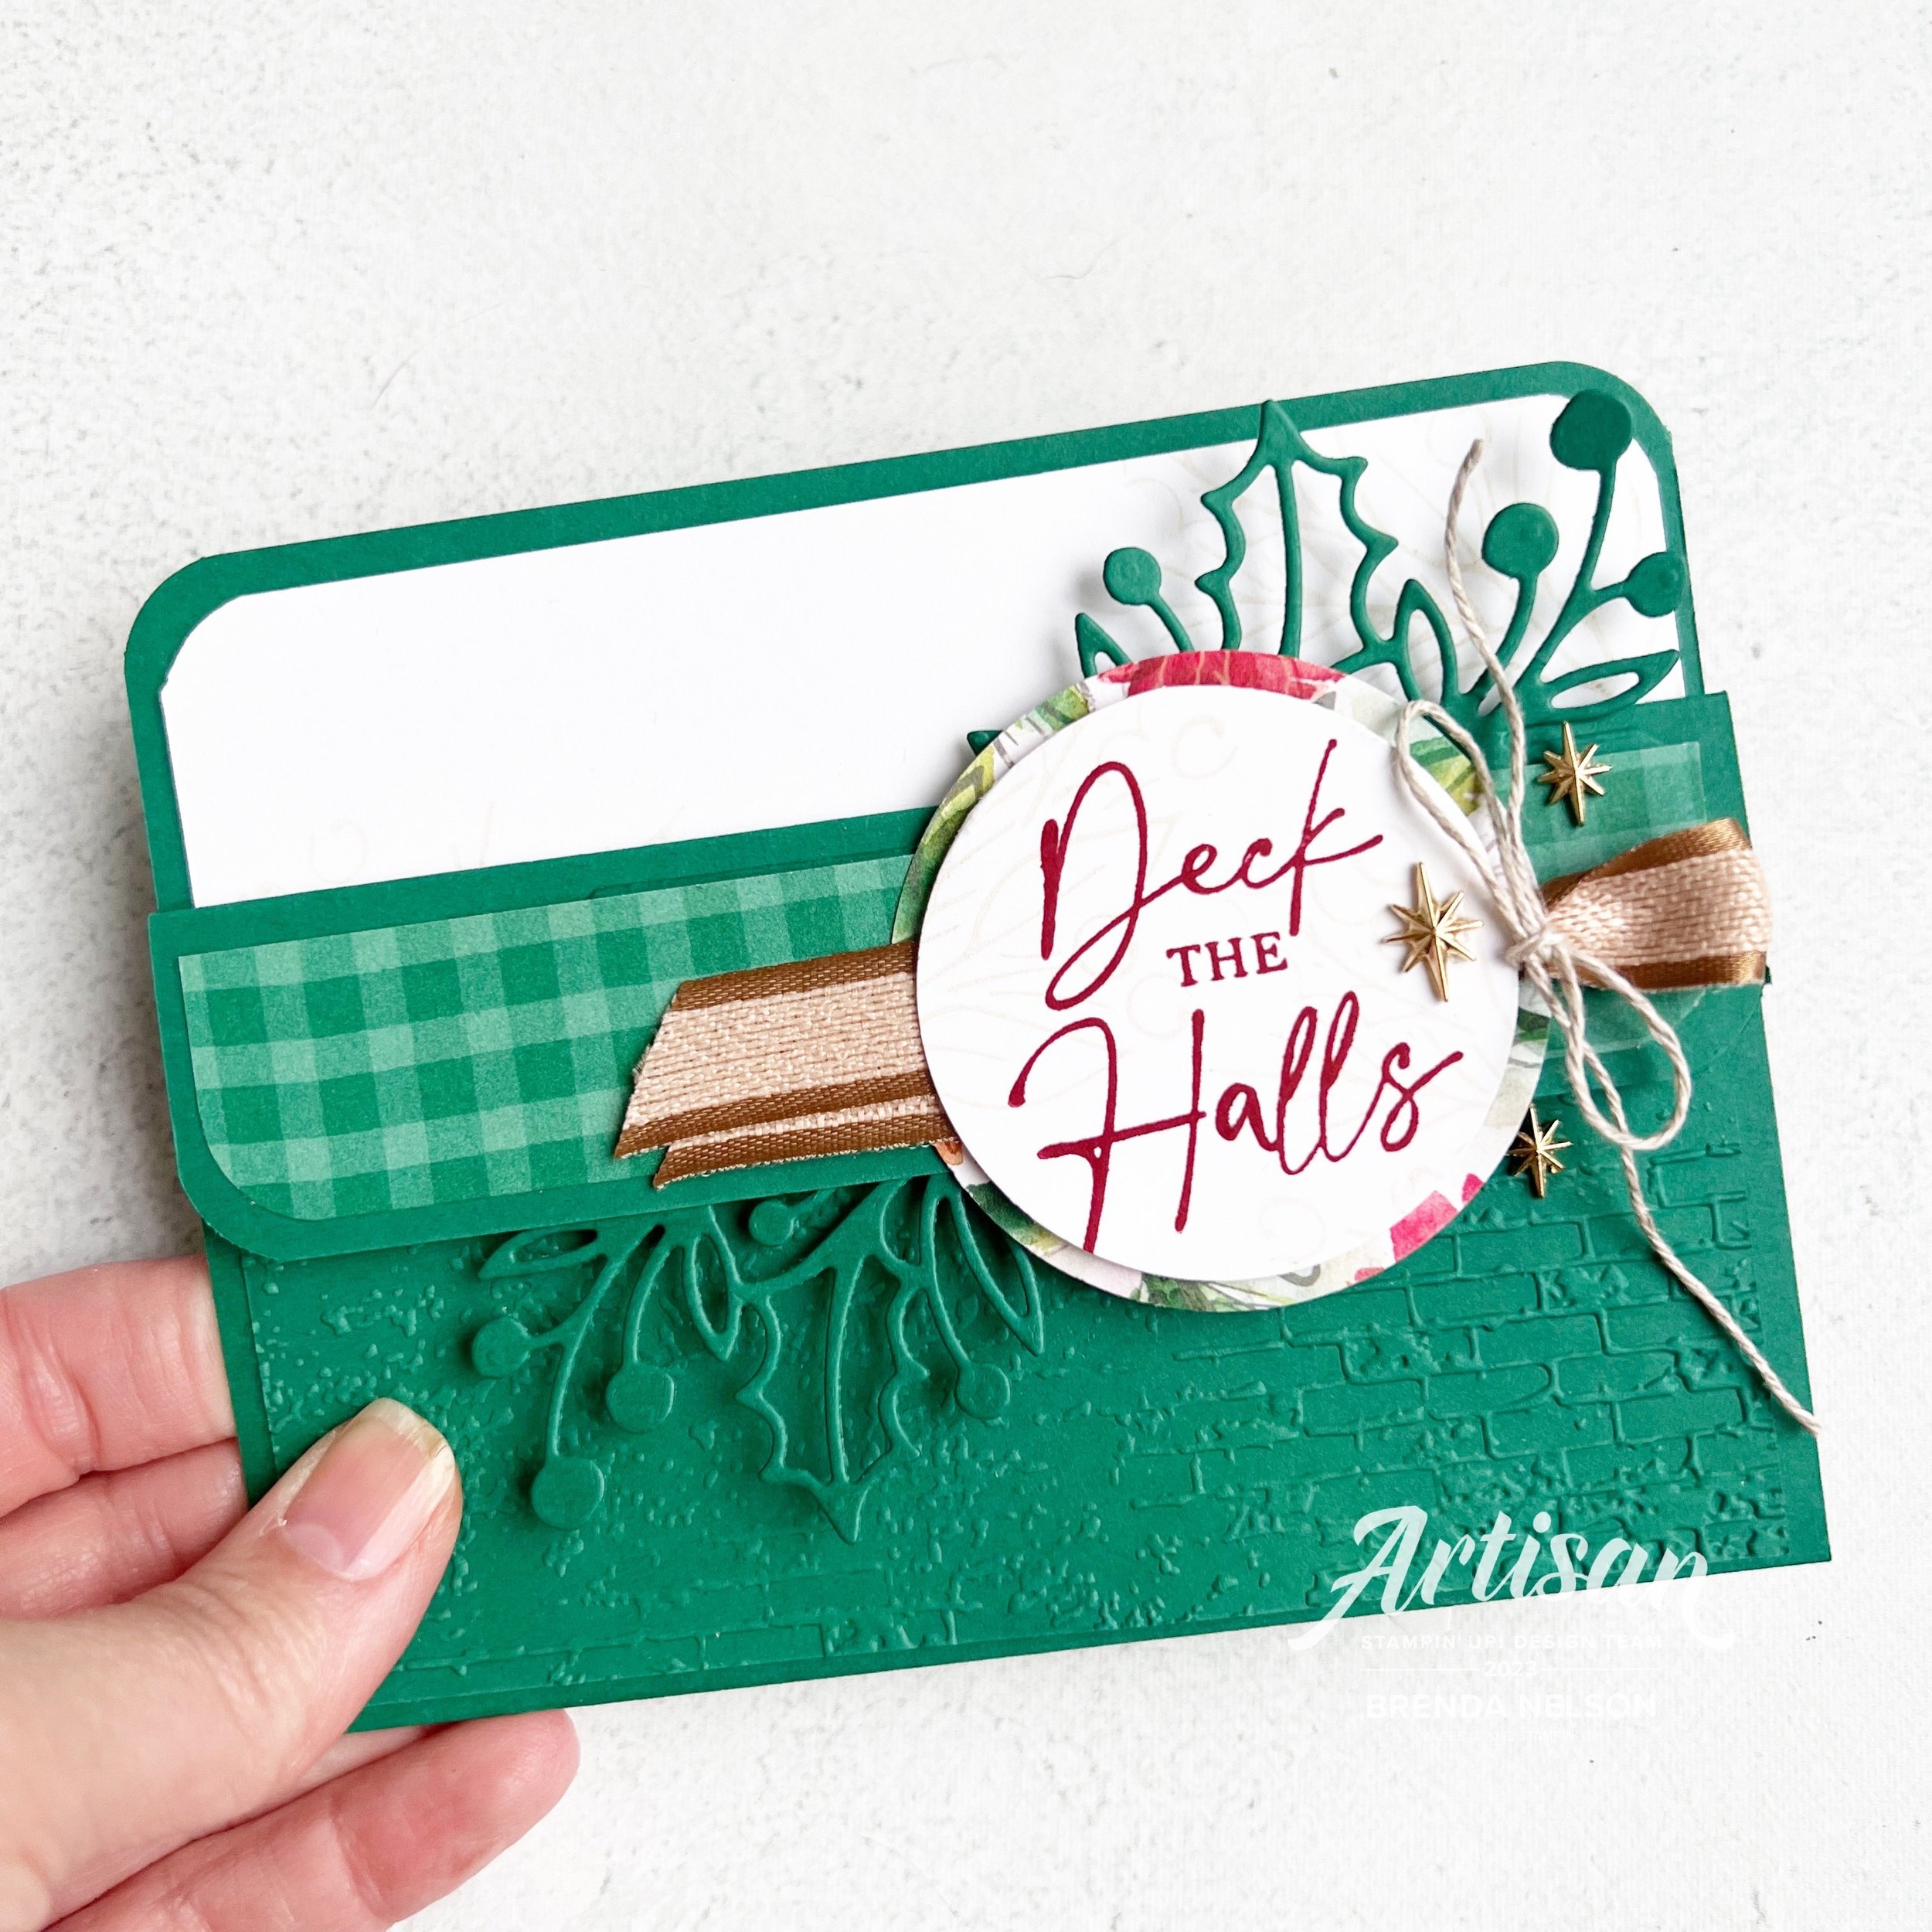
My project for today is a card with a fun fold that I make EVERY SINGLE YEAR! Its just one of my go to favorites as its a great way to give a gift card inside or hide some money or even a flat little chocolate.

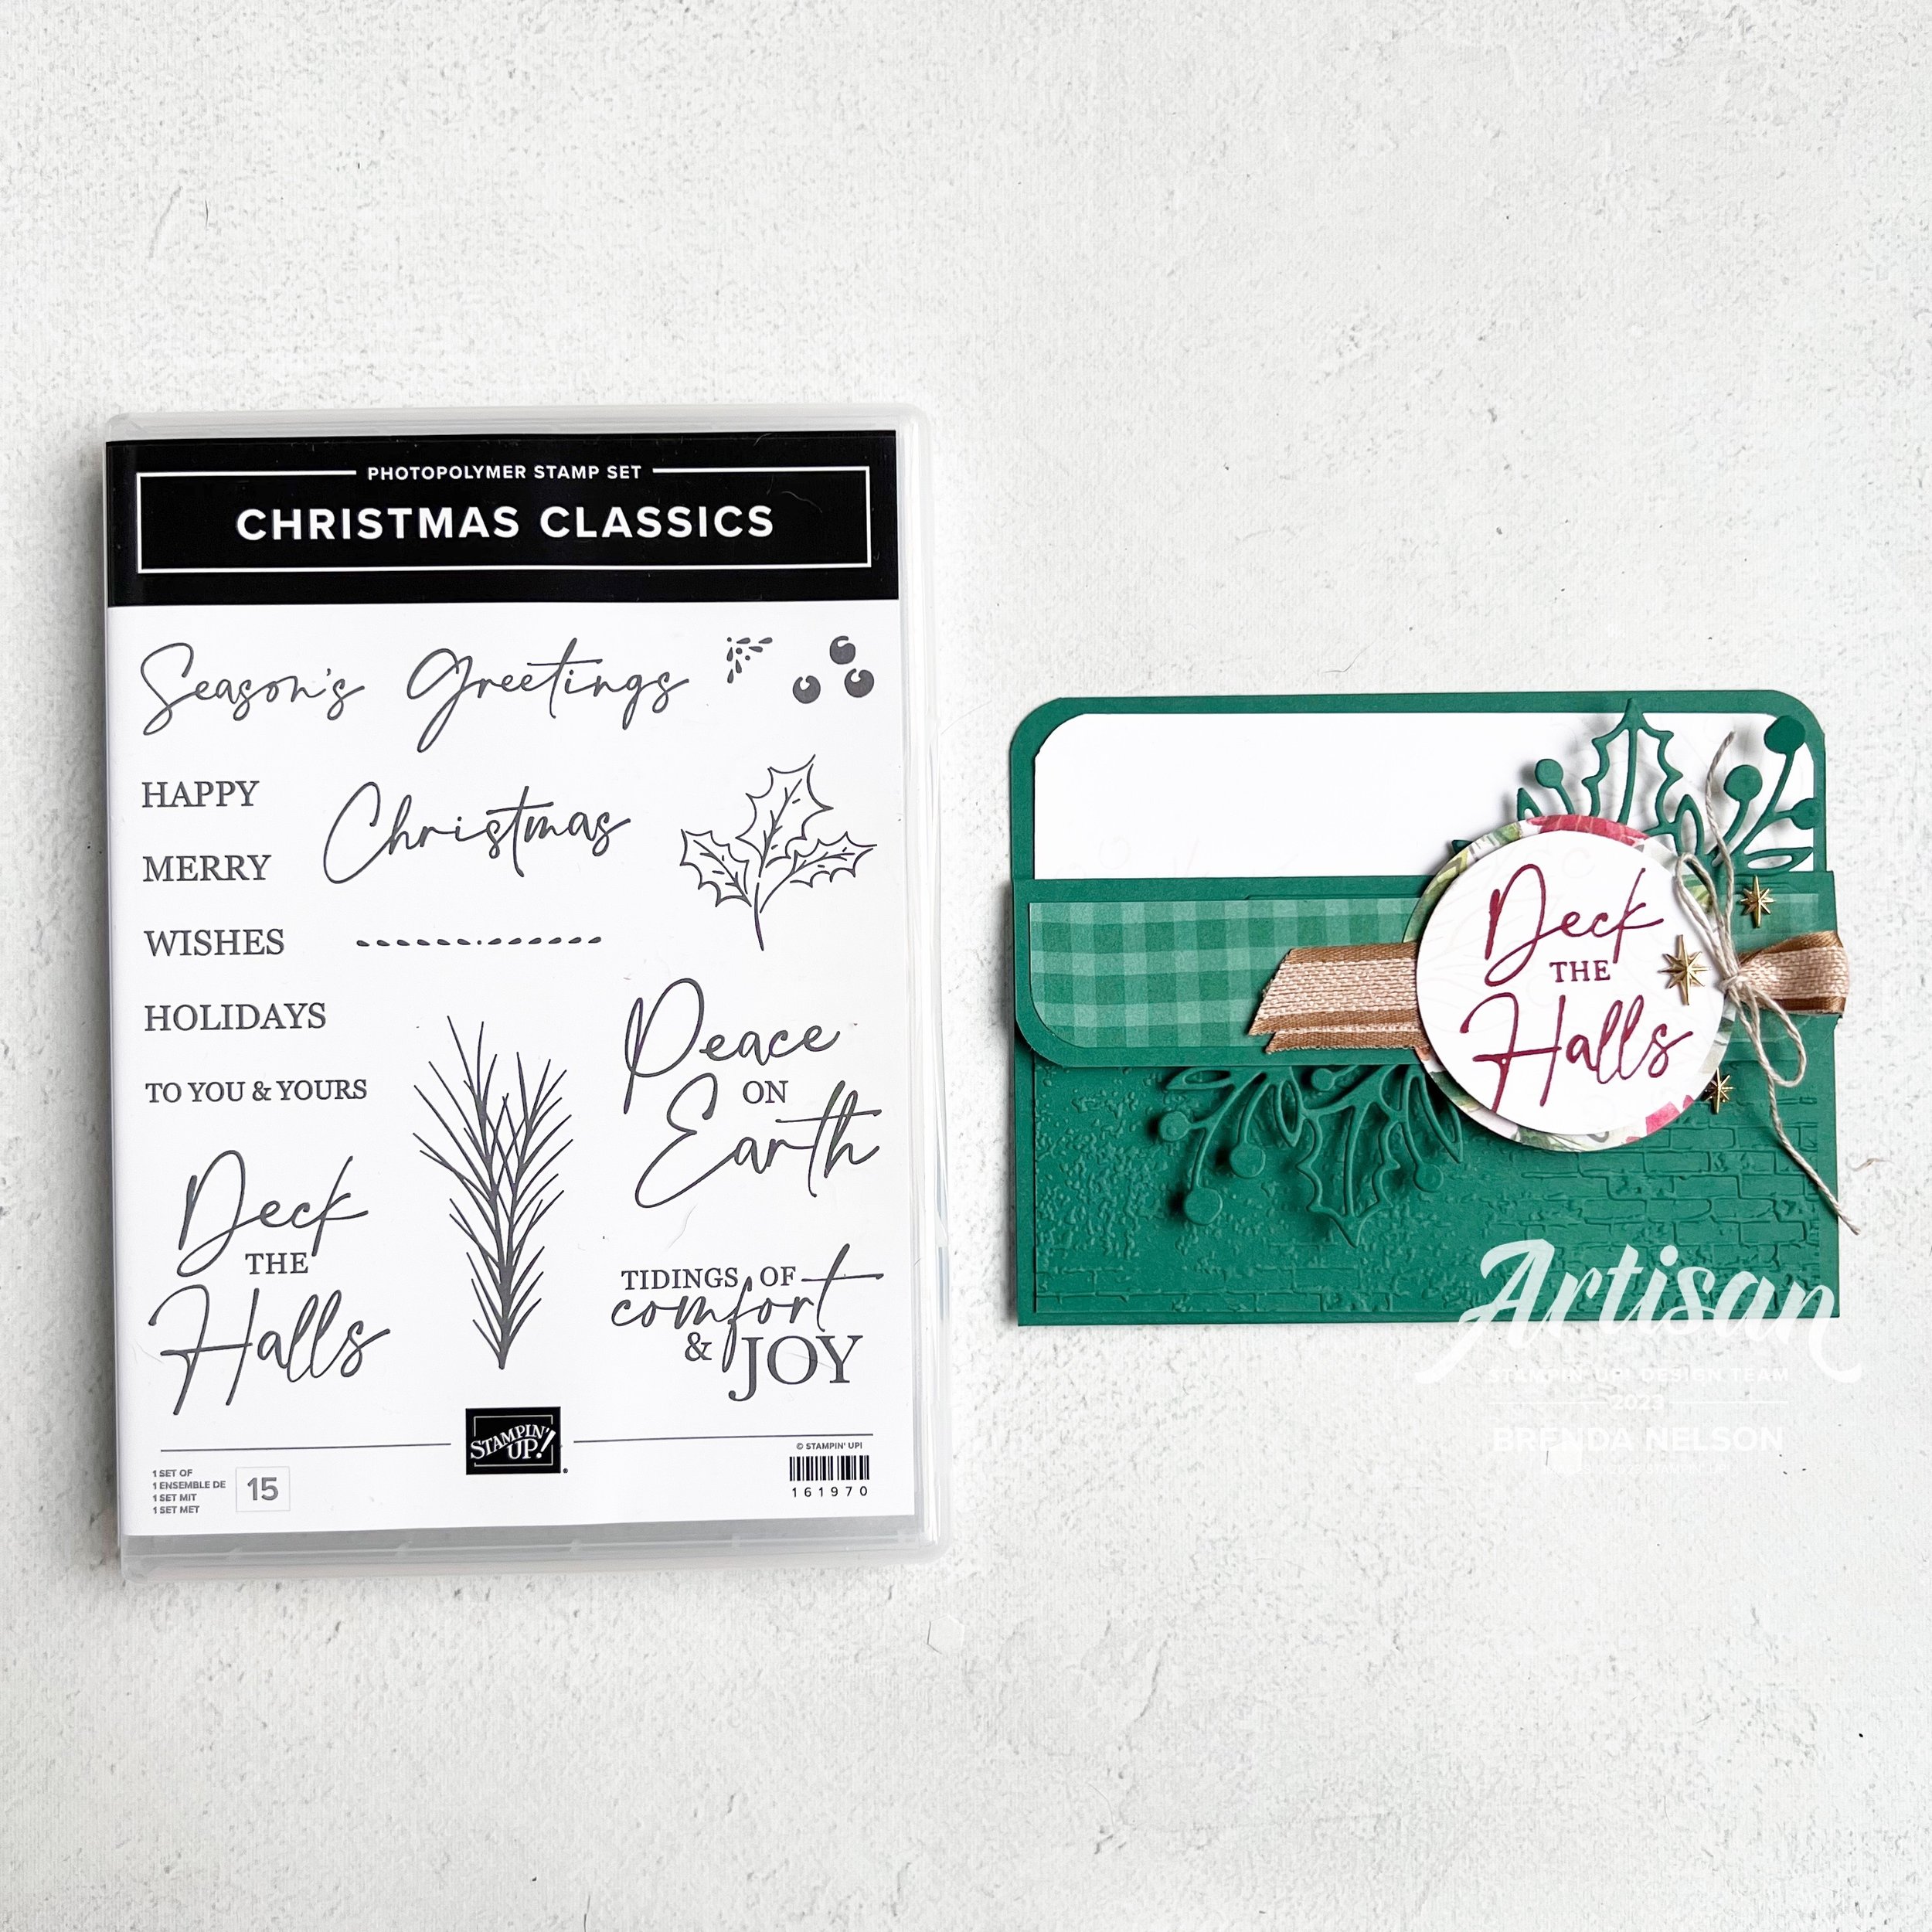
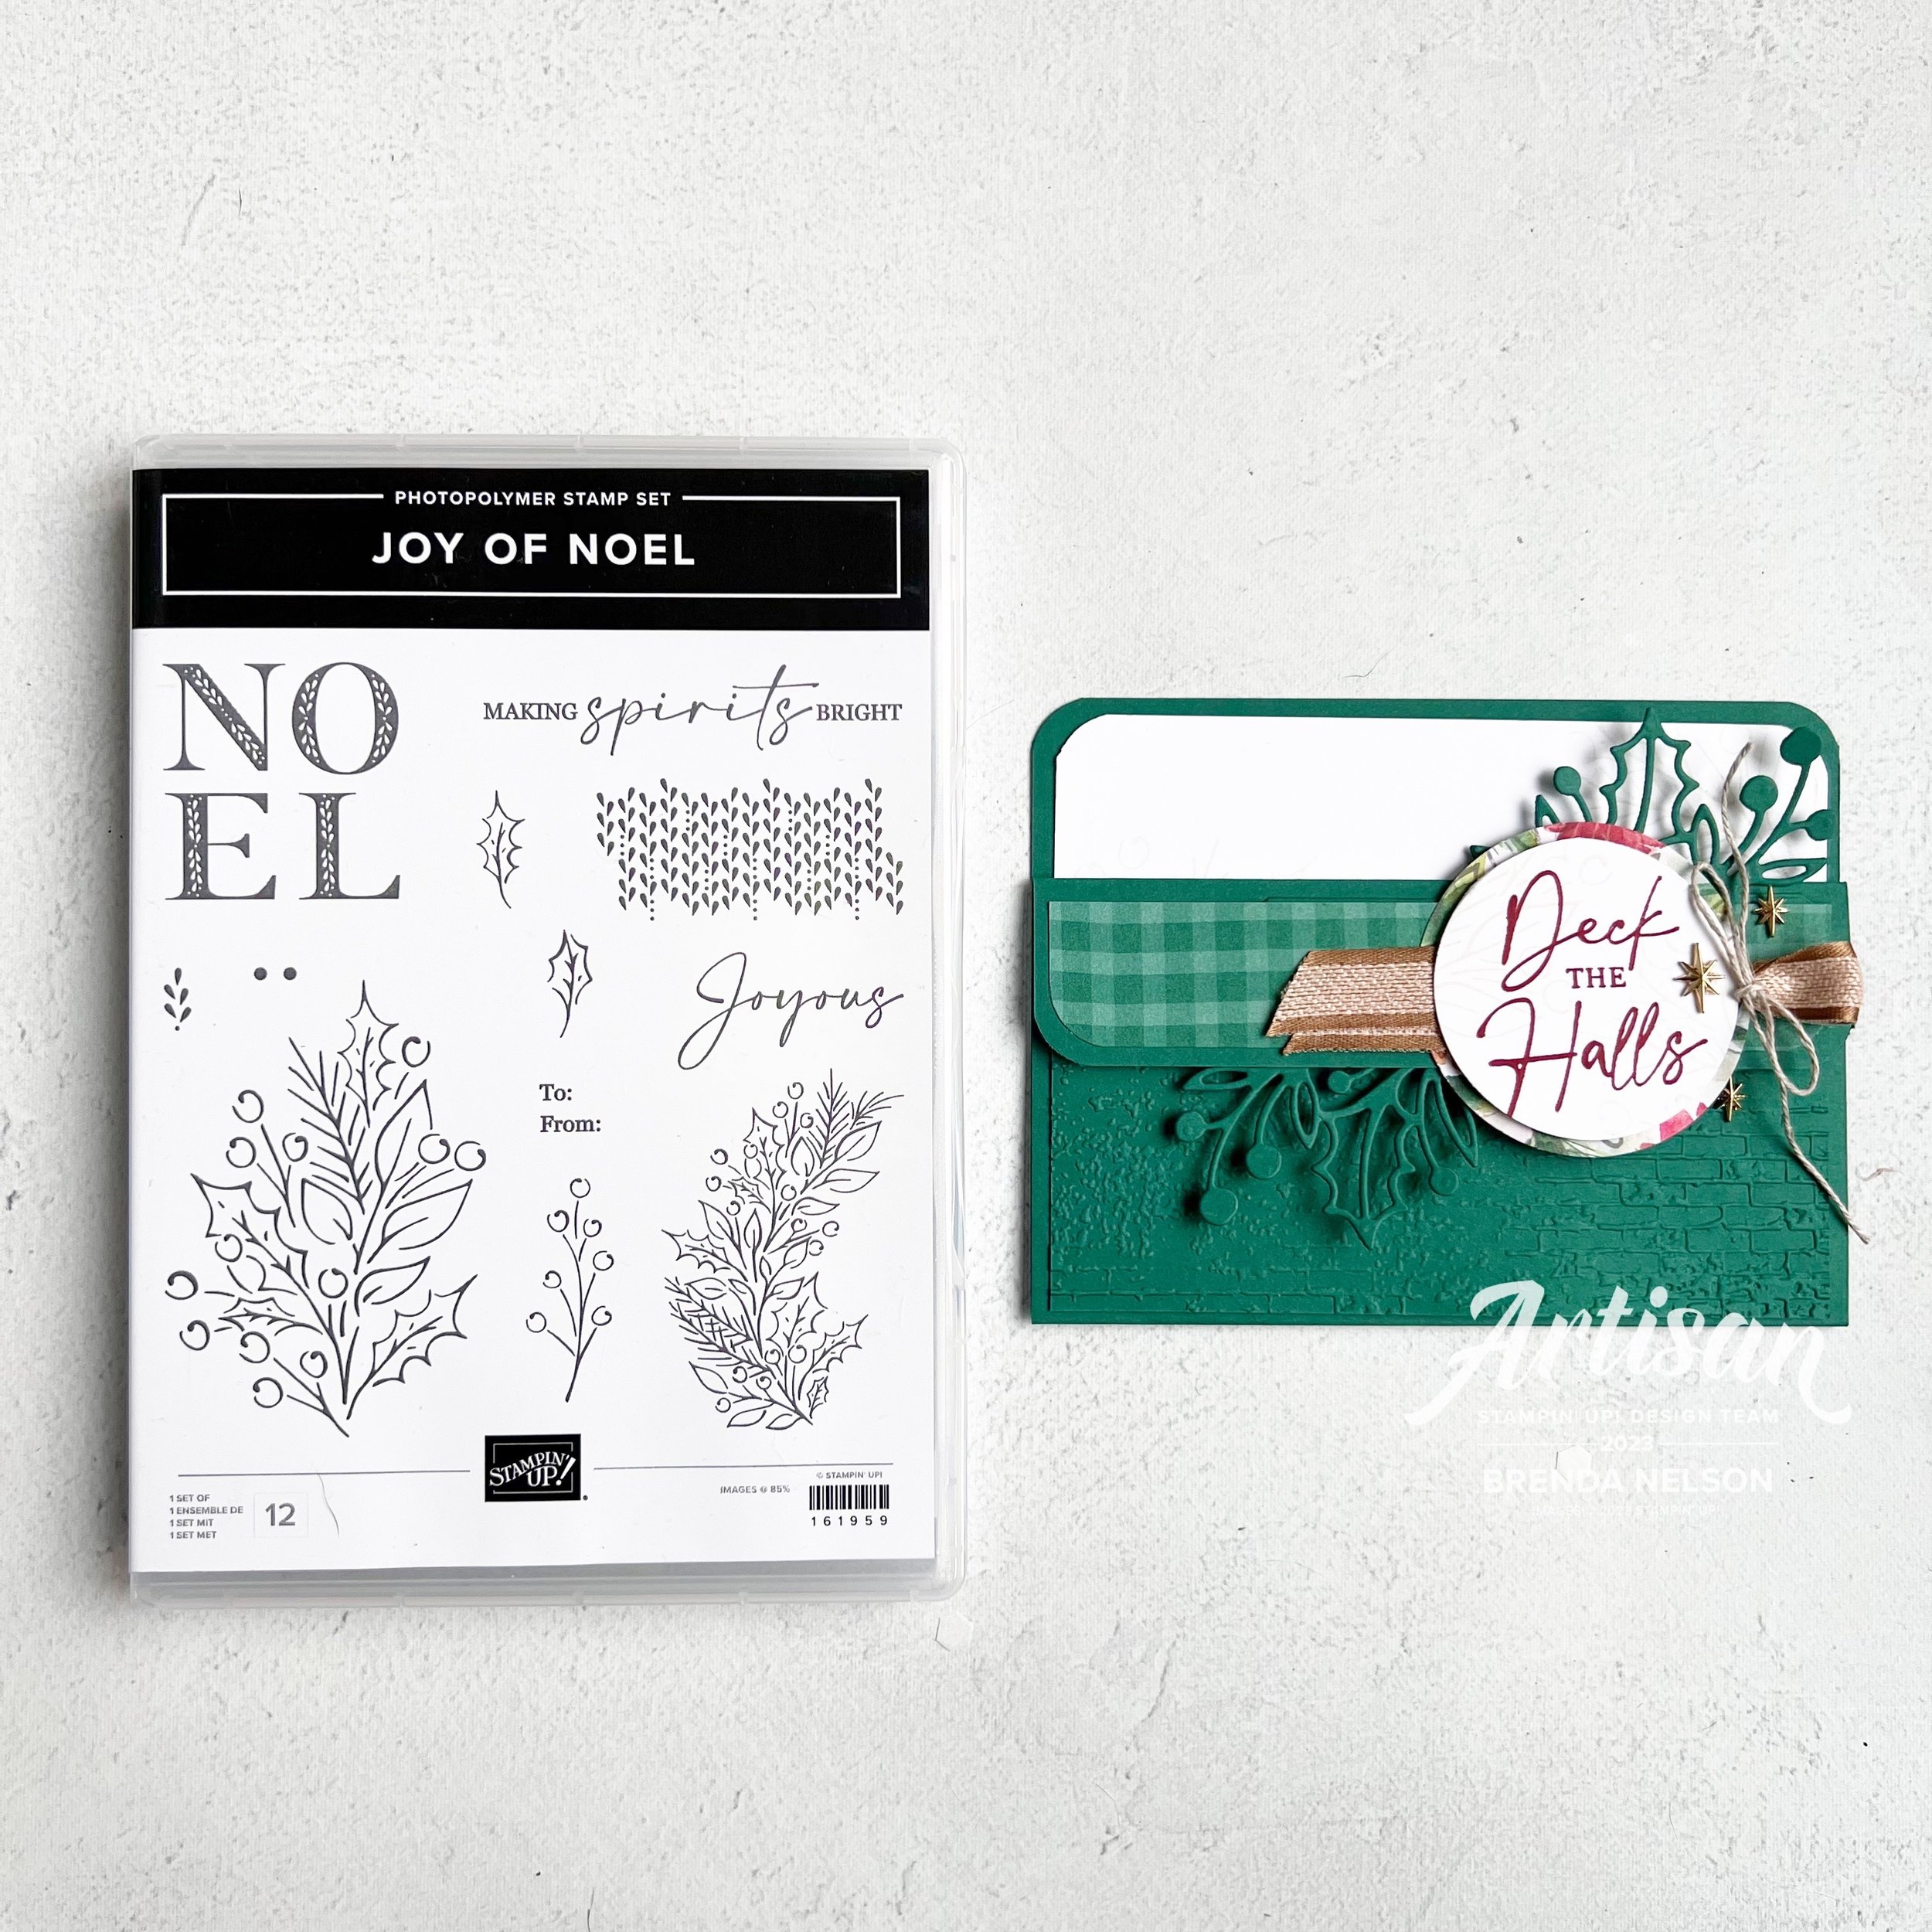
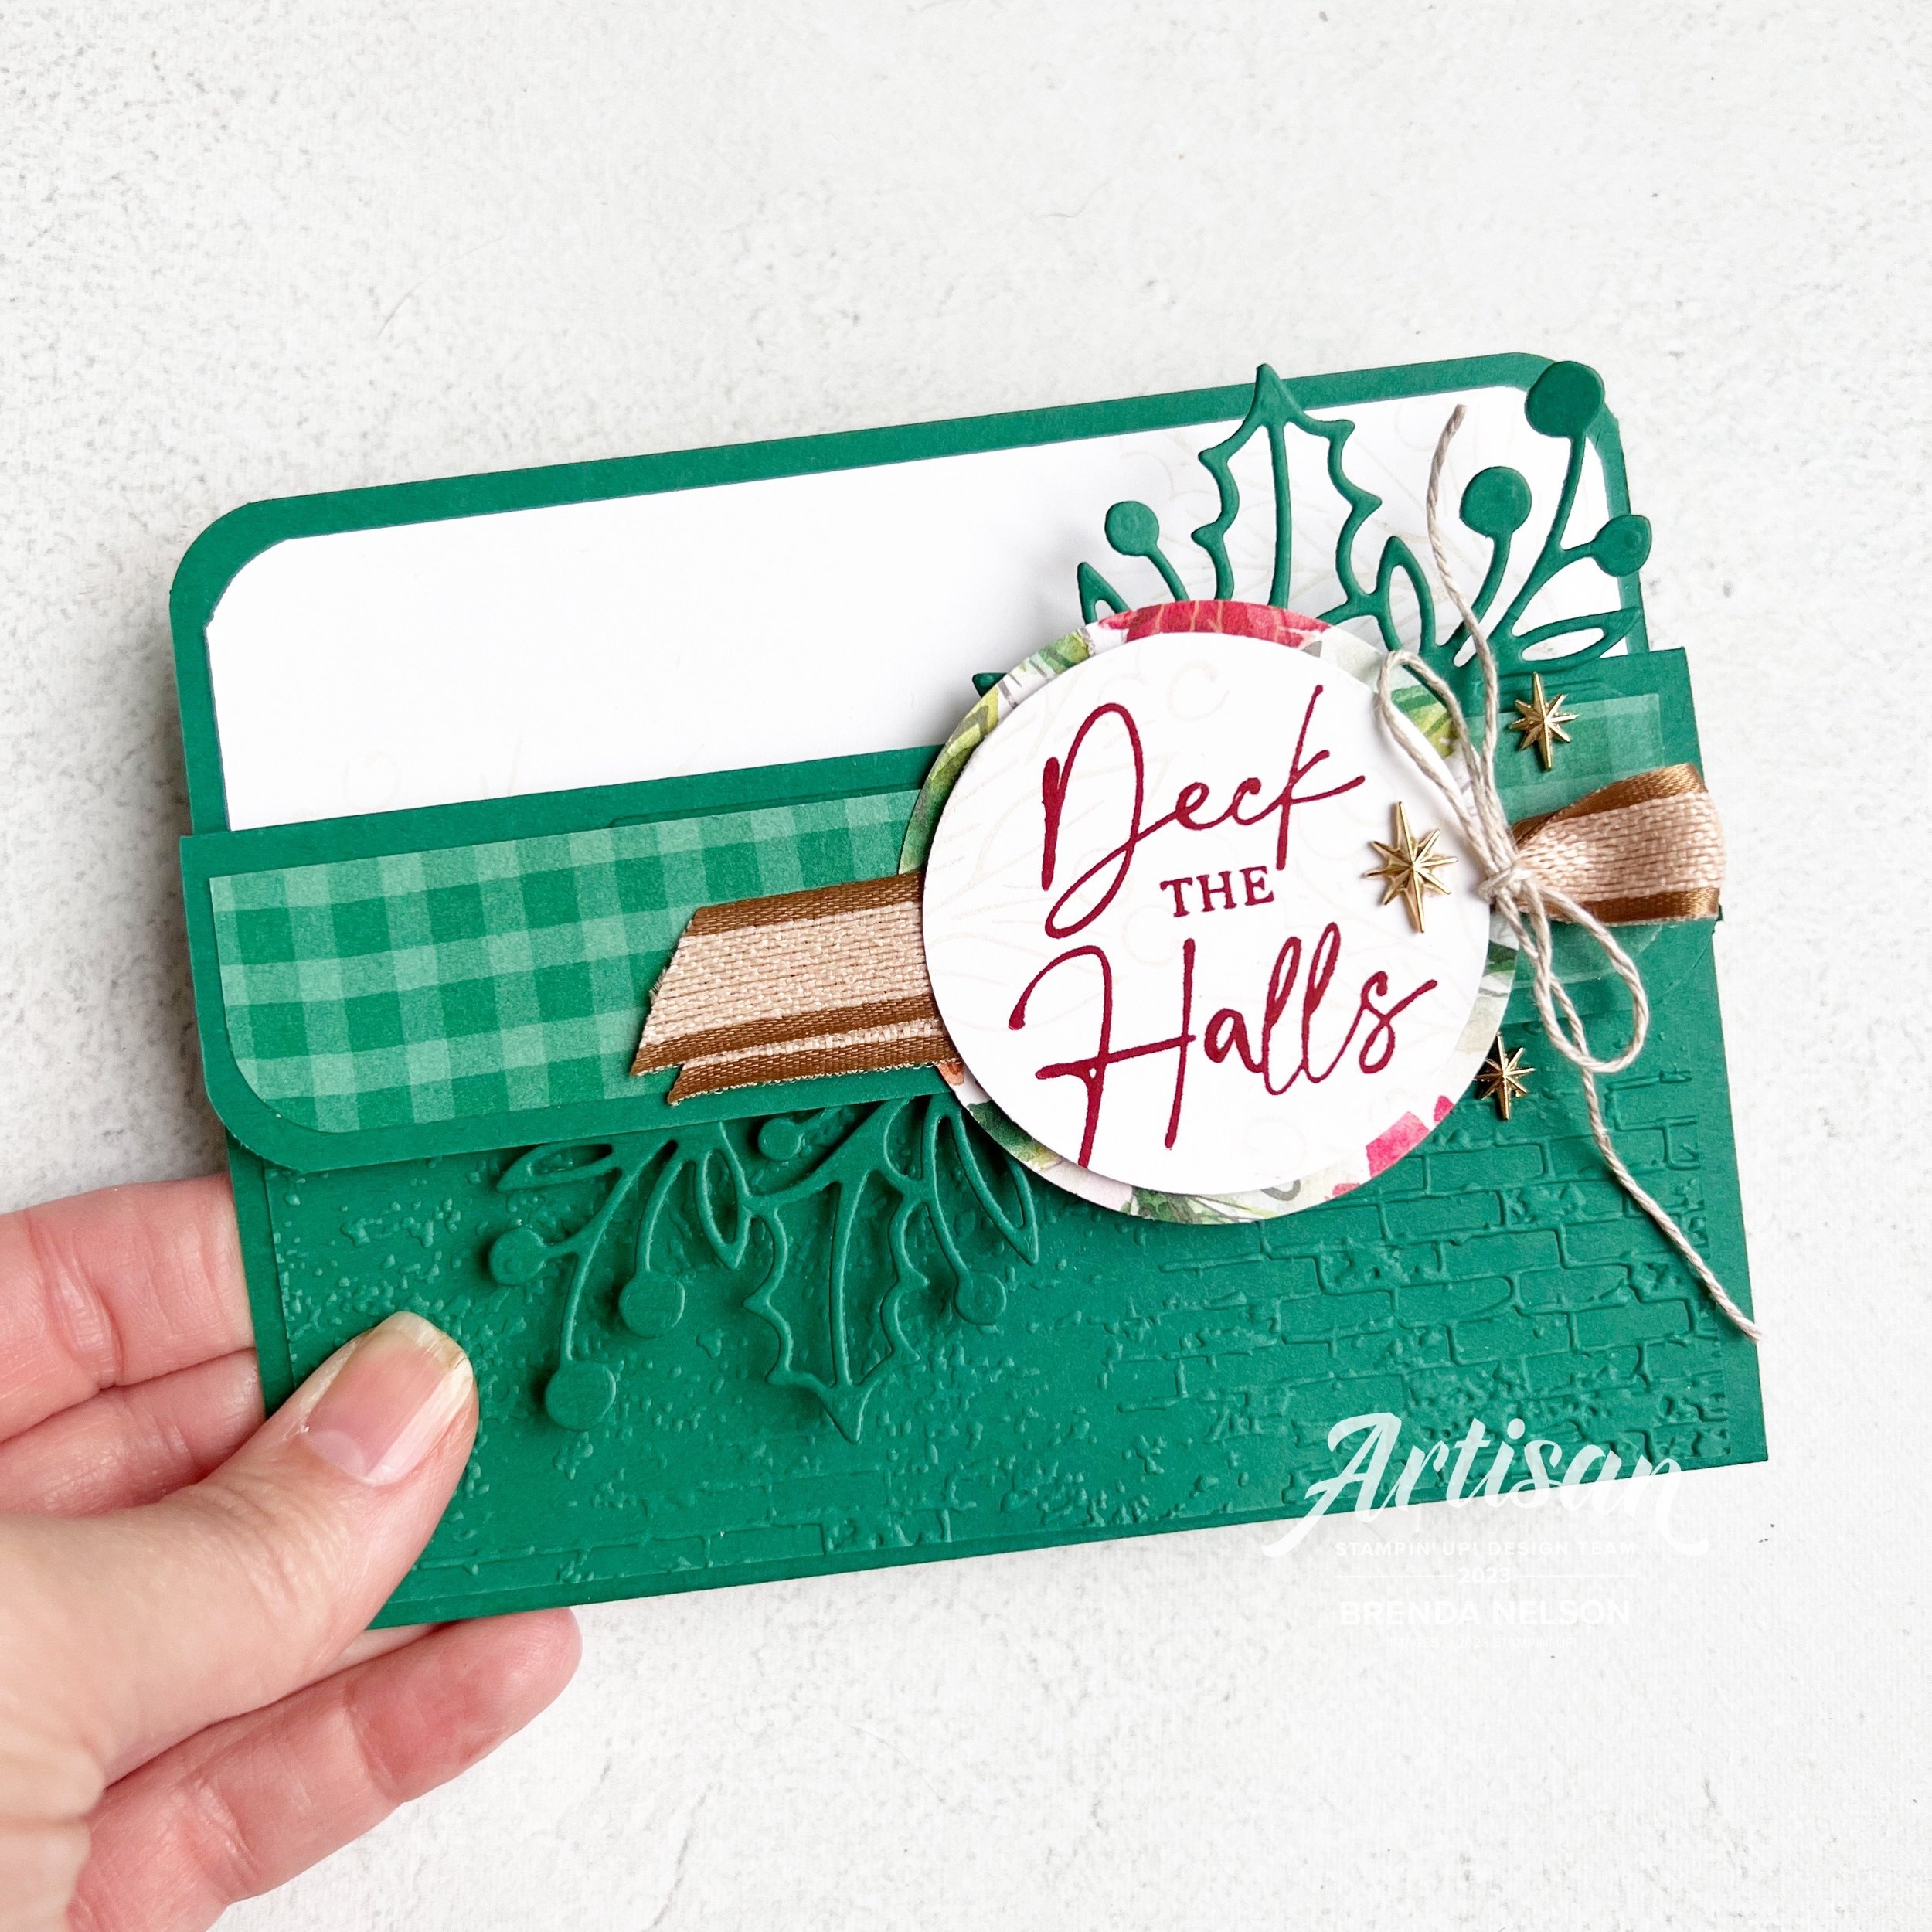
This project is a combo one that uses both of the stamp sets from the Joy of Christmas Suite collection!

I love how these bundles work together so that you can build off of each one of them and I do appreciate the traditional aspect of this suite. I knew I wanted to add the Shaded Spruce gingham pattern from the Joy of Christmas 12x12 paper so I decided to make the card base the same color.

This is a standard card that is scored at 4 1/4, and then you score one side at 1 1/4 to make the flap that folds down creating the ‘pocket’. I also rounded the pocket on the flap and base for a little extra touch.

I added a 2 1/4 x 5 1/4 layer of Shaded Spruce that I ran through the Exposed Brick 3D folder in the annual catalogue—if you do not have this folder you need #addtocart now as its awesome and works with SO MANY things!

Both the Joy of Noel and the Christmas Classics stamp sets are a part of a bundle and the Christmas Classics dies have all the labels and some greenery, while the Joy of Noel dies of the word ‘Noel’ and some larger greenery. I am going to say that you will just need them both, hahaha!

The fun part of this card for me is the greenery that you see emerging from the top and bottom of this fold. I die cut this shape, which is really designed to be a label with the greenery and I cut it in half!


I then tucked this greenery under the DSP on the right and under the flap more in the middle leftish.

I sealed the card with 2 staples that you don’t see, to make the pocket. The I sealed the flap down with some Dimensionls.

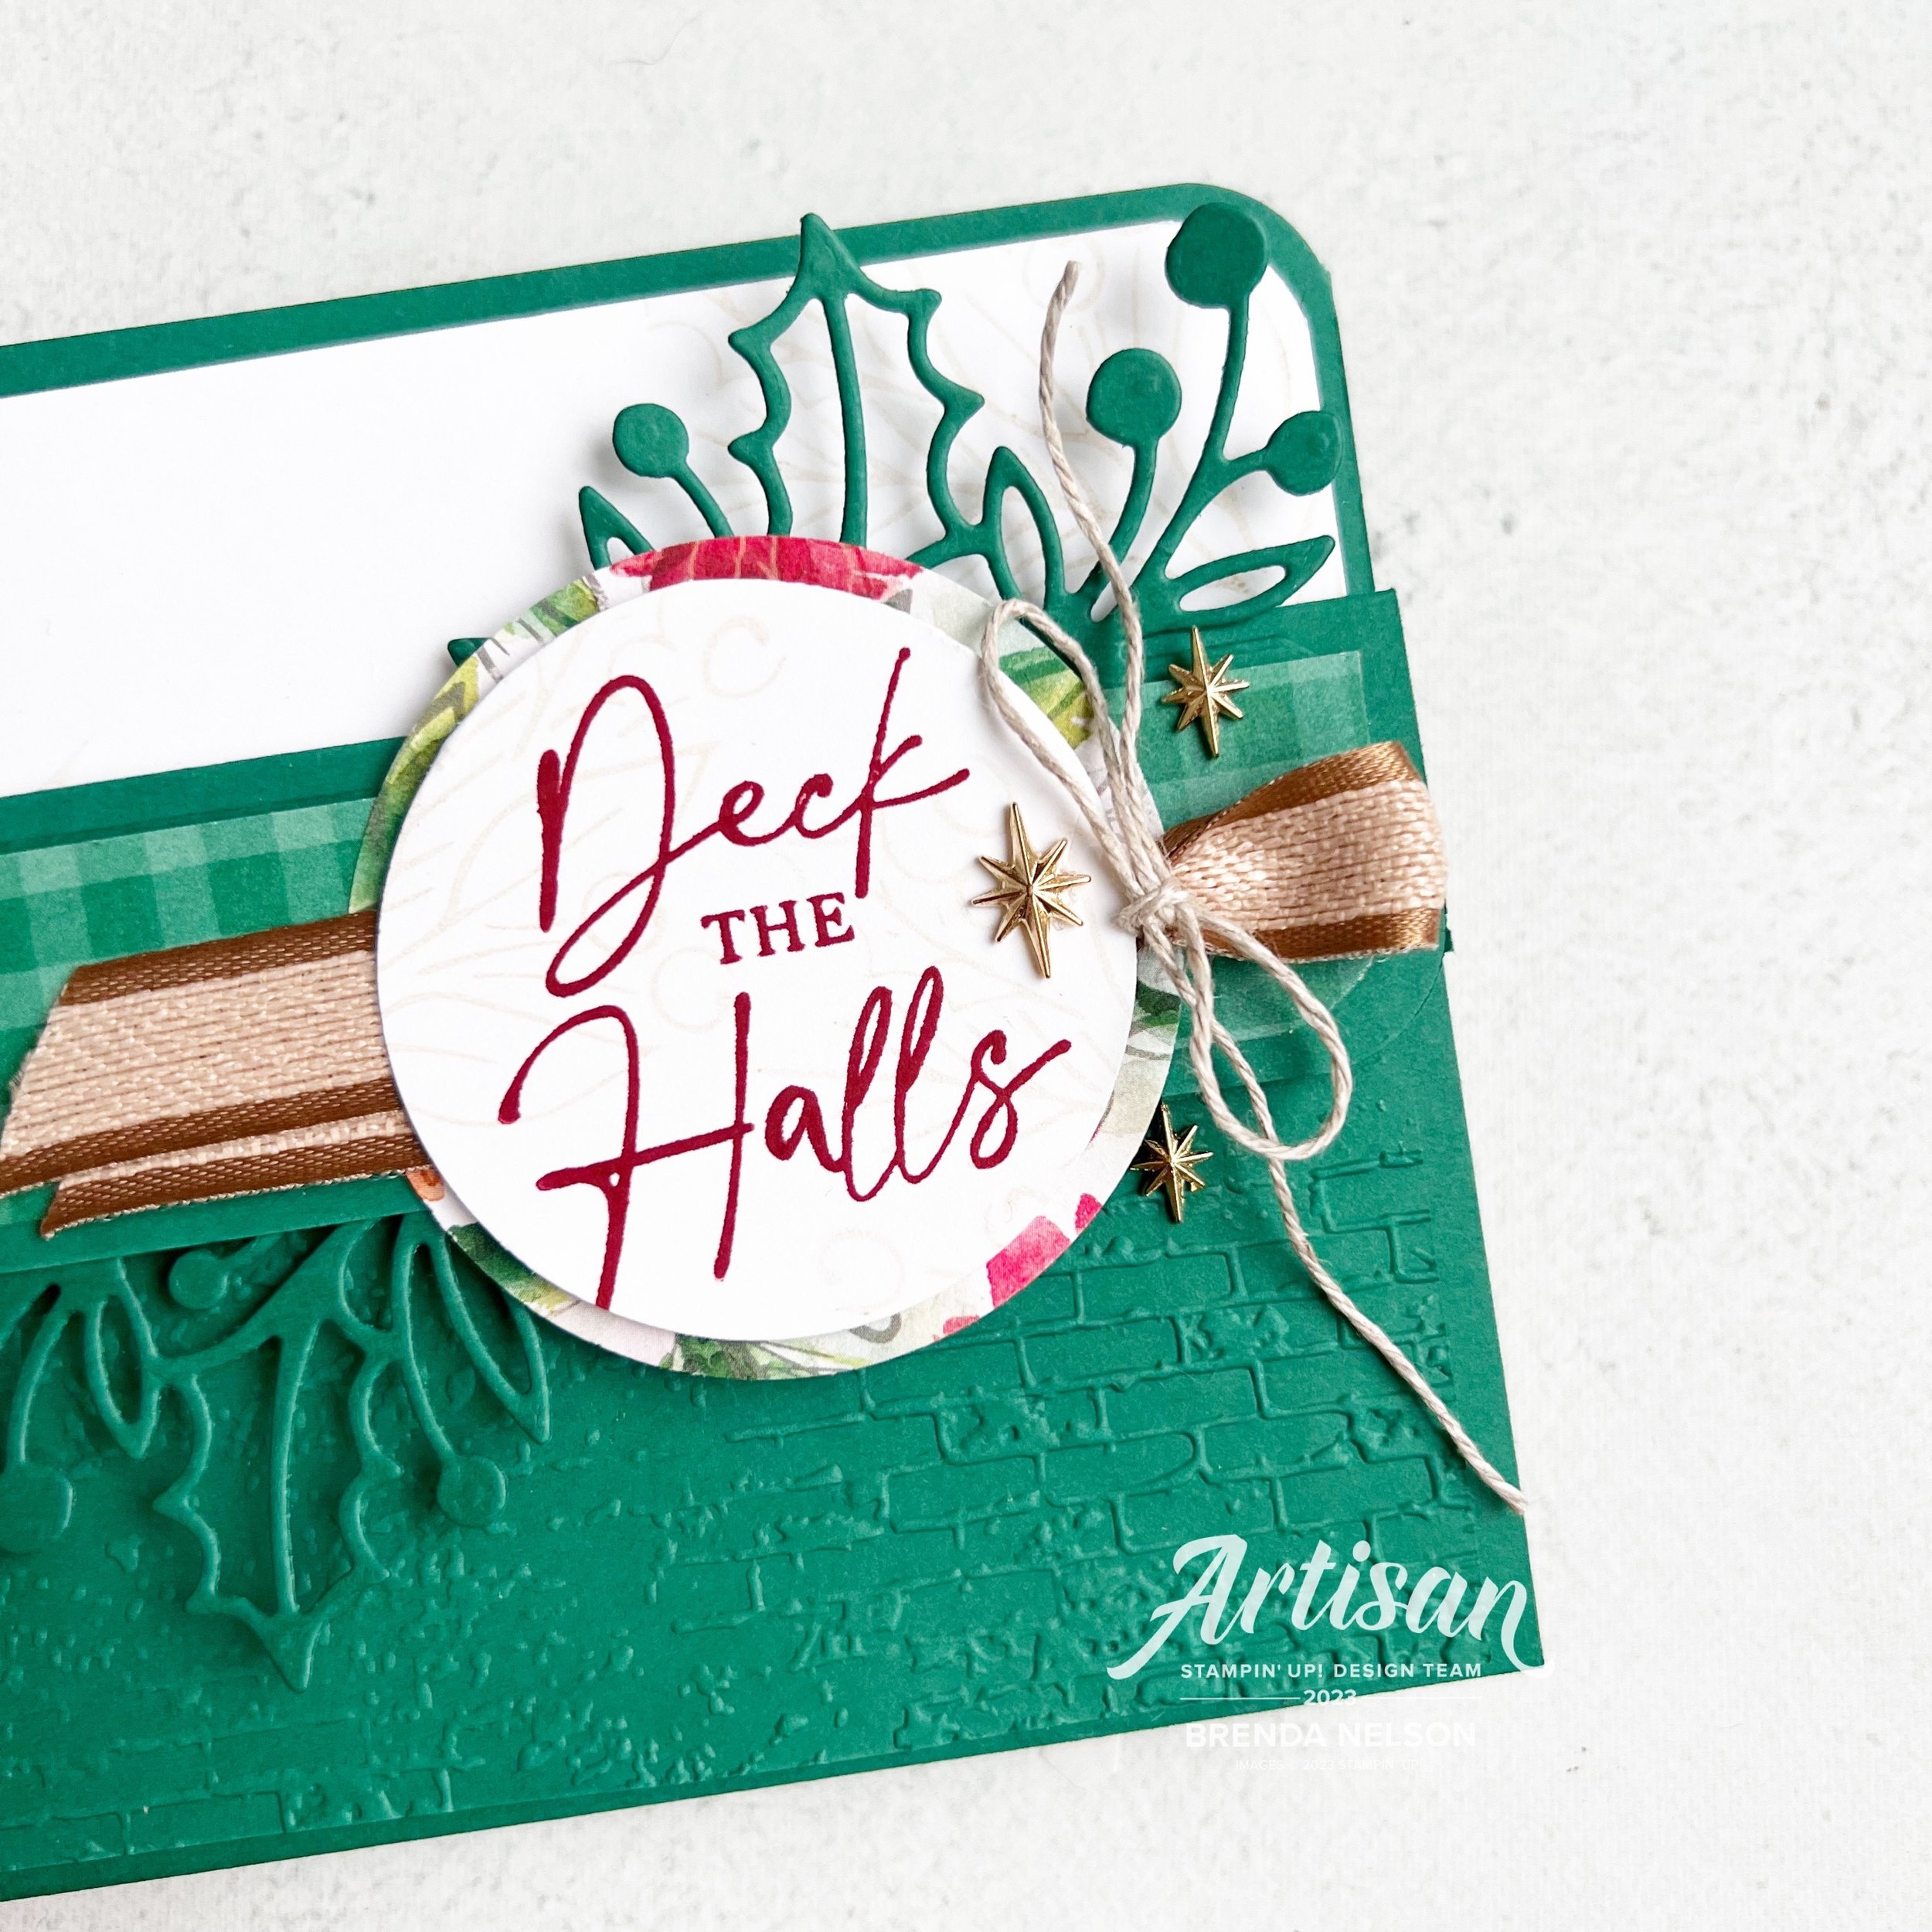
Sometimes to keep the card closed I will use twine or ribbon. However, this time I wanted the Pecan Pie ribbon to be more of an accent in between the layers of my sentiment.

The sentiment is stamped in Cherry Cobbler and then I used one of the large images from the Joy of Noel set to stamp some imagery behind the sentiment. I used Crumb Cake ink that I stamped off on my scratch paper (or grid paper) so that it would be faint. I added the sentiment onto of a 2 1/4 inch circle of DSP to bring in a few color just peeking from the outside ring.

Lastly I added some embellishments, Adhesive-Backed Star Trinkets, from the O Holy Night suite. I thought they were a more unique touch to this project than just a gold sequin or such.

I am really really pleased with how this card turned out and I will no doubt be sharing it at my upcoming ‘Joy of Christmas’ Virtual Stamp Camp/Retreat.

Joy of Christmas Stamp Camp —co hosted with Tricia Schaelow from @stampint—if you are not following her, please do!

When: Saturday, Oct 21 at 10:30 am on Zoom (which is awesome as anyone from Canada can join in the fun with us)

Fun Stuff: The stamp camp is $75 and includes everything you see below —Joy of Noel stamp set, full roll of Black & Very Vanilla ribbon, and half a pkg of the Joy of Christmas 12x12 paper PLUS a special guest demonstration from my friend Julie @thepaperhaven and 6-8 make’n takes! These won’t be your ordinary make’n takes either—they will be a mix of 3D, holiday decor and cards!

Registration closes on Sept 30th for this event and your kit can be shipped anywhere in Canada at your expense! Please reach out if you are interested in registering (one of these days I will figure out how to take payment through Squarespace!)

I have one more project to share with you tomorrow as a part of my ‘Creative Convention’ weeklong extravaganza! I hope you will come back and please feel free to leave any comments!

Creative Convention--Day 5!

5 awesome days of inspiration! Yippee! I hope you have been following along so far, if this is your first visit, make sure you go back to see what you have missed. I away in Las Vegas this week with some of my Stampin’ friends for Backstage—a leadership conference SO I thought I should have my own little Creative Convention by sharing a full week of projects with you!

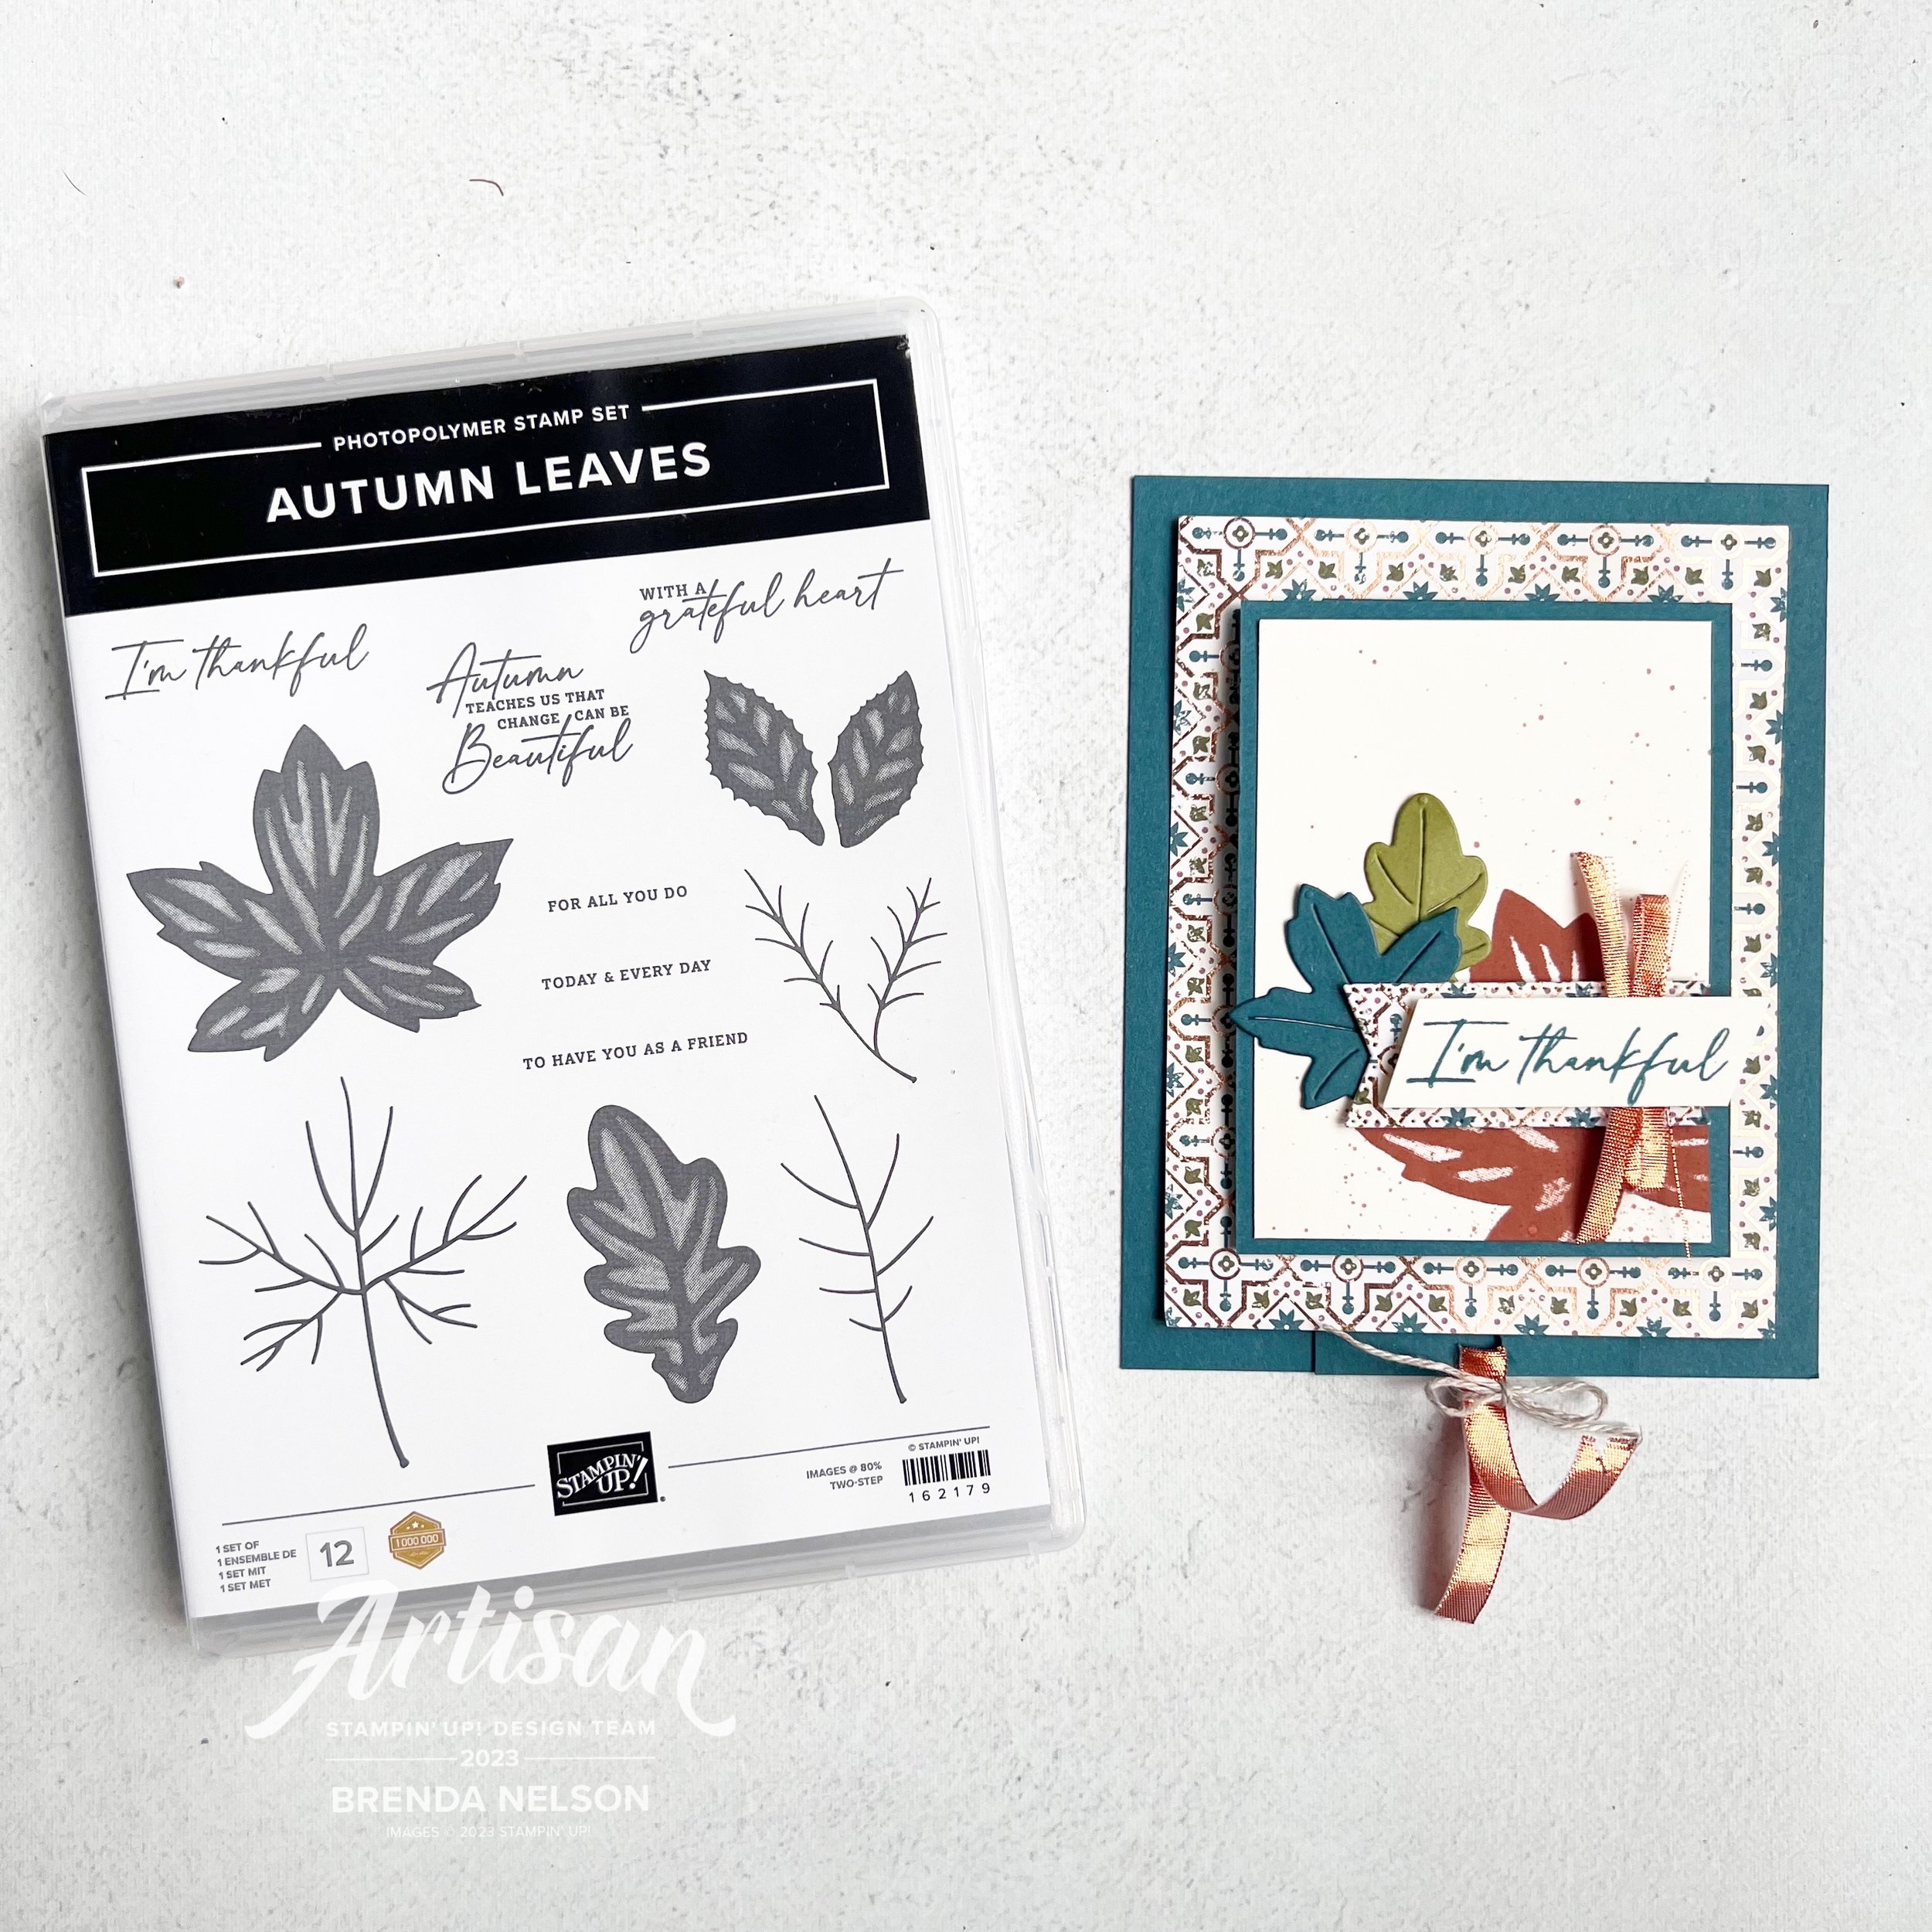
I couldn’t resist making another project with the Autumn Leaves Bundle. Fall is beautiful here in Edmonton, but sometimes it doesn’t last that long and winter comes too quick. So I will take all the opportunity to create fall projects while I can!
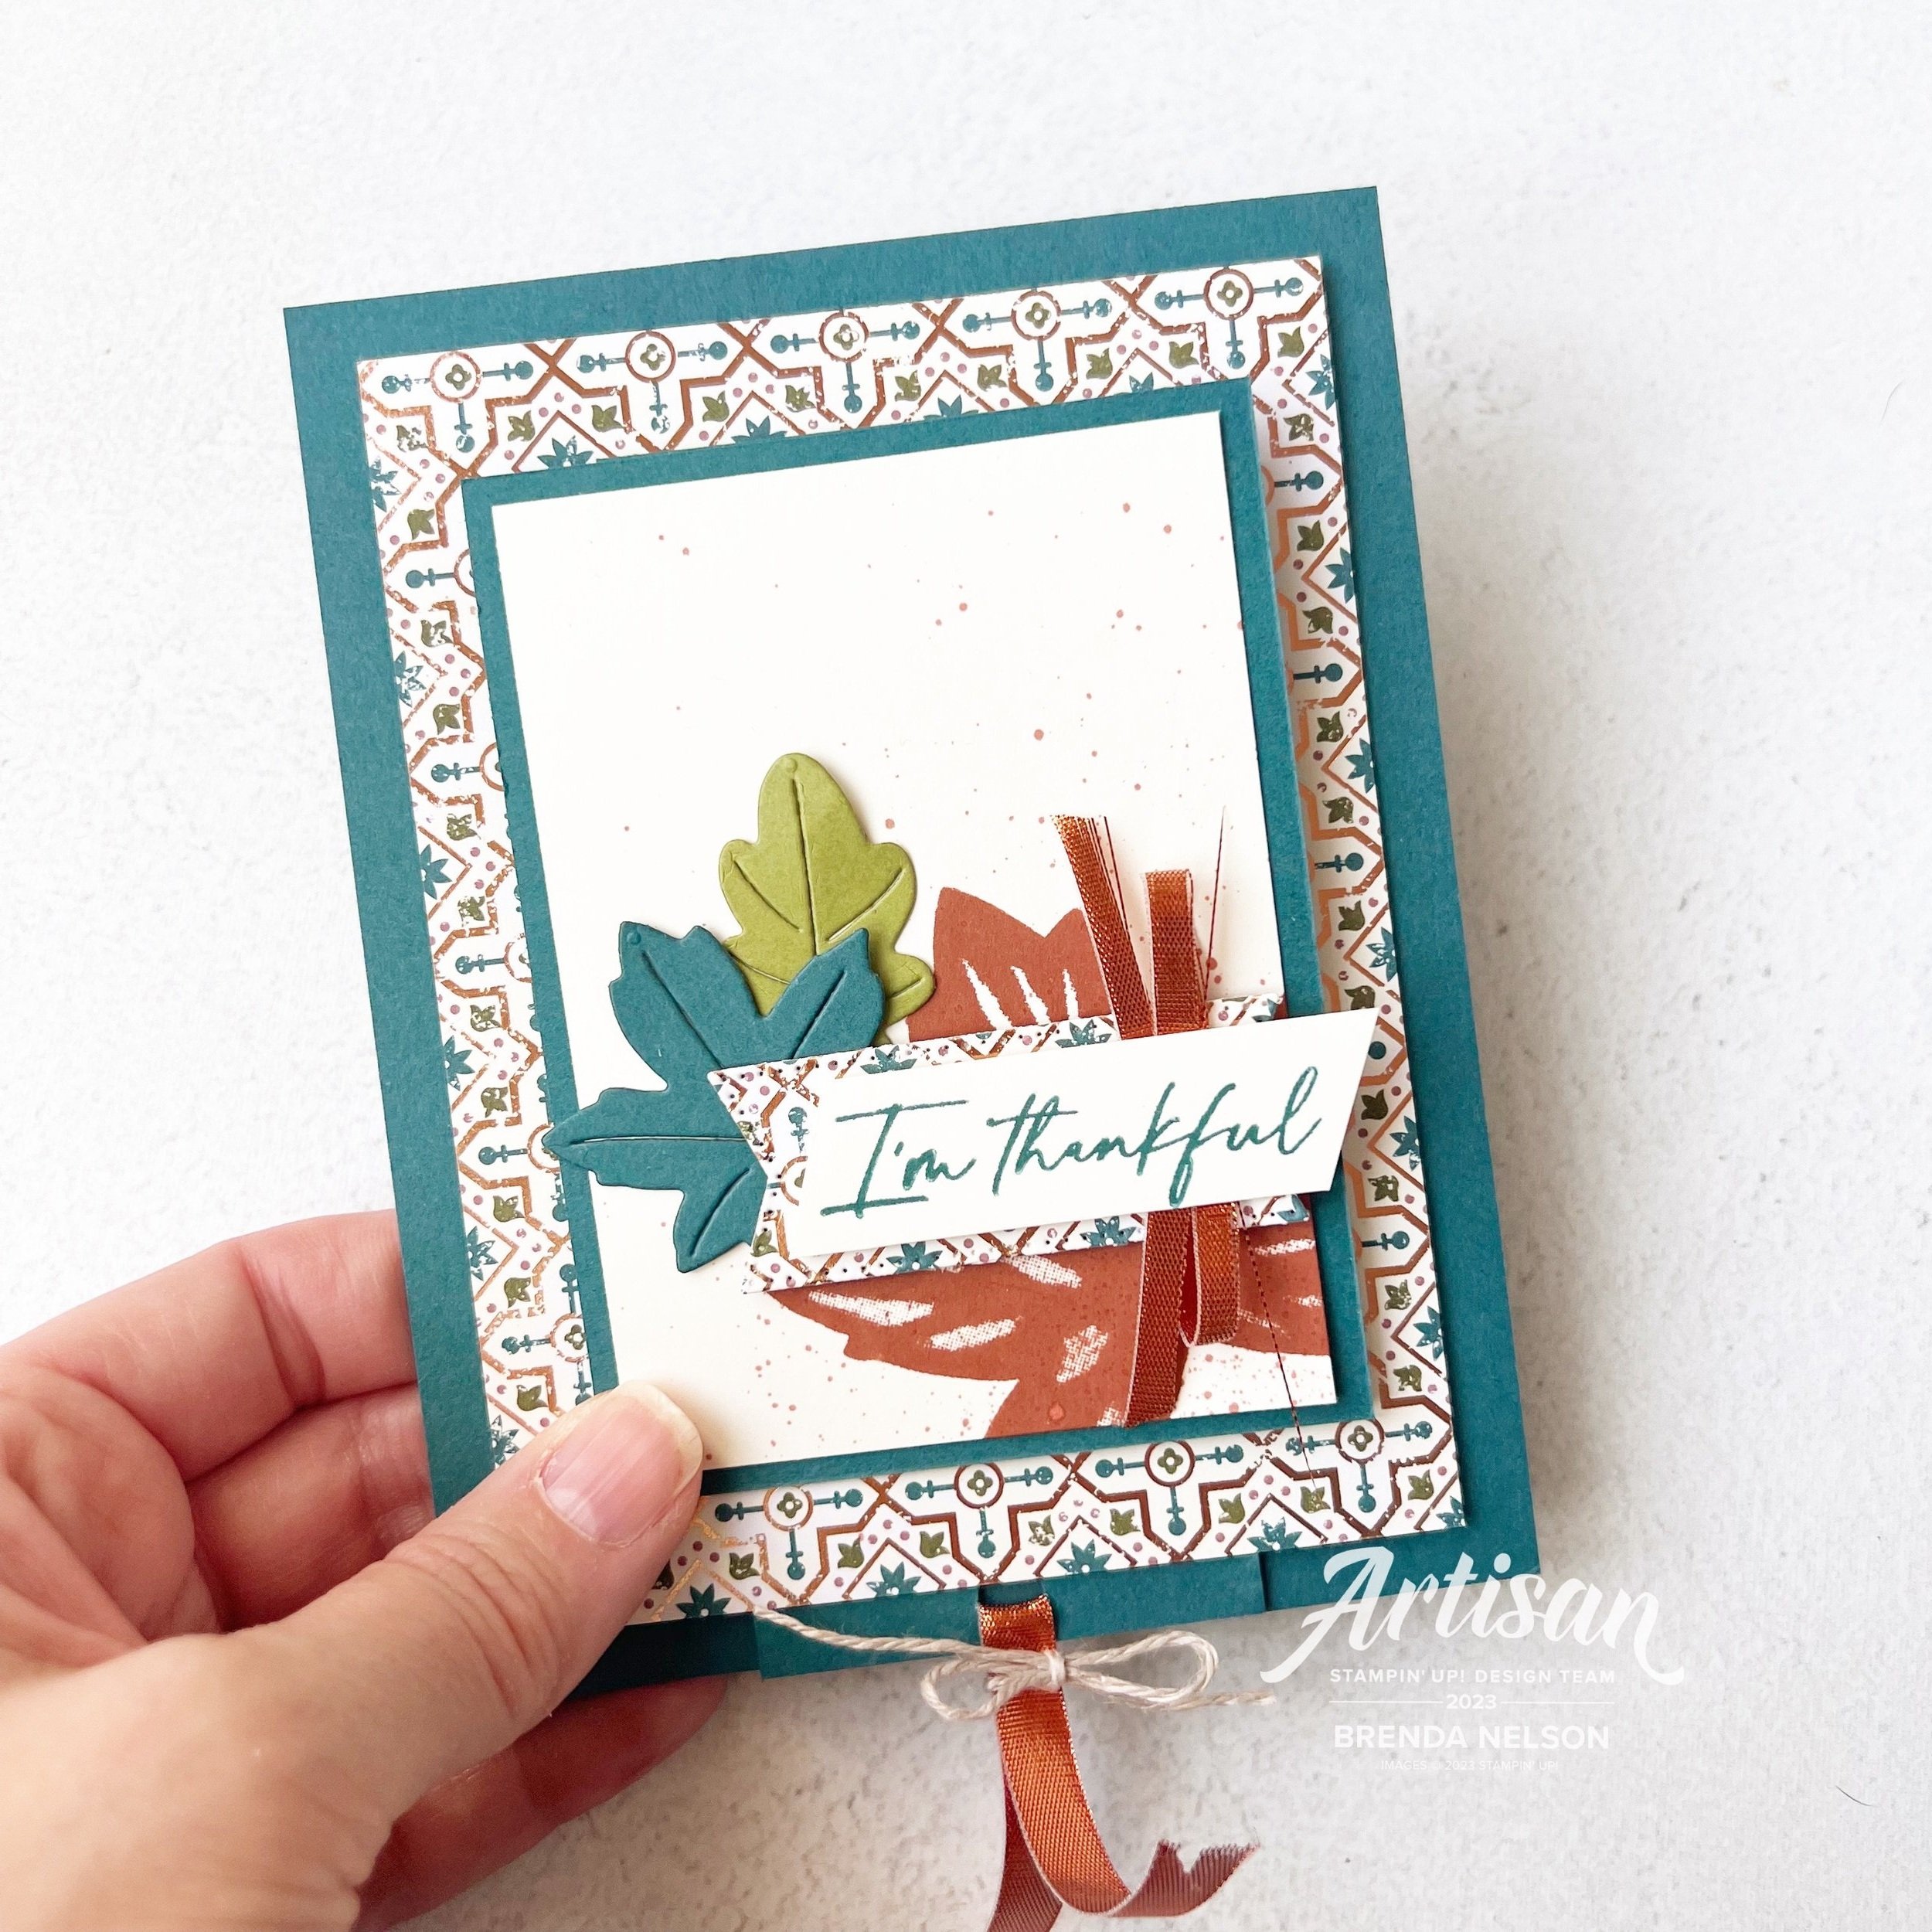
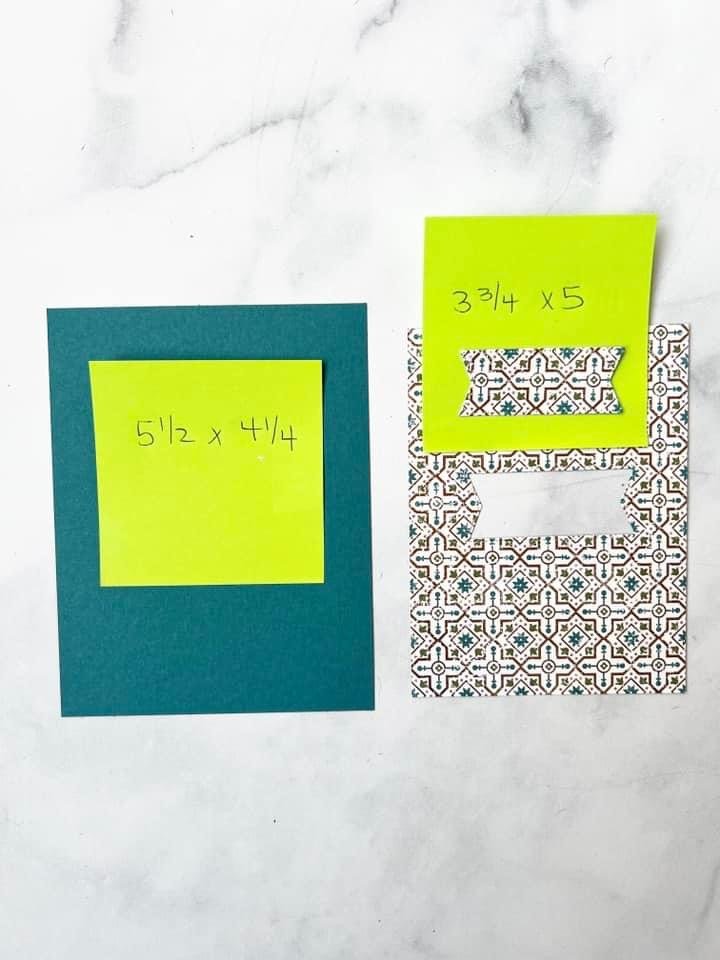
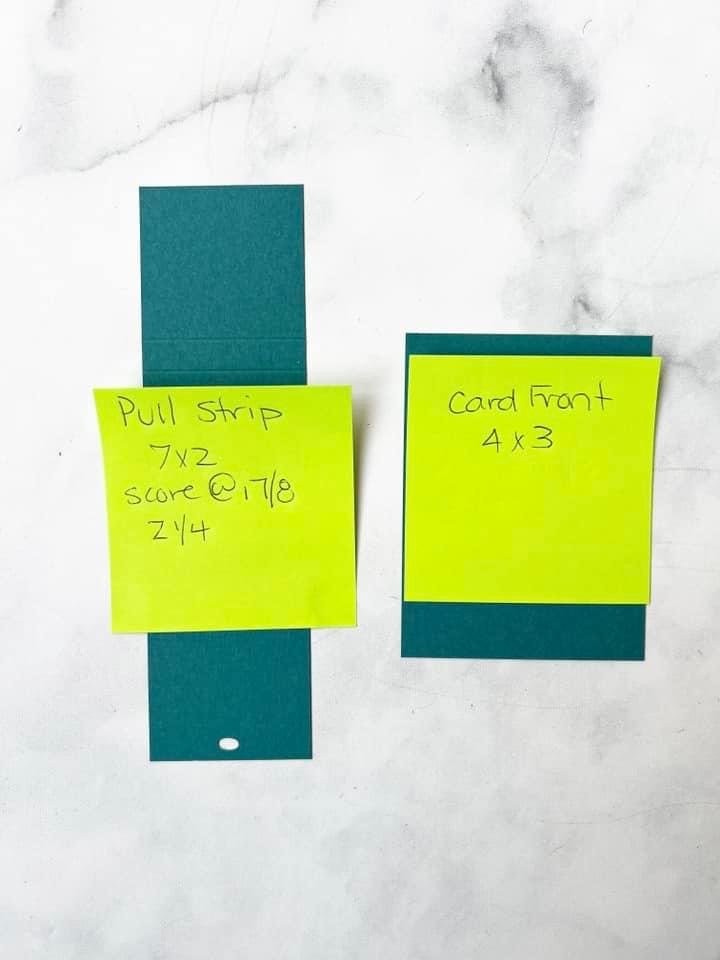
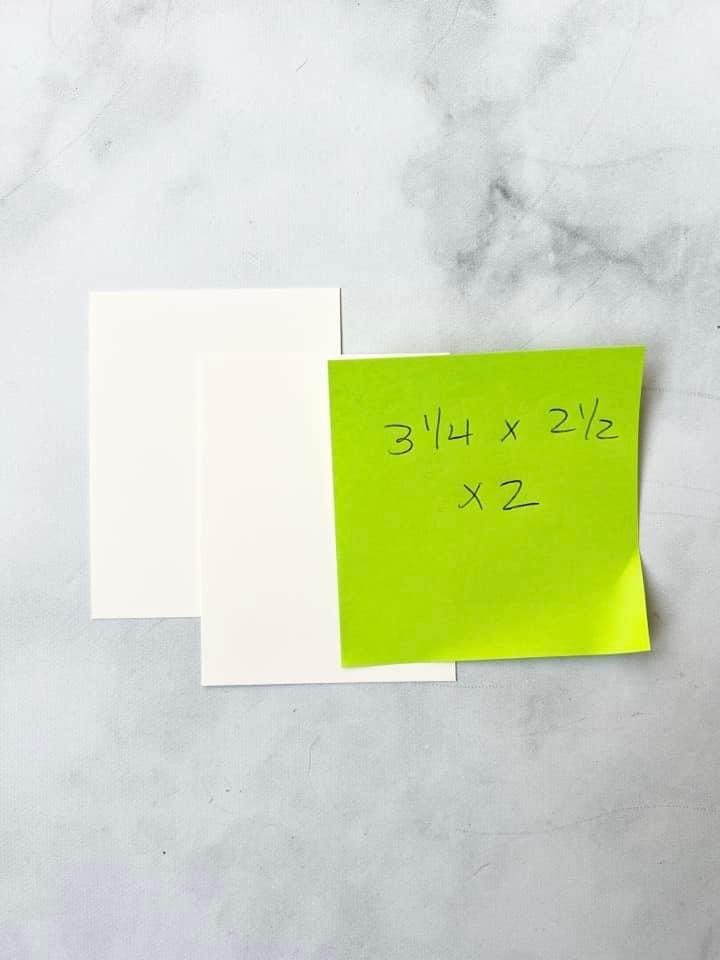
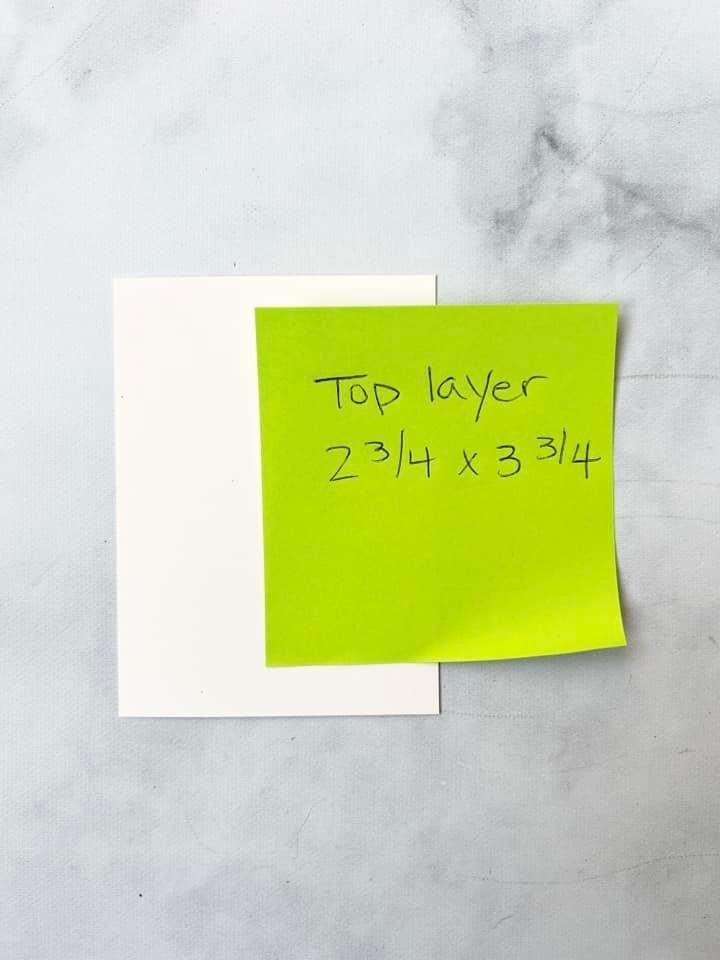
Earlier this month I had a Team meeting and I have been trying to share fun or unique folds with my team. Now I do not have the brain power to create these folds myself which is why I am so grateful for this amazing Stampin’ community we have. I found this ‘Pull Tab’ card on Instagram by @stampinjill (go give her a follow if you aren’t) and I went to her blog for all of the measurements and instructions on how to make this card. Here are the measurements I shared with my team (I have the pictures so why not share!)

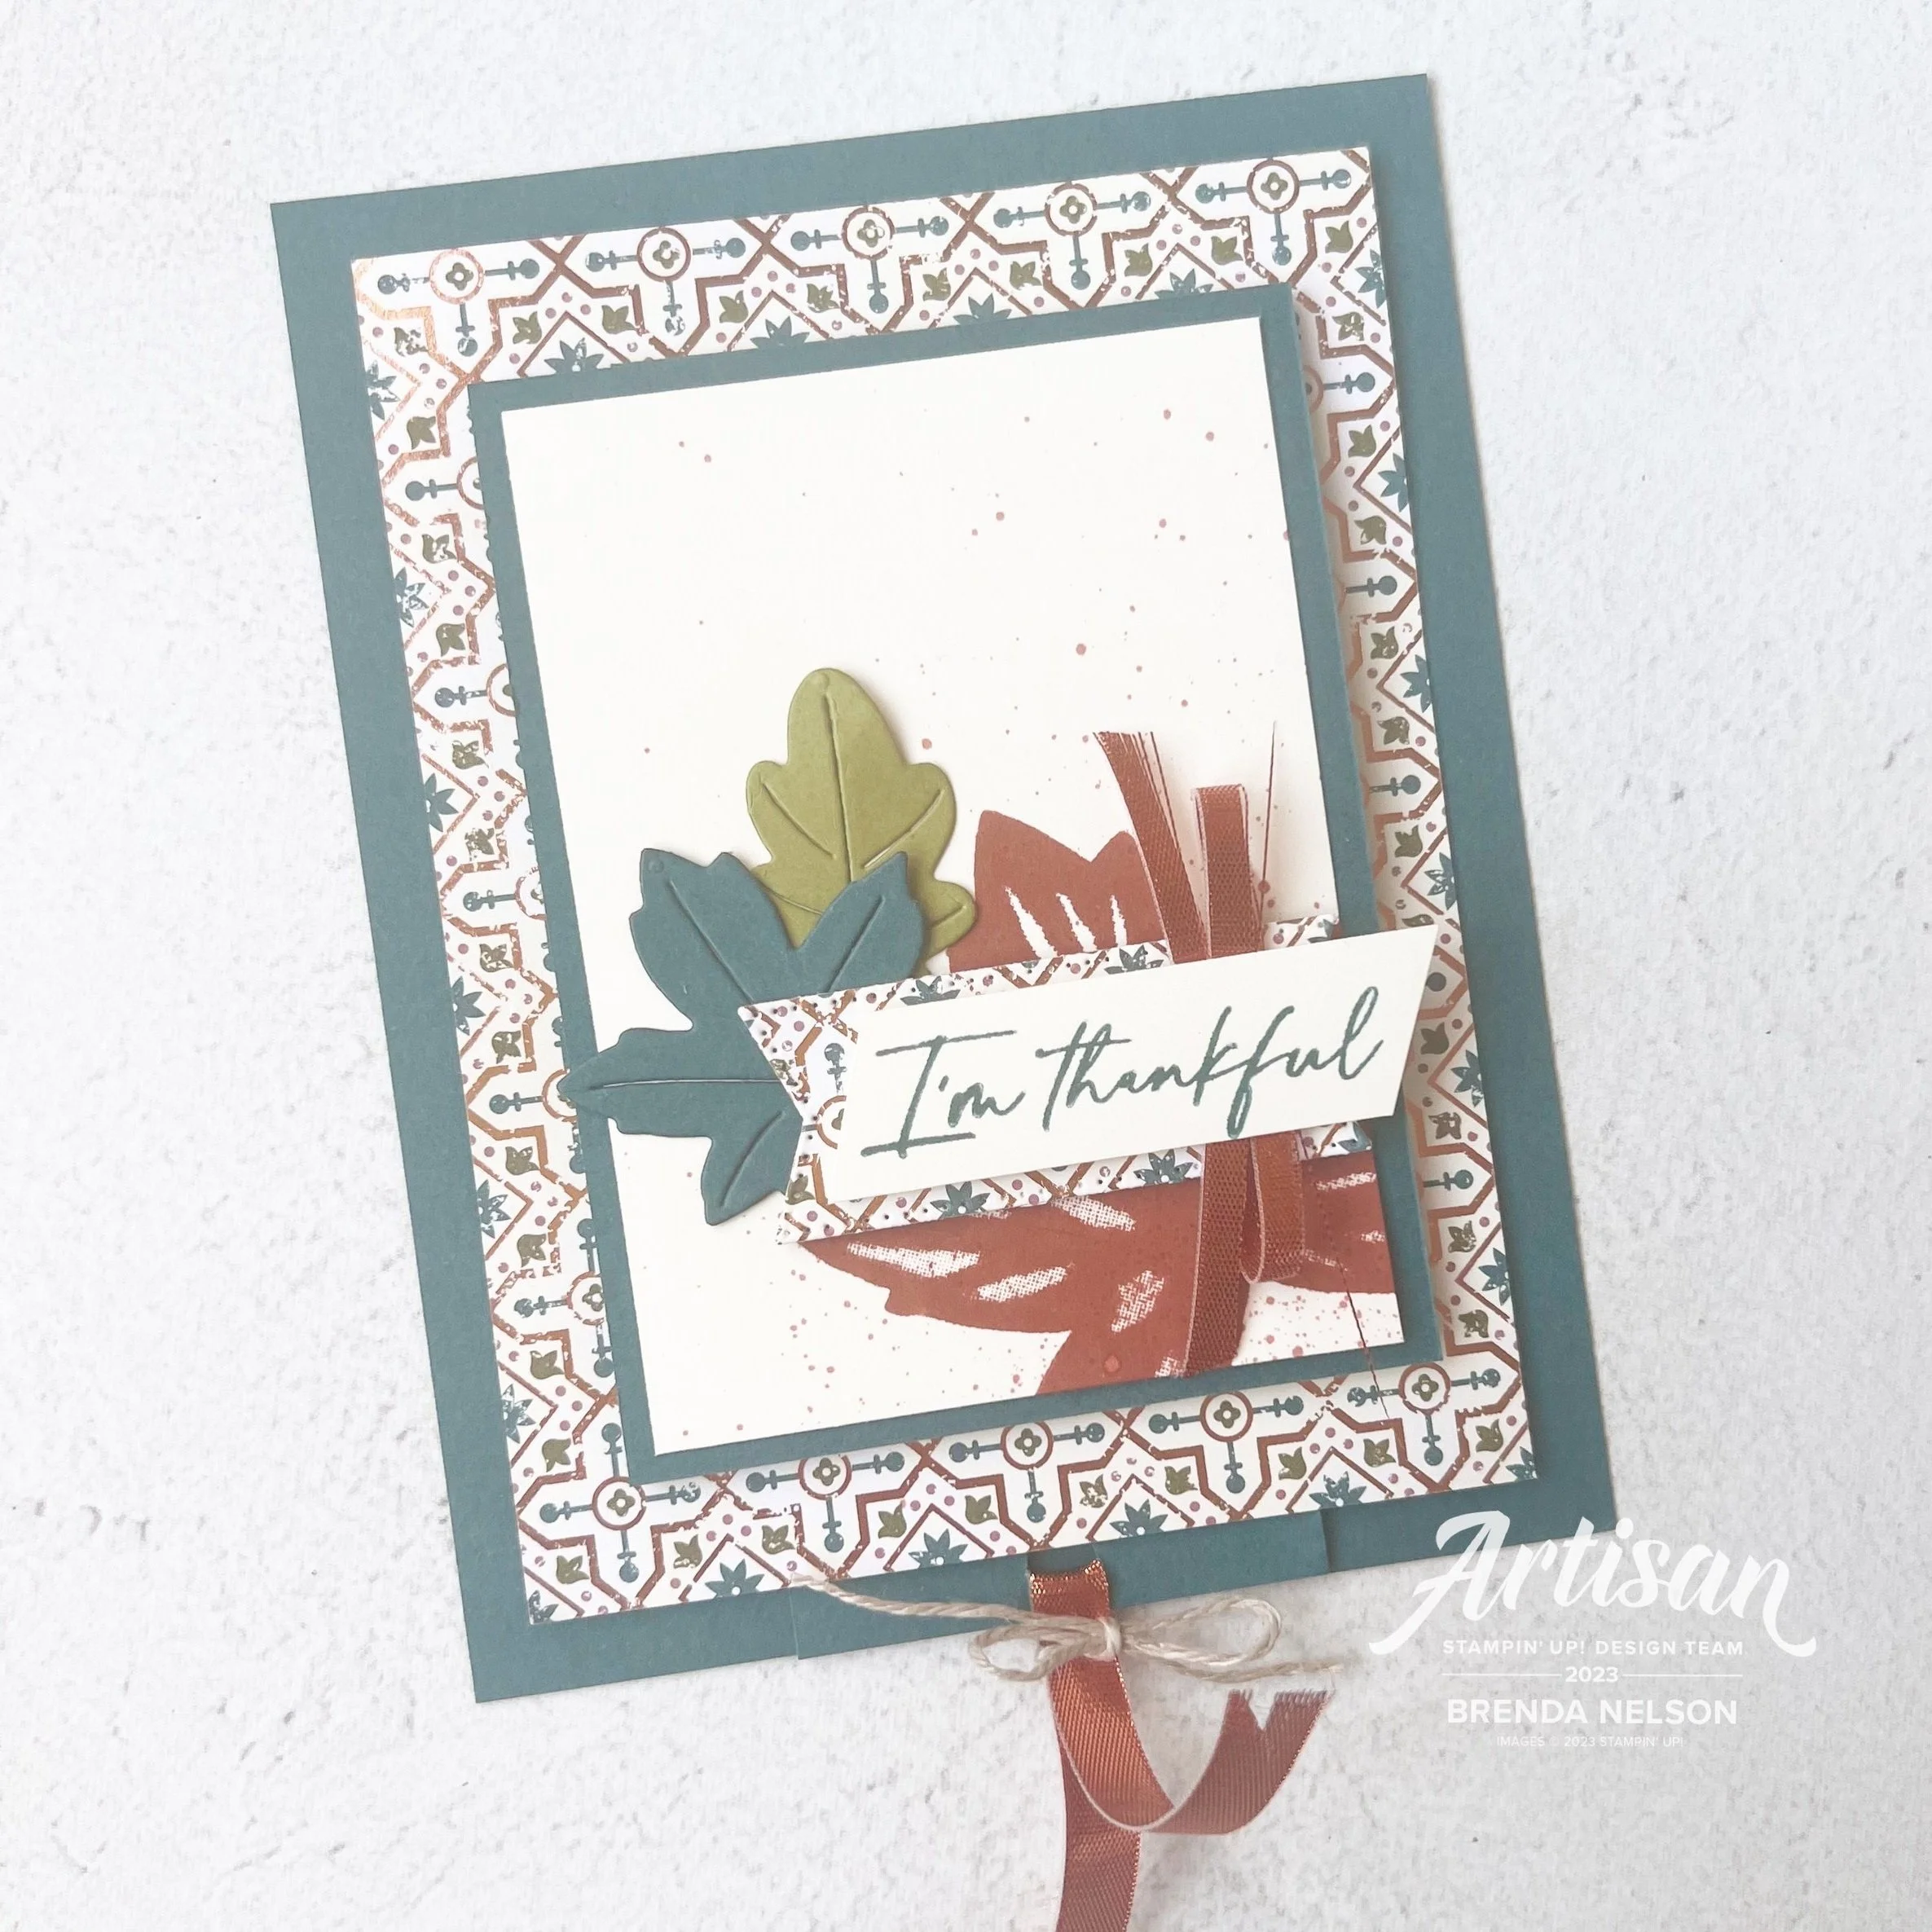
I wanted to use the All About Autumn suite to inspire my team so I stayed really true to the colors found in the All About Autumn 6x6 DSP.

The base of my card is Pretty Peacock and I used Very Vanilla for all of my stamping.

I stamped the large maple leaf in Copper Clay, one of our fabulous new In Colors and did a little spray of ink with the dark Stampin’ Blend marker. Two die cut leaves in Old Olive and Pretty Peacock finished off the front with the sentiment and some of the new Copper ribbon.

NOTE: I repurposed the tag die that was used to cut the pull tab section from the DSP. I don’t like to waste so it was perfect to add under the sentiment

When you pull the tab at the bottom the front panel flips open to this perspective.

I did a little more stamping on the top Very Vanilla piece, this time using the large leaves from the set in Old Olive ink and the smaller leaves in the Copper Clay ink. I did a little more ink spray and added another leaf die cut.

On the bottom panel, I let the DSP shine (along with the base piece of course) by choosing a pattern and simply cutting it with the maple leaf die and adding the sentiment on top w a little Linen Thread.

I hope you head over to Jill’s blog— https://stampingjill.com/ to see her awesome instructions on how to make this Pull Tab card!

Hope to see you back tomorrow! Please feel free to leave me comment too!

Creative Convention--Day 4!

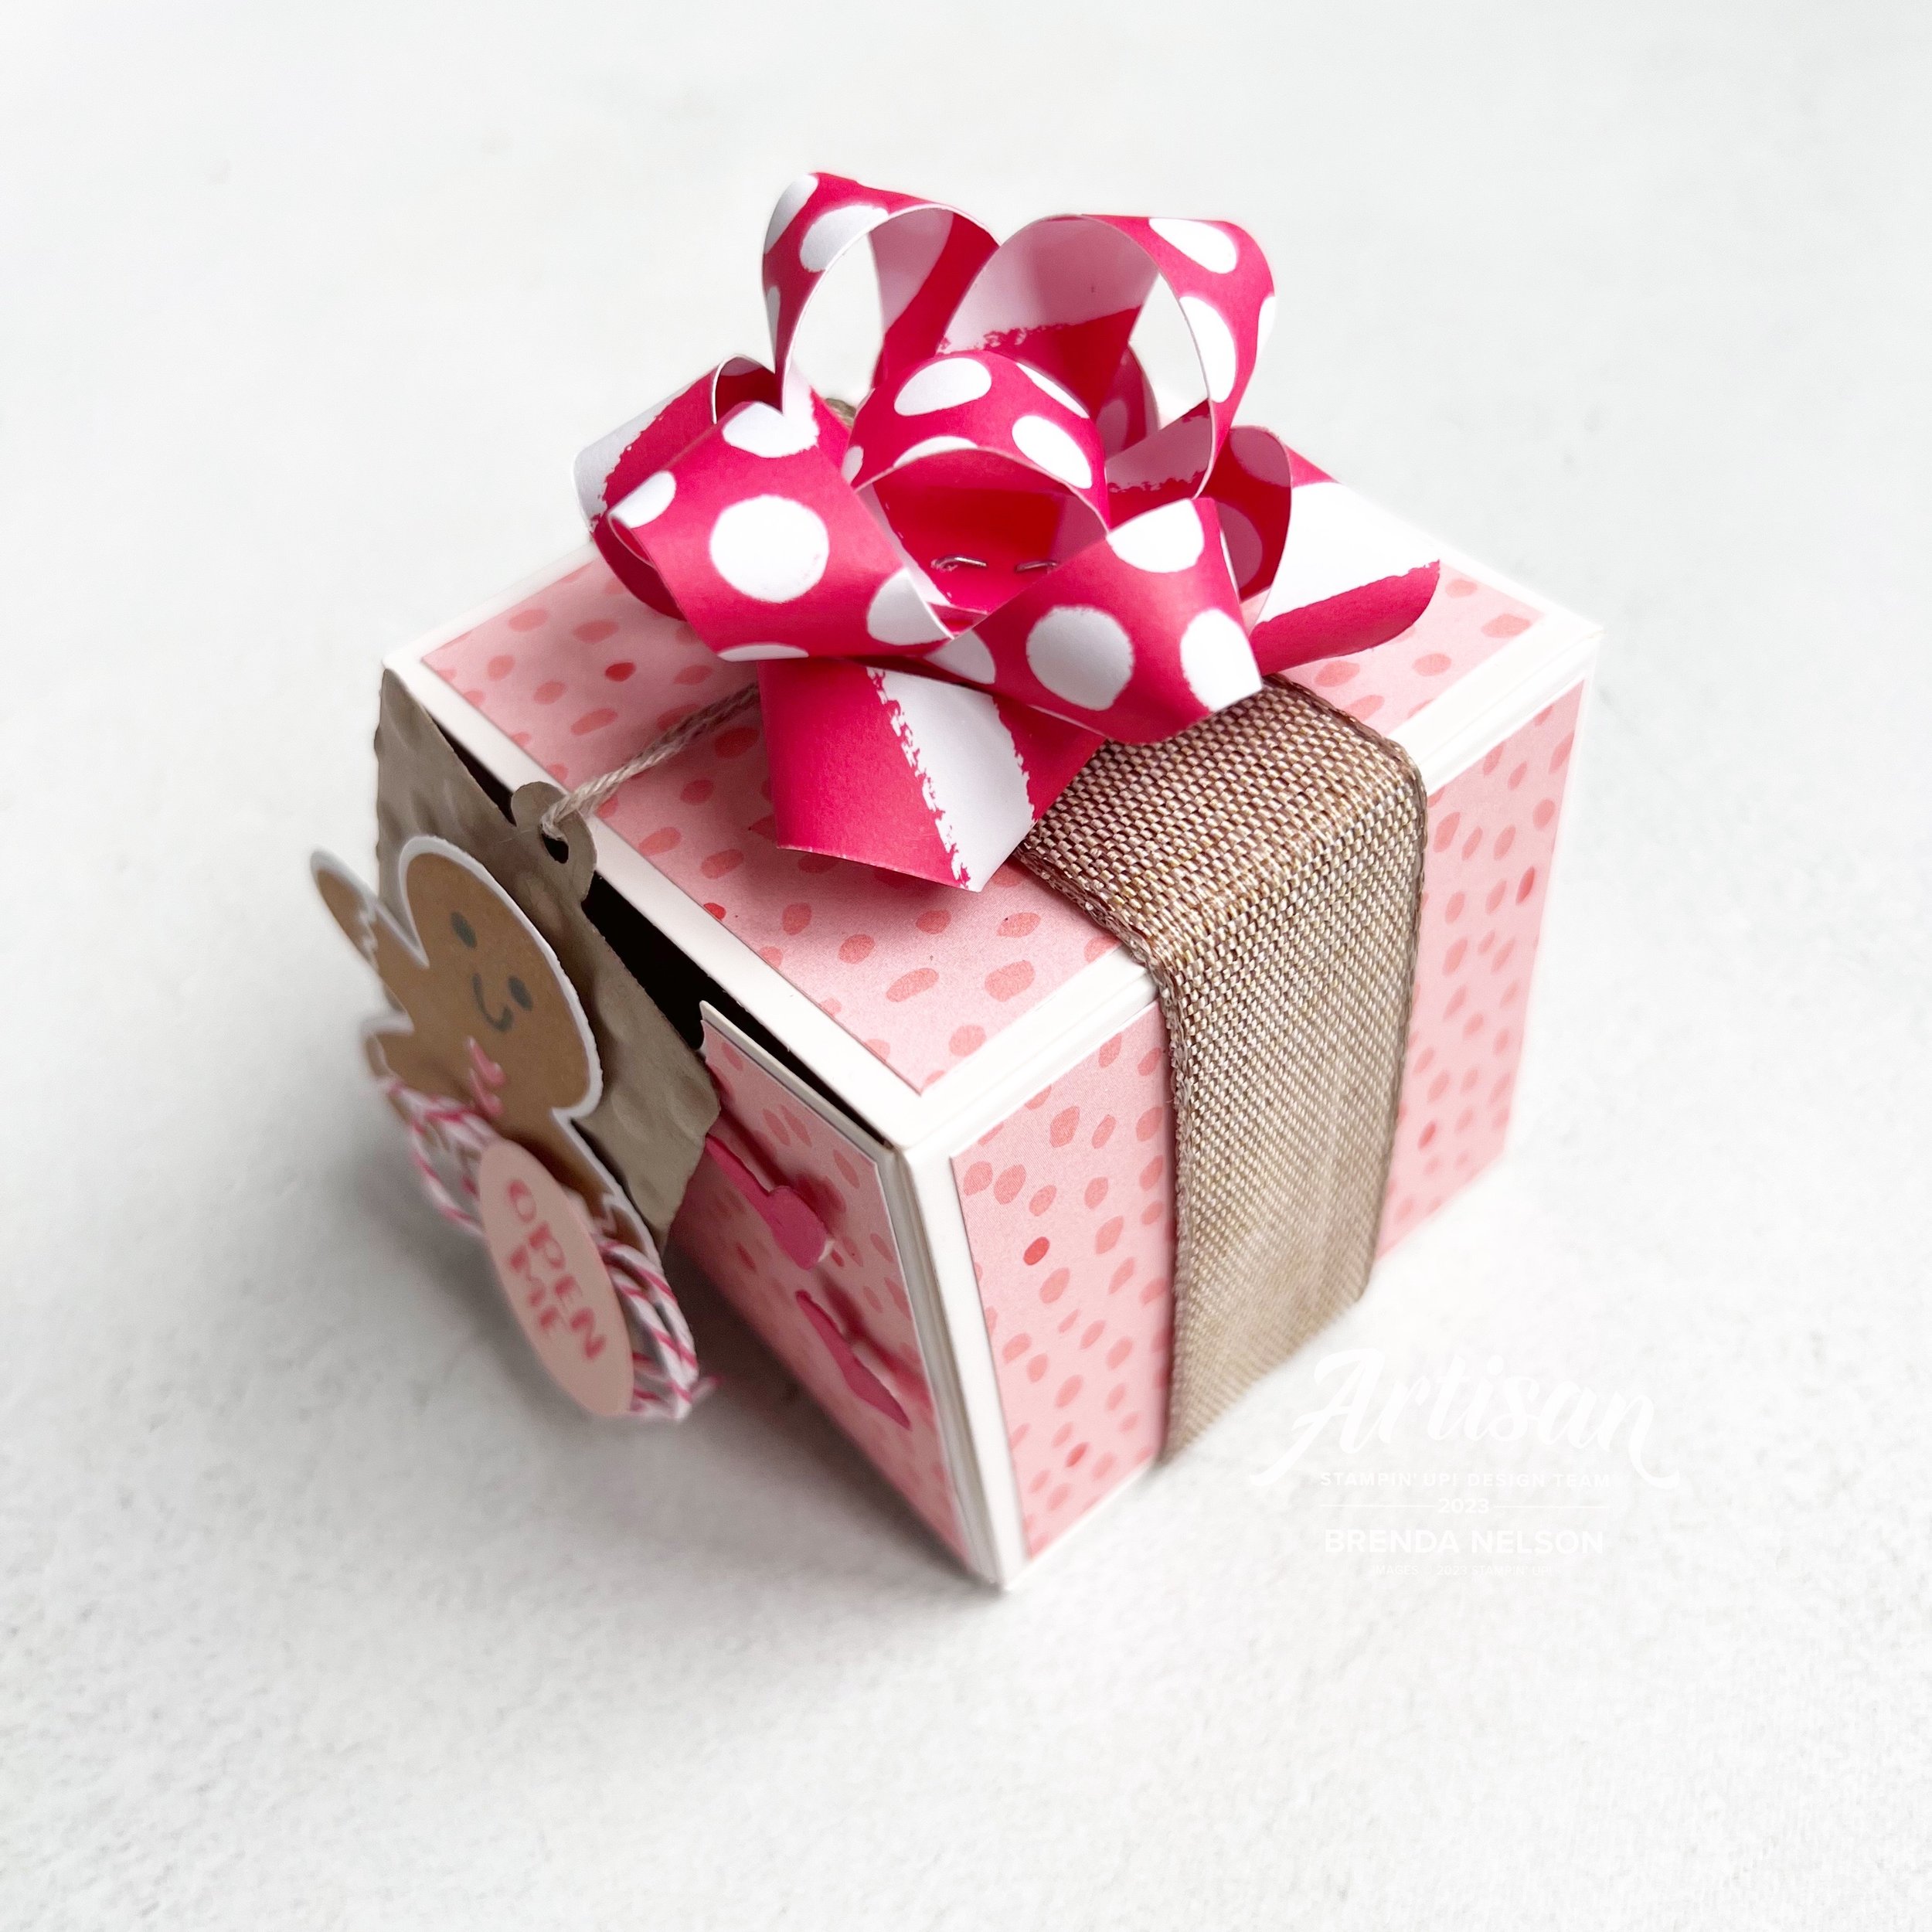
Hello friends! Today I decided to share something that is NOT a card with you because I am really excited about these new Nested Treat Boxes that are coming out in the Holiday Catalogue! Welcome back for my 4th share of my Creative Convention—my week long blogging extravaganza while I am away at Backstage!

These Nested Boxes felt like a natural pairing with the Sending Cheer stamp set. This set is a part of a bundle and was one of my choices when planning my pre-order. While I do love traditional Christmas, I also love fun whimsical Christmas too and this bundle definitely fits the bill!

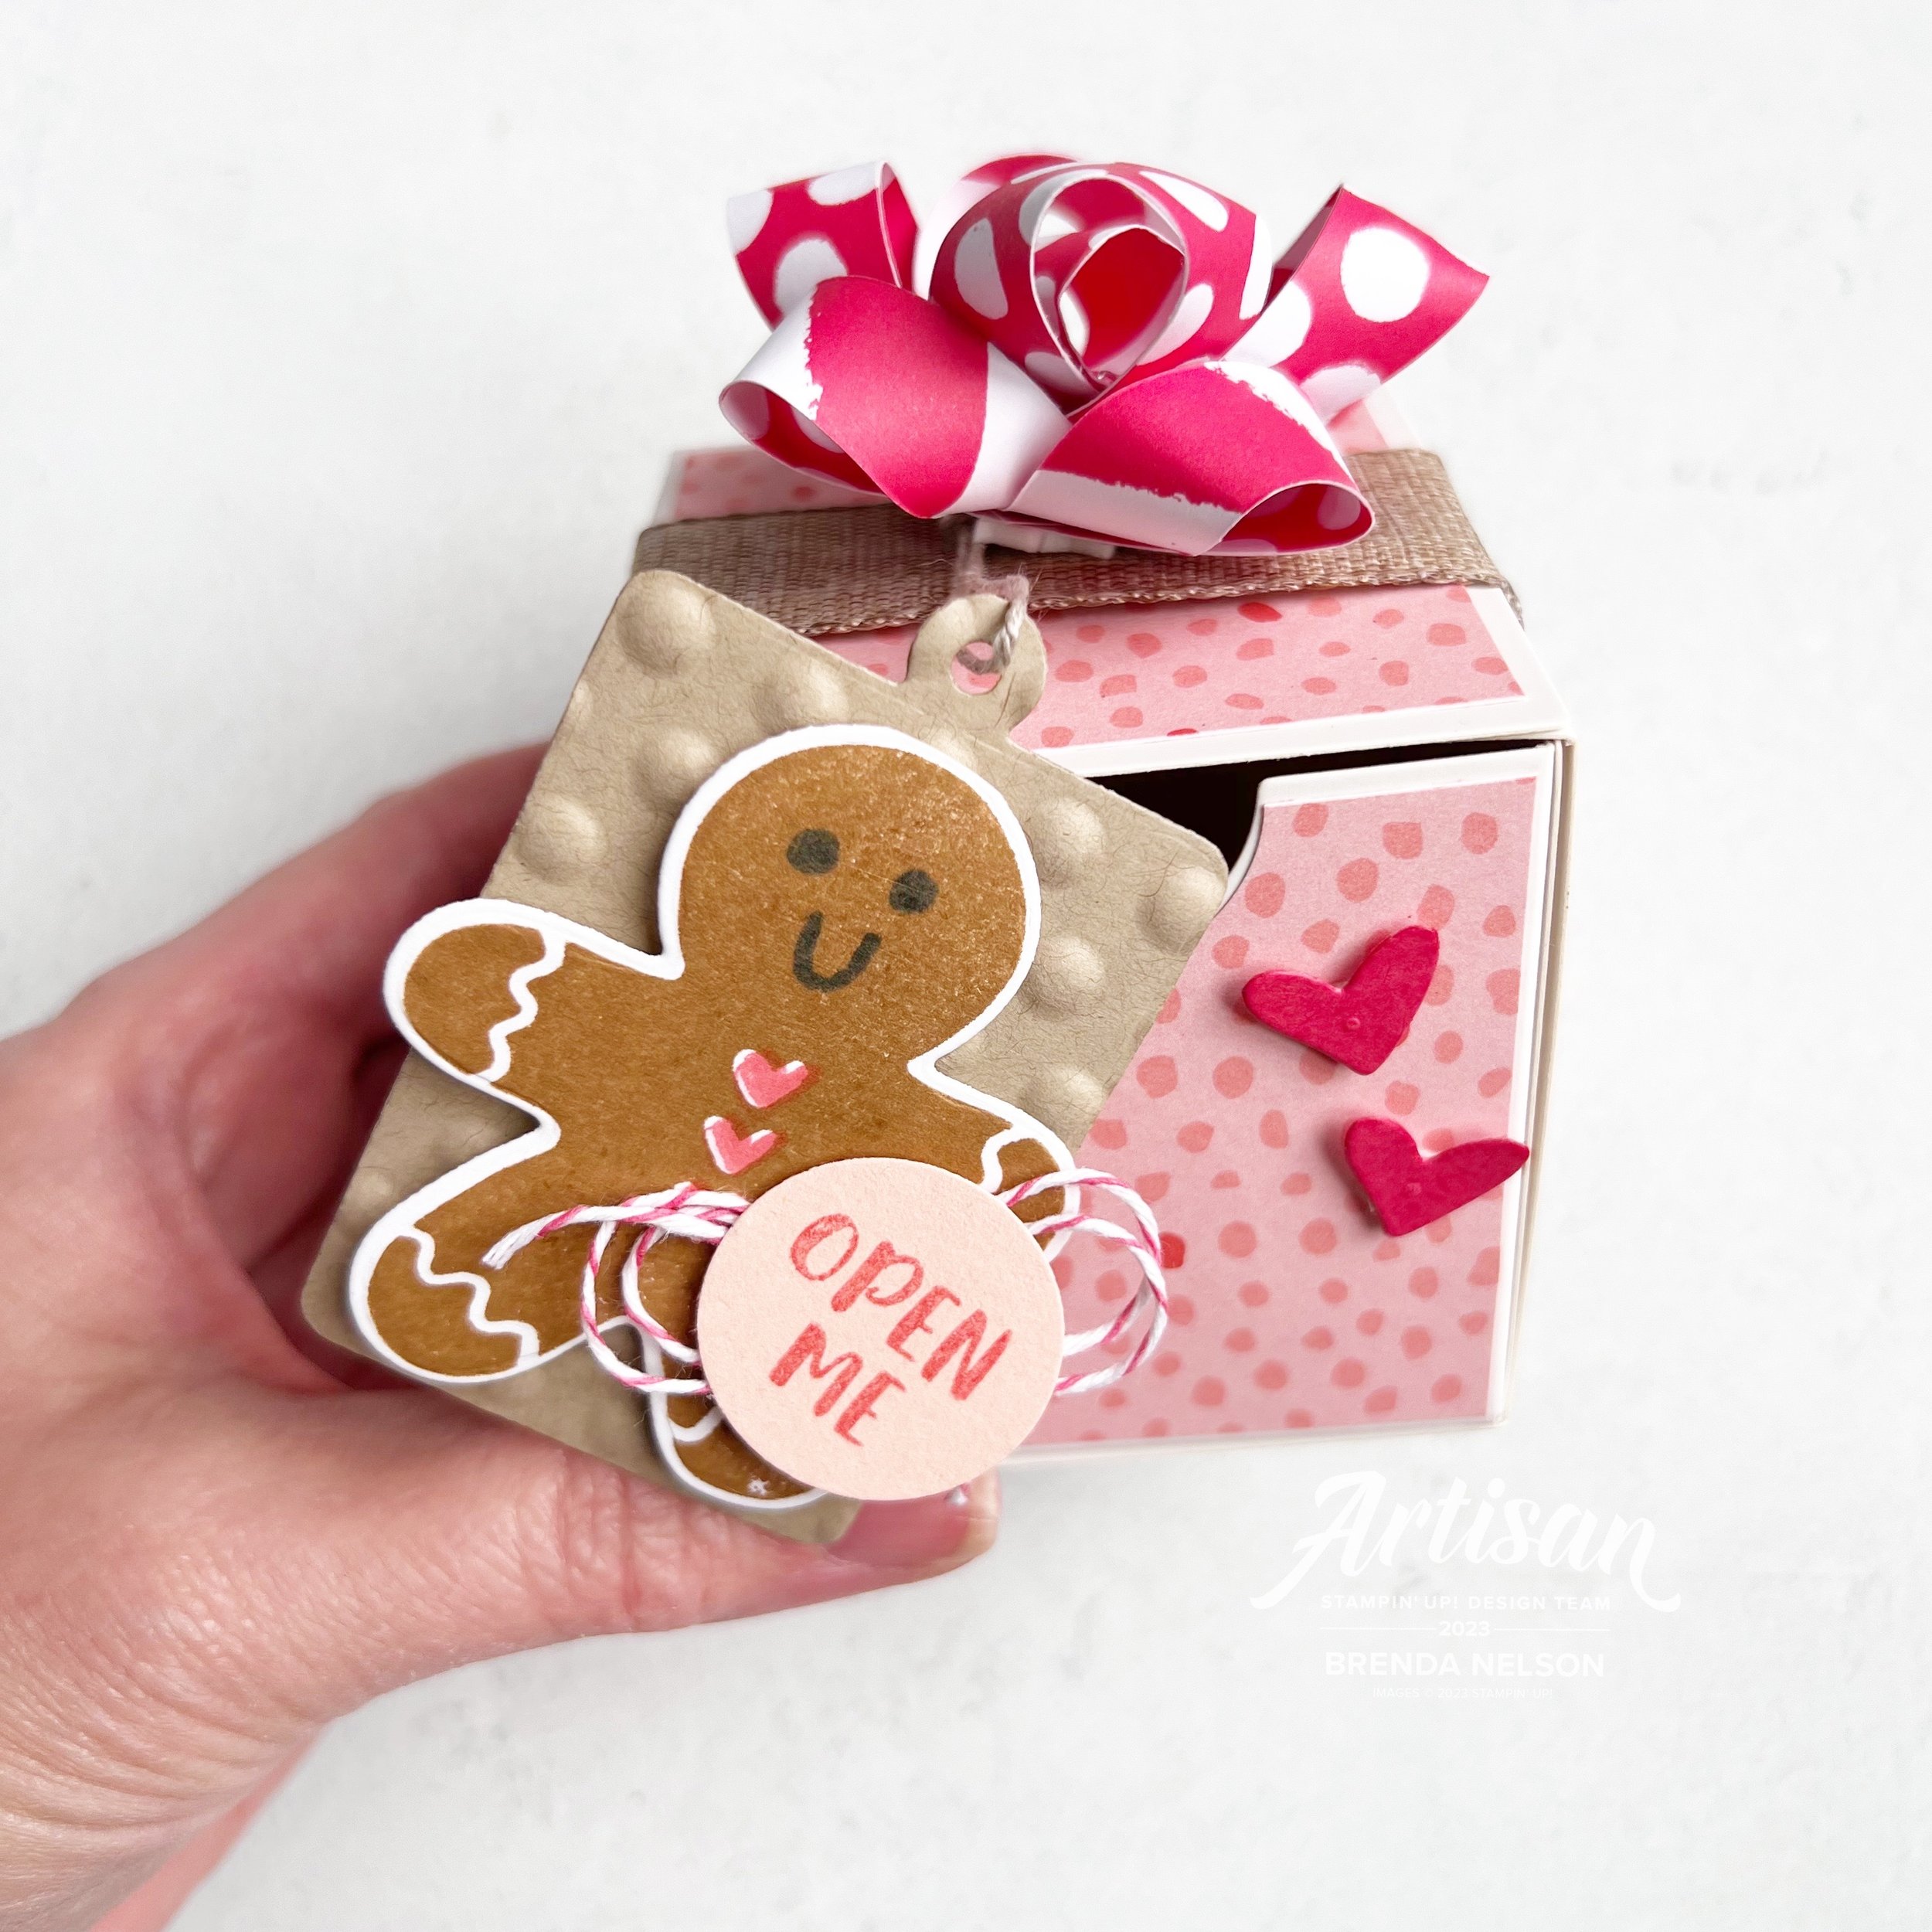
These Nested Treat Boxes are 2 1/2 x 2 1/2 wide so they can fit a variety of awesome surprises inside!

Instead of using this bundle to make a card, I thought it would be fun to use it to decorate the Nested Treat Boxes. I used squares of DSP from the Garden Walk 6x6 paper to cover the sides of the box and wrapped a length of the Natural Ribbon around the box.

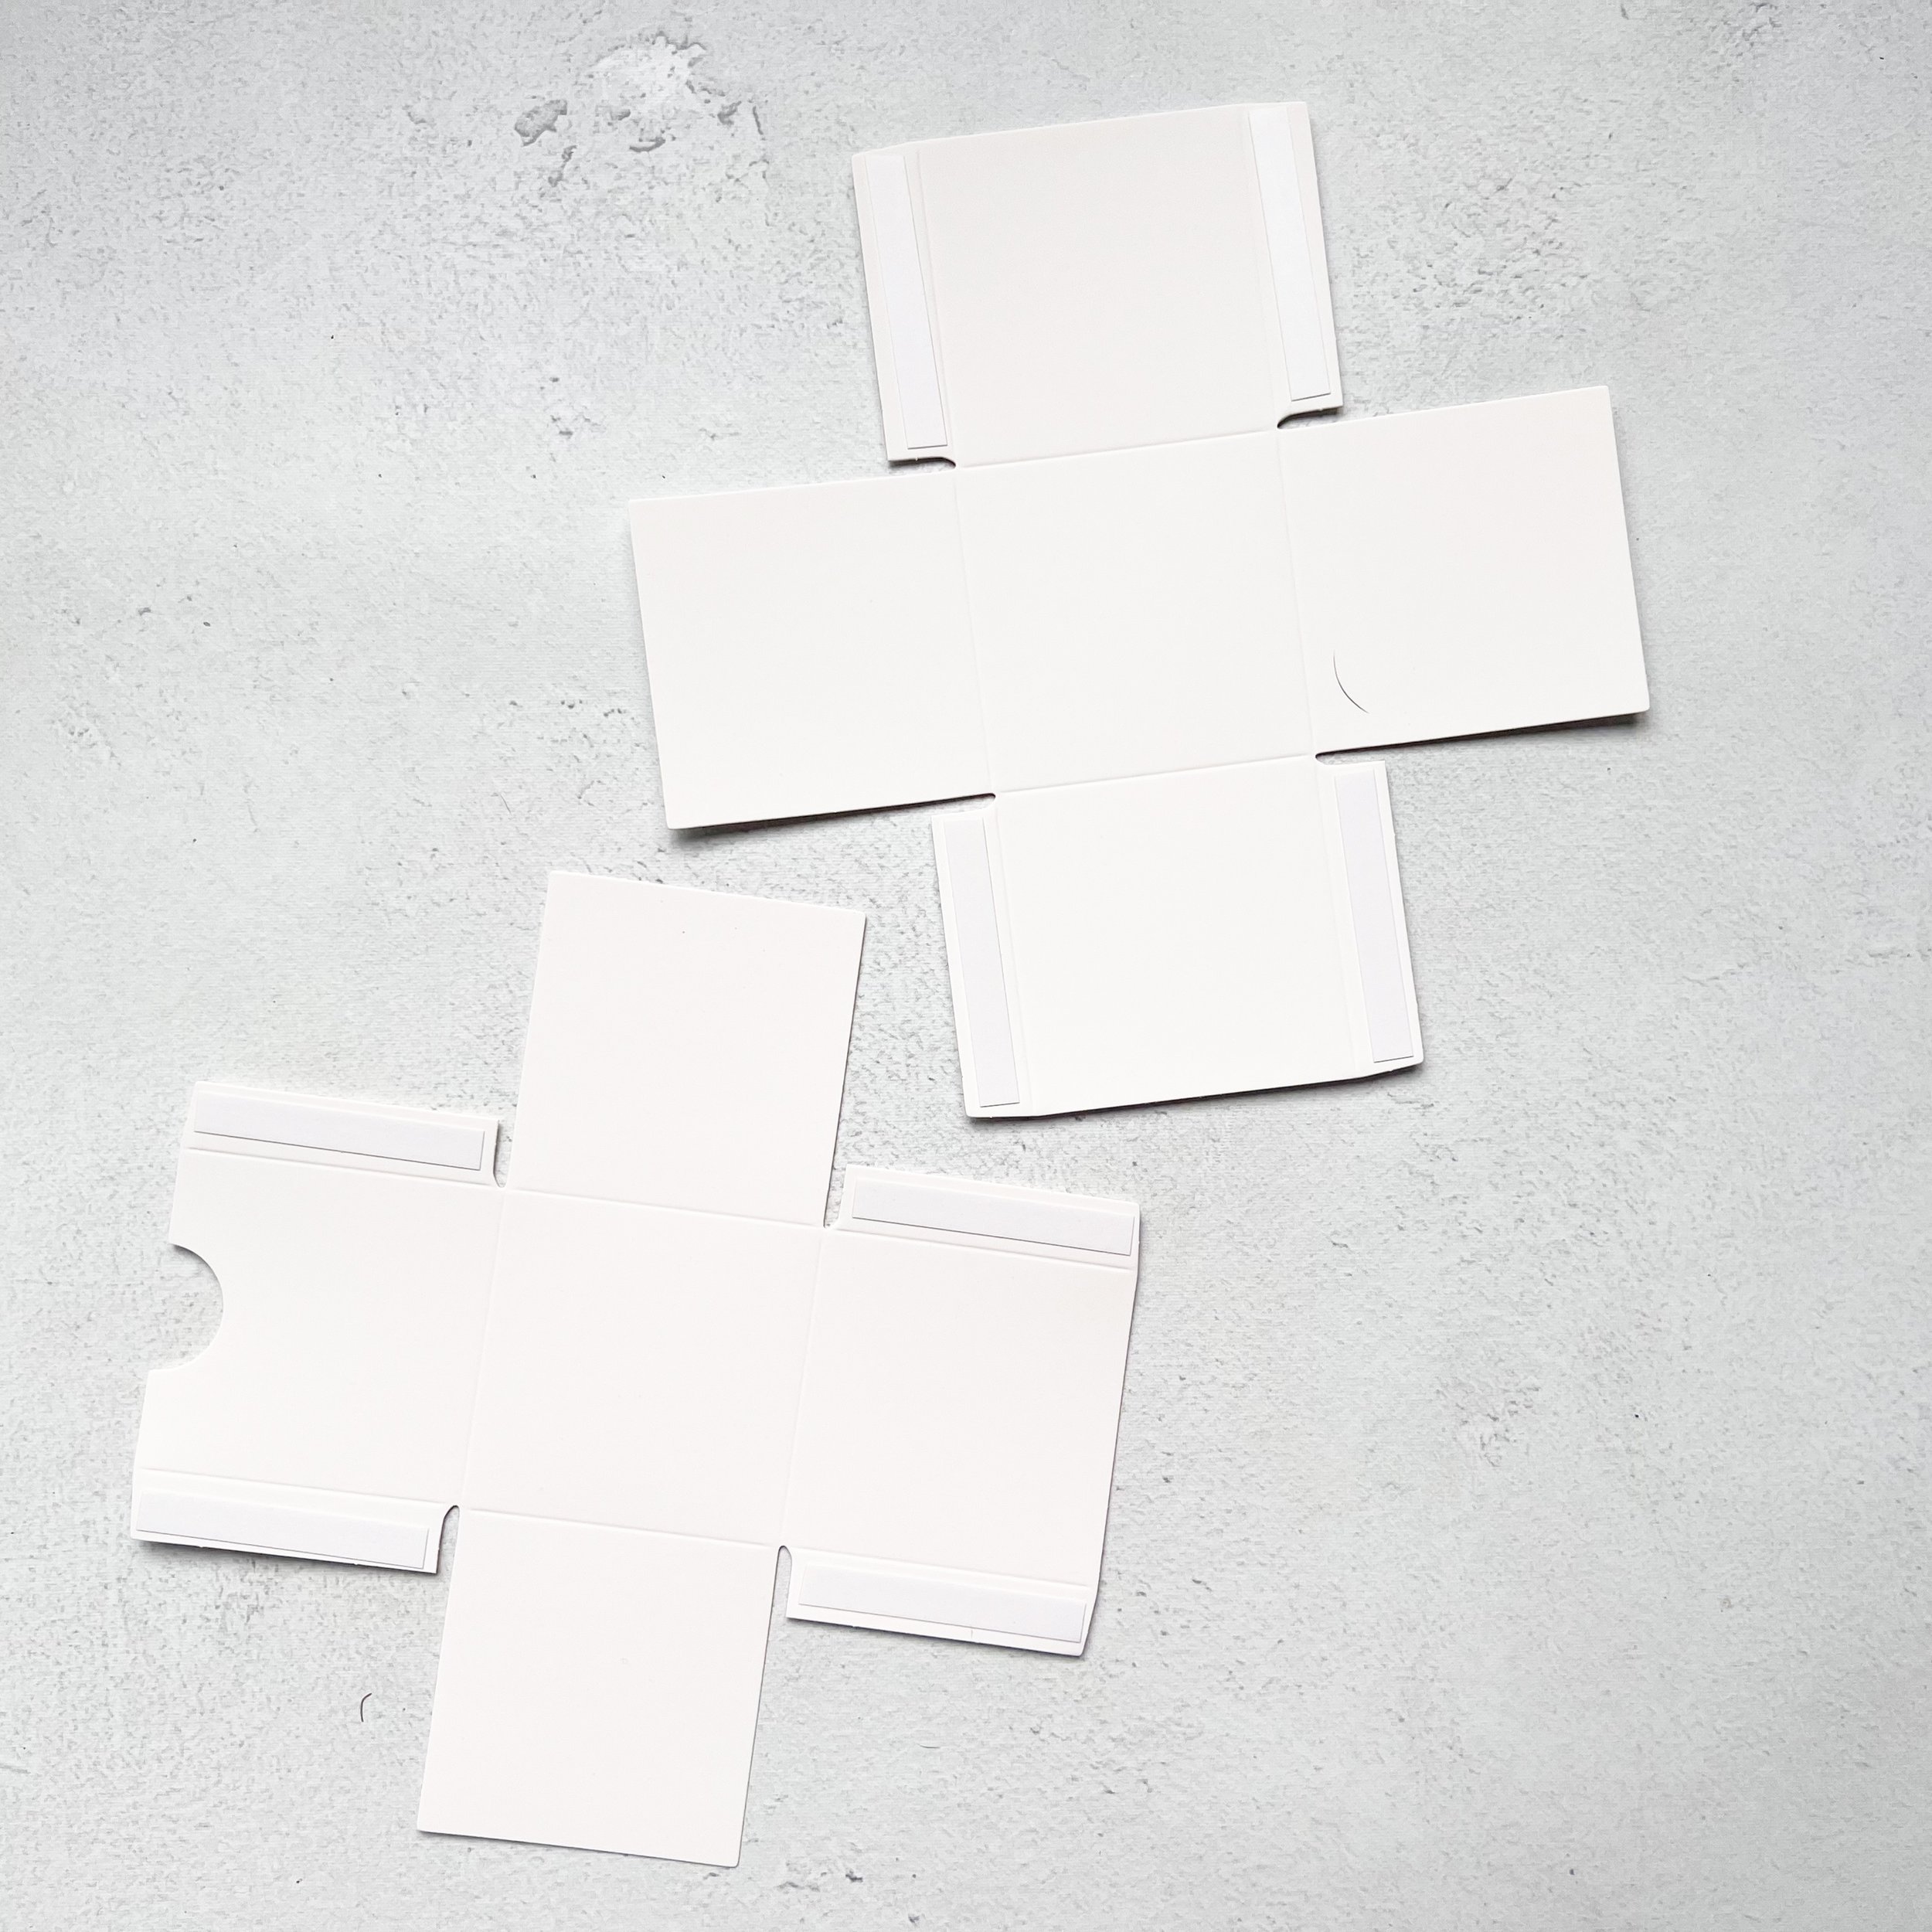
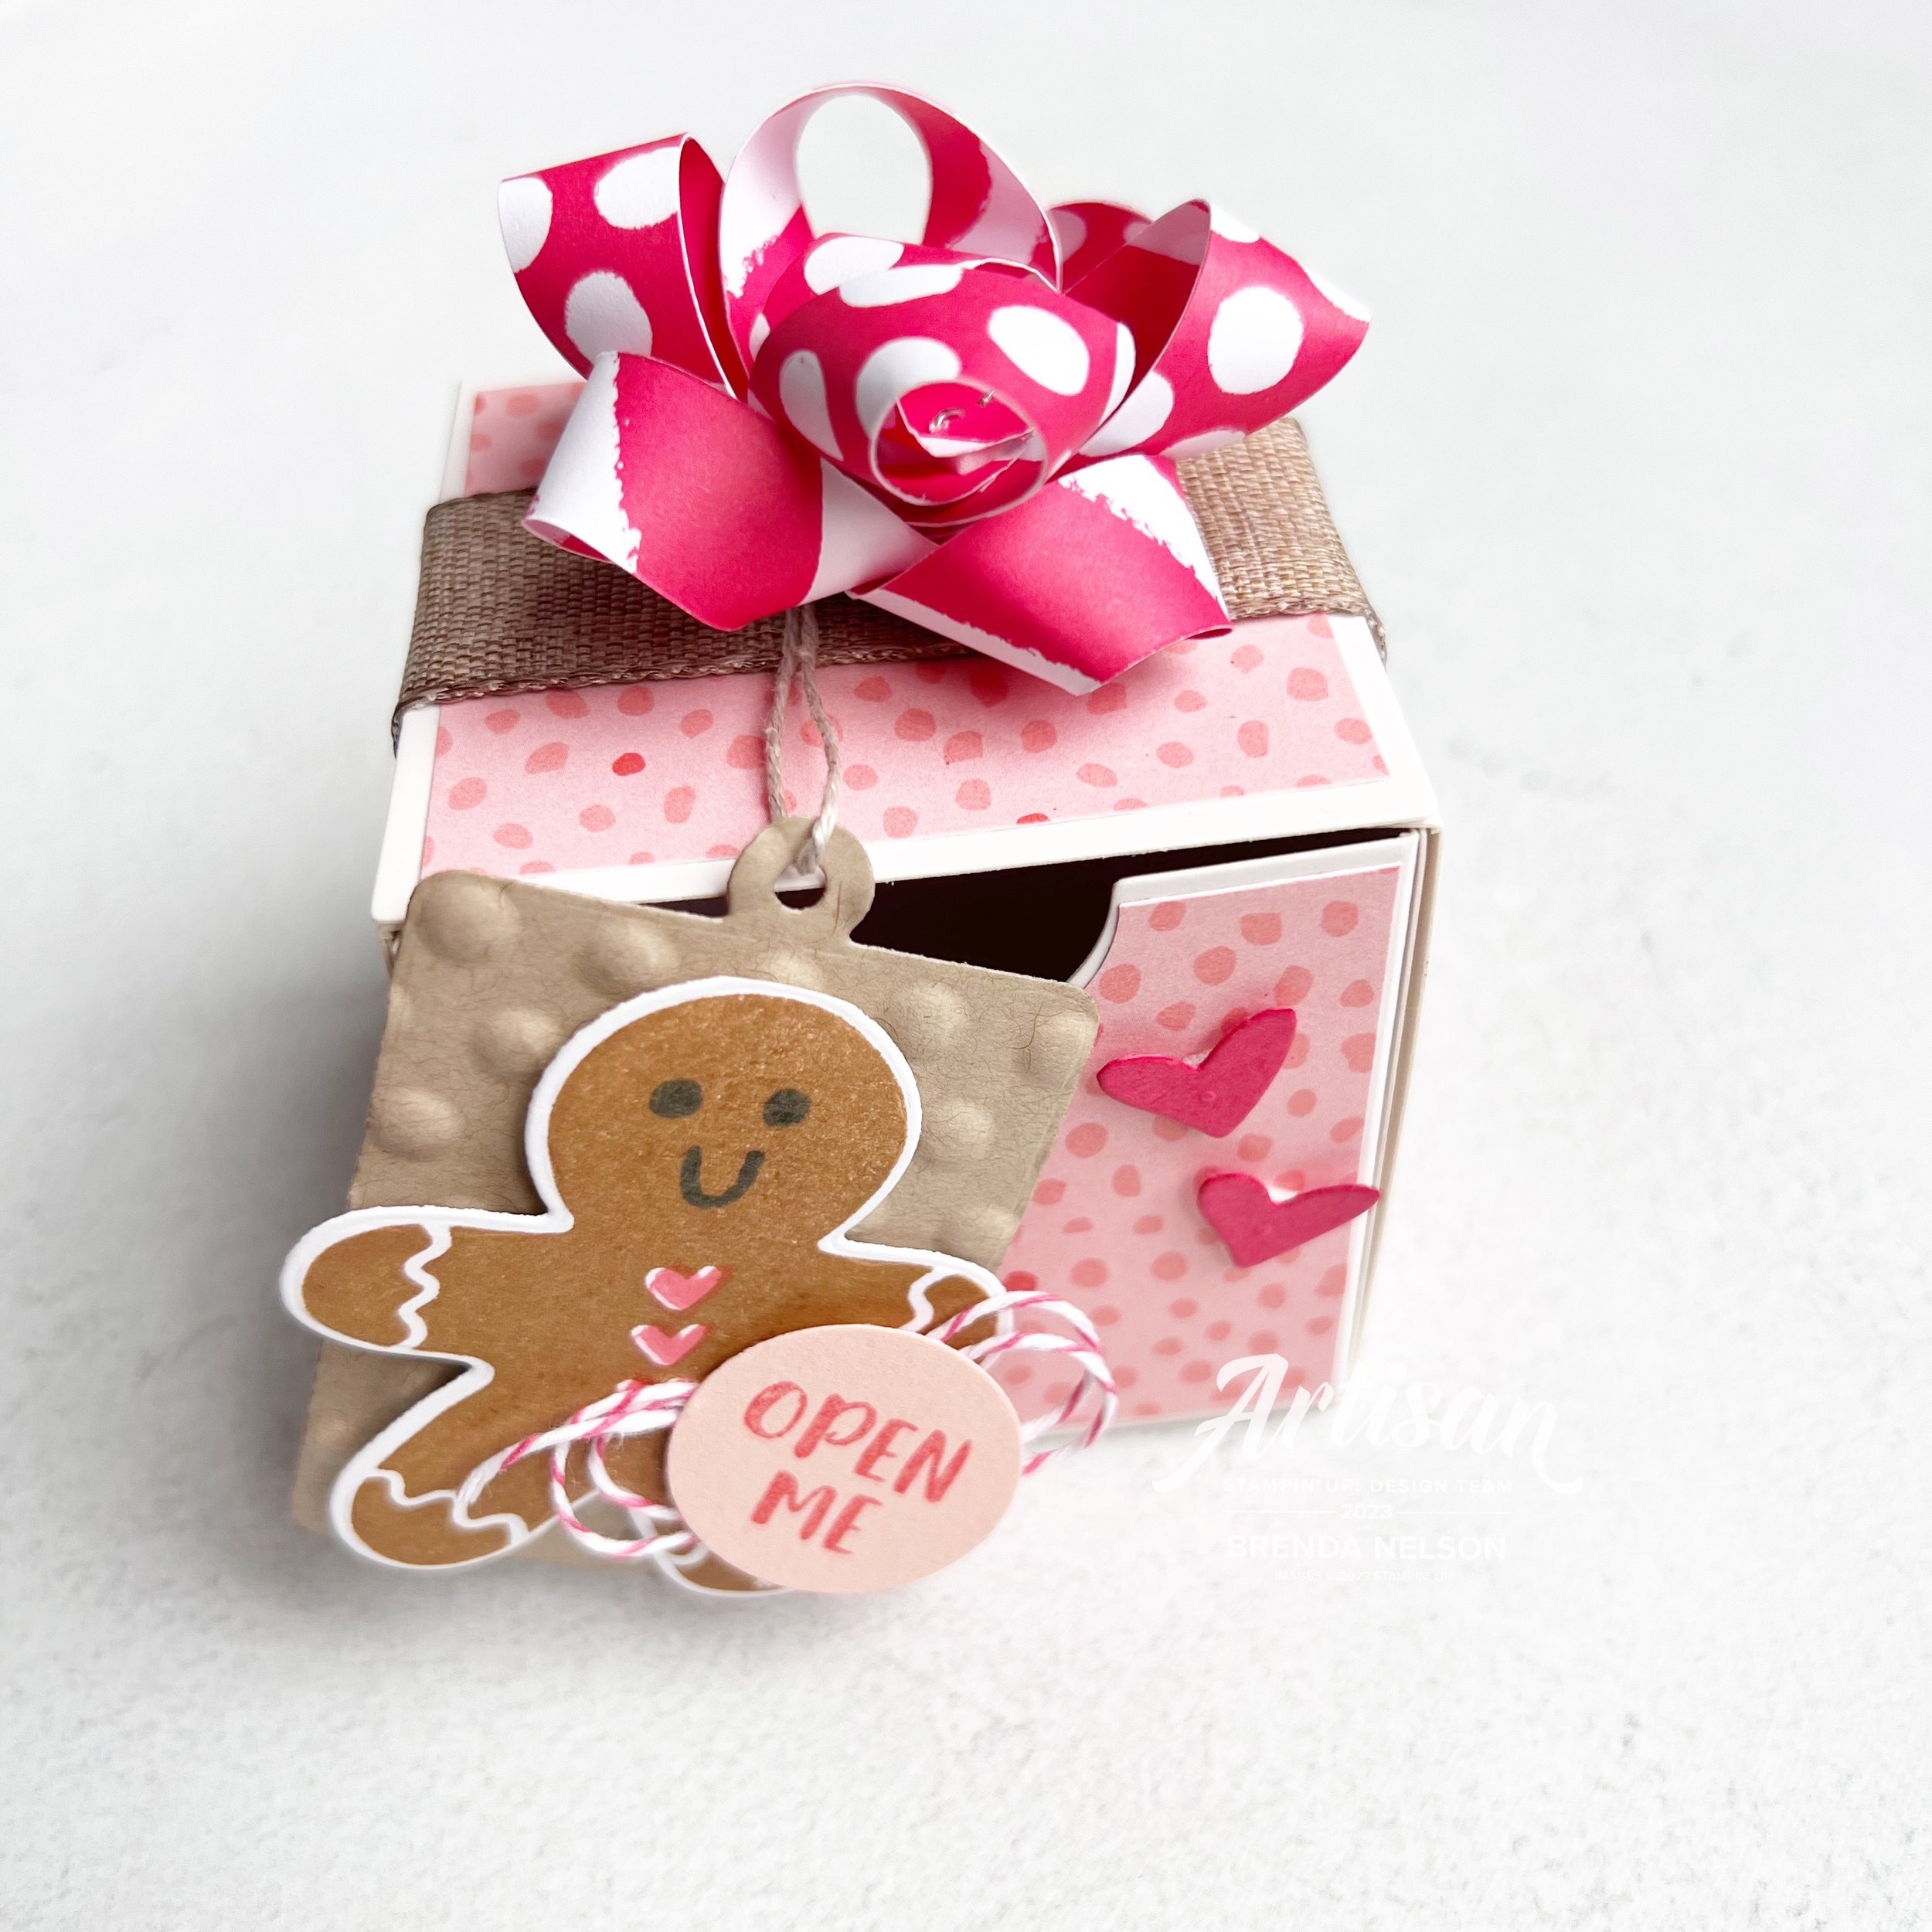
The boxes come in two pieces—the outside and the inside and the inside box has a little notch out so you can get your finger in there to pull it free. You can take a 1 inch circle punch or die and snip out a section of the DSP so that it matches the box!

I love that this box glues itself together! It is a definite perk and makes assembly so easy!


The box was screaming for a mini bow so I made one using strips of DSP from the In Color 2022/24 collection in Sweet Sorbet. Sweet Sorbet is one of my favorite holiday reds! It plays so well with pink so it was a perfect fit to match this DSP! I reversed the patterns on each layer of the bow as well so you see both stripes and dots!

I cut a tag from the Sending Cheer Dies in Crumb Cake card stock and ran it through the polka dot embossing folder that is part of the Online Exclusive embossing folders.

I found Pecan Pie was the perfect color for a Gingerbread Man—you can add his face and fill in his heart buttons with 2 additional stamps in the set. There is a die for him too that is actually a tag, so just snip it off. Easy peasy!

I hope this cut little project inspires you to #addtocart the Nested Treat Boxes when they become available. I think they will make some fun holiday decor, are great for birthdays and little gifts that you want to give!

Creative Convention--Day 3!

Hi friends! Welcome back to Day 3 of my Creative Convention—a fun little blog sharing, creative inspiration, sneek peek week that I decided to create and put together while I am away at Backstage in Las Vegas!

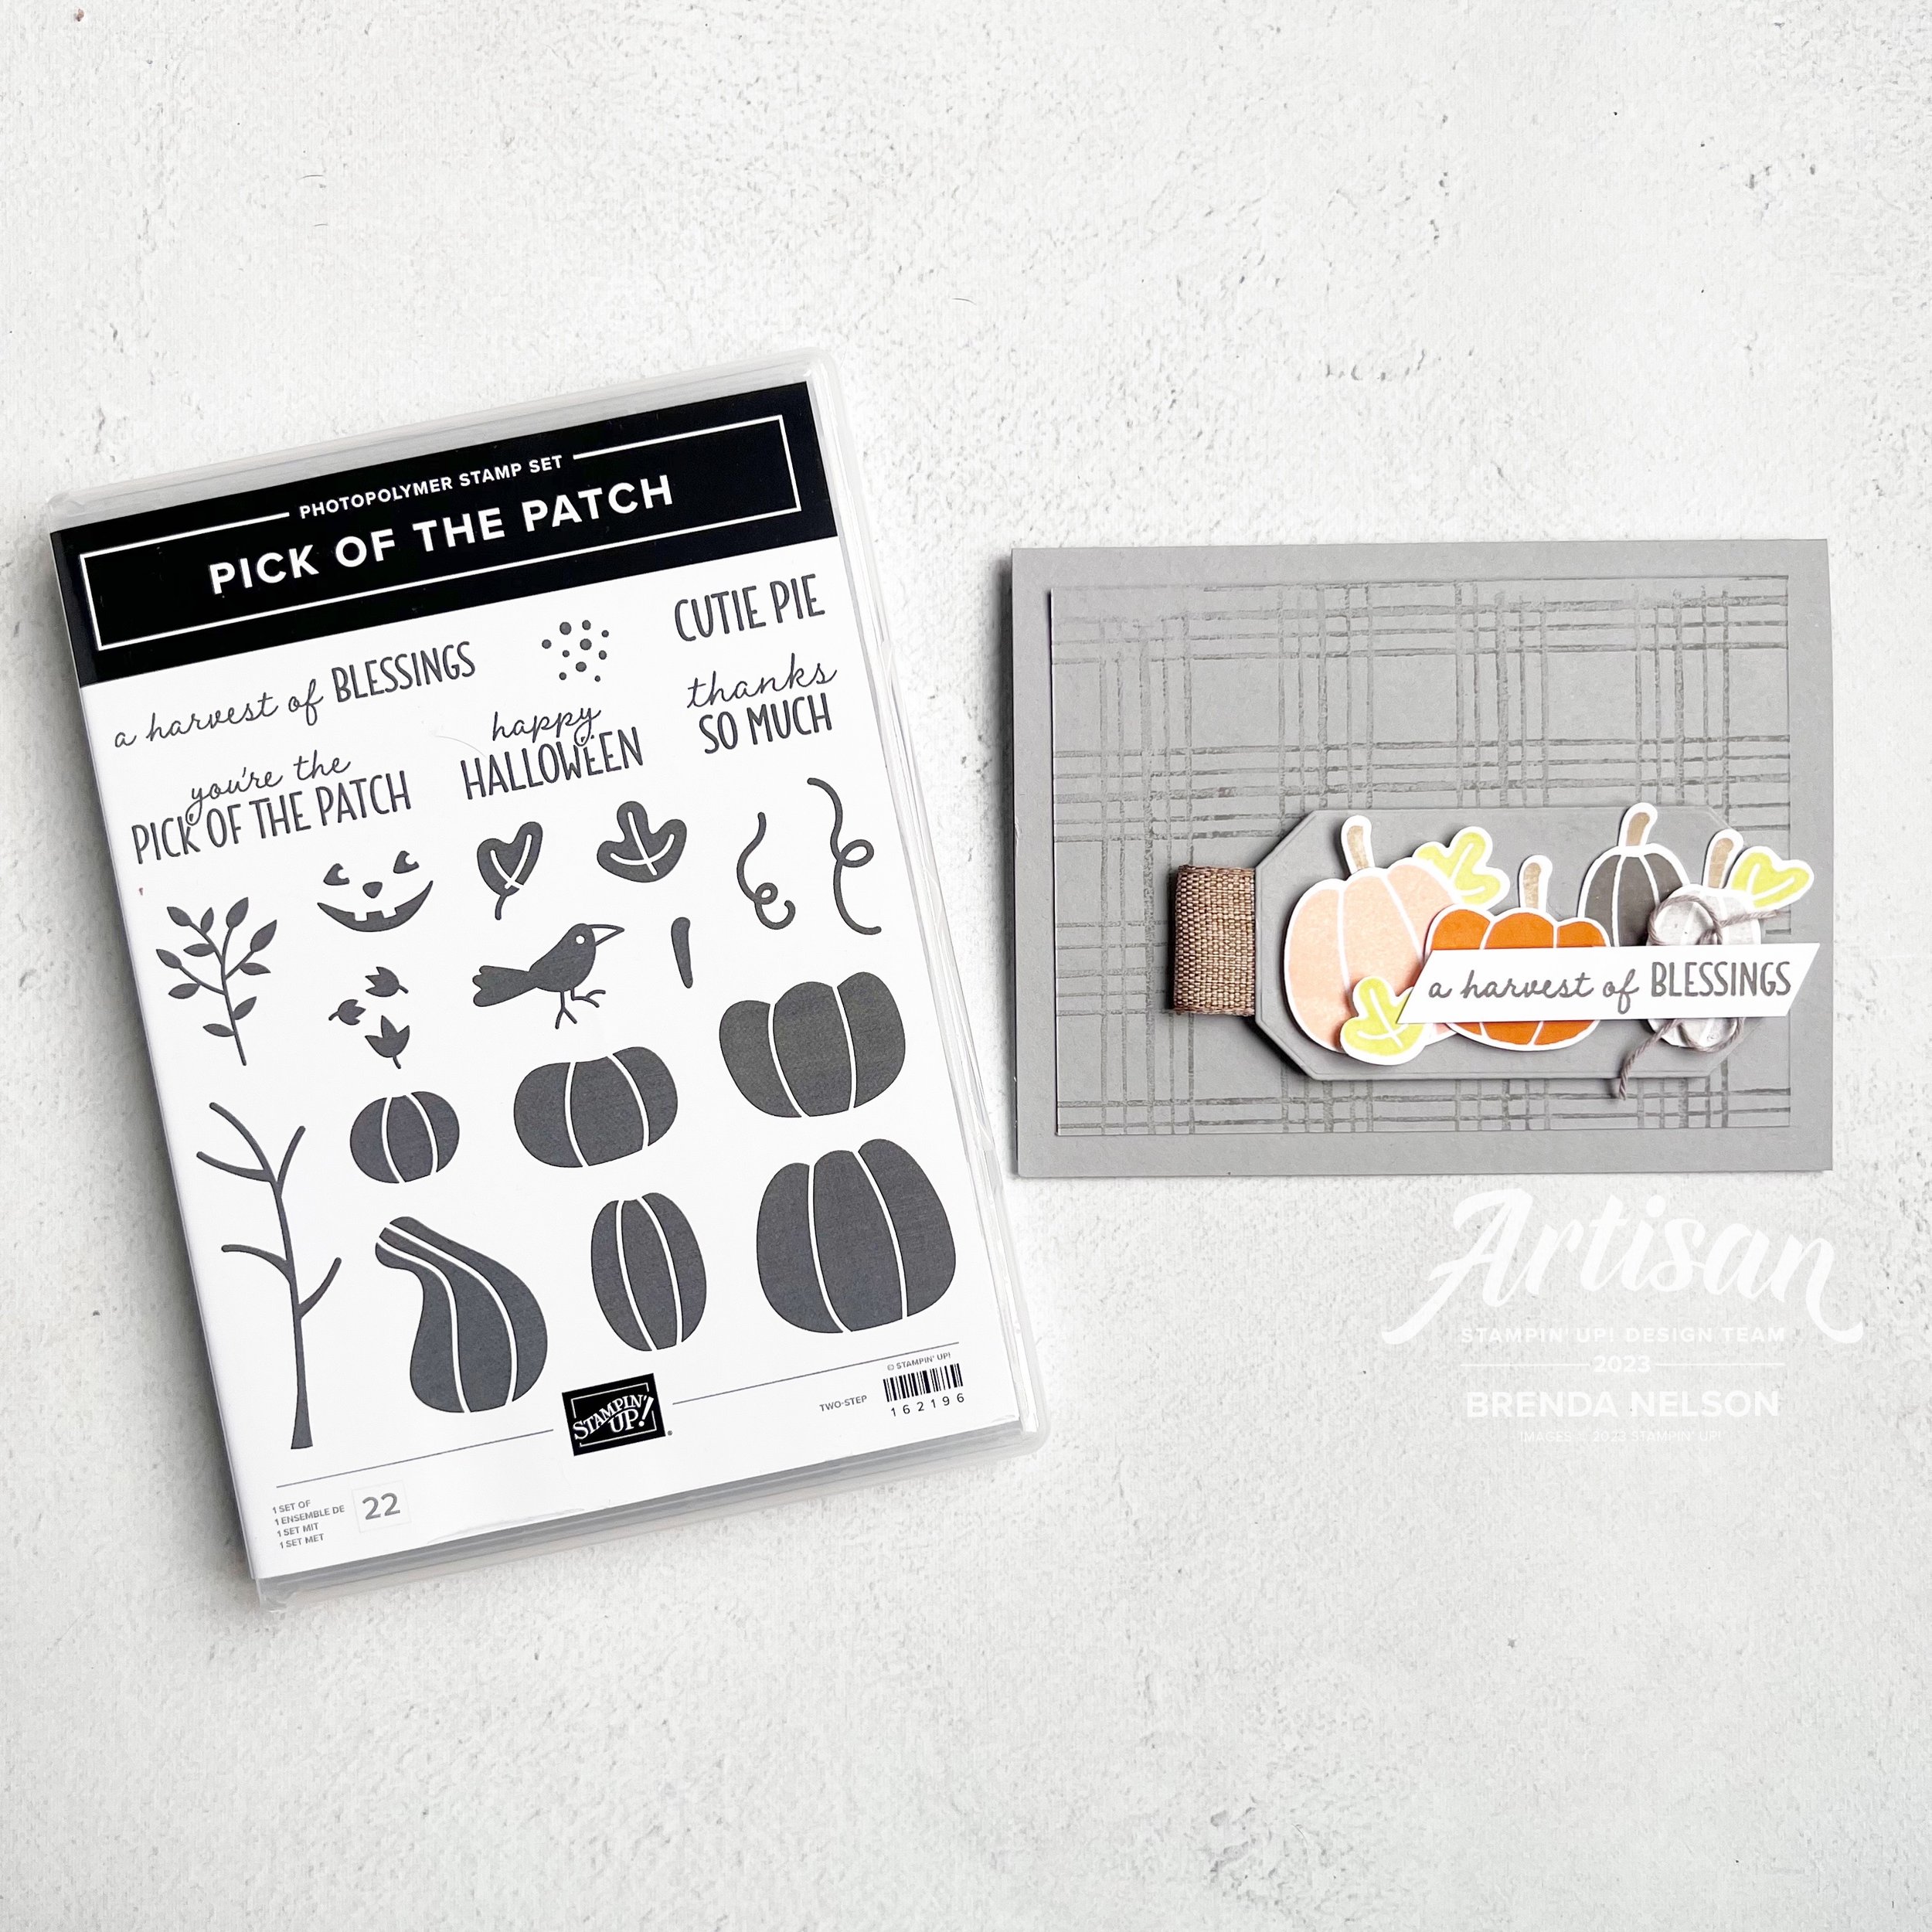
Today the project I want to share with you is one I decided for a recent swap I participated in with some of my demonstrator friends. The Pick of the Patch stamp set was one of the first sets on my list when we were able to put in our pre-order. I love pumpkins and Halloween and I LOVE the whimsical fun feel of the pumpkins and gourds in this stamp set. There is also a coordinating pumpkin punch too! SO much to love!

I decided to tie in the Pick of the Patch stamp set with some items that I love from our annual catalogue—so I reached for the Sketched Plaid stamp set and the Country Corners Dies. I have been using these dies ALOT—they are definitely a #craftroommusthave

If you haven’t already I would definitely #addtocart and you can do so by clicking on this link if you are interested!

I started with Smoky Slate as my base and stamped the Sketched Plaid onto my first layer using Pebbled Path ink—however, to soften it, I took my Blending Brush over top of the stamp to actually REMOVE some of the ink. I really like the finished look! And am glad I took this extra step!

I stamped the pumpkins ini Petal Pink, Pumpkin Pie and Pebbled Path ink that was stamped off. The leaves are in Lemon Lime Twist—so I used the Brights, Subtles In Colors and Neutral color families to make this awesome swap!

Now I had to make 24 of these cards…how do you prep for swaps?

I pulled out my little muffin tin to use for storing the different images I was stamping and cutting out! It makes keeping things sorted and easy for the assembly stage. Especially if I plan on working on the swaps over a course of a few days.

I added my little pumpkin patch to one of the Country Corner die cuts and some of the new Natural Ribbon to act like a little tab and popped this layer up with Dimensionals.

I am so happy to share this card as inspiration for you this week and I really hope everyone is excited to get my swap card in the mail!

Make sure to check back tomorrow to see my 4th project share!