Color Fusers--June 2021 Blog Hop
/Hello friends! Welcome back to another fun blog hop featuring the new amazing In Colors 2021-2023. Now, I have been stamping with Stampin’ Up! for a quite a while, coming on 15 years actually! And I have to say that this new lineup of colors is probably some of my all time favorites. Remember that year they released Coastal Cabana…me neither but its probably at the top and this new collection just might kick it out of first place!

If you are a total newbie to Stampin’ Up! then this might be one of your first peeks at these colors or experience with the In Color collections. If you are a seasoned stamper than you have been seeing this colors ALL OVER THE PLACE because demonstrators like myself, cannot get enough!
I wanted to make a scrapbook page and showcase these colors with another new amazing product— the Shimmer Vellum. Now this ain’t your regular old vellum friends, this is shimmery and awesome in all the right ways and it comes in 12x12! Yay! You can expect to see me using this alot during this catalogue period.
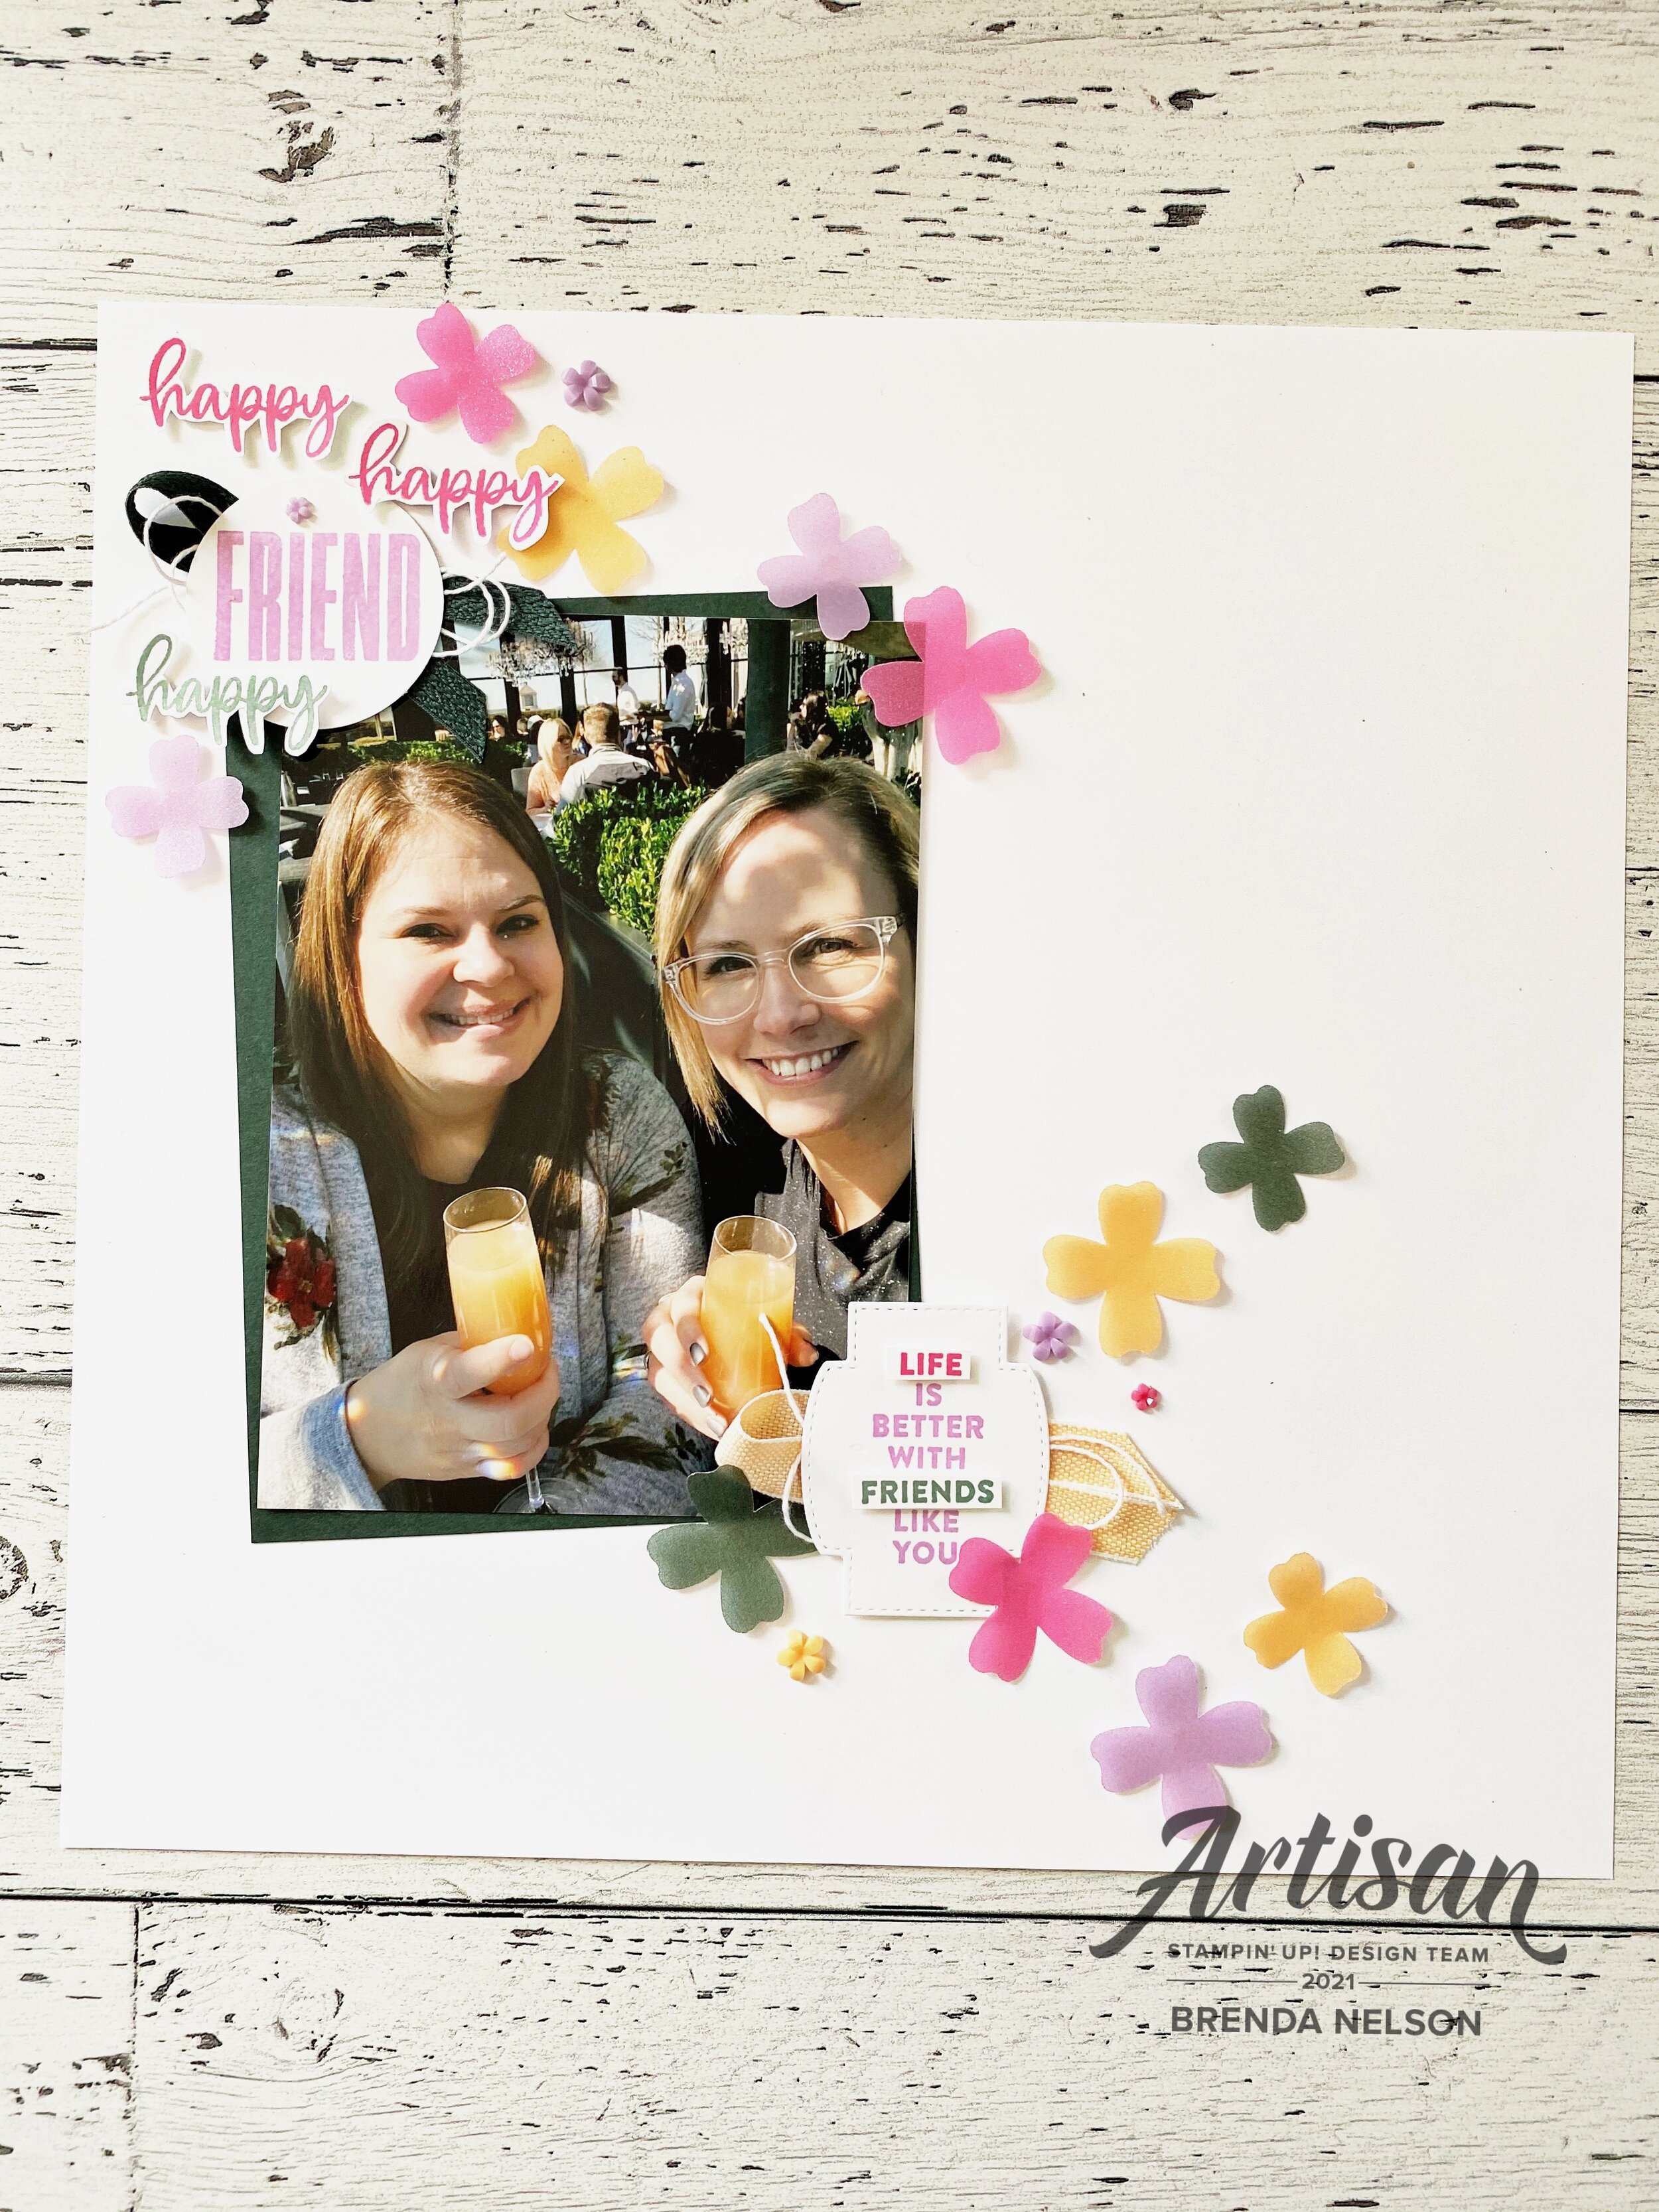
This is my awesome friend Jessica and I on our last girls trip together in March of 2020! Look at us, so smiley and happy. The day after this trip ended to Ohio—guess what happened? Covid.
I used the Flowers of Friendship bundle and the Biggest Wish stamp set as the features on this layout. The crisp Basic White base really helped these flowers pop right off of the page. Now vellum can be tricky to adhere because you can usually see the adhesive through the vellum, but would you believe there is a Mini Dimensional behind these flowers? This vellum is just thick enough they disappear on the white page base.

One of my favorite new embellishments are the Loose Flower Flourishes which I have also added onto this page as they are available in Pale Papaya, Polished Pink and Fresh Freesia. They work so well with the Flowers of Friendship bundle too as the flowers have a similar look to them. And they are a flat backed embellishmentt so they attach easily with a Glue Dot.
I stamped out the sentiment in Fresh Freesia and die cut it with a shape from the Stitched So Sweetly Dies. I then stamped it again in Polished Pink and Soft Succulent so I could trim out a couple of the words to pop up on a Mini Dimensional.
I added some of the new Pale Papaya & White ribbon behind the sentiment with some white twine. I can’t help myself, I love my embellishments and almost always had some ribbon or twine, or both, behind my sentiments.

I wanted to incorporate the Biggest Wish stamp set into this page as I loved the fact that it had the word Friend in it. I am always on the lookout for that. I stamped it with Fresh Freesia and punched it into a circle. I used one of the mini flower embellishments for the dot of the ‘i’.
Behind the ‘Friend’ I added the new Evening Evergreen 3/8 Chevron Weave ribbon which is so nice in person! And of course a little more white twine.
I stamped ‘happy’ twice in Polished Pink and once in Soft Succulent and hand trimmed them out to add to the page with a Mini Dimensional. How did we survive before Mini Dimensionals…these are the thoughts that keep me awake at night! hahaha!
I hope this page inspires you and if you have not added the Shimmer Vellum to your cart than do so! You can shop with me by clicking the Hostess Code link on the side of my page.
I can’t wait to see what the rest of the team creates with these fantastic new In Colors! You can hop NEXT to see what Melanie has designed for us!

Or if you want to head backwards you can do that too! Either way go all the way around so you don’t miss any awesome inspiration. By clicking Previous you will be heading to visit Bonnie! Have a lovely June and we will see you back again in July!