Create with Connie and Mary--Love is in the Air!

Can you believe it is the end of January already? Happy that this month is done as it hopefully it means we are another month closer to ‘normal’ life! Where I live, things are still pretty strict and we are in the middle of a cold snap, so its a bit of a rough patch. Luckily I have my stamping hobby to keep me occupied!

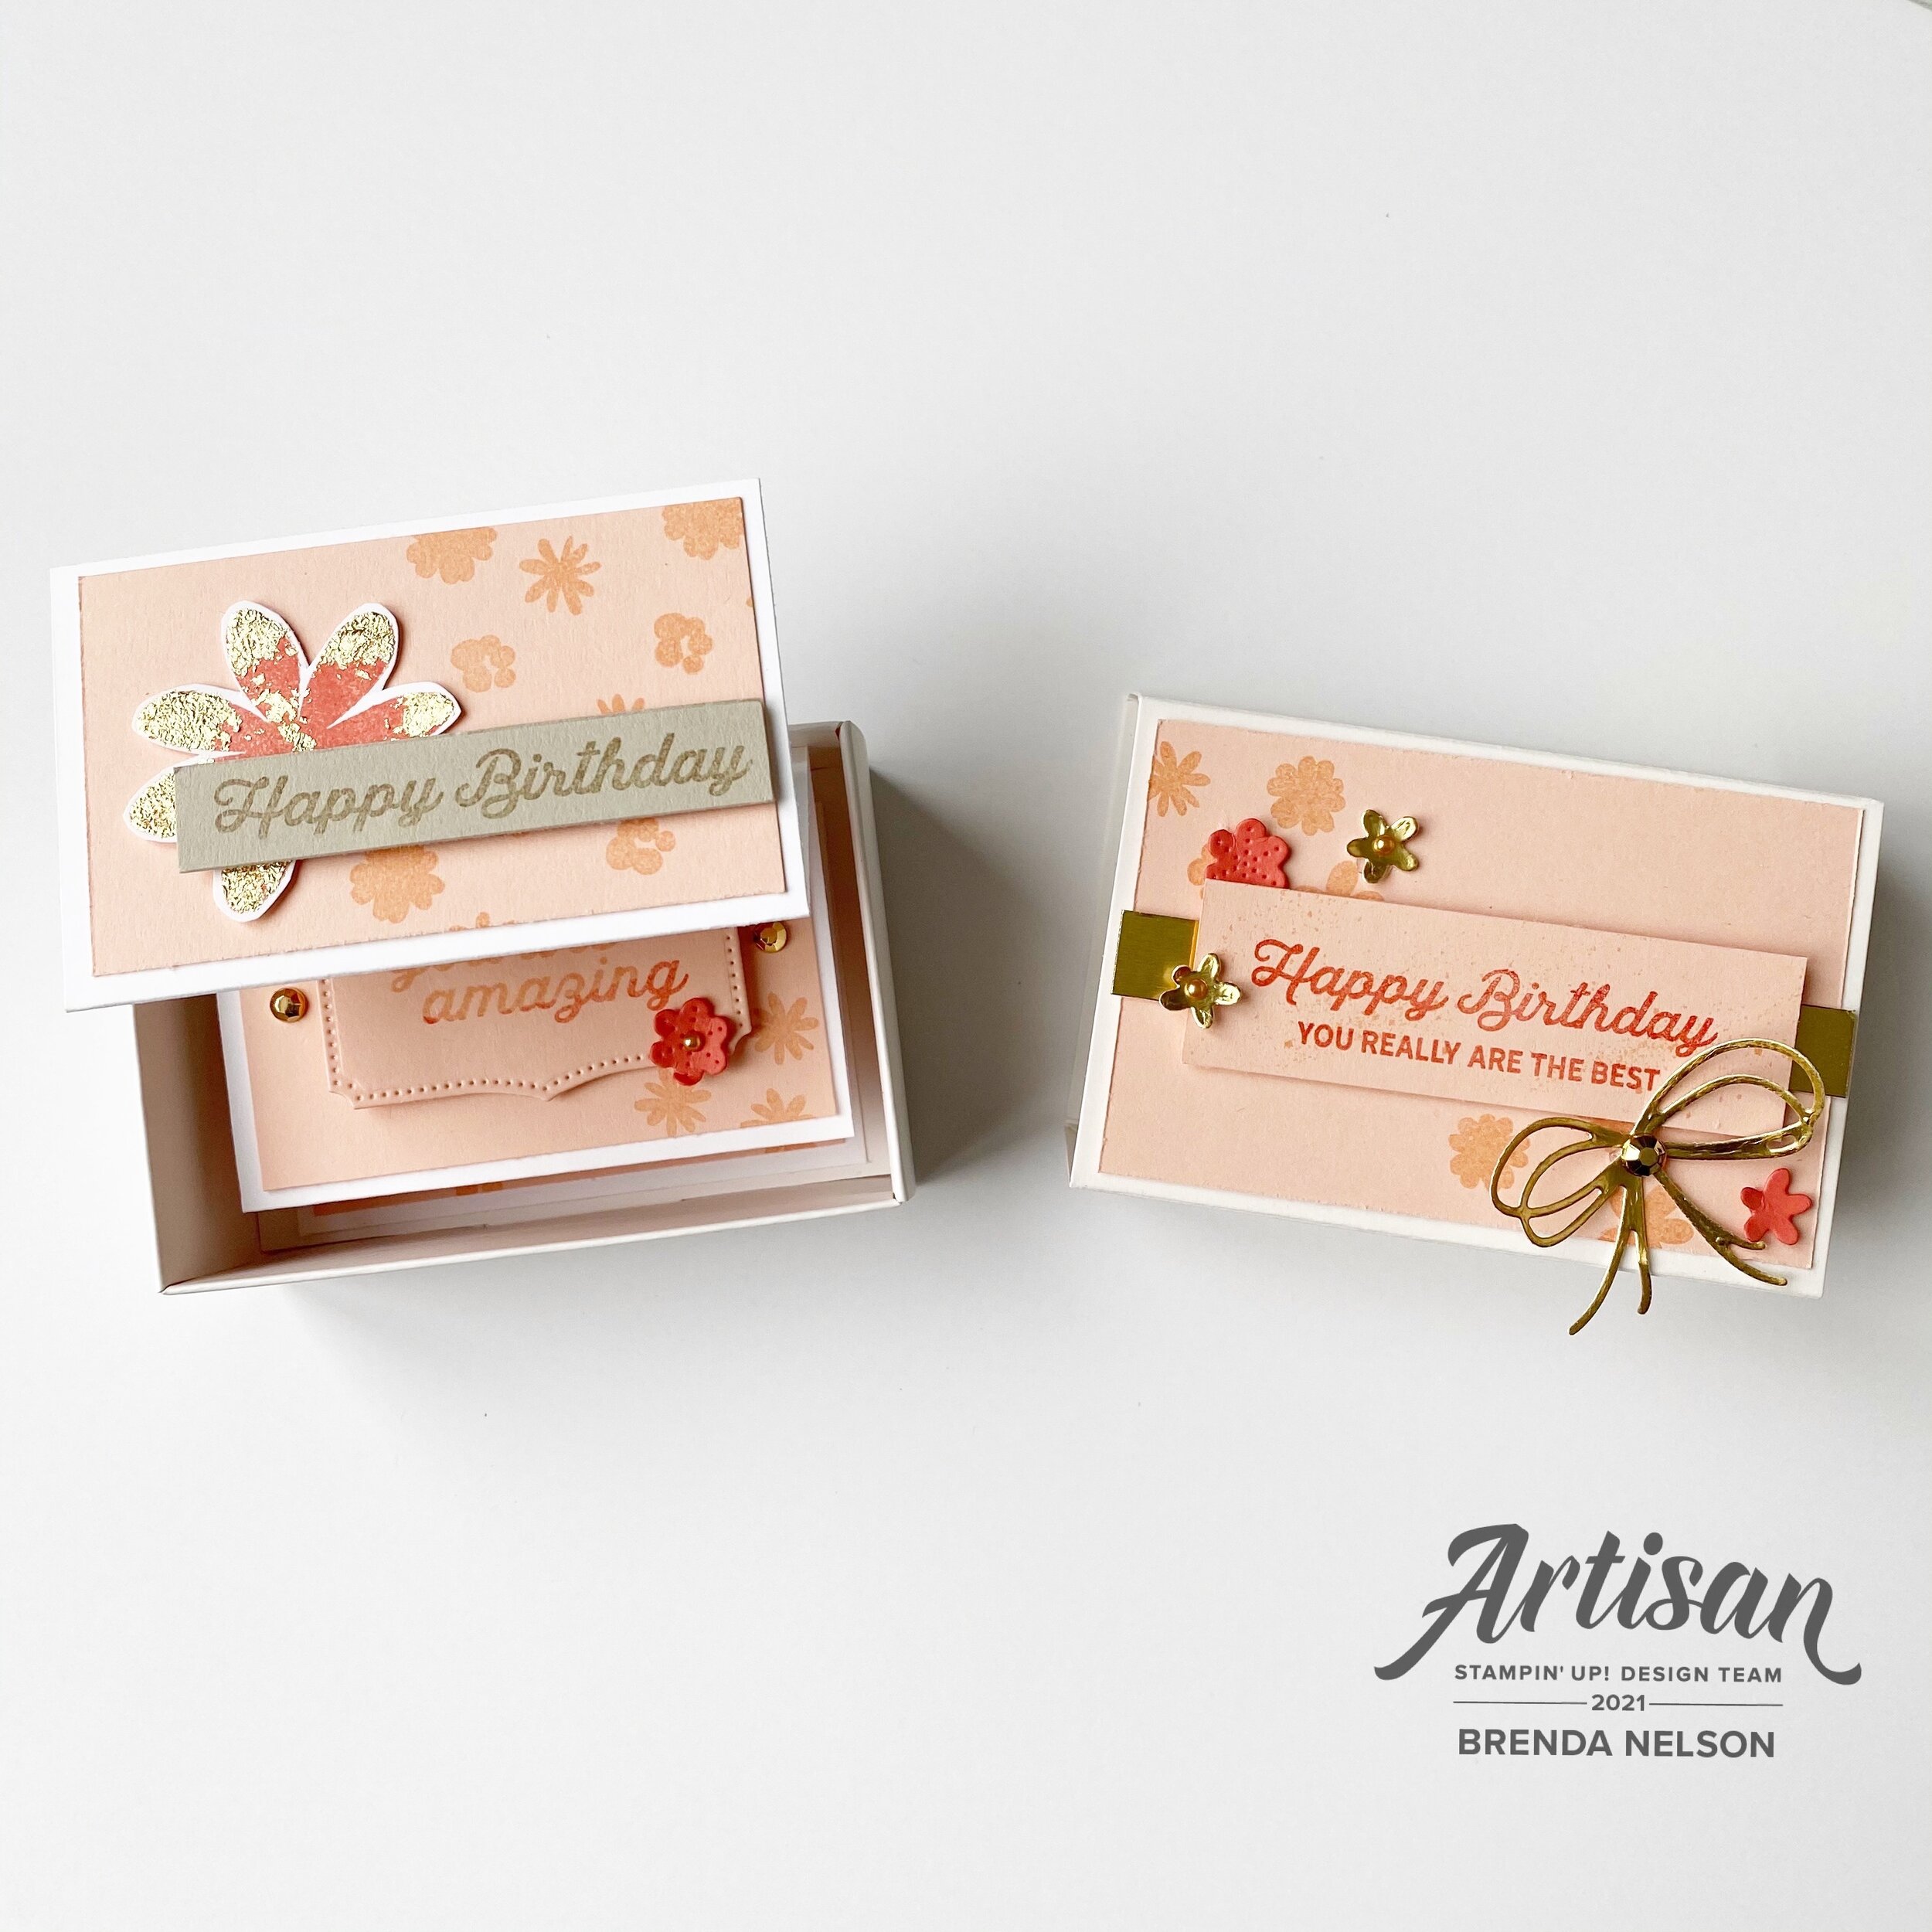
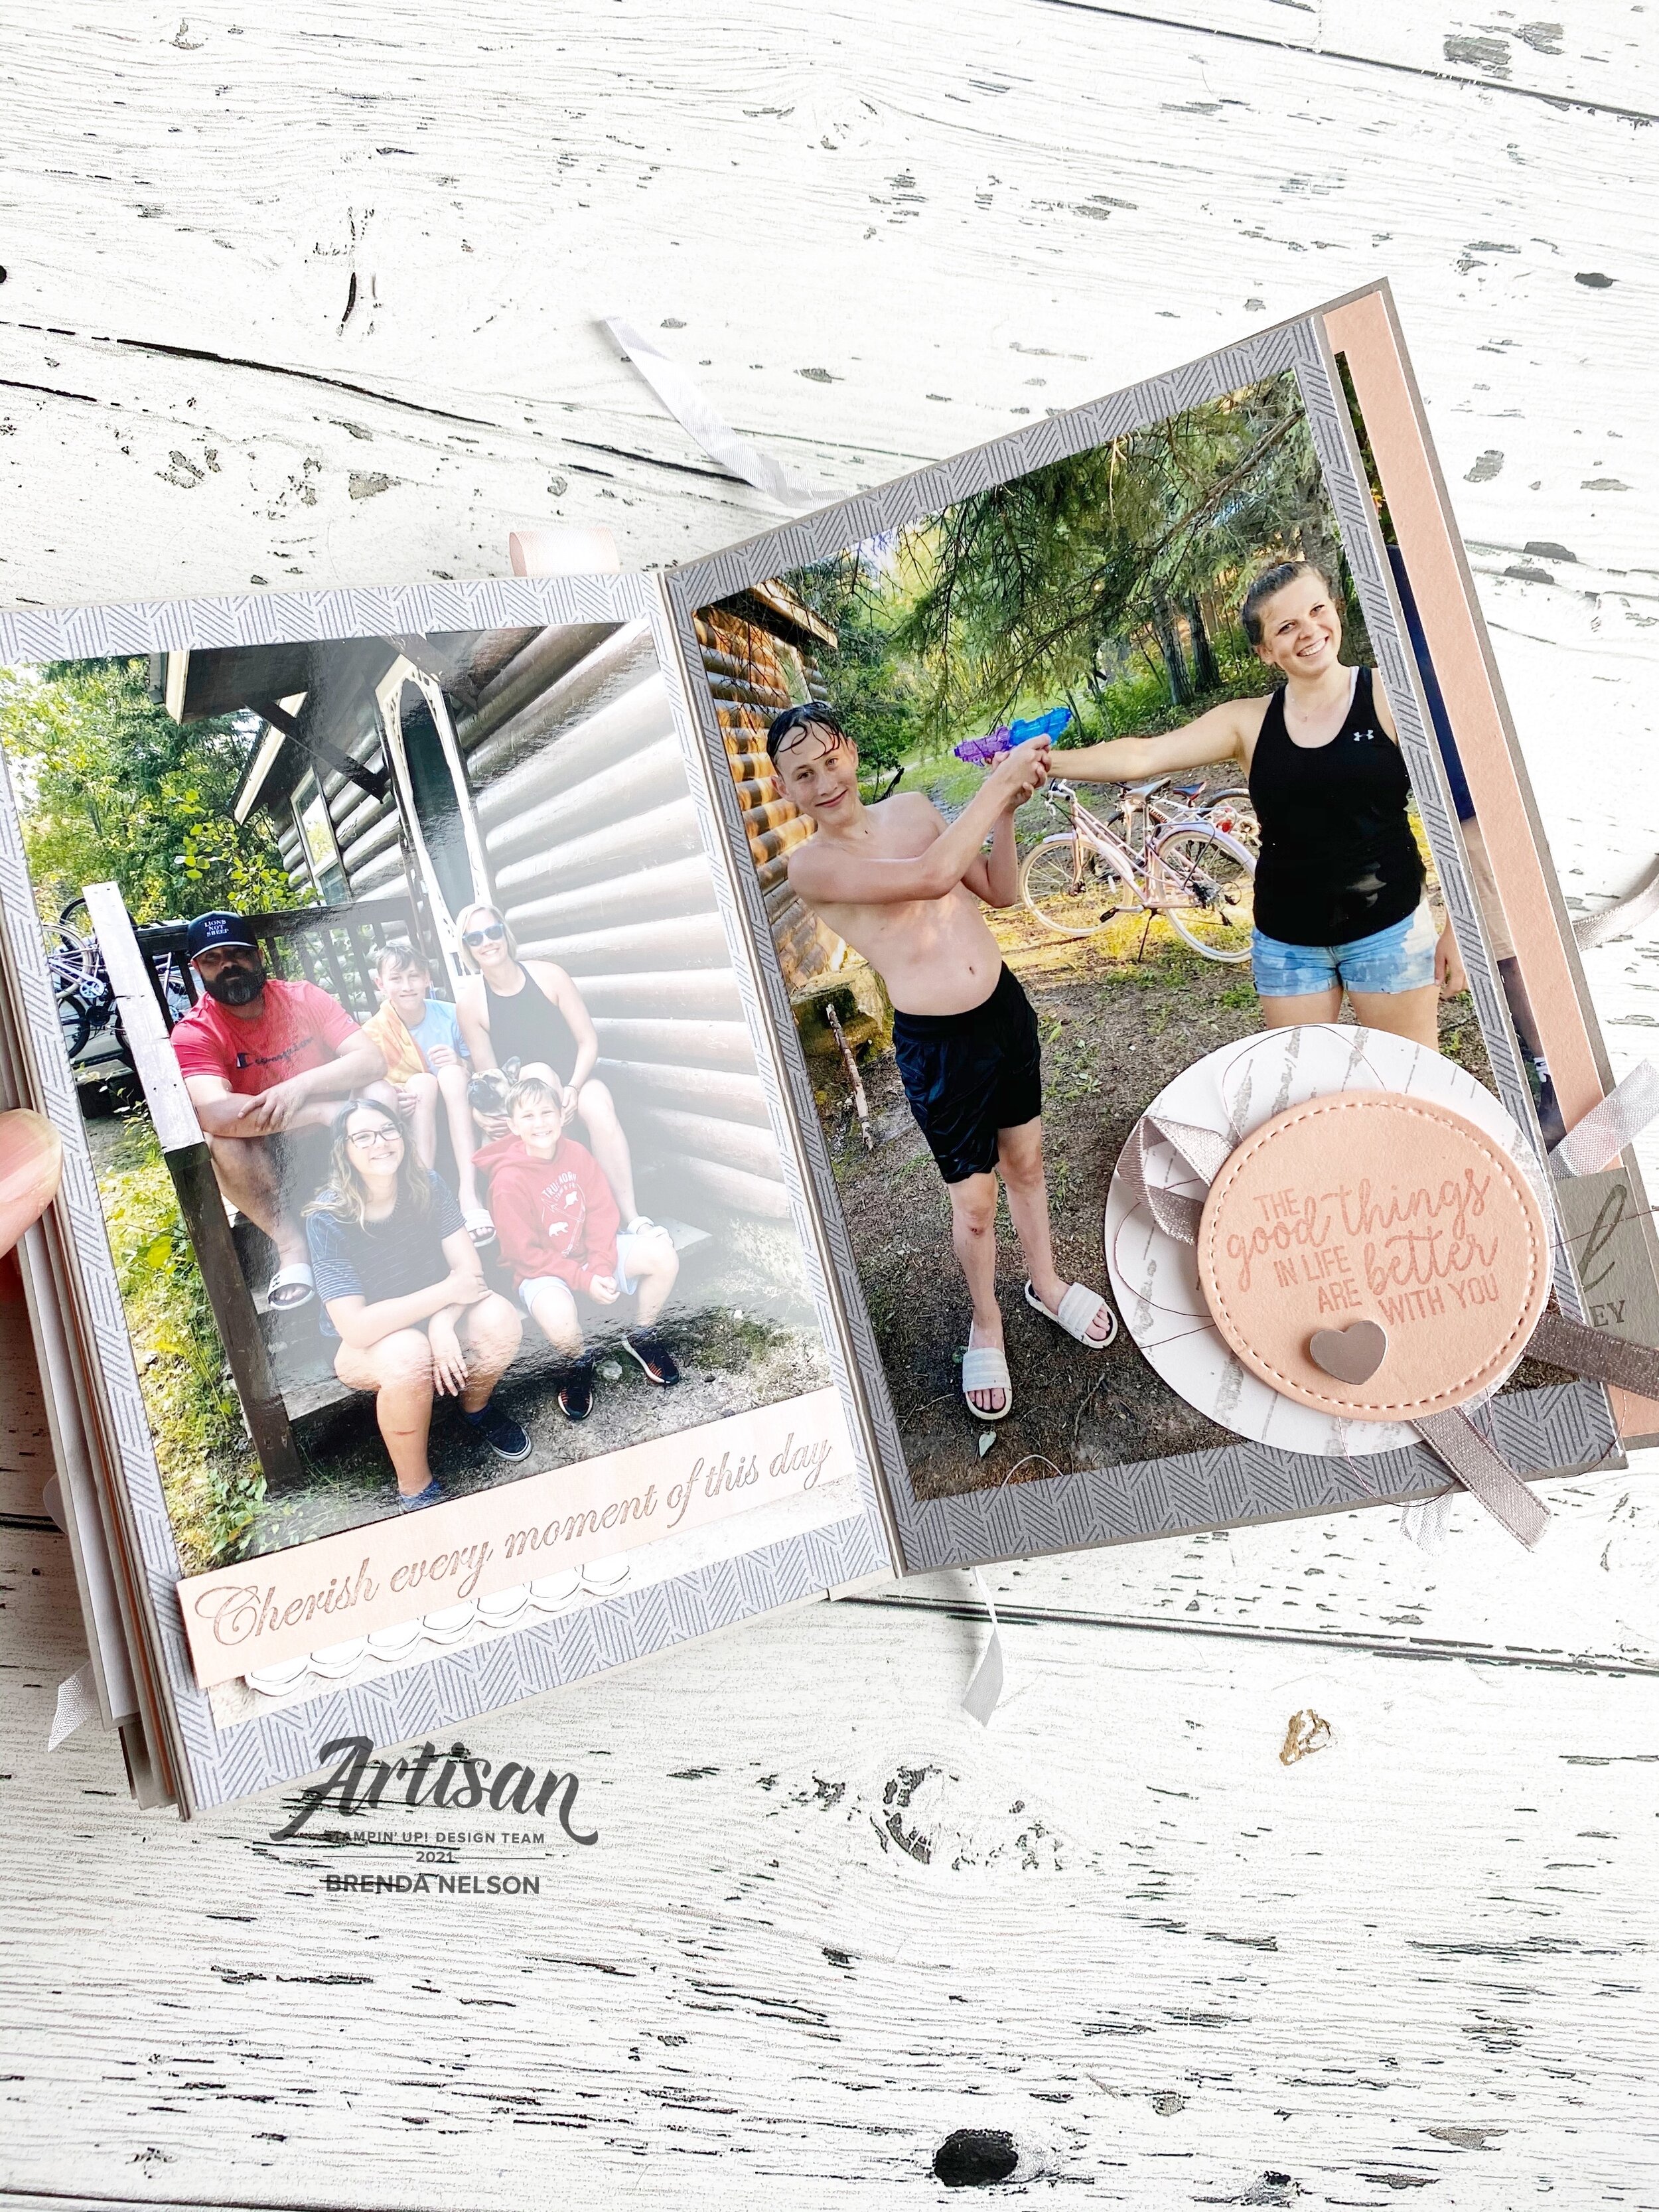
This week our theme is Love is in the Air so I wanted to make a card that has a ‘love’ theme but feels airy and light. I hope you enjoy what I designed!

Design Team.jpg
final (1) 4.jpg
 

For my project this week I decided to experiment again with the new Blending Brushes. Playing around is honestly the best way to learn about a new product. The Blending Brushes are actually so user friendly, I am seriously impressed!

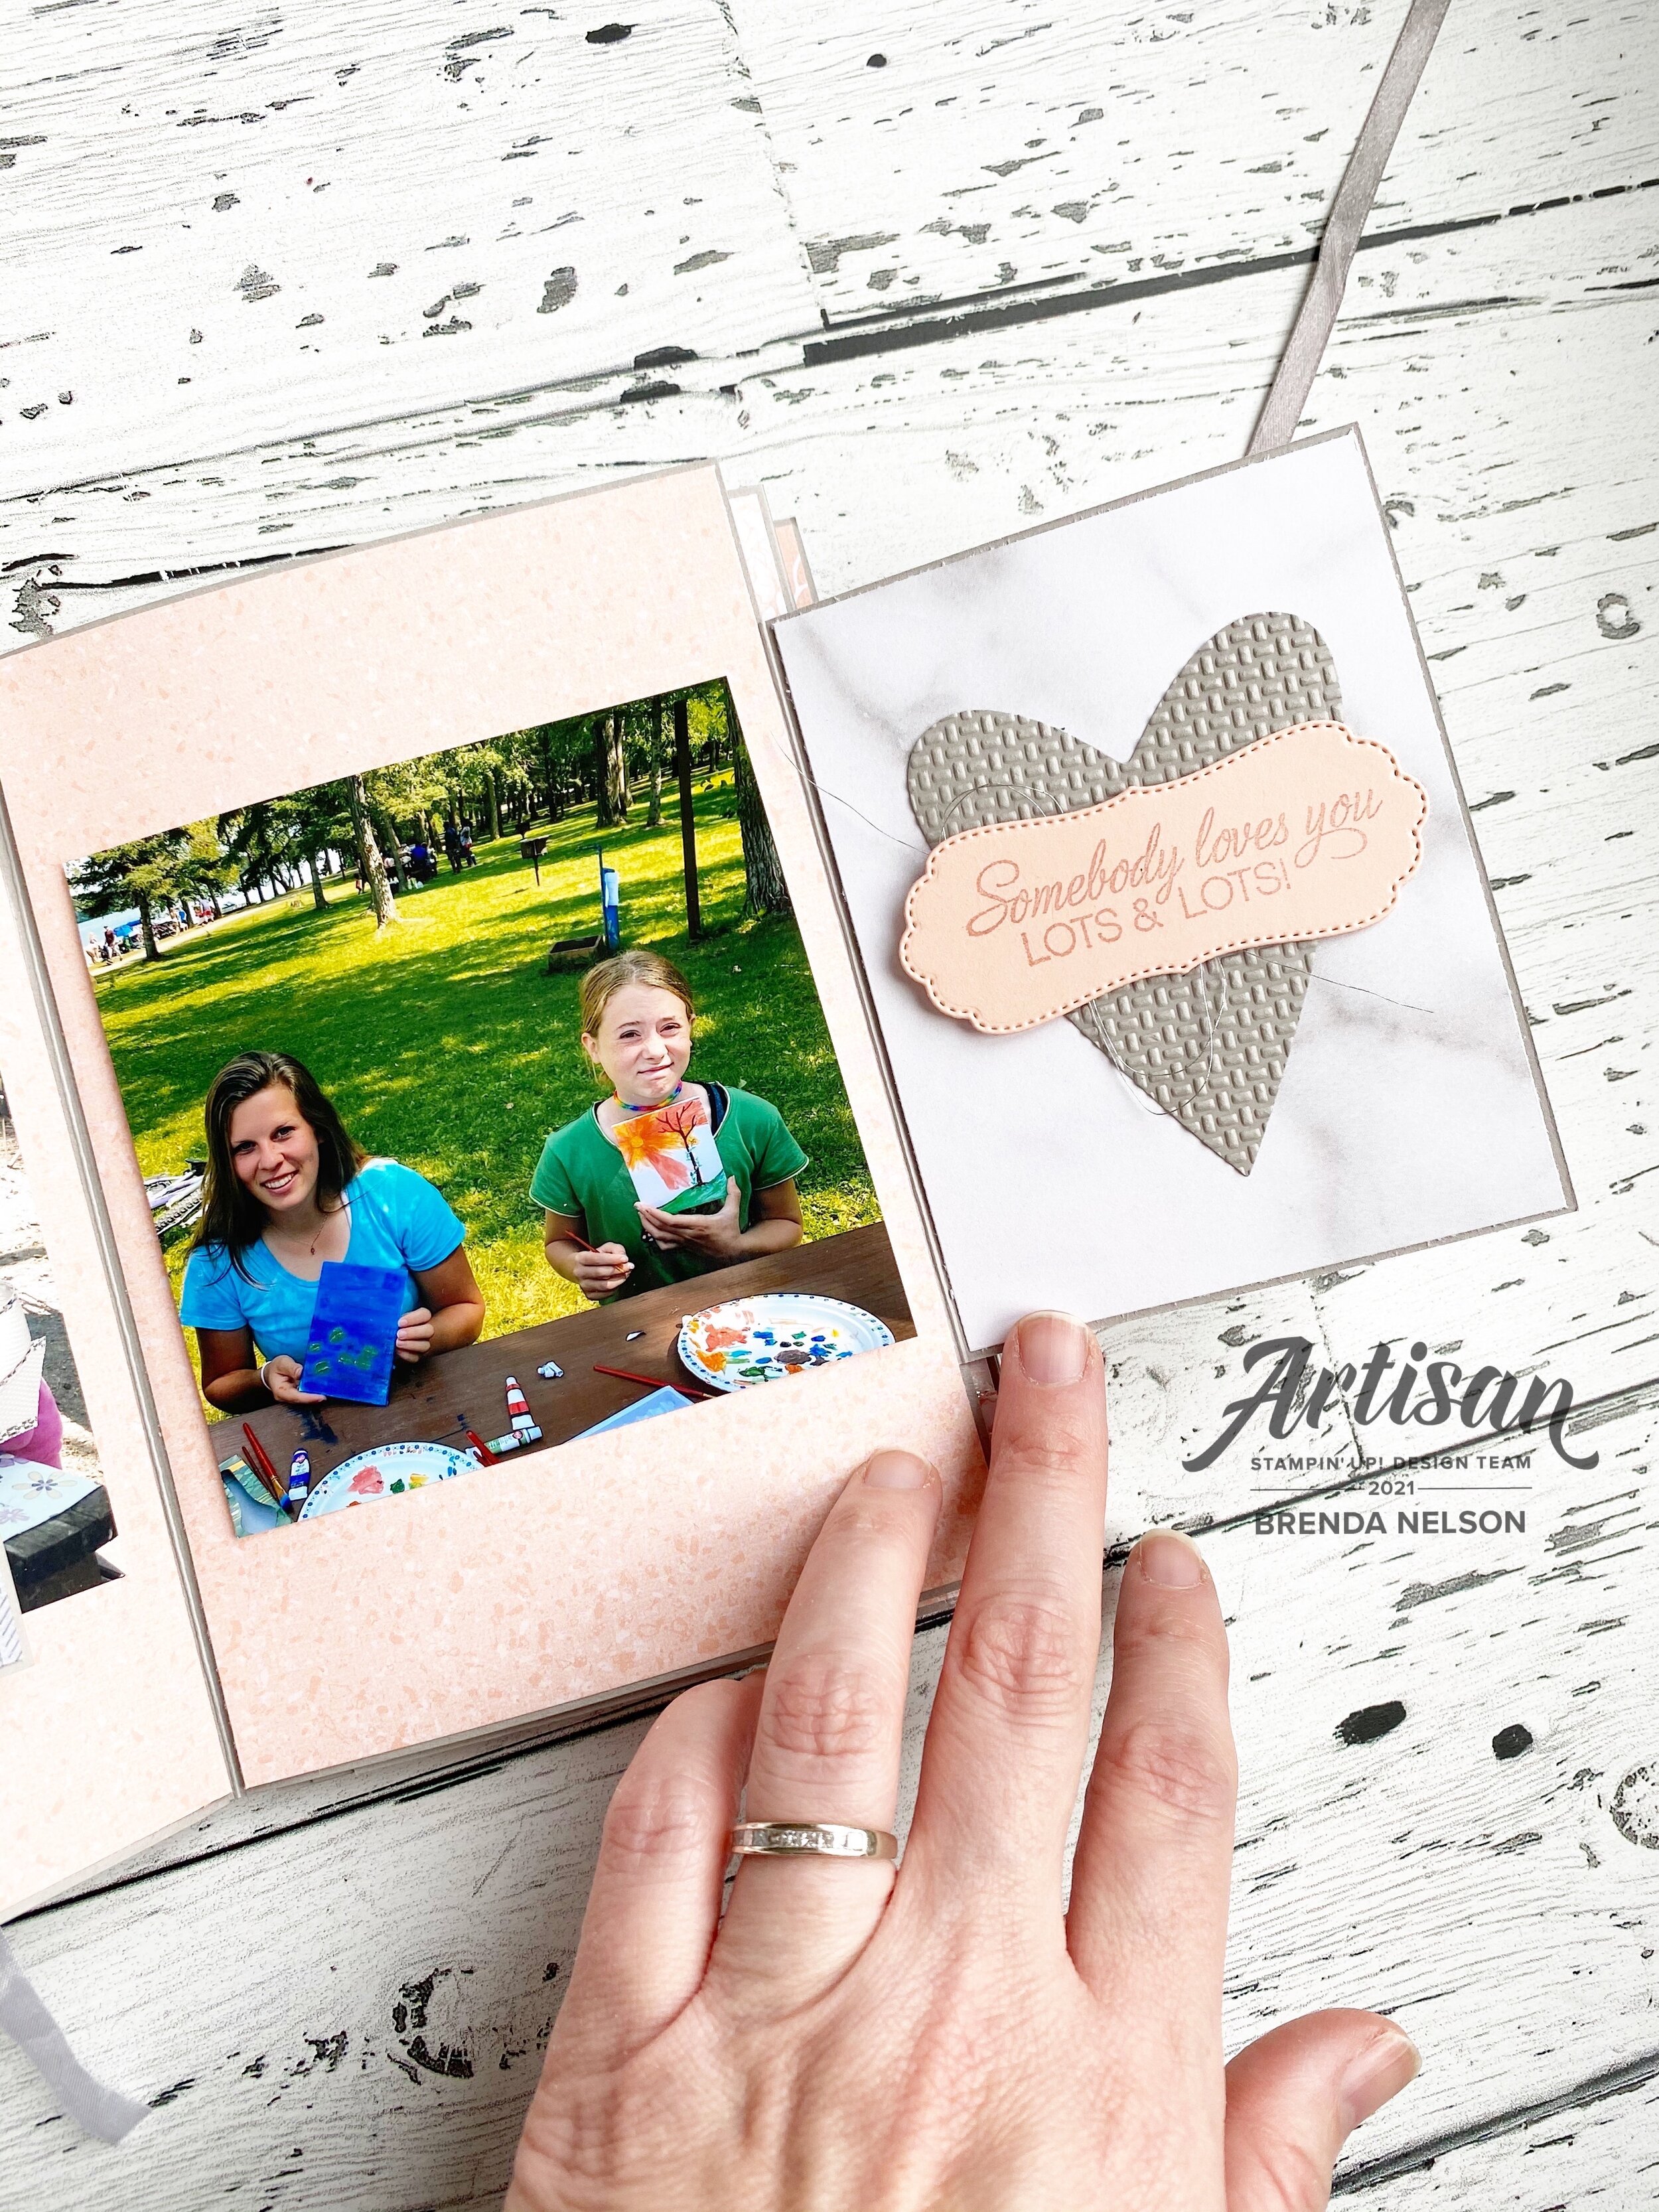
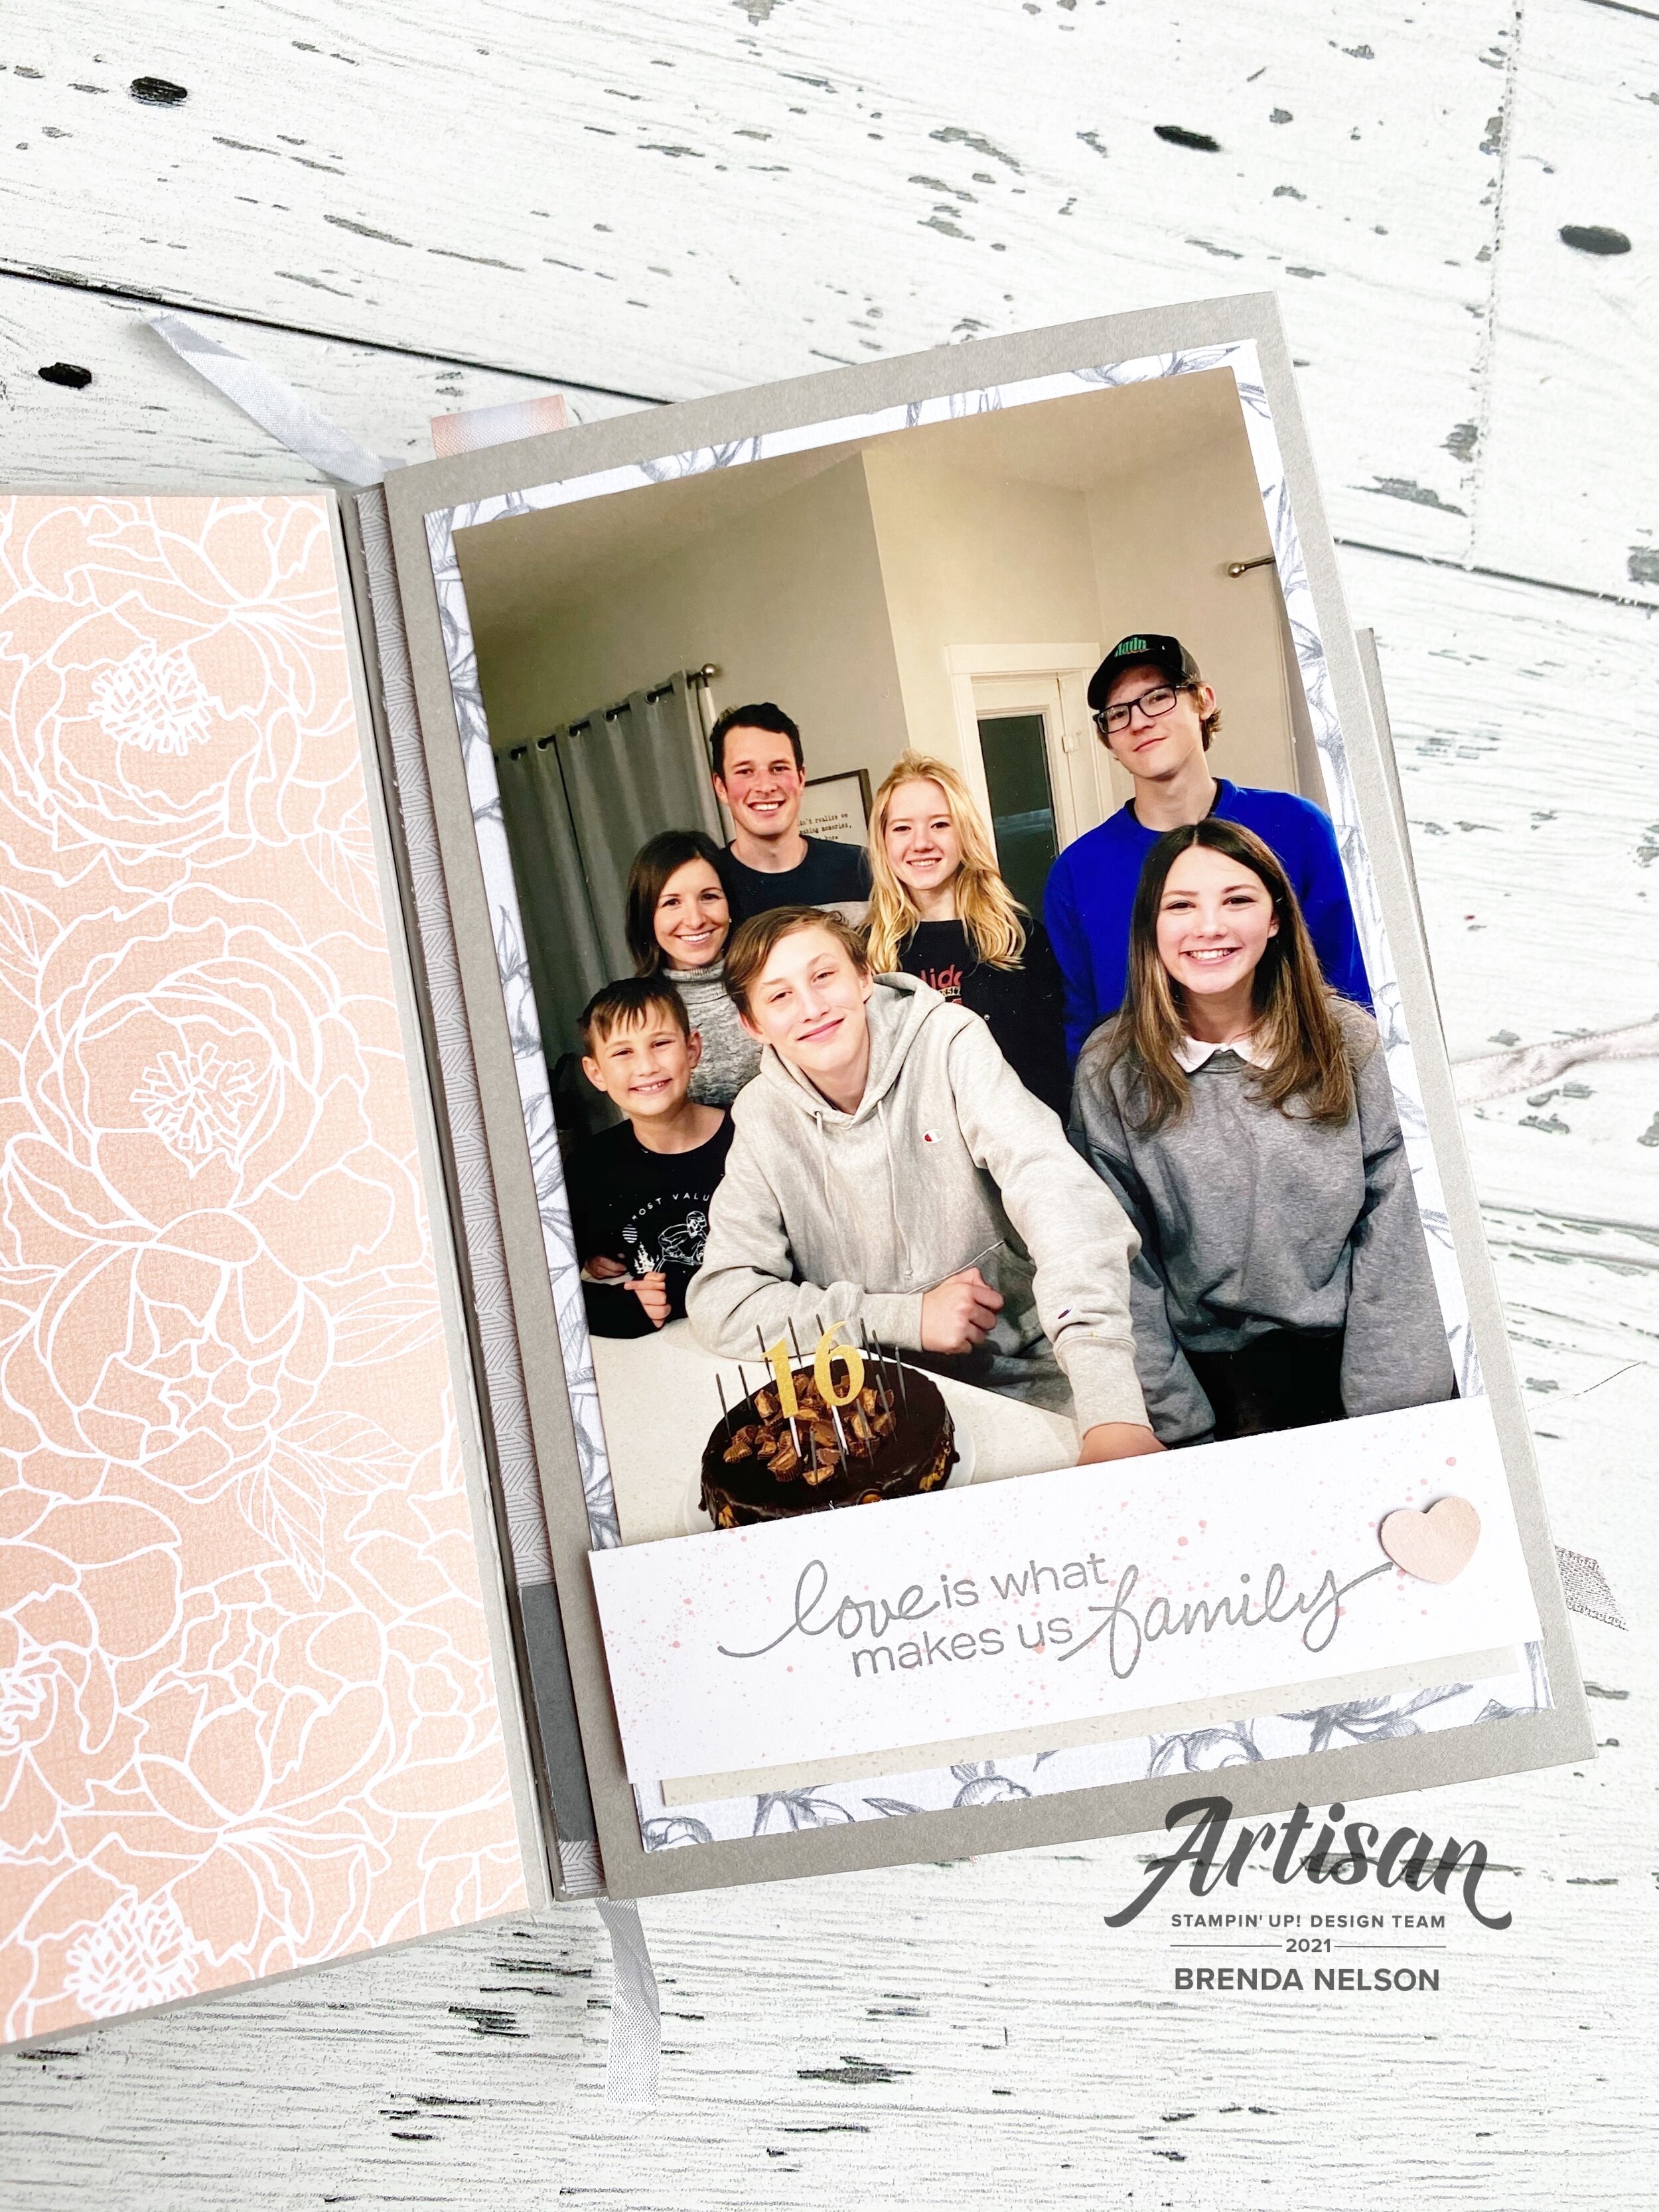
The only stamp on this card is from the Always in my Heart stamp set found in the January to June catalogue.

final (1) 5.jpg

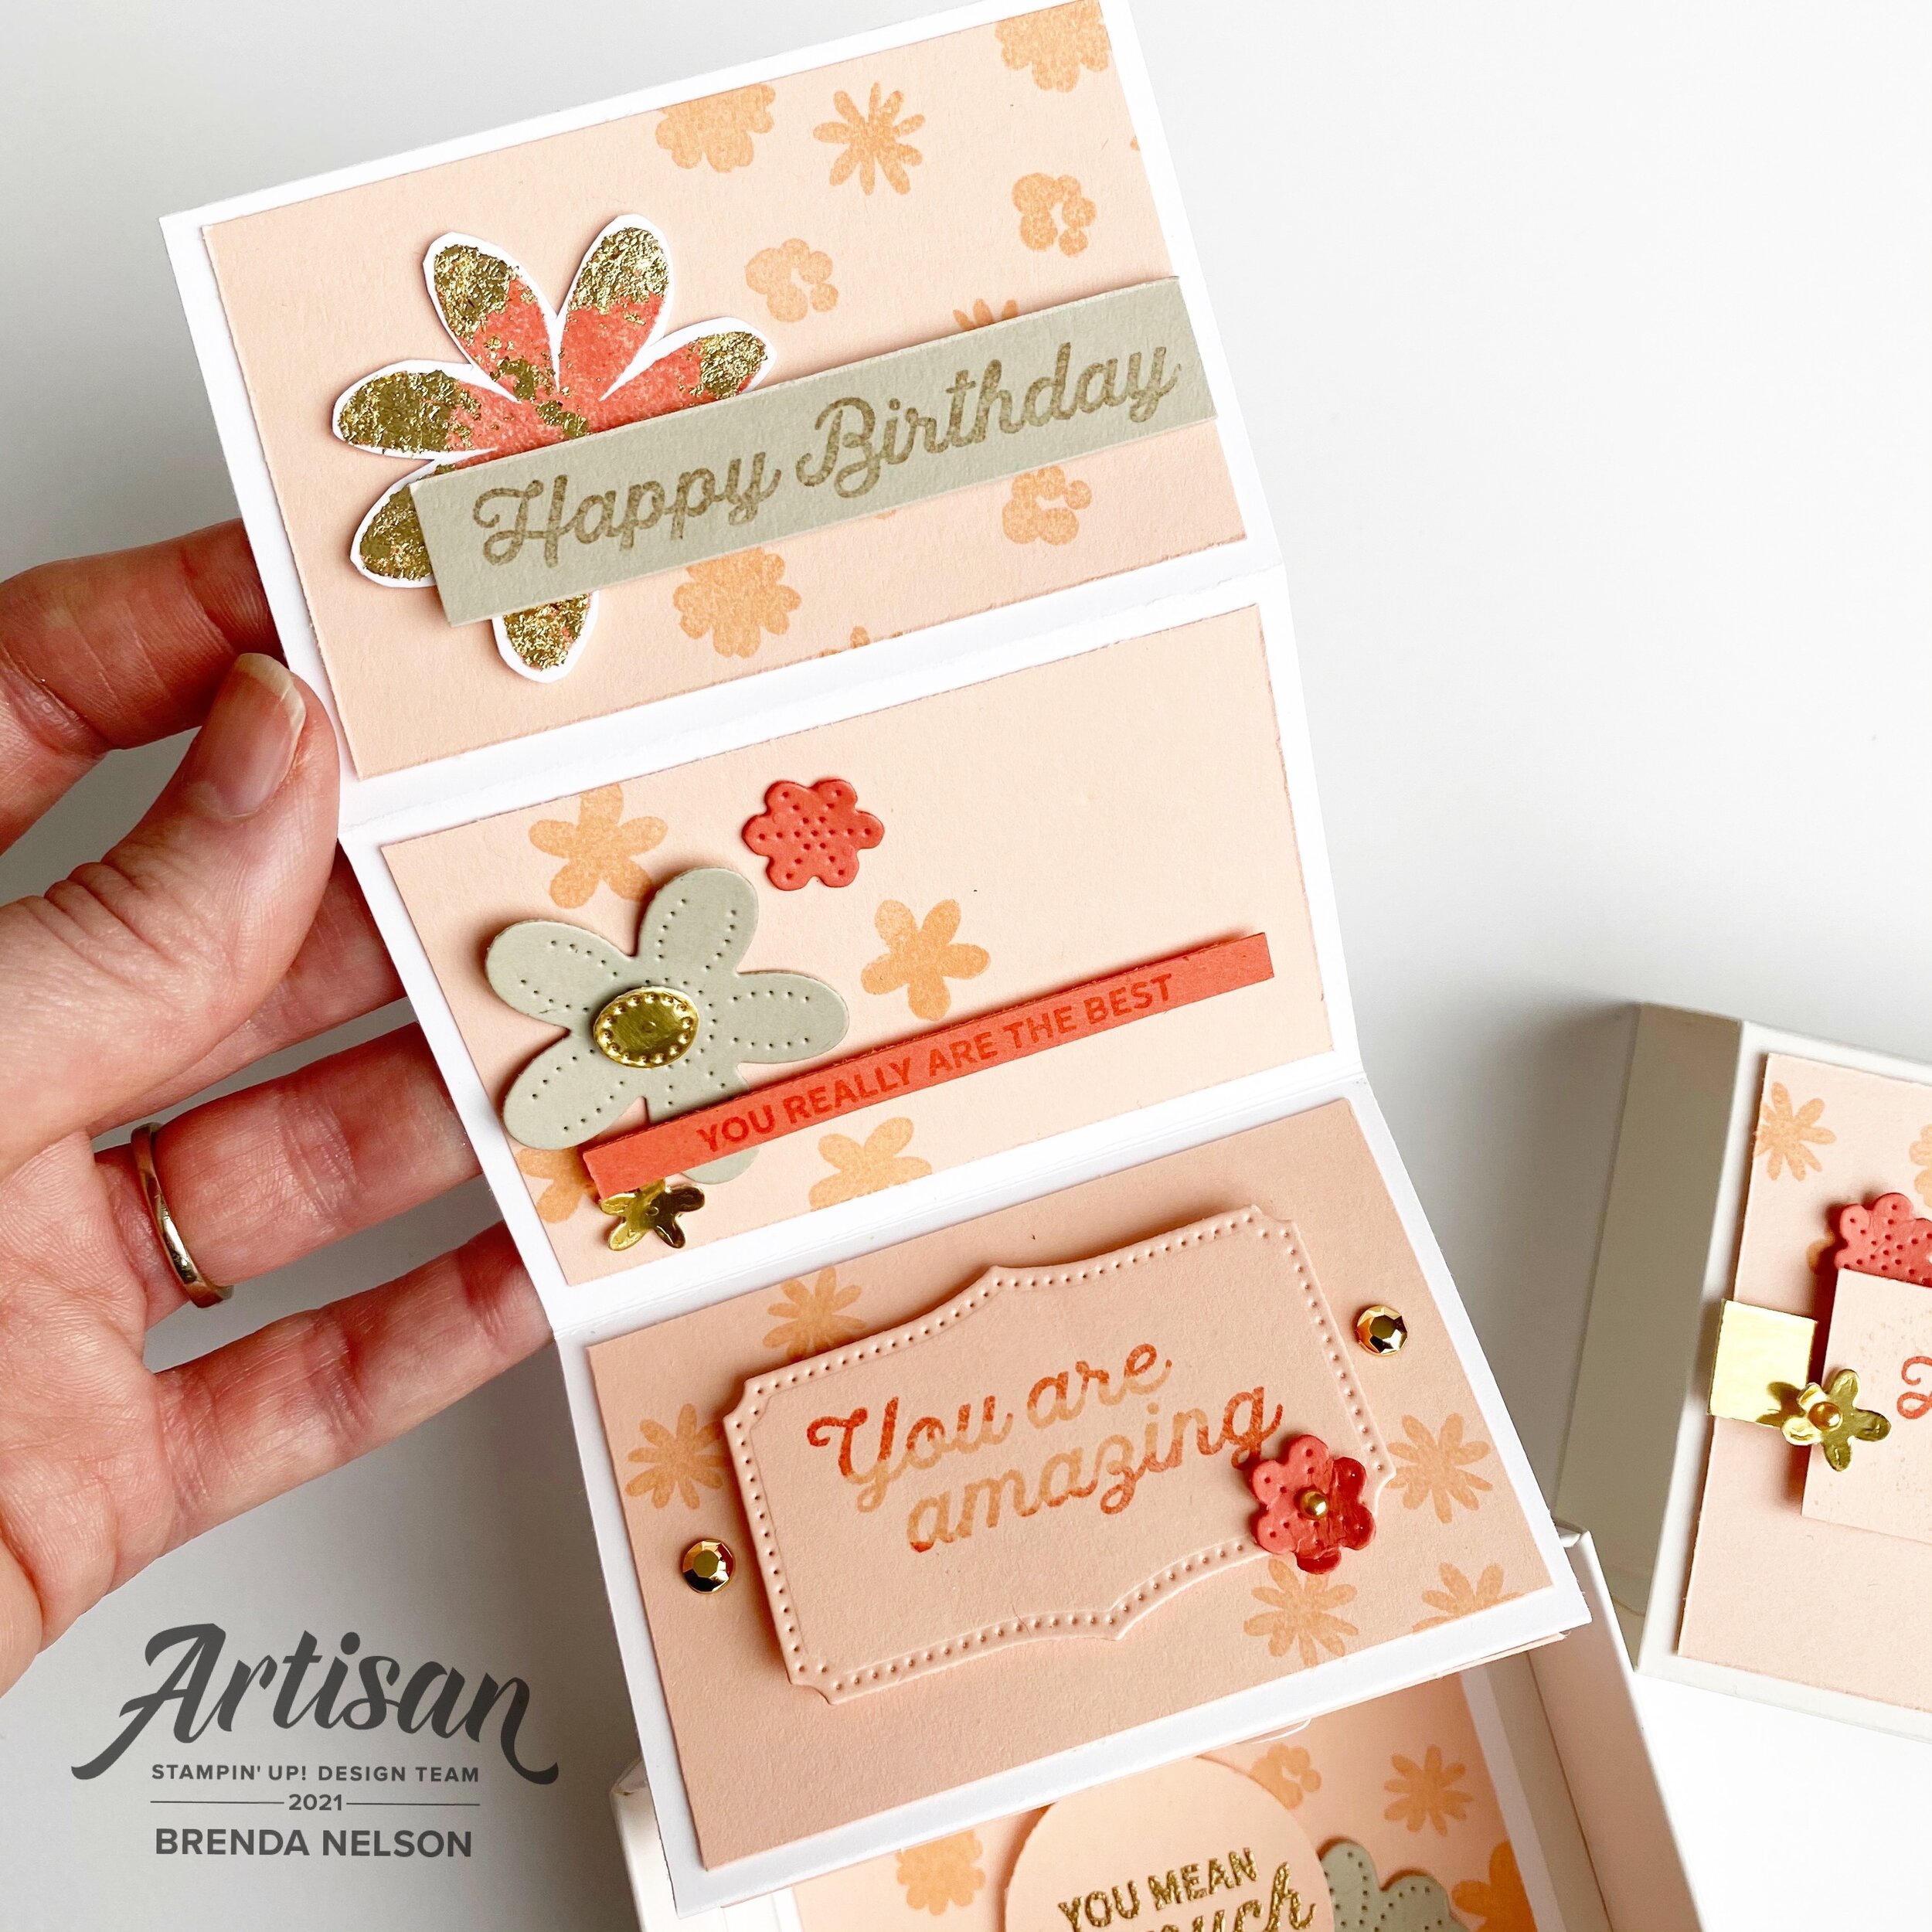
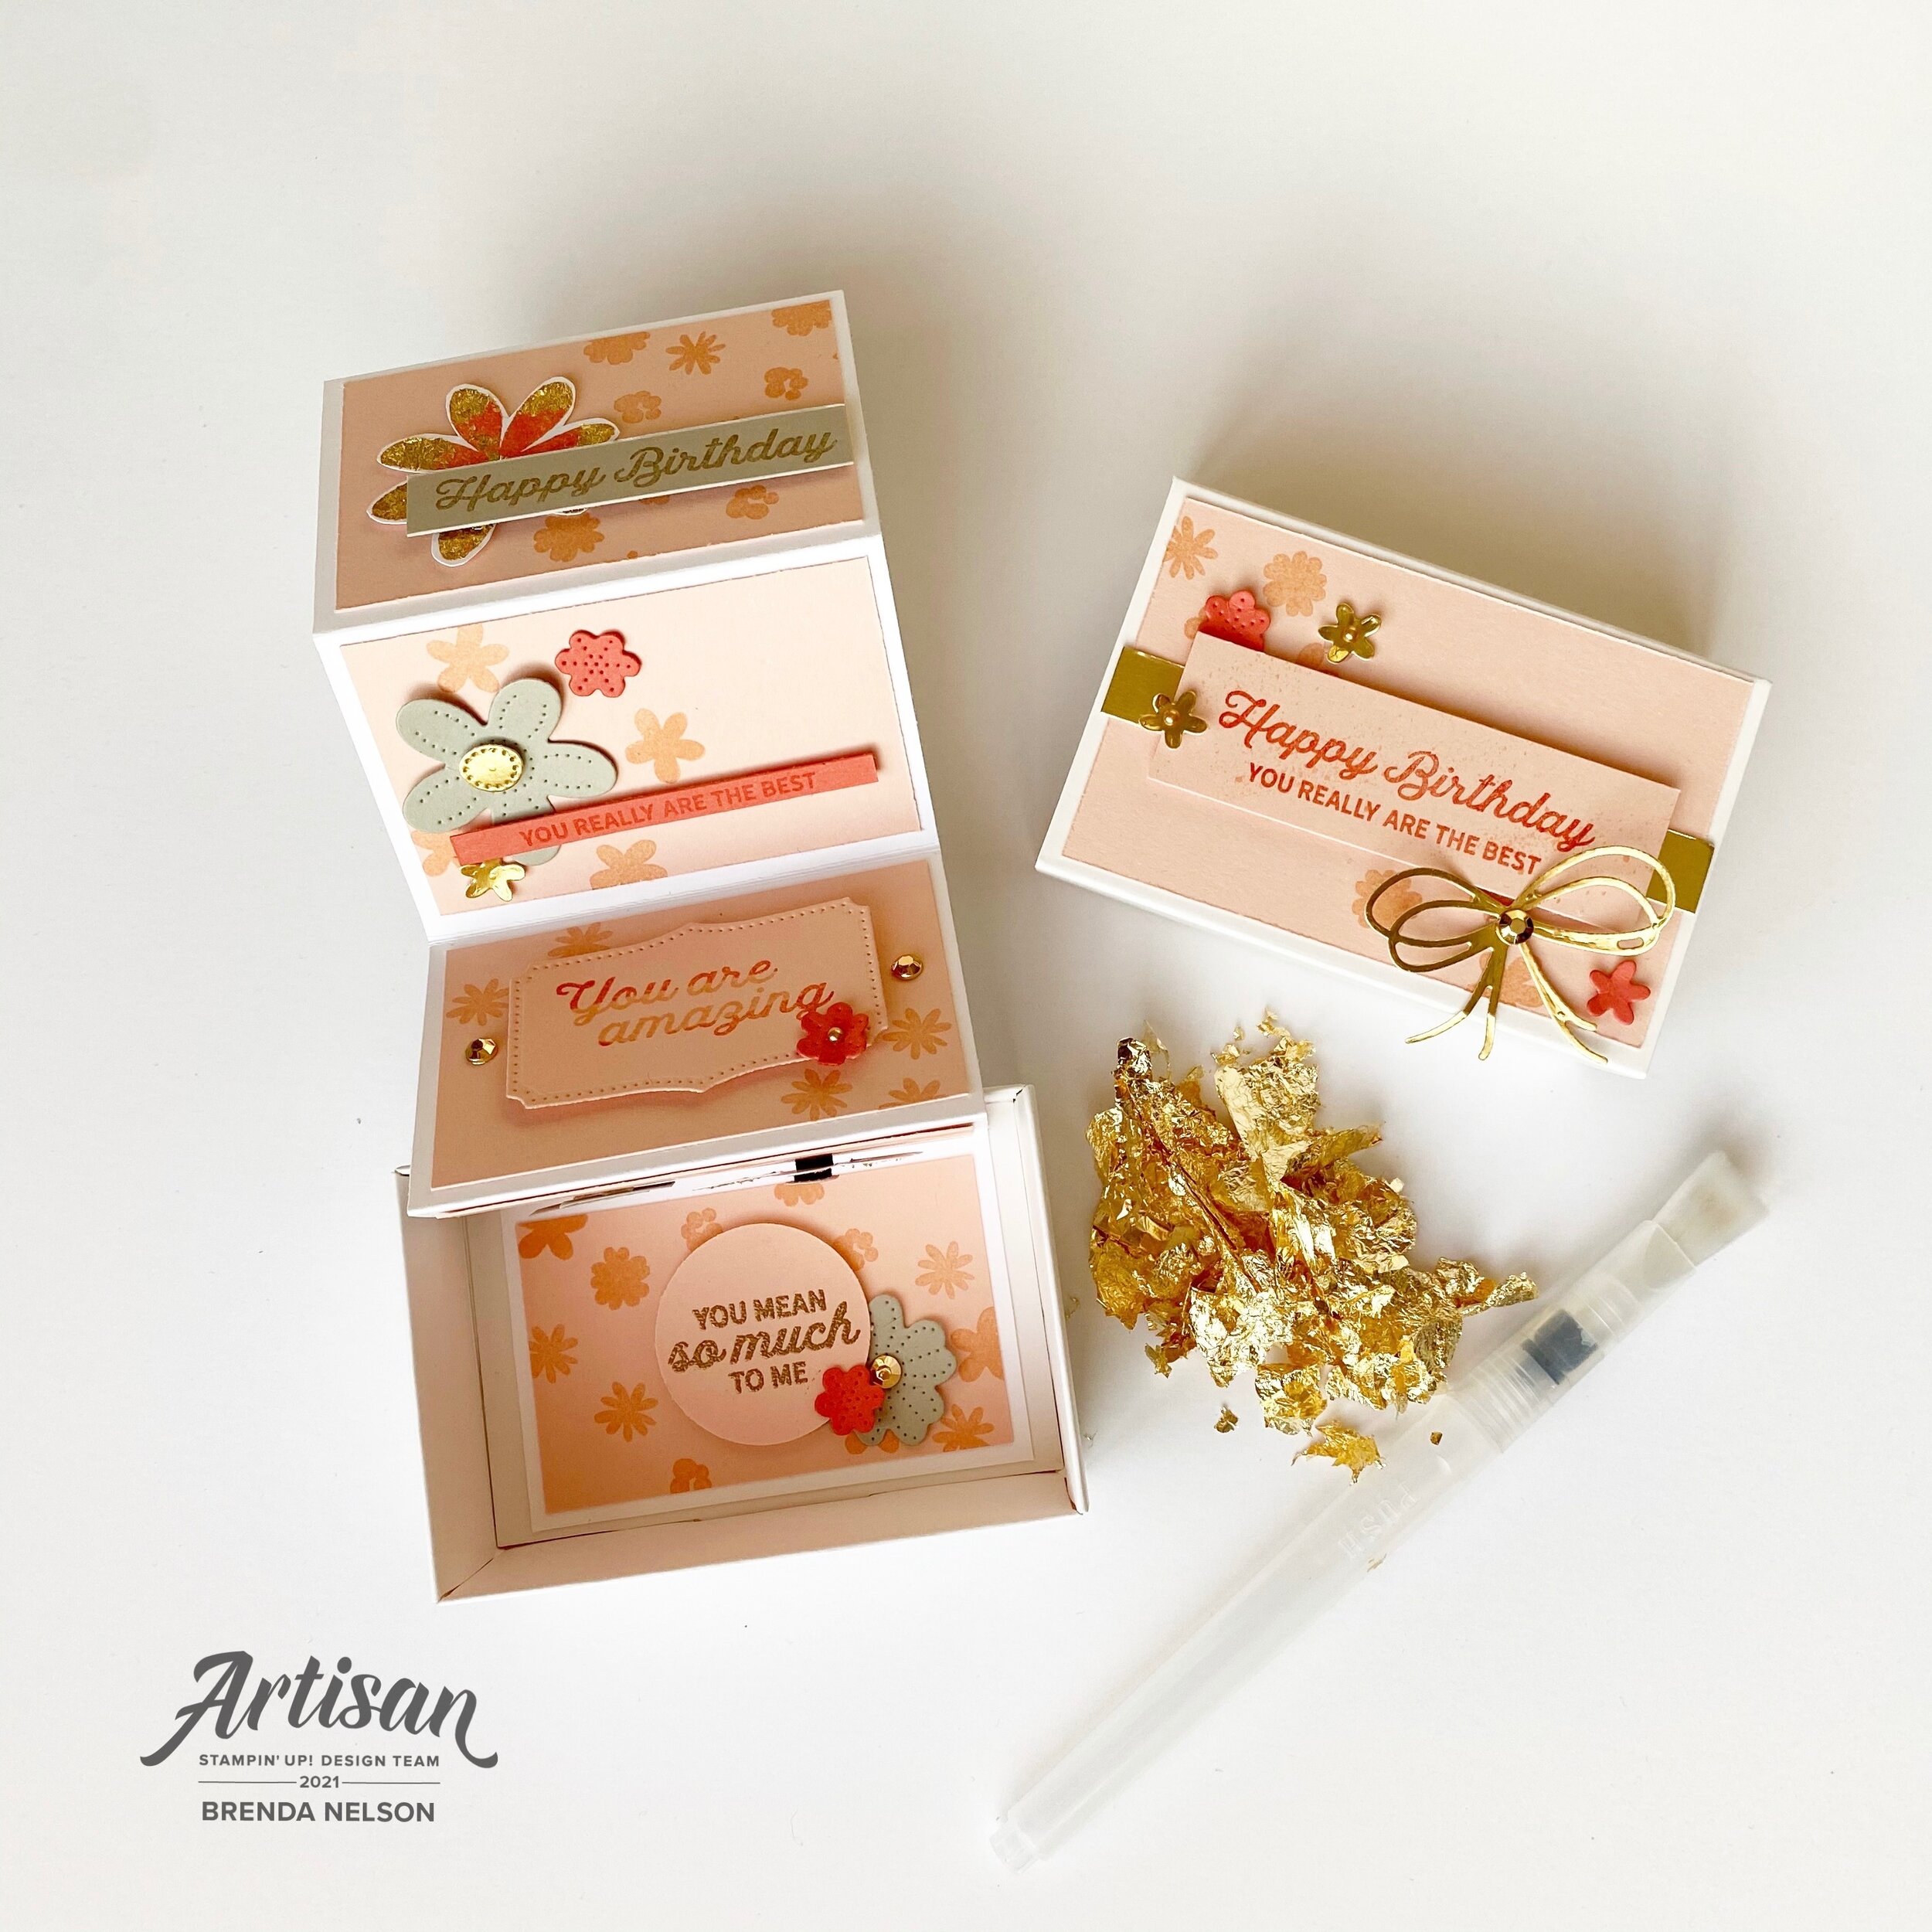
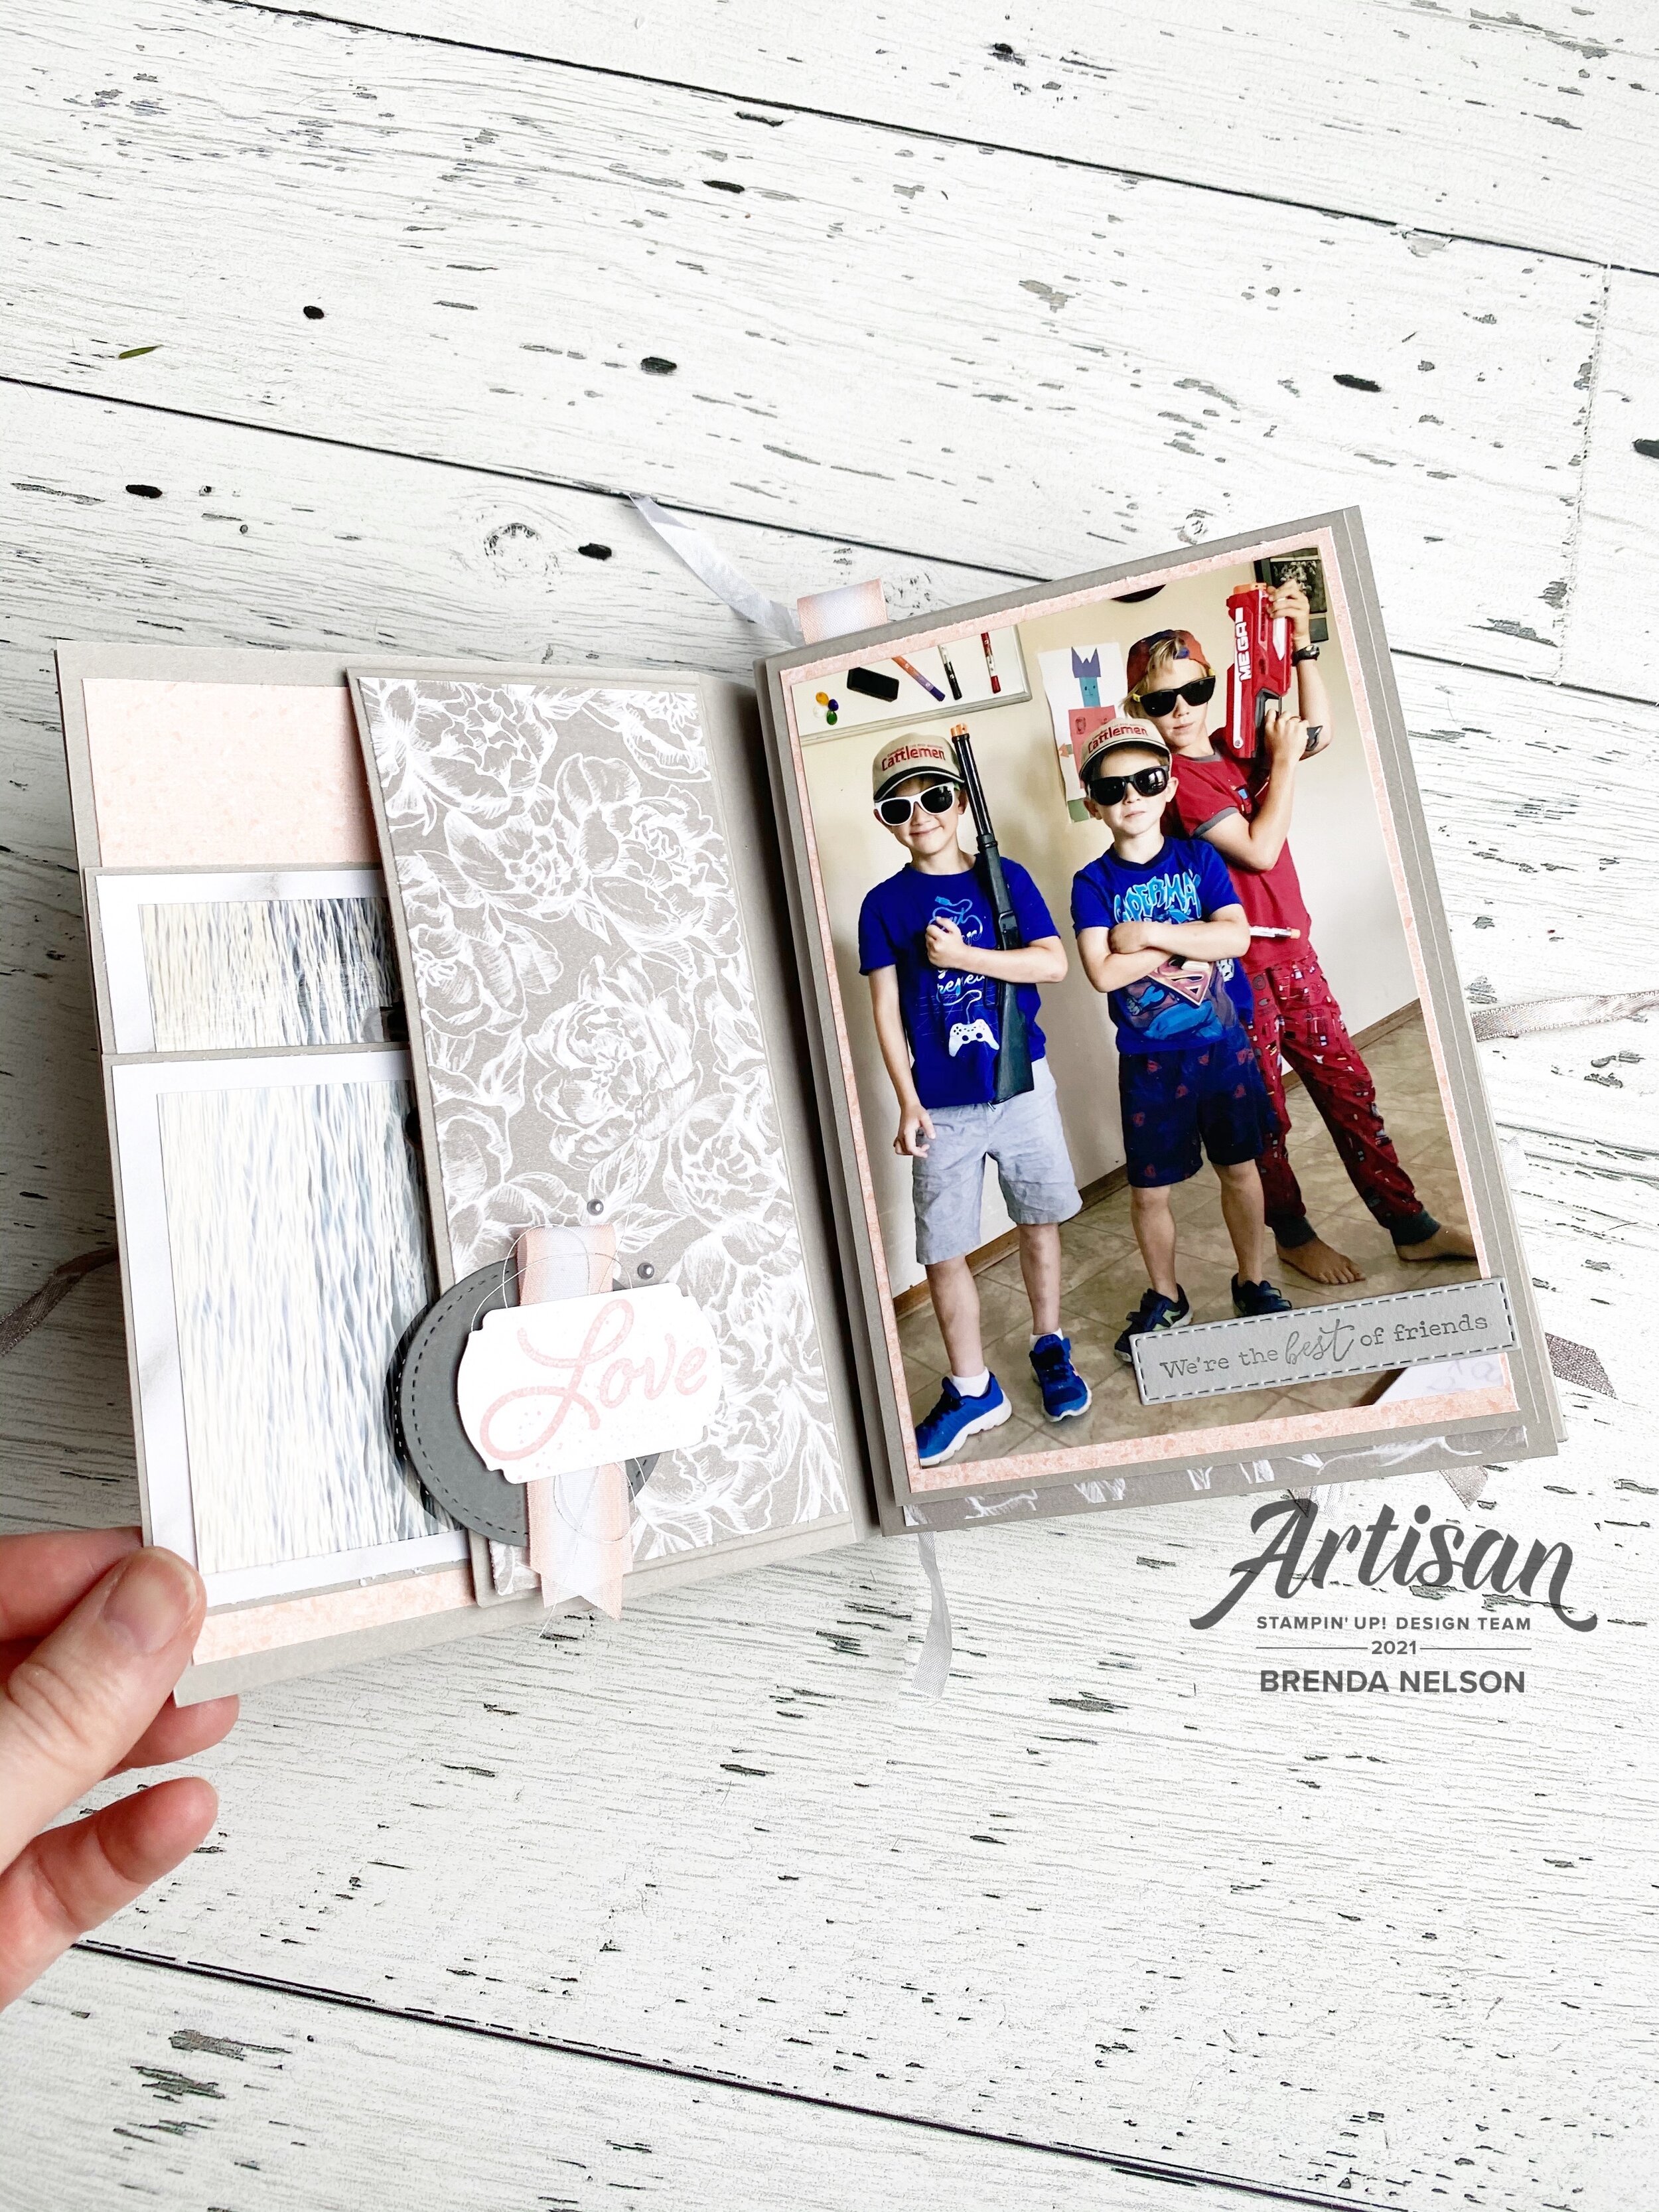
The feature of this card is the box I created with my Blending Brush and stencil I made using two Stitched Rectangular dies to create the box/frame. I used Coastal Cabana for that ‘airy’ bright feel I was wanting. I used the Blending Brush to create the Coastal Cabana box. The sentiment is then stamped on top with Momento Ink.

final 10.jpg

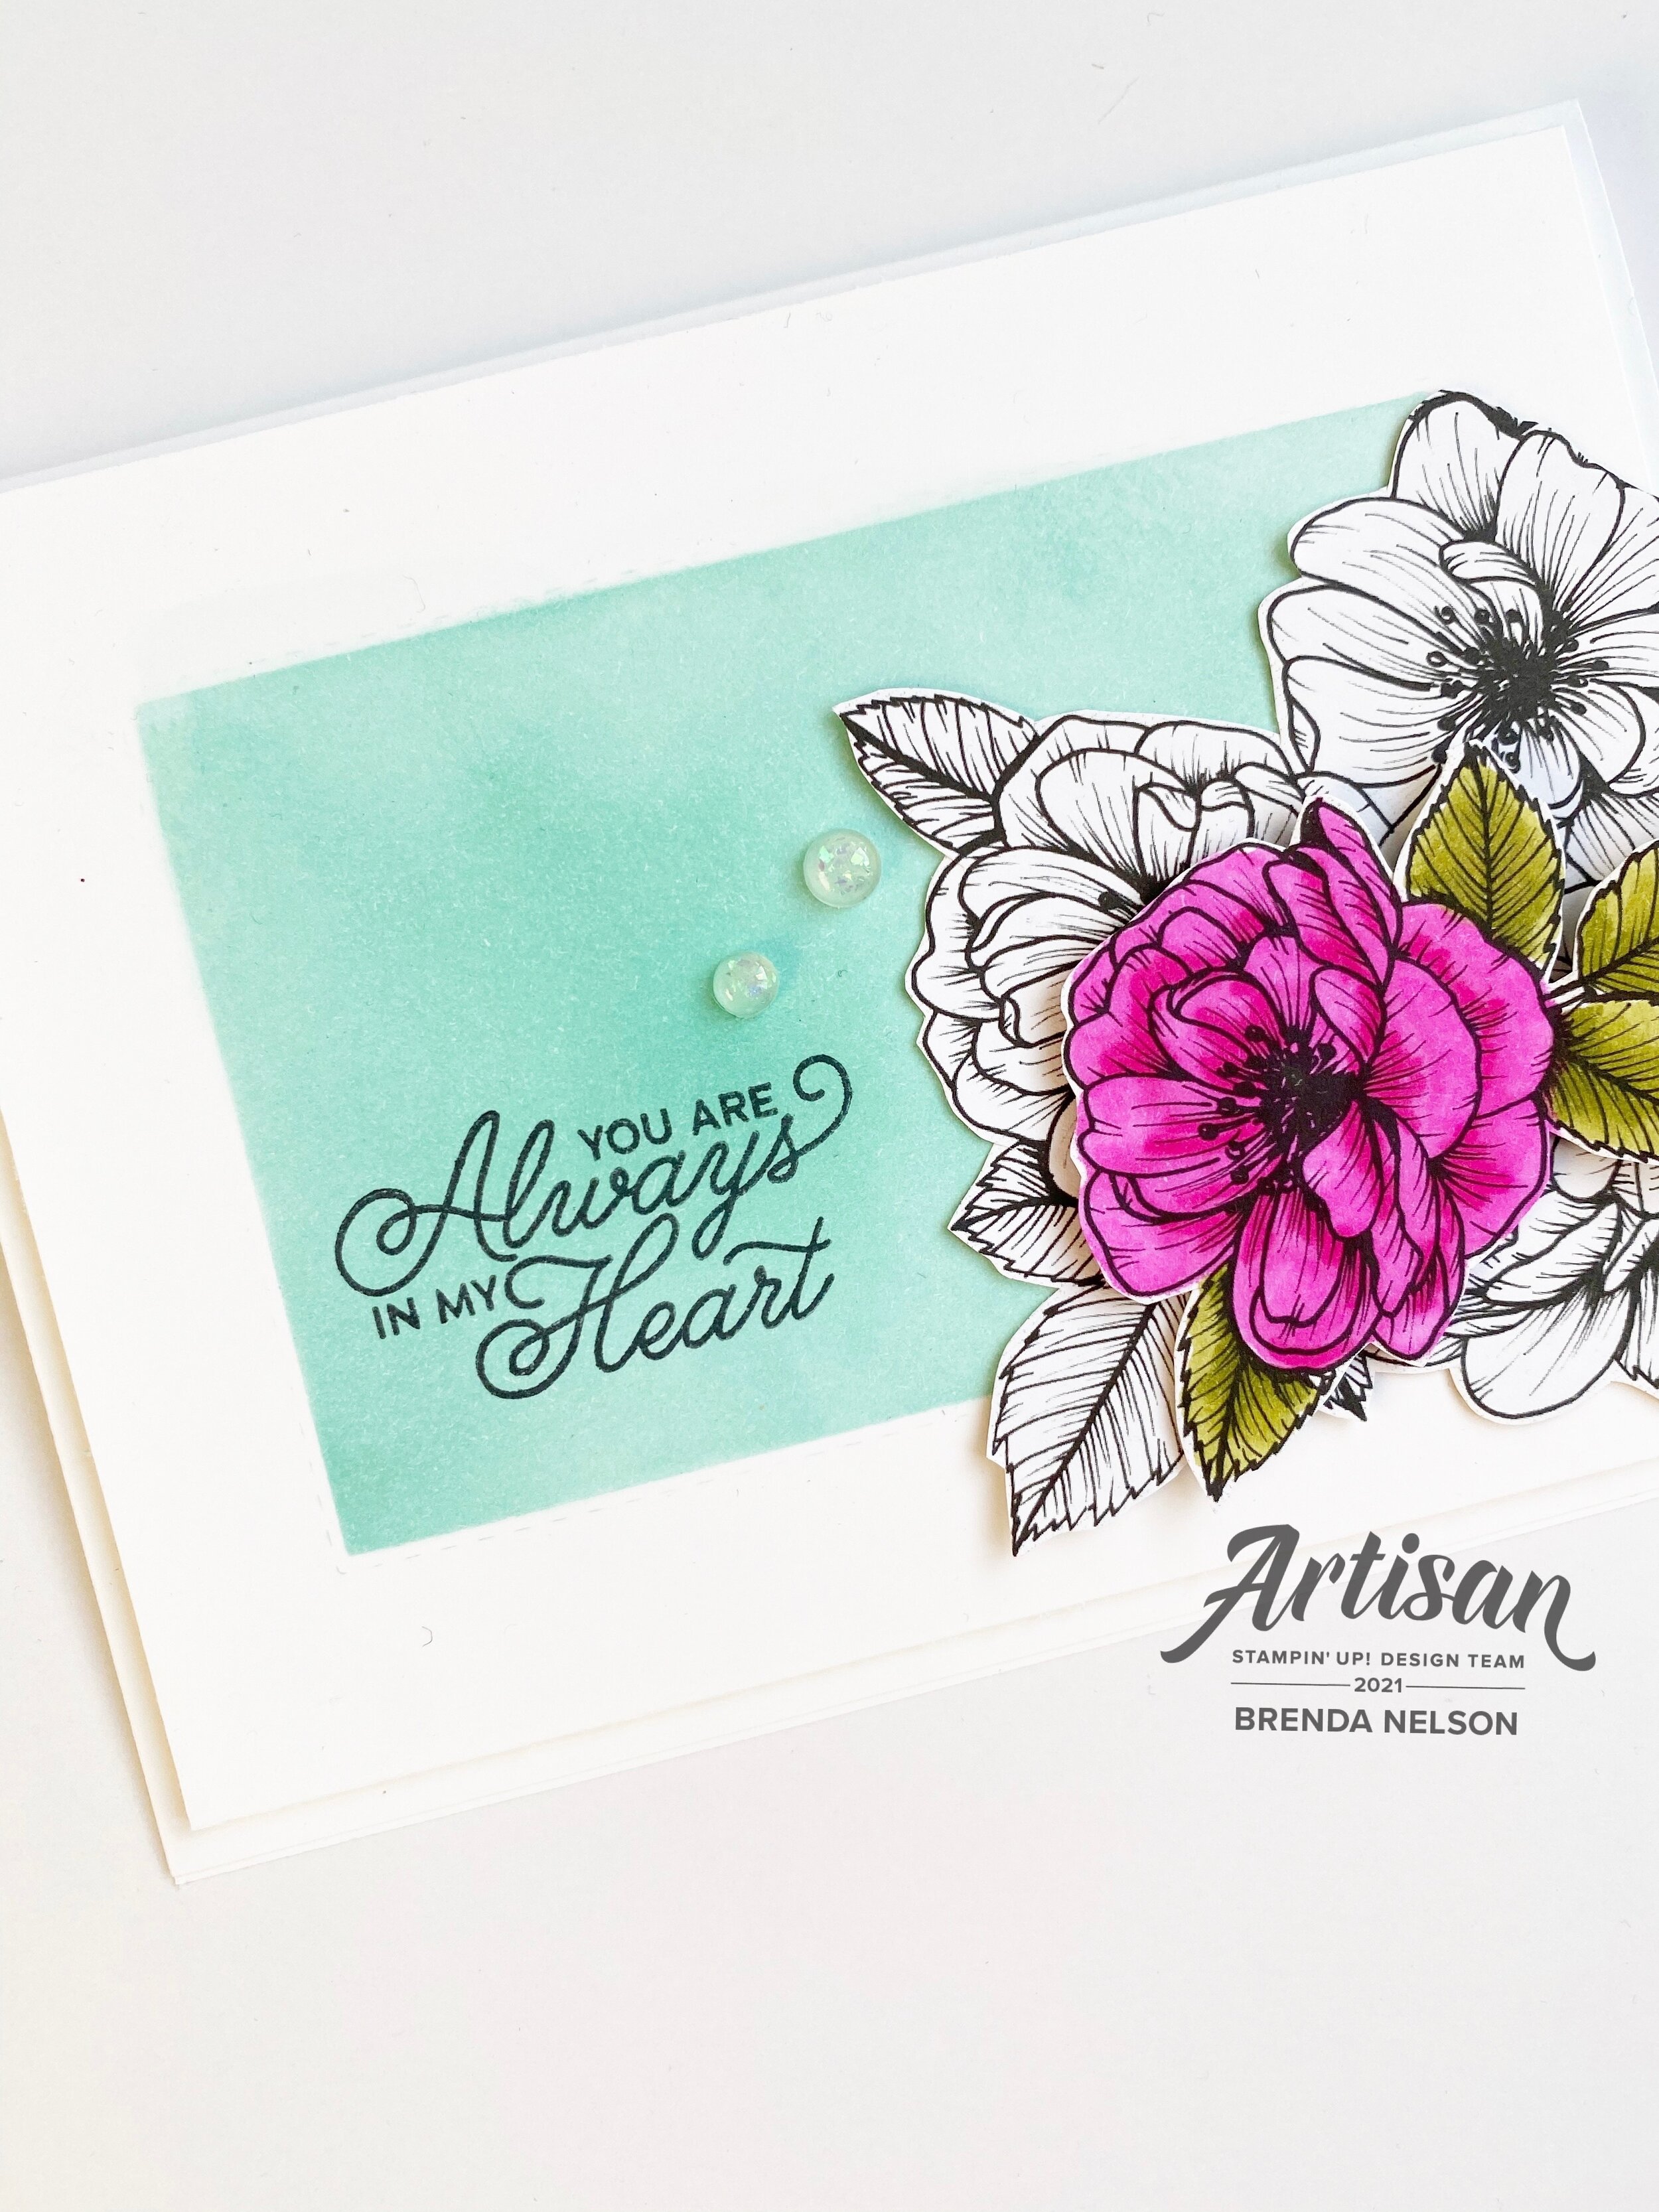
The flowers on this card are from the True Love Designer Series paper. I cut them by hand and then isolated a second flower on top after coloring it with the Magenta Madness and Old Olive Stampin’ Blends.

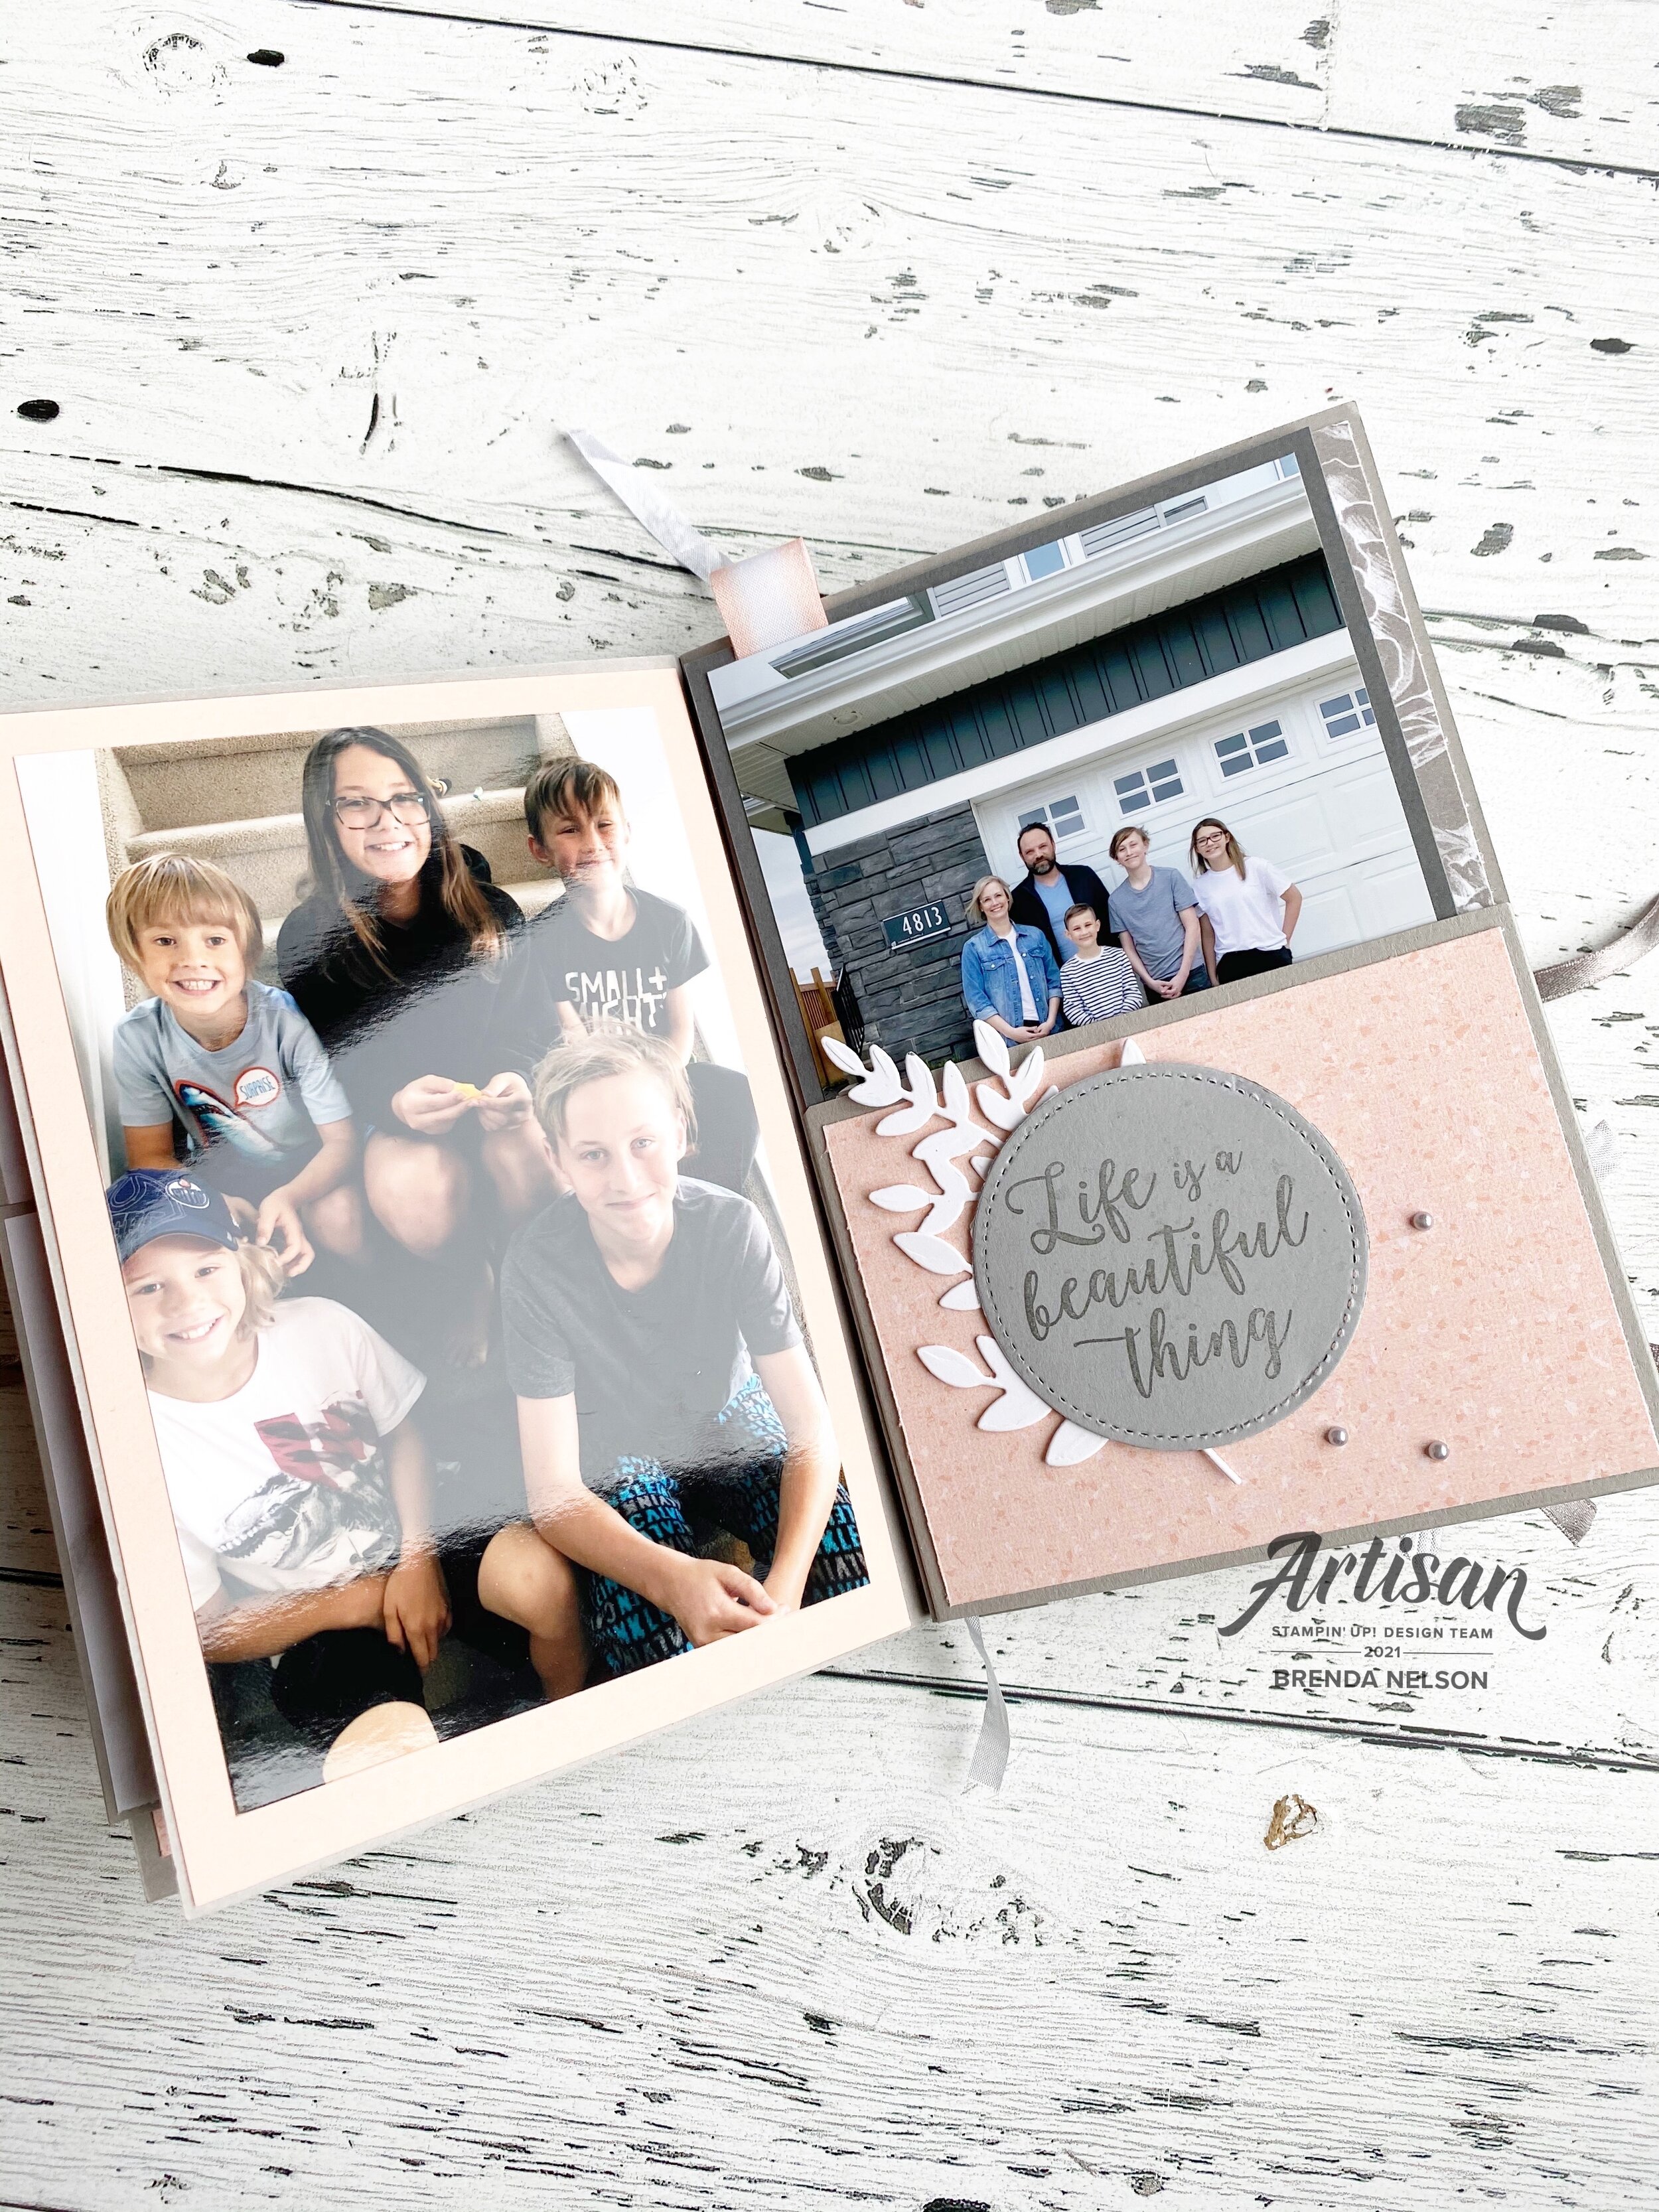
I added in a few Opal Rounds as a finishing touch. I love how they are almost translucent but have a bit of flecking to them for interest.

I really really love how this card turned out and think its an awesome way to showcase off the Blending Brushes!

Can’t wait to see what Melissa has shared (you can go BACK) or what Connie has desgined (NEXT). Enjoy the upcoming month!

Artisan Design Team January Share!

OMG friends! I can’t believe I can actually TYPE the word ARTISAN…its literally been a dream of mine for the last few years and a GOAL (big difference) over the last 18 months. I started my blog with the purpose of having a platform to apply for the team and to create a digital archive of things I love. Scrapbook pages, recipes, cards and experiences. I joined some blog hops which has been exciting and has helped me grow and develop, meet deadlines, improve my photography and so much more! My blog is a place where I can be somewhat interactive with you (I love comments) and I am still learning and wanting to add more features!

So when I got the call on September 16th, yes I know the date as it was my 20th wedding anniversary, I cried. Like ugly cry and was so so happy. My daughter was in the car with me and had no idea what was going on!!! Haha! My biggest hope for my kids is they can set a goal, work and strive toward it with vision and purpose and achieve it. It is actually quite amazing. So I am SO HAPPY to be on the 2021 team and to share my creations with you!

My very first Artisan project featured the In Bloom Bundle and Paper Blooms Designer Series Paper (from Sale-a-bration 2021).

My very first Artisan project featured the In Bloom Bundle and Paper Blooms Designer Series Paper (from Sale-a-bration 2021).

Let’s start with the fun pull out birthday card in the Love You Always Treat Boxes! As soon as I saw how these treat boxes worked I knew I wanted to create some kind of pull out project. I decided on a birthday card after seeing all the fantastic sentiments in the In Bloom stamp set.

The boxes are easy to assemble which is awesome. To create the pull out feature you need a piece of Basic White card stock measuring 3 1/2 x 11 1/4. Score at 2 1/4, 4 1/2, 6 3/4 and 9. Accordion fold it and add the Petal Pink panels on measuring 2 x 3 1/4. You need 5 panels.

Then you can stamp and embellish as desired!

The colors I used to create this pull out birthday card are Petal Pink, Calypso Coral, Sahara Sand, and Gold Foil accented with the Gilded Leafing. To add the Gilded Leafing to my flowers I used Heat’n Stick Powder with a finger dauber. The dauber allows you to have more control over where you want to apply the Heat’n Stick powder. Once you heat set the powder (do not over heat as it will lose the stickiness) press it into your Gilded Leafing and use the large Water Painter to brush off the excess and reveal the details.

Of course I also had to create a scrapbook page to feature this fantastic Paper Blooms Designer Series Paper and my sons 16th birthday!

Of course I also had to create a scrapbook page to feature this fantastic Paper Blooms Designer Series Paper and my sons 16th birthday!

I chose the dark pattern from the DSP because I thought the Night of Navy would really pop against a Basic White background. I flanked each side with strips of Calypso Coral card stock. I didn’t want to use 12x12 paper (I covet for page bases) so I cut the strips from 8 1/2 x 11 and pieced them together behind the photo mat. I also popped the Gold Foil photo mat up on Dimensionals.

You may notice some circles on the layout and those are cut with punches from the DSP.

I applied the same technique to the flowers on this page as the pull out birthday card with the Gilded Leafing.

final 3.jpg

This layout combines flowers cut using the Pierced Bloom dies, stamped flowers and flowers cut from the DSP. You will notice in this picture that I stamped the “You are Amazing” right on the circle cut from the DSP and embossed it in gold. I love this feature!

I used the new Resin Hearts, Gilded Gems and Gold Metallic Pearls as accents on the page. I love the fun bow cut with the dies and Gold Foil paper.

I hope you enjoyed my first official Artisan Design Team showcase projects! Make sure to check out Stampin’ Up!’s Facebook page to see everyone’s creations and follow me over on Instagram @stampwithbrenda

I hope you enjoyed my first official Artisan Design Team showcase projects! Make sure to check out Stampin’ Up!’s Facebook page to see everyone’s creations and follow me over on Instagram @stampwithbrenda

If you live in Canada and would love to create these projects yourself you can shop my Online Store or use the Hostess Code to have items sent direct to you! Just confirm it says “Shopping with Brenda Nelson” in the shopping bag :)

Create with Connie and Mary--Valentine's with a Twist!

Welcome friends! Thanks for checking in this week to see what we are creating! This week we are making valentines projects with a color twist or untraditional colors. I immediately thought of using the color blue as we have so many fabulous blue shades to choose from! And I felt like blues would lend themselves to making a more masculine feeling valentine.

Design Team.jpg

If you have been following along on my recent crafting journey (please follow me on Instagram—@stampwithbrenda) than you would know I have been having a lot of fun with our new fantastic Blending Brushes. I decided to use three shades of blue to create a background to cut with the Floral Heart Dies and unexpectedly ended up with an idea to create a partner card!

final (1) 15.jpg

My original idea was for the card on the left. I used my Blending Brushes with Seaside Spray, Balmy Blue and Misty Moonlight. Once I cut out the floral heart I was left with this amazing free floating heart that I couldn’t waste—so I used it to create the card on the right.

final 22.jpg

I ended up using a variety of products to create these two cards. I wanted smaller sentiments that wouldn’t take away from the floral or heart dies. The Valentine Keepsake stamp set was a perfect fit as the “Be Mine” and the “With Love” phrases fit perfectly in a 1 inch circle punch. Both sentiments are stamped on Balmy Blue card stock with Misty Moonlight ink.

final 23.jpg

I really wanted this card to showcase the Pearlescent Specialty Paper too. You can see how it looks when added to a white card base and the blended die cut background really pops on this clean canvas. The accent hearts on the bottom of the card are stamped in Seaside Spray and are found in the Always in My Heart stamp set.

final (2) 5.jpg

I made this second card because I had this amazing blended heart cut out and couldn’t waste it. This card base is Misty Moonlight with the same little hearts stamped along the bottom. The designer series paper layer is from the Flowers for Every Season collection. The floral heart die is used to cut out the Seaside Spray card stock and the banner on this card is also cut from the same die set using the Pearlescent Specialty Paper. I really love how both of these cards turned out!

I can’t wait to see what amazing creations Melissa and Connie have designed for this week. You can go BACK to visit Melissa if you are starting here and NEXT to continue on the hop and see what Connie has created.

Flip & Pull Mini Album Project

I wanted to share a mini album I made for my Mother in Law for this past Christmas. I took a class that my friend and fellow demonstrator Jessica, @jessbstamps, offered in November. We put this album together over 2 sessions and then were left to add photos and embellishments on our own. It truly is a one of a kind project and gift!

final 3.jpg

This completed album definitely has some weight to it. Because the album was so interactive with photo panels opening and flipping in every direction, I did have to be more aware of embellishing. So while I didn’t embellish to my typical avid standards I am happy with what I was able to add into the album. I think it will make a really great keepsake as it is pretty well constructed. We used a lot of Tear & Tape on this project!

I want to note that because I do not have this album in front of me anymore, I cannot exactly remember the order of the pages. So the way my photos are shared my not actually be how they are in the album! Disclaimer! And I have NO measurements or anything for you as I did not design this project.

We have so many fantastic stamp sets to choose from that I had no shortage of inspiration to embellish this album. I added in a variety of ribbons and Silver Metallic Pearls through out and kept the colors true to the Peony Garden DSP. The base of the album is Smoky Slate card stock and we almost used an entire package to make this album and almost the entire package of Peony Garden DSP.

We have a very large family on the Nelson side. 19 grand kids! My nephew recently married so we are now at 20, plus all of the adult adults! So this project was a perfect way to showcase everyone and reflect on the many amazing family memories we ha…

We have a very large family on the Nelson side. 19 grand kids! My nephew recently married so we are now at 20, plus all of the adult adults! So this project was a perfect way to showcase everyone and reflect on the many amazing family memories we have made so far.

My favorite aspect to this album are all of the fun pullout pages and the pages that lift up in every direction possible. Some flip up, some flip down! Pages pull out and fold it. Its actually quite spectacular!

There is so much to explore and see while looking through this project.

One of the gals that took this class with me called these little panels ‘Saloon Doors’, we all thought that was the perfect way to describe them!

One of the gals that took this class with me called these little panels ‘Saloon Doors’, we all thought that was the perfect way to describe them!

final 21.jpg

I hope this project has inspired you! I would love to make another one and fill it with memories of my family, but for now I know my Mother in Law and extended family, who live a province away, will enjoy looking at this mini album!

Create with Connie and Mary--strip it down!

This was actually a really good challenge for me this week as I am not someone who typically does simple stamping or one layer cards! SO I had to get creative to see what I could come up with!

Design Team.jpg

I almost always have a card base with a least one layer of card stock on top. Sometimes there is another layer of Designer Series Paper on top too! So I knew that the first thing to go with my ‘strip it down’ challenge was to stamp direct to my Basic White card base.

final (1) 4.jpg

I decided to create a fun background using our new Blending Brushes and the Curvy Dies (available in the JJ Catty). I used Coastal Cabana Ink to blend the background and then tapped some water on top with my large Water Painter brush. I was just playing around and am happy with how it turned out. The water acts as an ‘eraser’ and makes the ink disappear. You can see it happen before your eyes!

This is the template I used to create my blended area

This is the template I used to create my blended area

Once I had my fun area blended, straight to the card base, I reached for the Snail Mail stamp set. I just love the little mushroom image! I used my Stampin’ Blends in Granny Apple Green, Pool Party, Bermuda Bay and Purple Posey.

Adding in a bit of white twine added a little something, but I still feel like for my stampin’ style this card is pretty stripped down!


I stamped the sentiment, Hello, straight onto the area I blended and I resisted every temptation to add some bling or anything else to this card.

And you know what? I actually love this clean and simple finished card!

I can’t wait to see what the other gals create this week! You can go BACK to see Melissa or NEXT to see Connie!

Please feel free to leave a comment!

final 7.jpg