Memories in Bloom!
/Hey friends—its been a while. Its been the worst two years of my life. I was not really prepared for the direction my life was taking but now that I am here I am grateful for the things that God was lining up for me before I knew what was happening. It was not an accident, it was a plan designed to save me.
I am thankful for my crafting community, especially those who were in the nitty gritty with me as I cried through teaching classes or needed to vent, who kindly offered me reassurance that I would not be stuck in that space for long. Because that is the thing right—we are never actually in that space for long. No matter what we are always moving forward. For a long time I was coasting along on the tide of life into an ocean where I did not want to be. But now I have the chance to bring myself and my kids into a space where we are meant to be.
I want to get back to share my creativity with others and focusing on creating life long memories with my kids and friends, and capturing these in a paper legacy! I look foward to sharing with you in this space. Including recipes and just general life stuff. One day my kids can look back on this too :)
I hadn’t been to disney since before Covid…its the same nostalgic feeling!
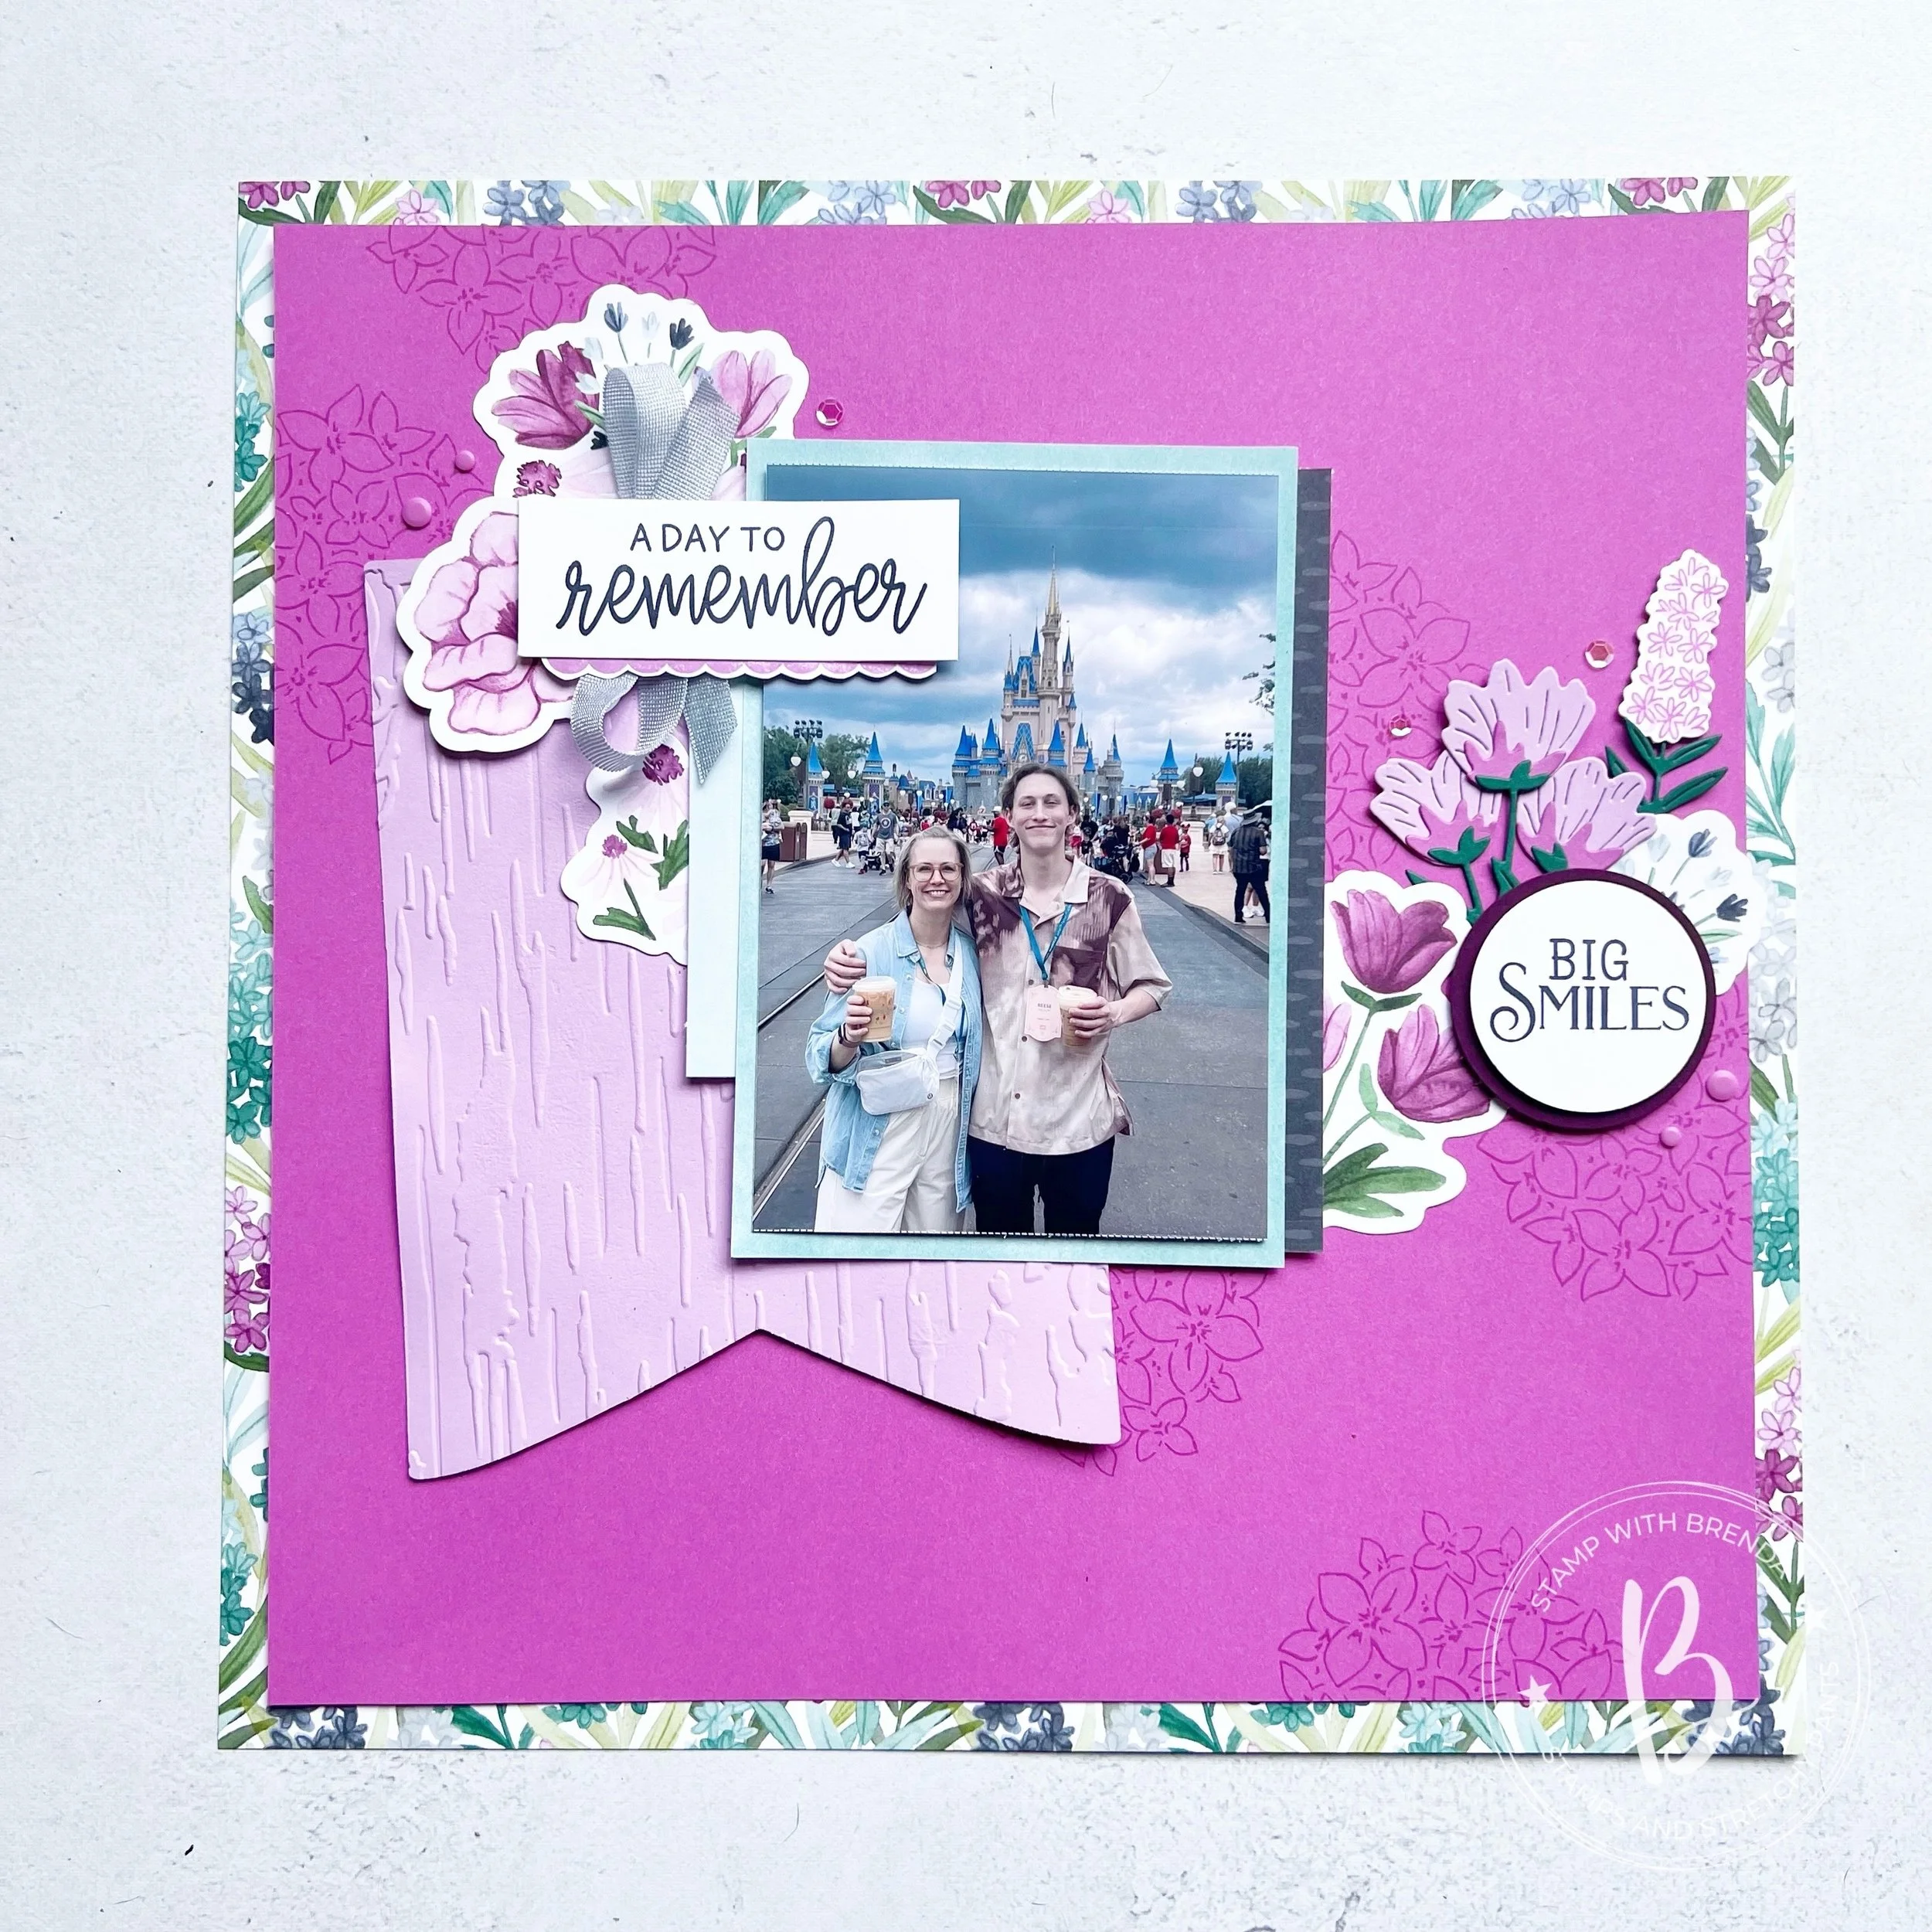
In May I spent a week in Disney with Reese. It was a amazing. Every mom should be so lucky to spend time on a vacation with their son, and in a place as fun as Disneyworld. I could not have asked for a better travel companion! Our first stop in the Magic Kingdom was for a Starbucks and a picture in front of the castle.
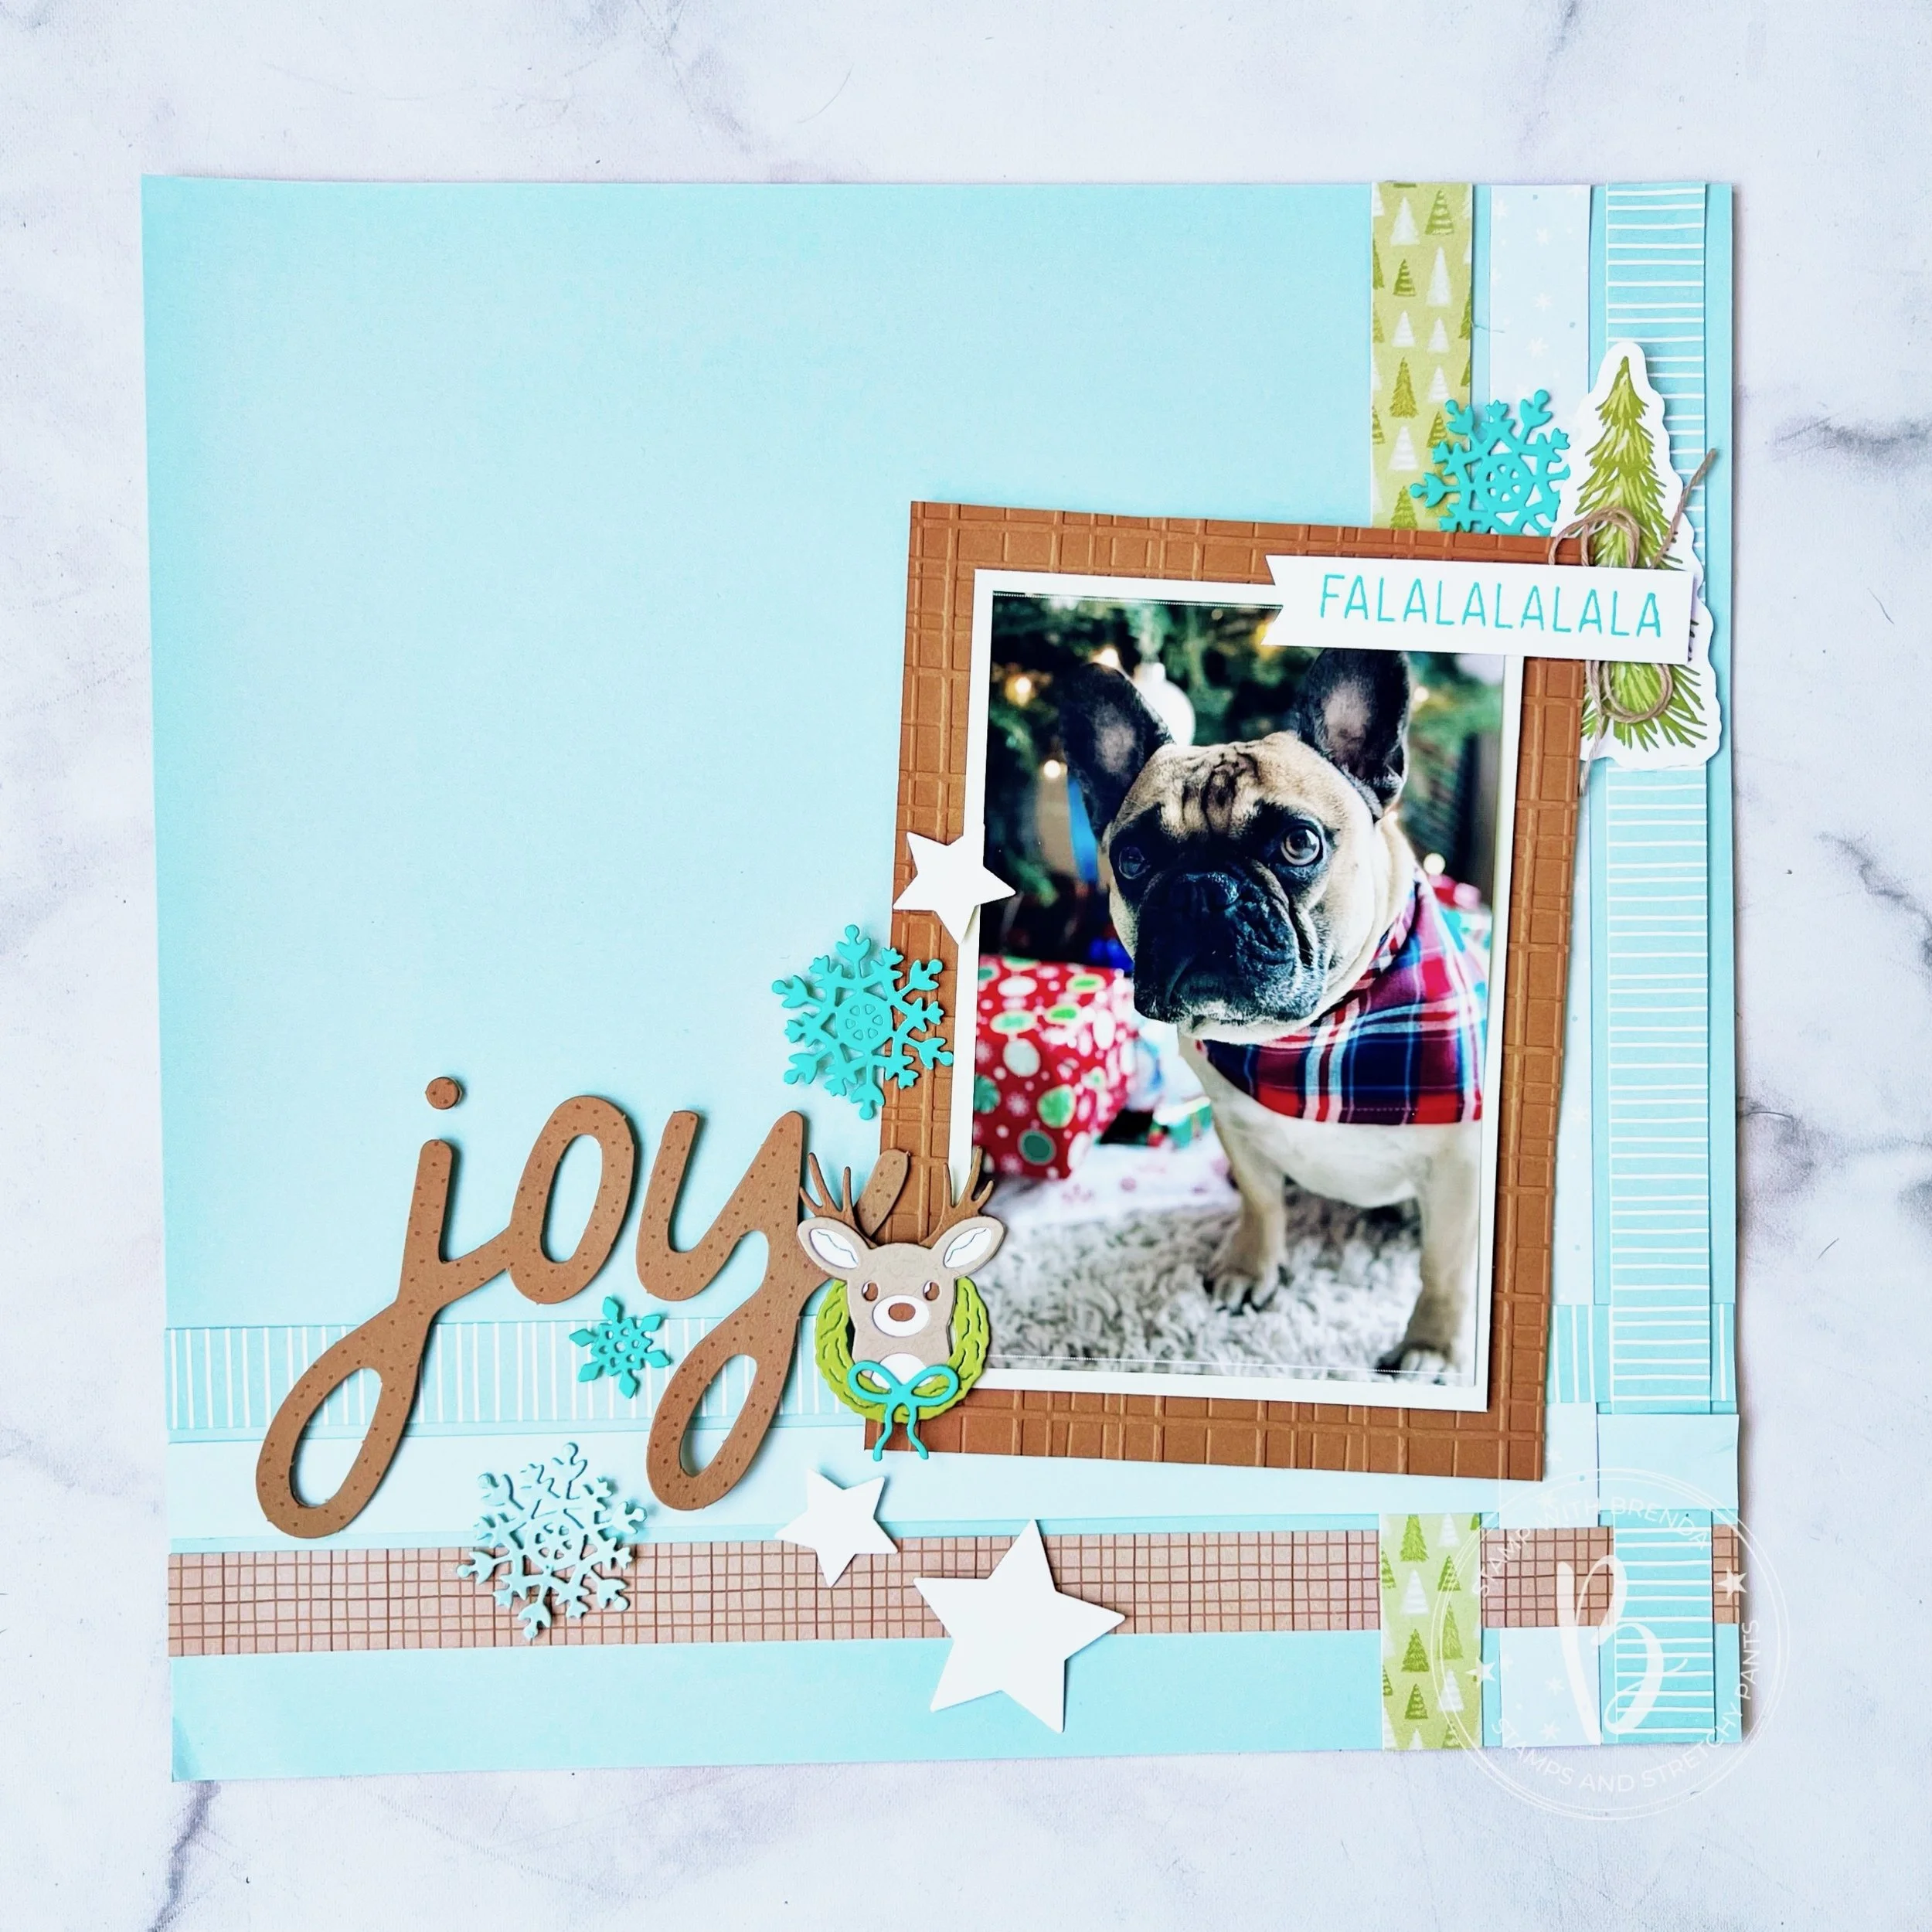
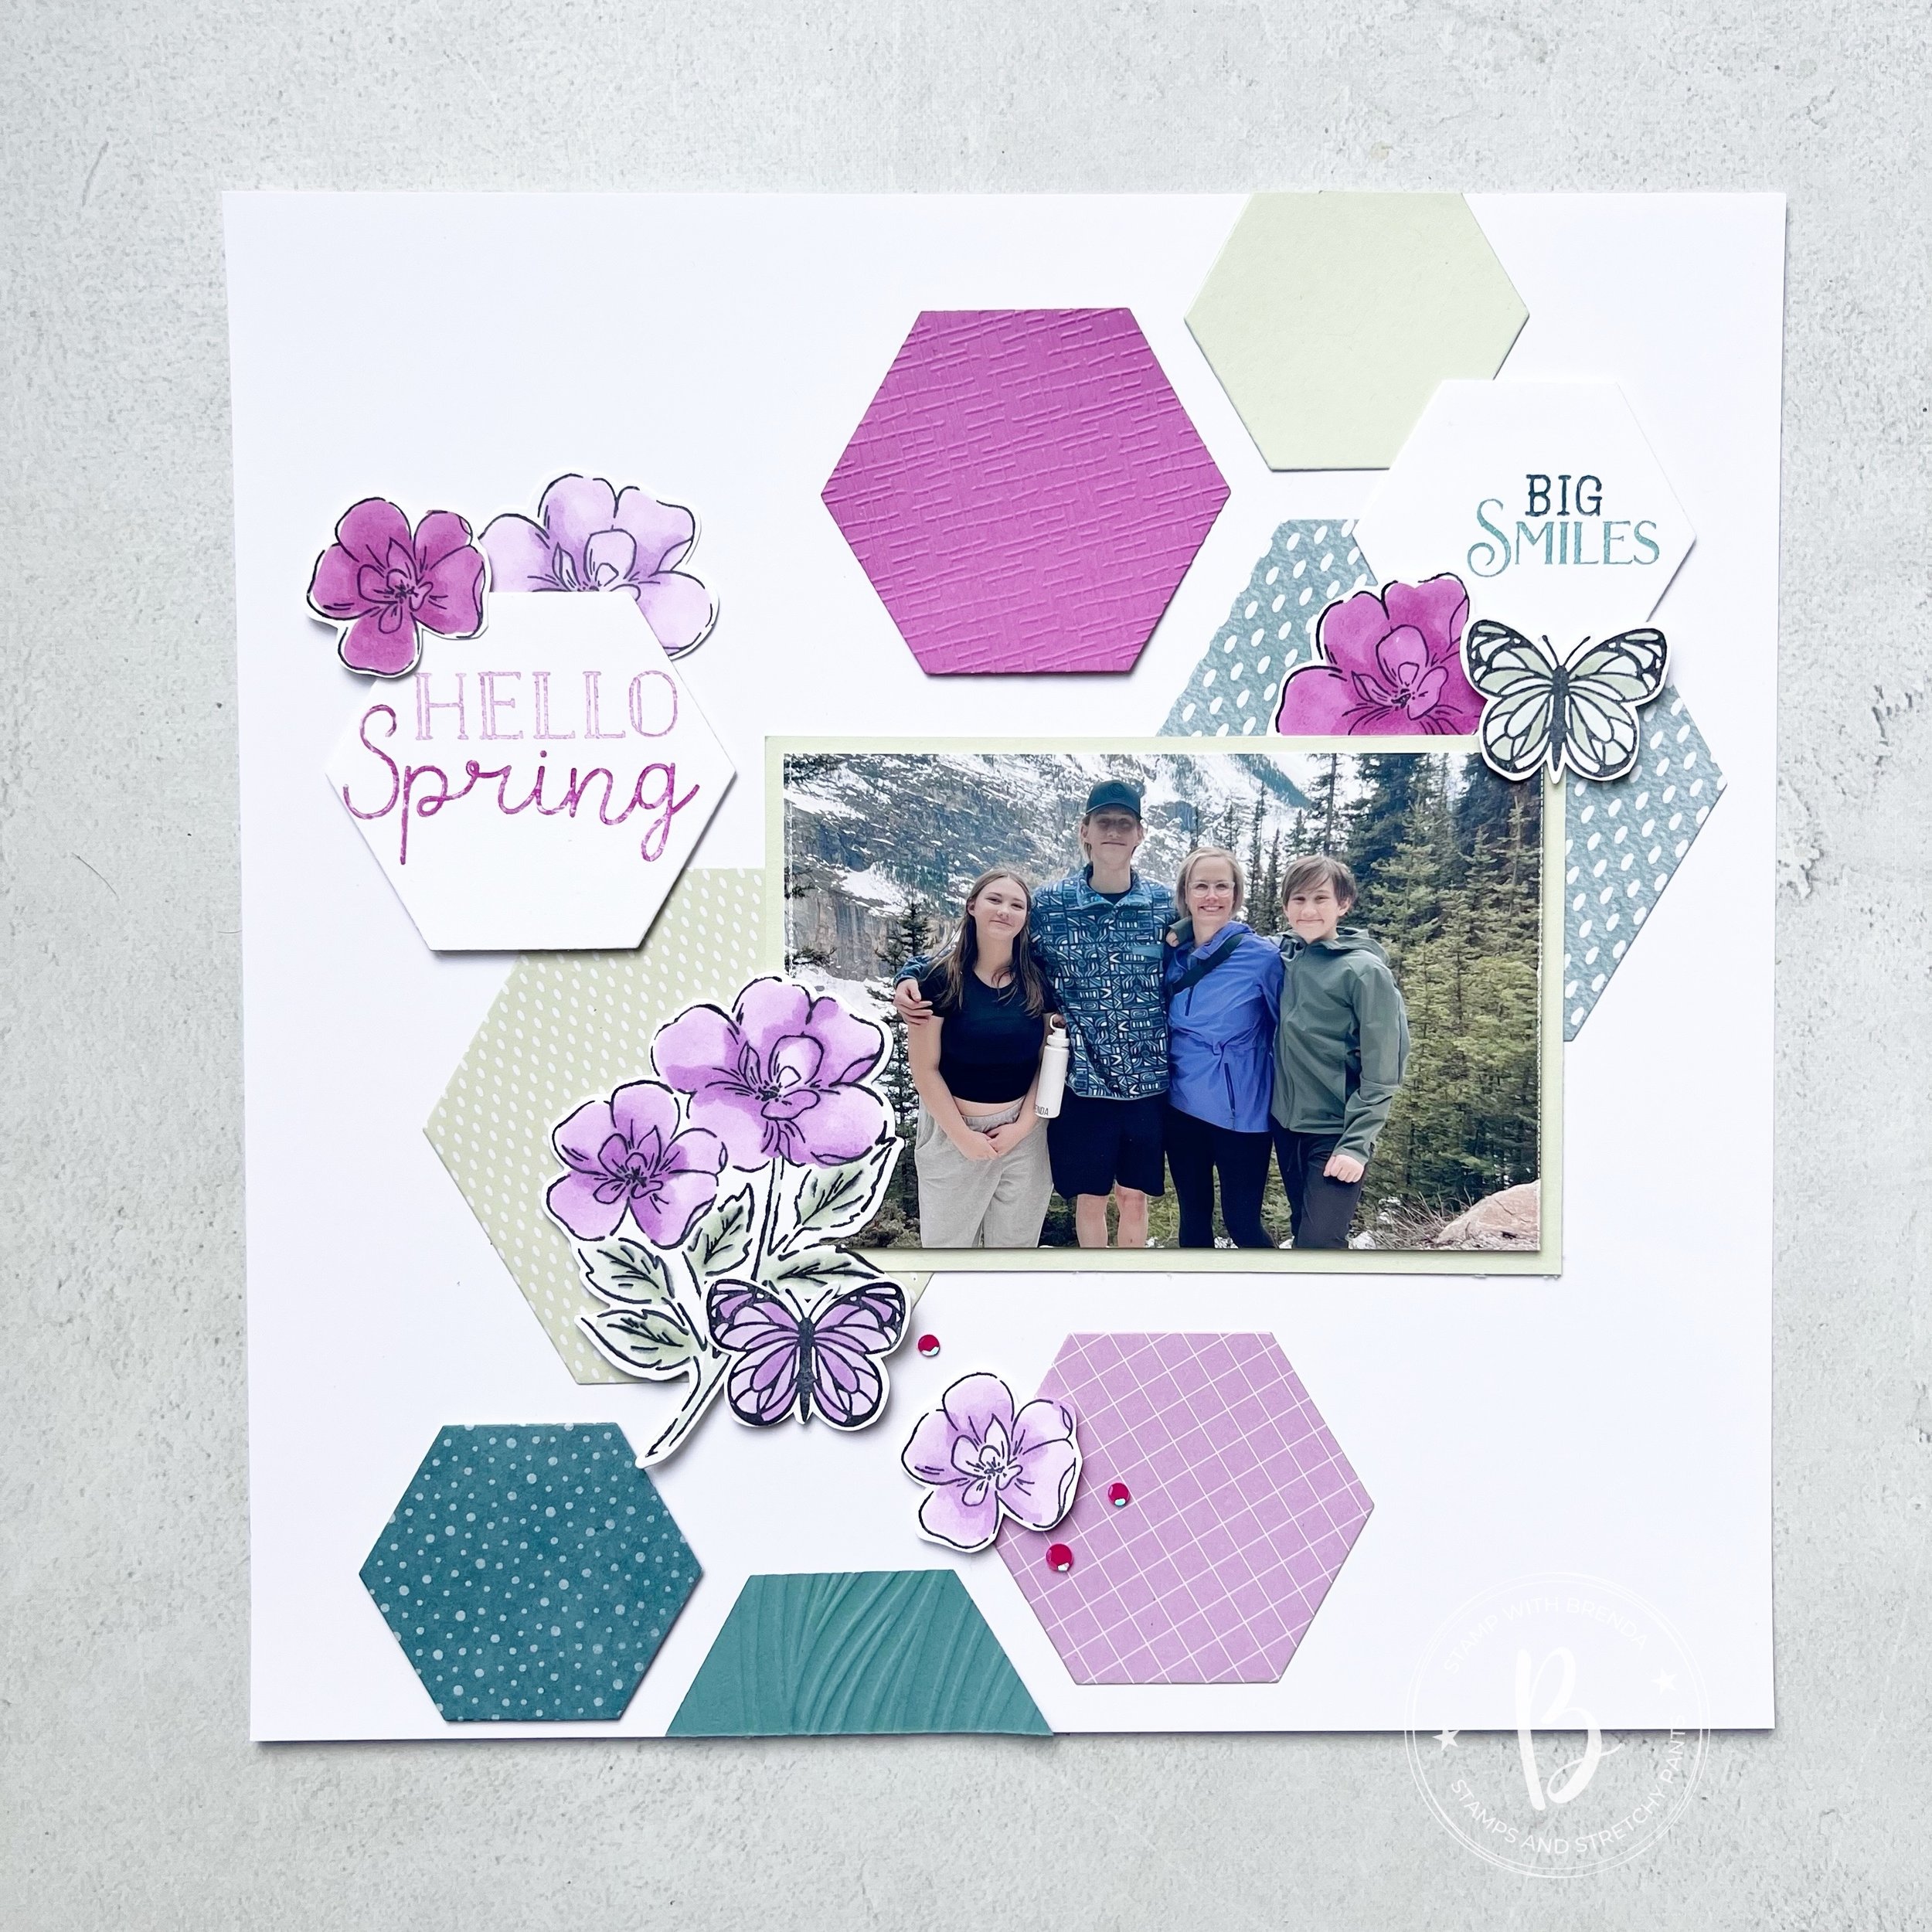
I created this page as part of a series for my Scrapbook the Day event that I have been hosting every few months in my Home Studio. Its been fun to take our kits and turn them into other designs, treat people to a homemade lunch and dessert and have happy energy in my crafting studio.
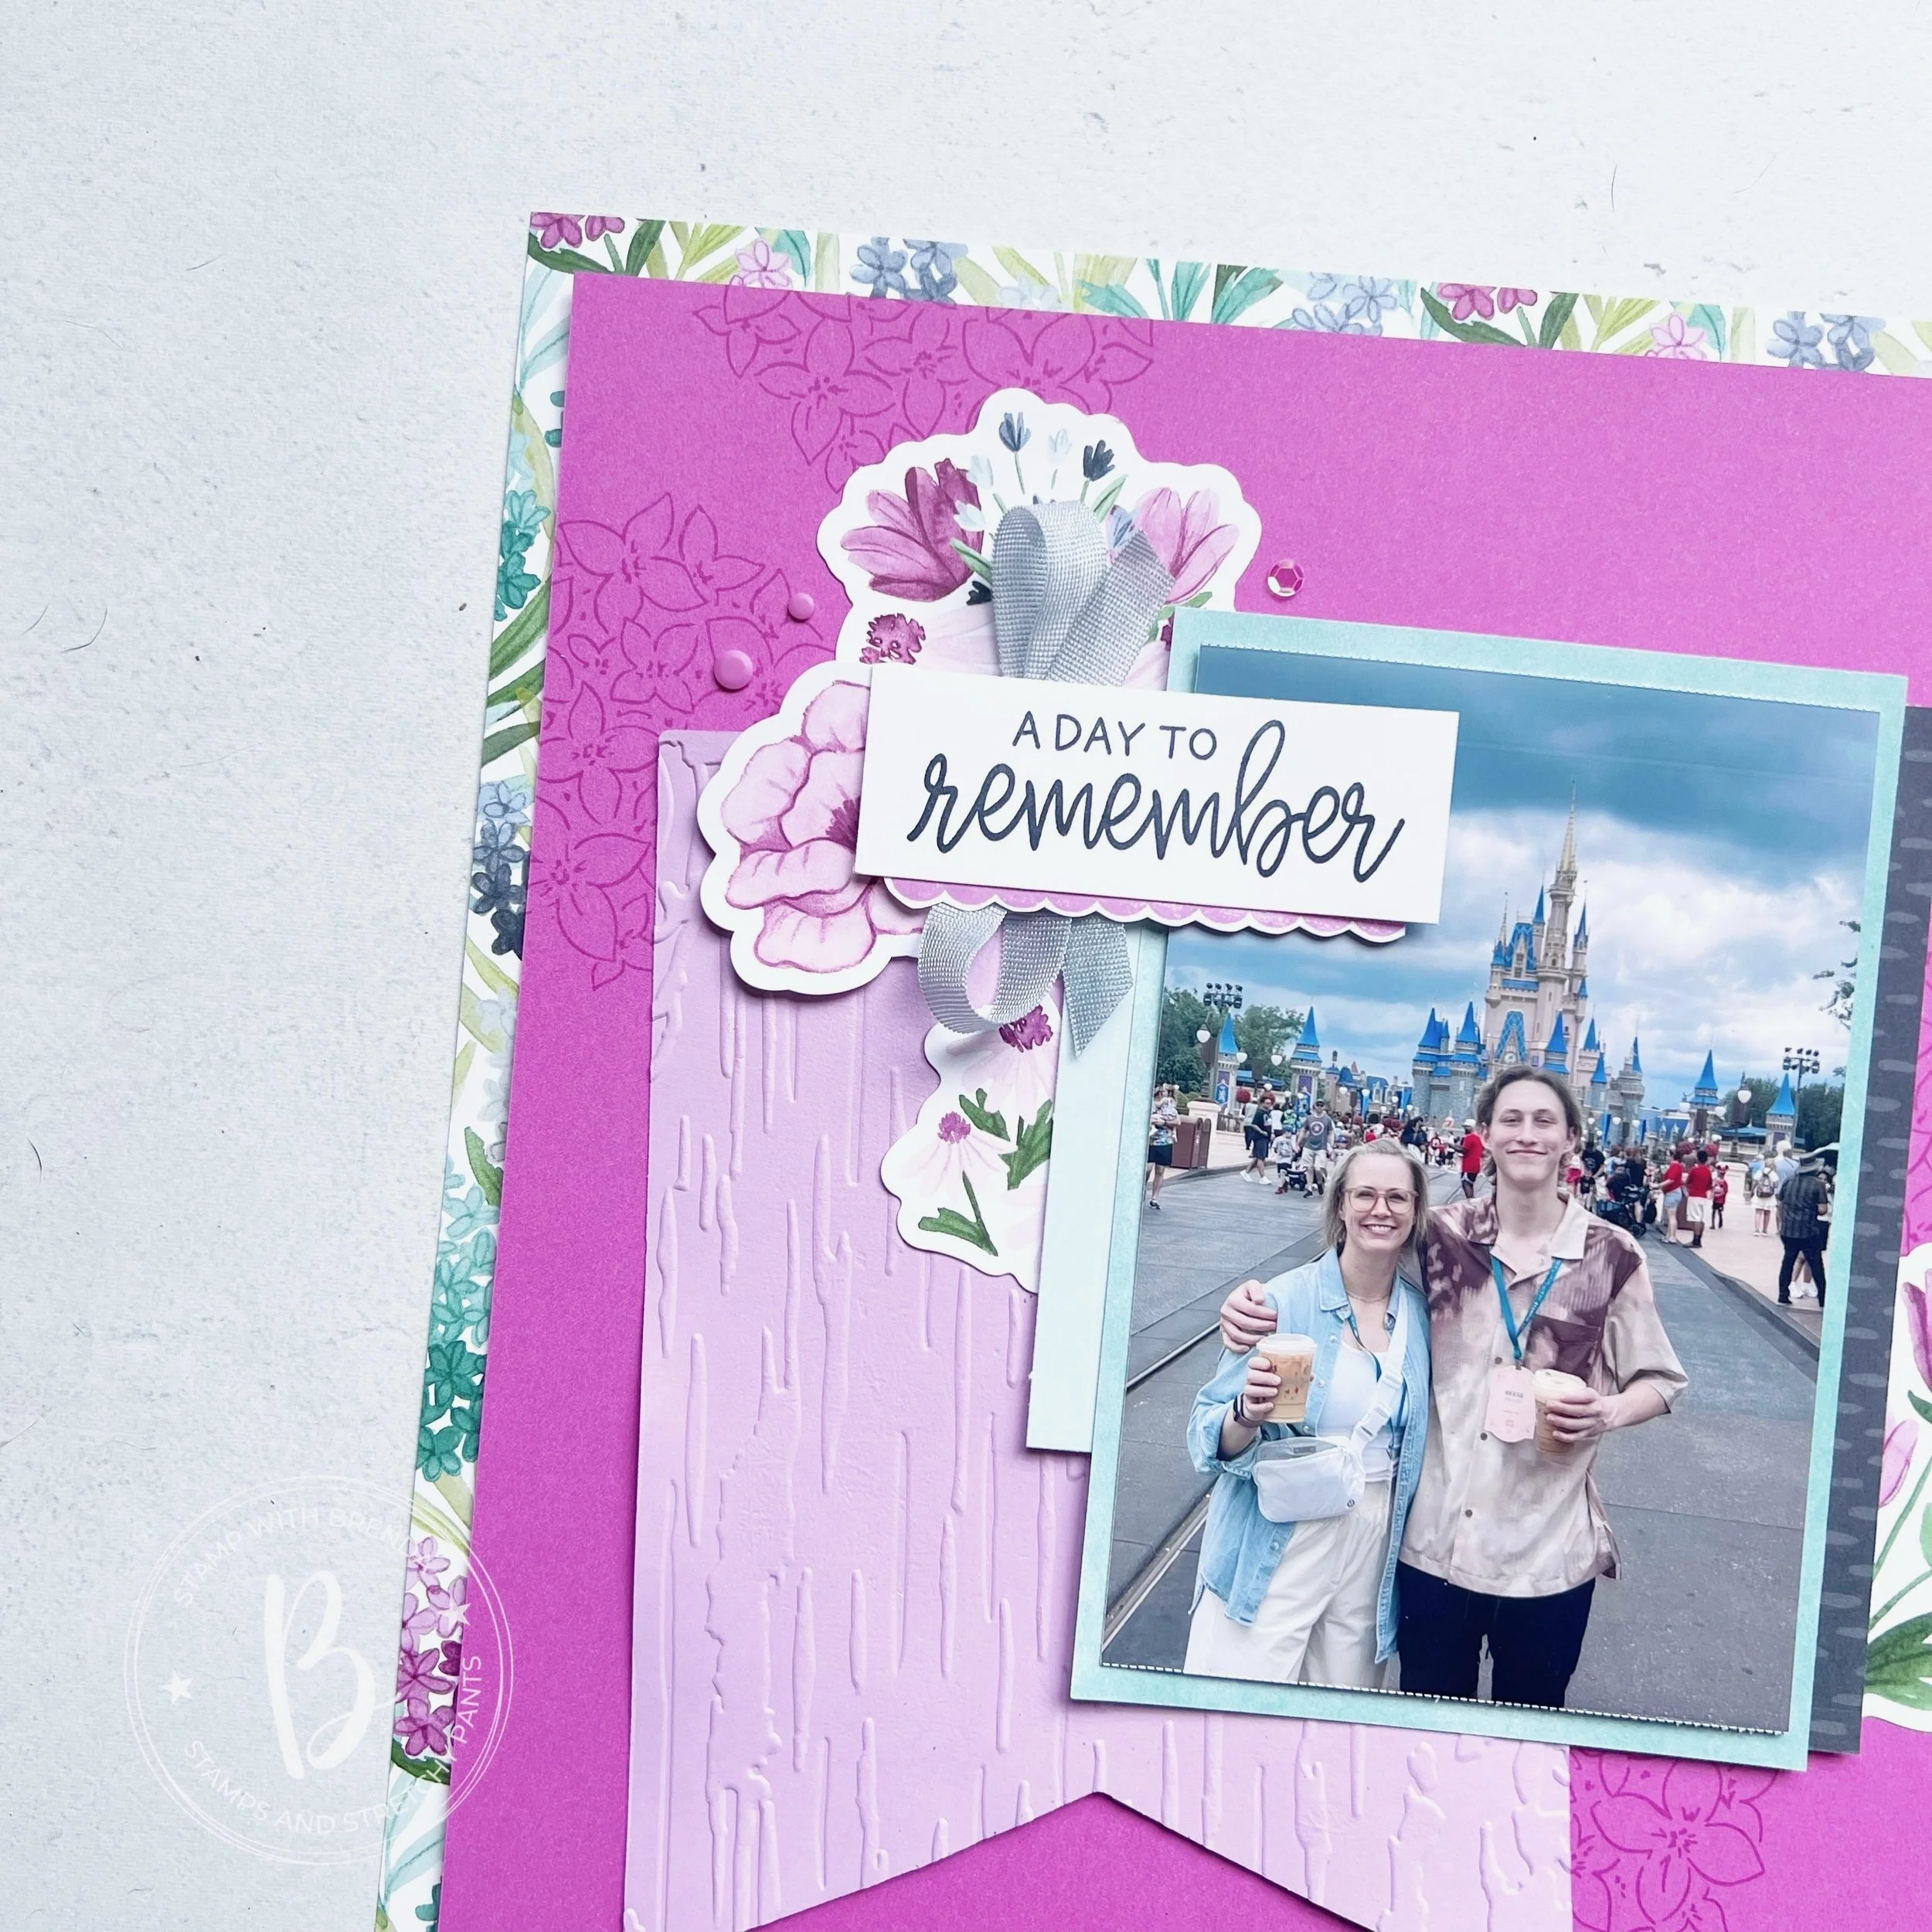
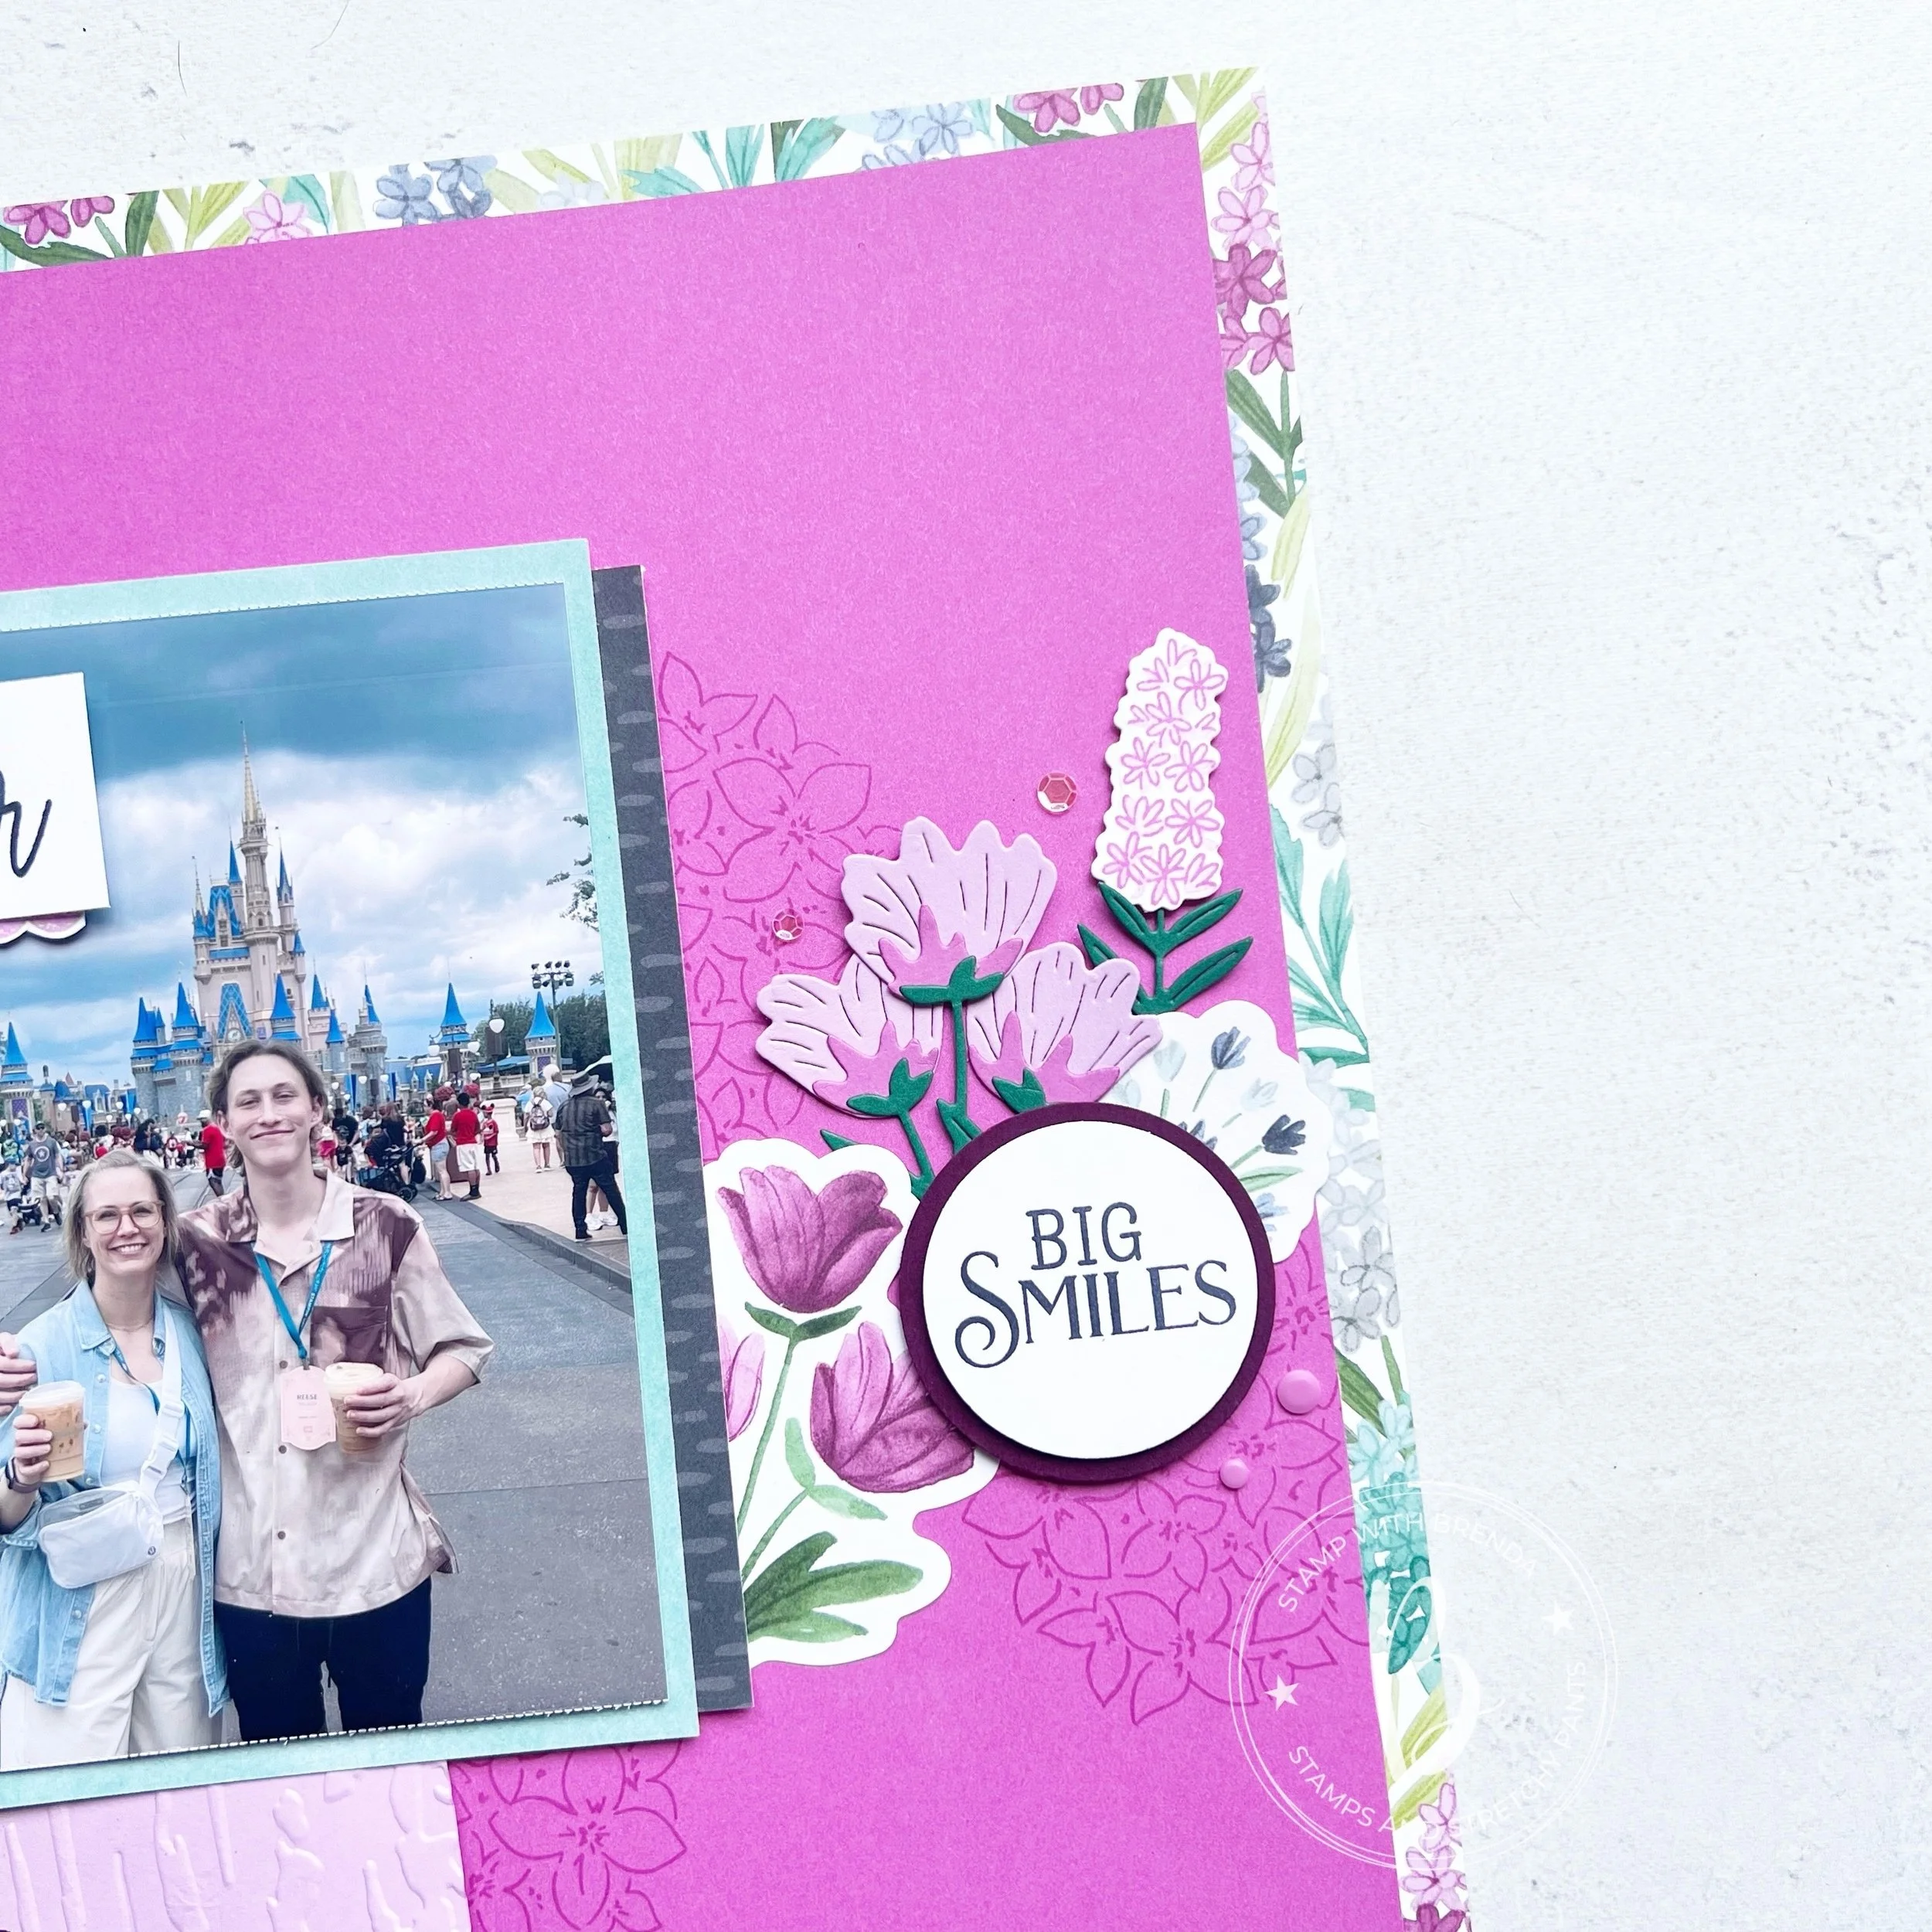
I used the Memories in Bloom kit as the backdrop for this page. Personally I feel like you can use flowers for almost anything. I really loved the colors of the kit and the fact that there was a matching bundle to incorporate. The Pretty Florals bundle was a great add on to bring dimension into my design as I am not prone to just using the pop out images from our kits. My personal style is for things to be more dynamic.
However, I did pull in a lot of other supplies as well to complete my page. I am loving the new Party Banners Dies and the Celebrate Together stamp set is an #addtocart moment if you have not already. I have used the ‘A Day to Remember’ so many times already! It’s a perfect scrapbooking or memory keeping stamp set. Storybook Life is another fantastic memory keeping stamp set and that is where ‘Big Smiles’ is found.
My sentiments are stamped in Secret Sea ink which is such a great alternative to Memento ink.
TOP TIPS:
Combining pop out pieces with stamping and die cuts is a great way to use a kit and bring a design to life. I like my pages to have texture and interest.
Balancing out a busy pattern by layering a solid card stock over top is a great tip when you do not know how to use those busy pattern.
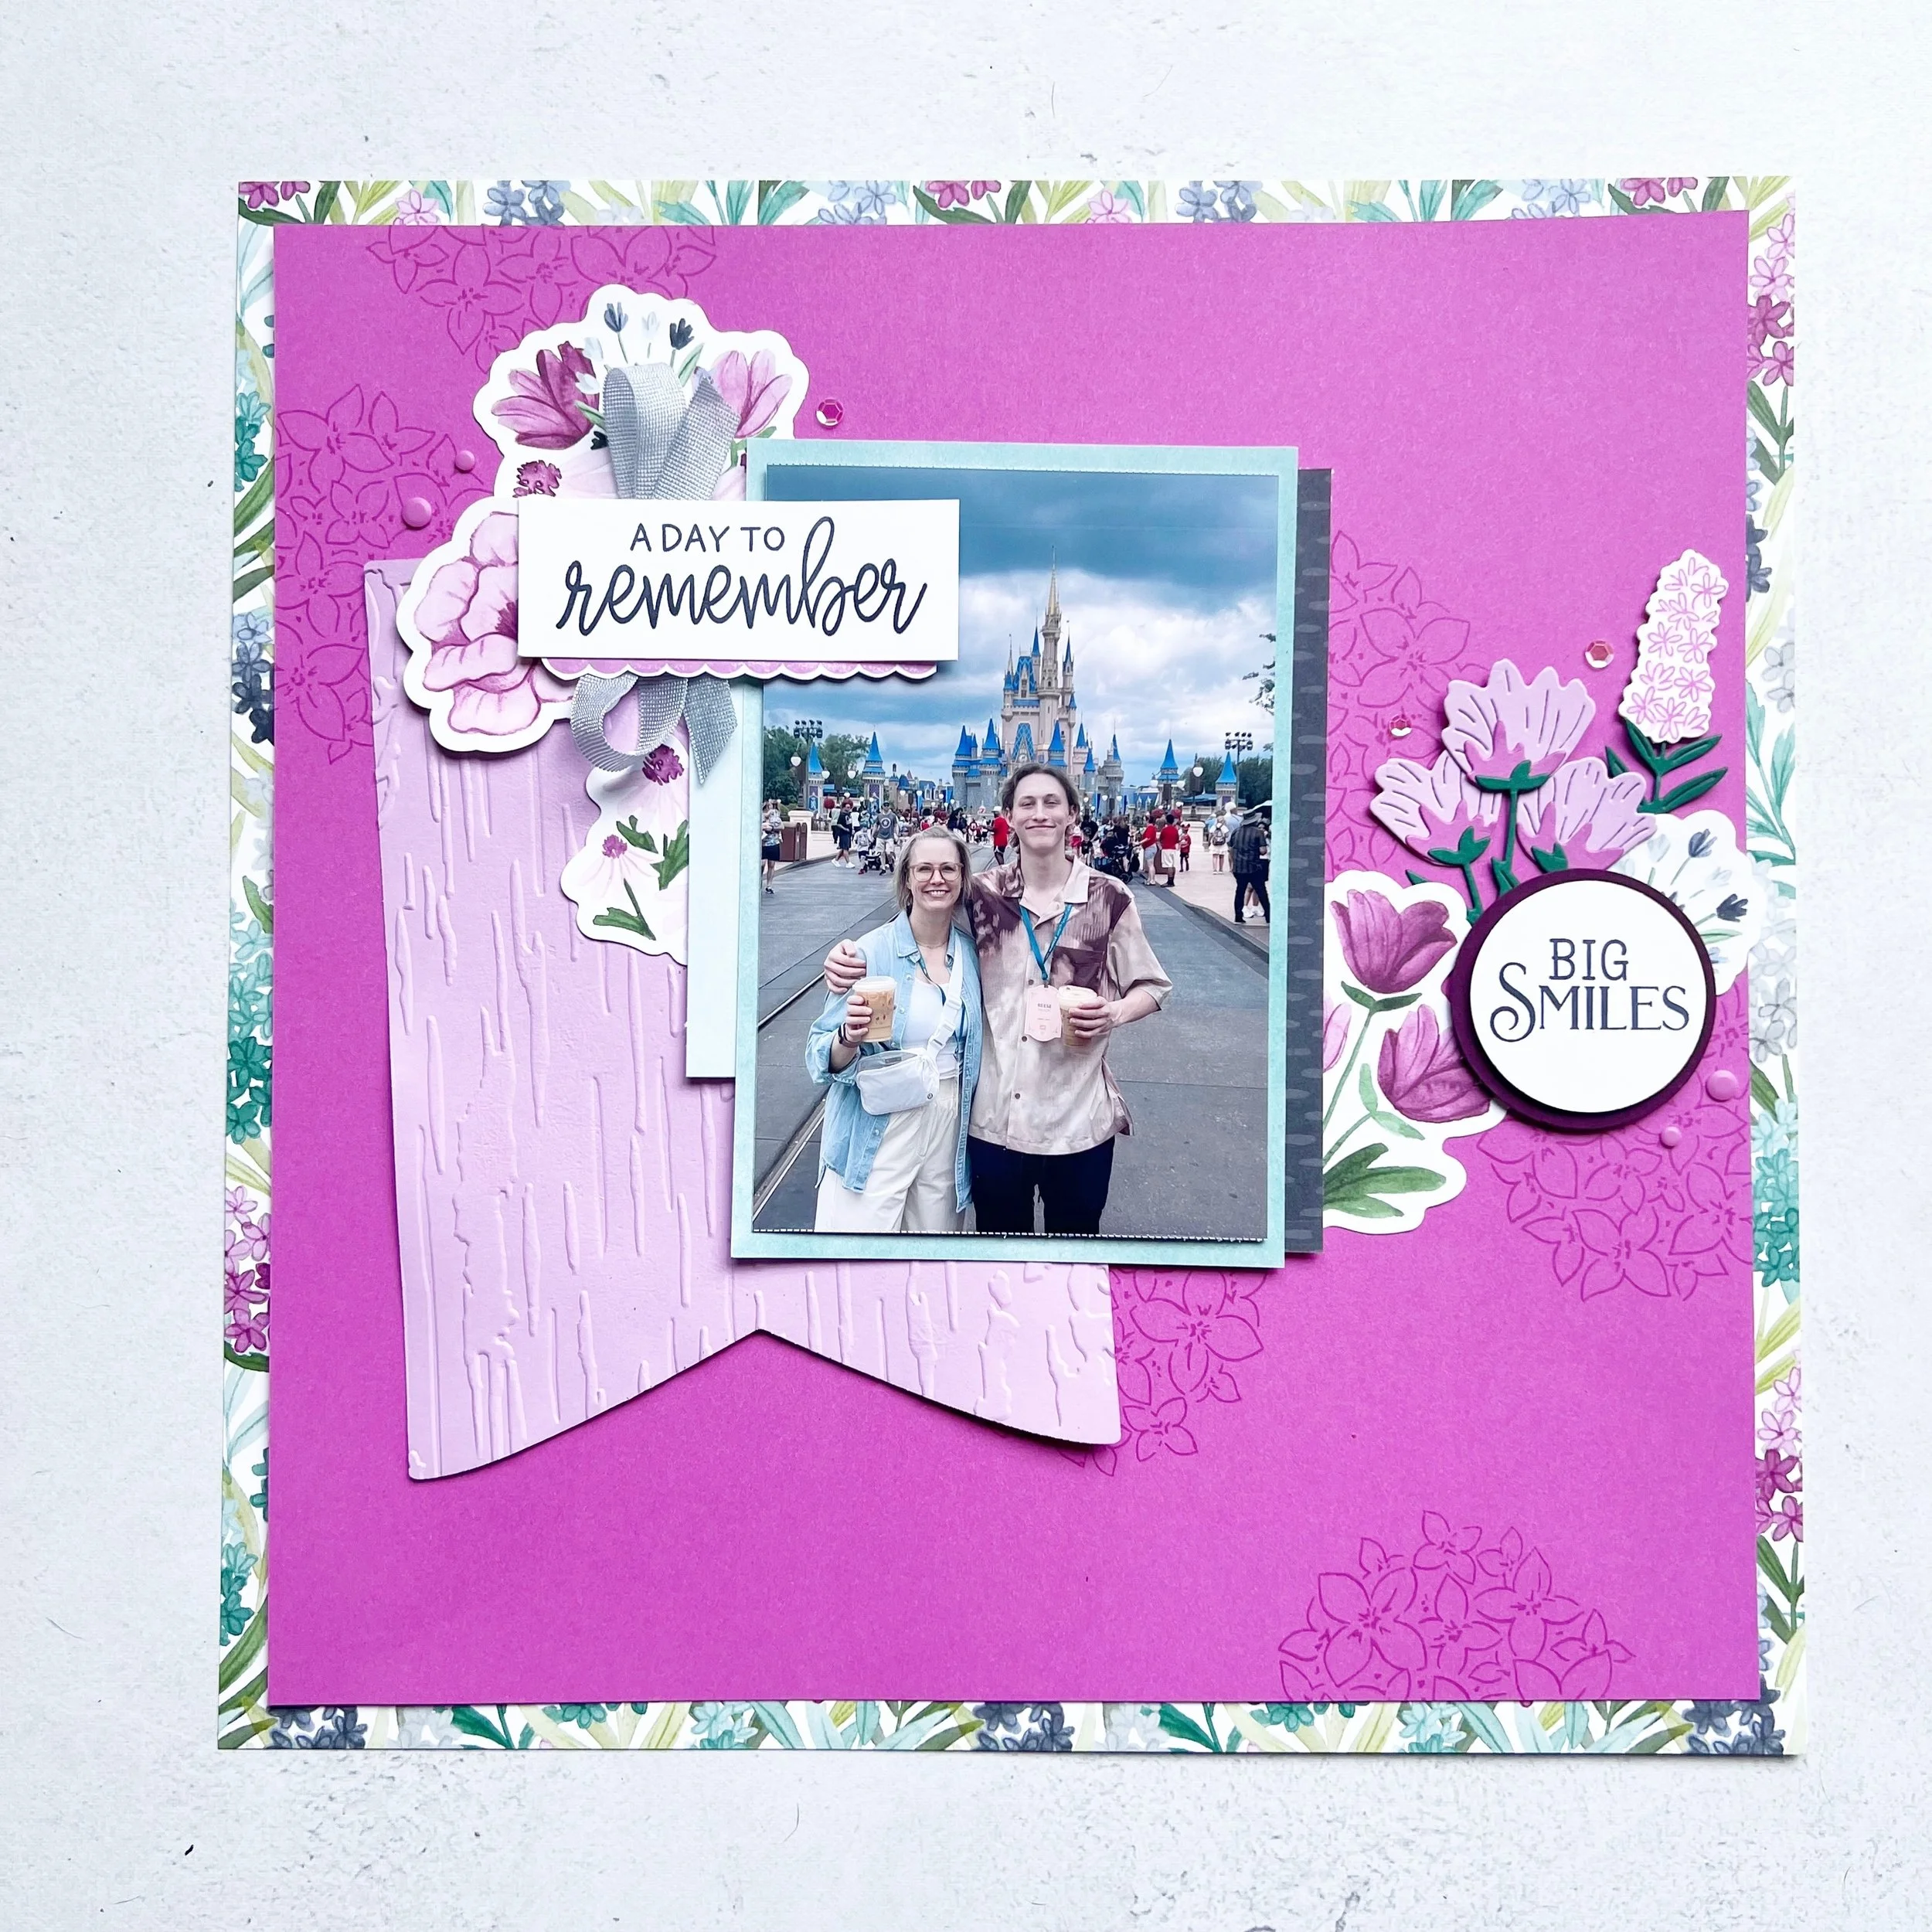
I used one of the large flowers from the Thankful Garden stamp set to fill in some space on the Petunia Paper base (stamping tone on tone). A combination of different embellishments is also fun (use up those random sequins or gems that you have left, it’s a crime they get abandoned!)
I hope this page sparks some new ideas in your own memory keeping!
If you are just starting your memory keeping journey—check out my gallery for a bunch of inspiration and follow me on instagram @stampwithbrenda if you are not already!
And wish me luck on my new journey—as I have been saying Brenda2.0 has just launched! If you are inspired to create this page please consider shopping with me in Canada—this helps me to keep loving what I do!
Shop with Me!
Product List![Memories In Bloom Scrapbooking Workshop Kit (English) [ 166713 ]](https://assets1.tamsnetwork.com/images/EC042017NF/166713s.jpg "Memories In Bloom Scrapbooking Workshop Kit (English) [ 166713 ]")
![Party Banners Dies [ 165264 ]](https://assets1.tamsnetwork.com/images/EC042017NF/165264s.jpg "Party Banners Dies [ 165264 ]")
![Pretty Florals Bundle [ 165179 ]](https://assets1.tamsnetwork.com/images/EC042017NF/165179s.jpg "Pretty Florals Bundle [ 165179 ]")
![Storybook Life Photopolymer Stamp Set (English) [ 166635 ]](https://assets1.tamsnetwork.com/images/EC042017NF/166635s.jpg "Storybook Life Photopolymer Stamp Set (English) [ 166635 ]")
![Thankful Garden Photopolymer Stamp Set (English) [ 165526 ]](https://assets1.tamsnetwork.com/images/EC042017NF/165526s.jpg "Thankful Garden Photopolymer Stamp Set (English) [ 165526 ]")
![Birch Wood 3 D Embossing Folder [ 164069 ]](https://assets1.tamsnetwork.com/images/EC042017NF/164069s.jpg "Birch Wood 3 D Embossing Folder [ 164069 ]")
![Petunia Pop 12" X 12" (30.5 X 30.5 Cm) Two Tone Cardstock [ 166690 ]](https://assets1.tamsnetwork.com/images/EC042017NF/166690s.jpg "Petunia Pop 12\" X 12\" (30.5 X 30.5 Cm) Two Tone Cardstock [ 166690 ]")
![Blackberry Bliss 8-1/2" X 11" Cardstock [ 133675 ]](https://assets1.tamsnetwork.com/images/EC042017NF/133675s.jpg "Blackberry Bliss 8-1/2\" X 11\" Cardstock [ 133675 ]")
![Fresh Freesia 8 1/2" X 11" Cardstock [ 155613 ]](https://assets1.tamsnetwork.com/images/EC042017NF/155613s.jpg "Fresh Freesia 8 1/2\" X 11\" Cardstock [ 155613 ]")
![Basic White 8 1/2" X 11" Cardstock [ 166780 ]](https://assets1.tamsnetwork.com/images/EC042017NF/166780s.jpg "Basic White 8 1/2\" X 11\" Cardstock [ 166780 ]")
![Cloud Cover 3/8" (1 Cm) Faux Linen Ribbon [ 165271 ]](https://assets1.tamsnetwork.com/images/EC042017NF/165271s.jpg "Cloud Cover 3/8\" (1 Cm) Faux Linen Ribbon [ 165271 ]")
![Petunia Pop Classic Stampin Pad [ 163811 ]](https://assets1.tamsnetwork.com/images/EC042017NF/163811s.jpg "Petunia Pop Classic Stampin Pad [ 163811 ]")
![Secret Sea Classic Stampin' Pad [ 165285 ]](https://assets1.tamsnetwork.com/images/EC042017NF/165285s.jpg "Secret Sea Classic Stampin' Pad [ 165285 ]")


![Thankful Garden Bundle (English) [ 165534 ]](https://assets1.tamsnetwork.com/images/EC042017NF/165534s.jpg "Thankful Garden Bundle (English) [ 165534 ]")
![Meant To Bee Dies [ 166582 ]](https://assets1.tamsnetwork.com/images/EC042017NF/166582s.jpg "Meant To Bee Dies [ 166582 ]")
![Beautiful Butterflies Photopolymer Stamp Set (English) [ 164608 ]](https://assets1.tamsnetwork.com/images/EC042017NF/164608s.jpg "Beautiful Butterflies Photopolymer Stamp Set (English) [ 164608 ]")
![White Willow 12" X 12" (30.5 X 30.5 Cm) Cardstock [ 166703 ]](https://assets1.tamsnetwork.com/images/EC042017NF/166703s.jpg "White Willow 12\" X 12\" (30.5 X 30.5 Cm) Cardstock [ 166703 ]")
![Petunia Pop 8 1/2" X 11" Cardstock [ 163801 ]](https://assets1.tamsnetwork.com/images/EC042017NF/163801s.jpg "Petunia Pop 8 1/2\" X 11\" Cardstock [ 163801 ]")
![Soft Sea Foam 8-1/2" X 11" Cardstock [ 146988 ]](https://assets1.tamsnetwork.com/images/EC042017NF/146988s.jpg "Soft Sea Foam 8-1/2\" X 11\" Cardstock [ 146988 ]")
![Lost Lagoon 8-1/2" X 11" Cardstock [ 133679 ]](https://assets1.tamsnetwork.com/images/EC042017NF/133679s.jpg "Lost Lagoon 8-1/2\" X 11\" Cardstock [ 133679 ]")
![Petunia Pop Stampin’ Blends Combo Pack [ 163828 ]](https://assets1.tamsnetwork.com/images/EC042017NF/163828s.jpg "Petunia Pop Stampin’ Blends Combo Pack [ 163828 ]")
![Fresh Freesia Stampin' Blends Combo Pack [ 155518 ]](https://assets1.tamsnetwork.com/images/EC042017NF/155518s.jpg "Fresh Freesia Stampin' Blends Combo Pack [ 155518 ]")
![Soft Sea Foam Stampin' Blends Combo Pack [ 154902 ]](https://assets1.tamsnetwork.com/images/EC042017NF/154902s.jpg "Soft Sea Foam Stampin' Blends Combo Pack [ 154902 ]")
![Tuxedo Black Memento Ink Pad [ 132708 ]](https://assets1.tamsnetwork.com/images/EC042017NF/132708s.jpg "Tuxedo Black Memento Ink Pad [ 132708 ]")
![2024–2026 In Color™ Stampin' Write Markers [ 163829 ]](https://assets1.tamsnetwork.com/images/EC042017NF/163829s.jpg "2024–2026 In Color™ Stampin' Write Markers [ 163829 ]")
![Subtles Stampin' Write Markers [ 161698 ]](https://assets1.tamsnetwork.com/images/EC042017NF/161698s.jpg "Subtles Stampin' Write Markers [ 161698 ]")


")
")


 Cardstock")