Around the World on Wednesday--You've Got Mail!

Hello friends! Welcome to another Around the World on Wednesday Blog Hop! This month our theme is You’ve Got Mail so I made a card with a design on the outside, inside and a coordinating envelope! I am currently living in a polar vortex in Edmonton, Alberta. Today’s temperature as I write this is -48 with the wind chill. So gross. Luckily my card is bright and cheery and makes me think of warmer weather!

91442295_10216484369808661_2887014979863576576_n.jpg

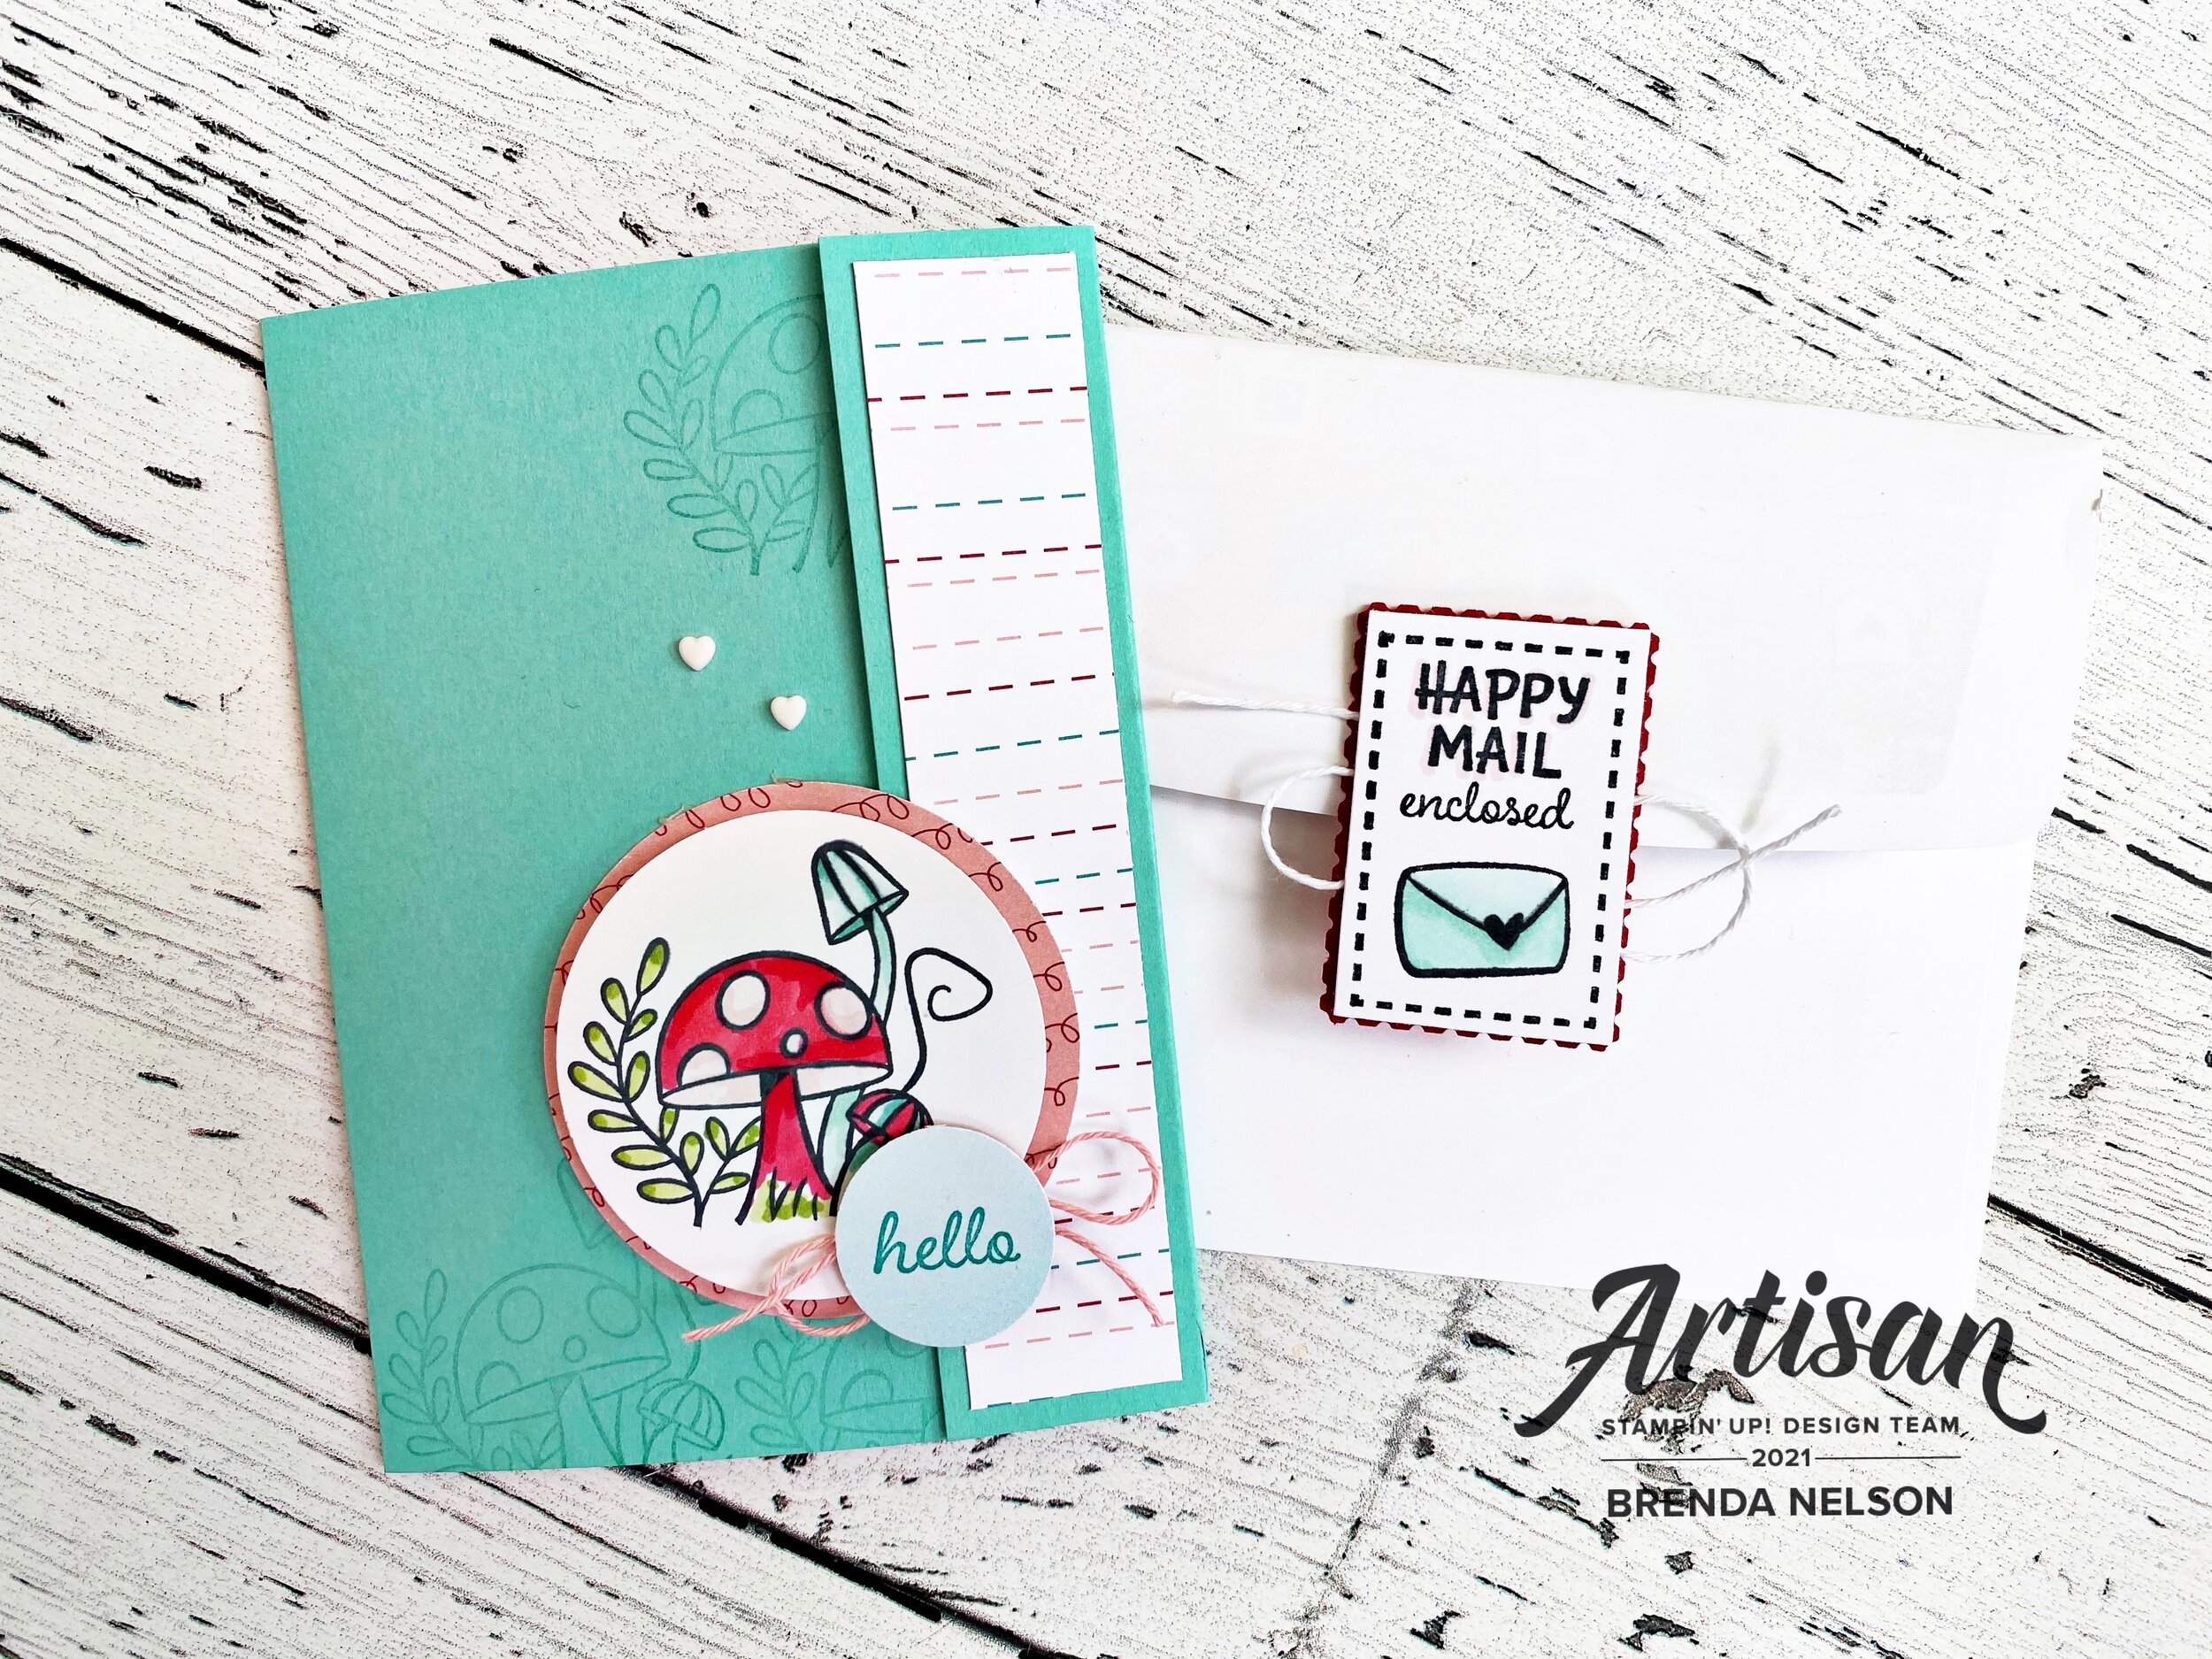
The Snail Mail Suite was the perfect choice for this theme. I have had so much fun creating with it lately as I find coloring very therapeutic! I love that it has dies and a coordinating punch (Rectangular Postage Stamp), plus some amazing Resin Heart embellishments and twine! So thankful Twine is back in our line up!

IMG_3447.jpg

Isn’t the back of this envelope so cute and fun? I added a bit of Tombow glue to the bottom and let it air dry. This allows the glue to become tacky so you can use it to close something but it can also be lifted up! Its a fun tip if you have never used the glue in that way before!

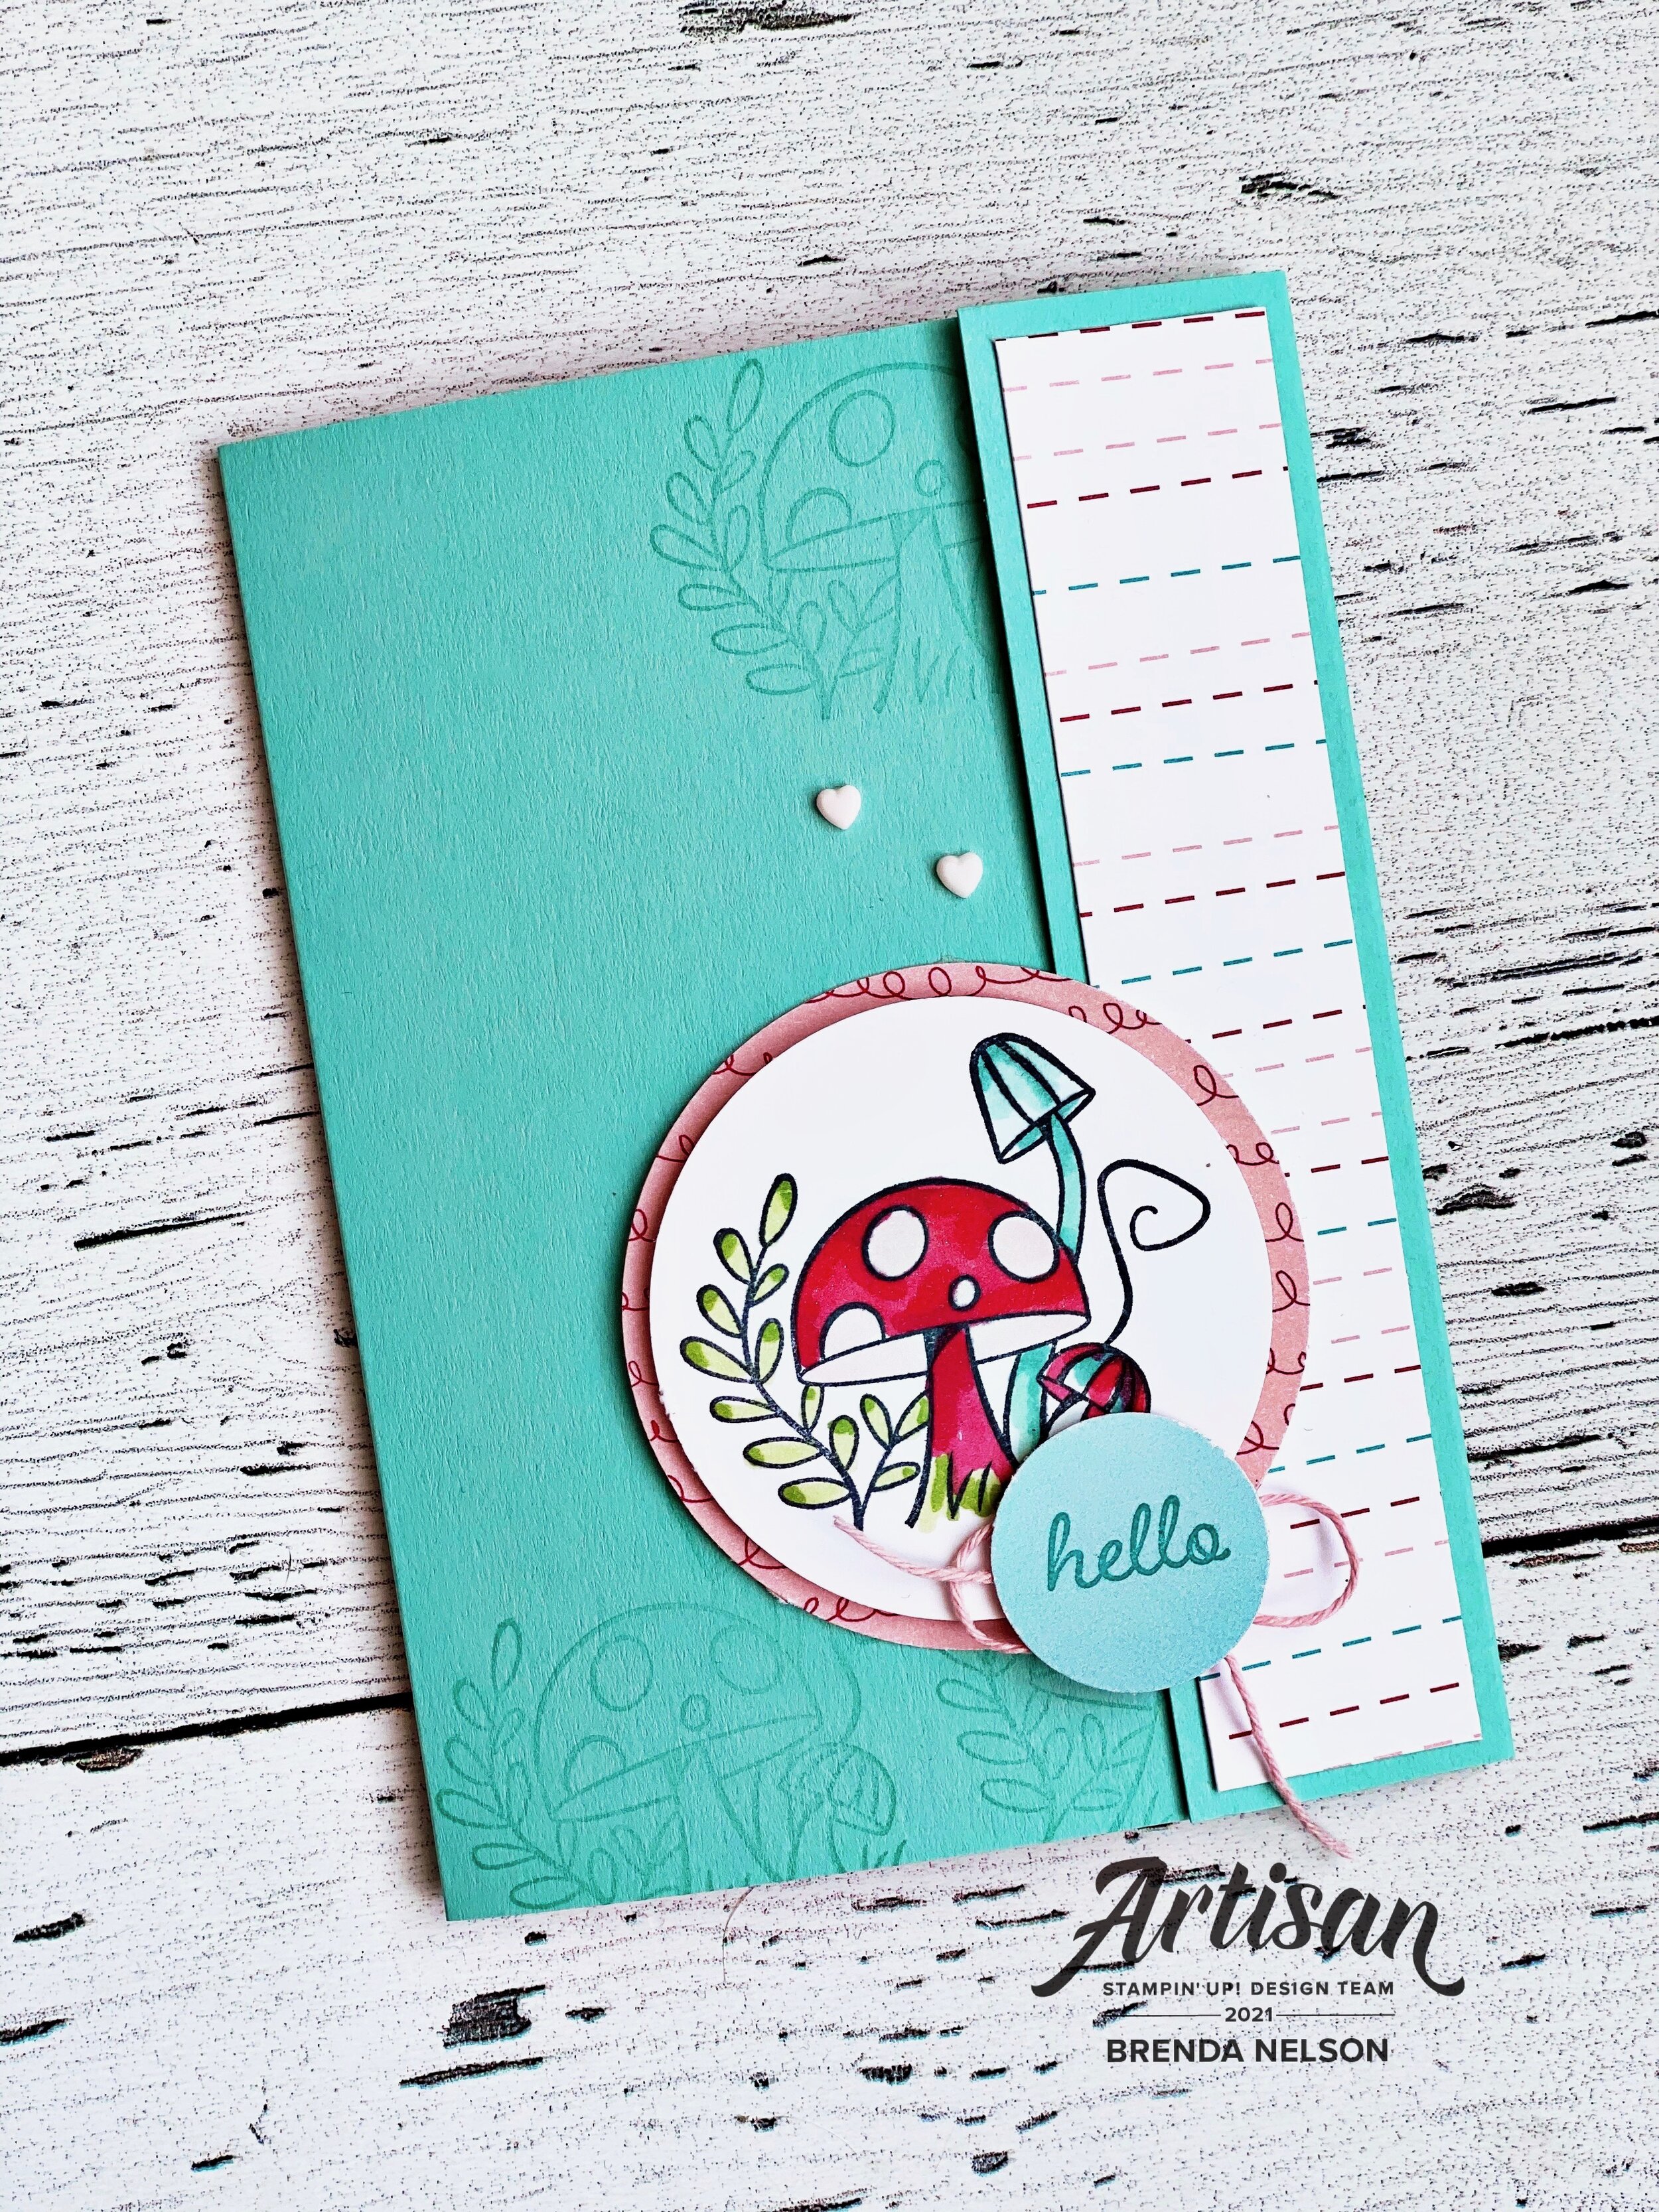
My card is also a bit of a fun fold card too! The dimensions are 5 1/2 x 8 1/2 and you score the base at 3 1/4 and 7 1/4. It makes the fun little flap on the front that you can embellish with Designer Series Paper. I used the Snail Mail paper on my card with a Coastal Cabana card base.


The flap is going to want to hang open so you need to find a creative way for it to stay closed until you want to open your card.

I used a 2 1/4 DSP circle and added a 2 inch Basic White circle on top that I stamped the fun mushroom image from the Snailed It stamp set. I used my Stampin’ Blends to color him in with some Wink of Stella on the main mushroom.

IMG_3439.jpg
IMG_3444.jpg

The inside panel is Basic White cut to 3 3/4 x 5 1/4. I stamped my cute snail and created a mask so that I could use my Blending Brush around him to create a Coastal Cabana halo. I then stamped Hello across the background. The snail is also colored with Stampin’ Blends. I created a little polka dot pattern on his present and added in a red Resin Heart! LOVE!

IMG_3454.jpg

Remember our theme? Well I knew I needed to dress up the envelope a bit so I pulled out a very very old retired die that cuts an envelope liner and I added it to the inside of our Basic White envelope. You could always trace one of our envelopes on your Designer Series paper to achieve the same idea.

IMG_3446.jpg

I had alot of fun with this theme and was so happy with what I was able to create! If you haven’t played with the Snail Mail Suite I hope you will give it a try, it is alot of fun!

IMG_3450.jpg

I can’t wait to see what the other design team members have created this month. I am sure you will be truly inspired as you travel around the world with us! You can click on Next Blog to see what Tricia Butts from the United States has created!

Create with Connie and Mary-Valentine's Favors!

I am super excited for Valentine’s Day this year and I plan on spoiling some of my favorite Galentine’s with a super cute project! Valentine’s favors happen to be the theme for this week’s Create with Connie and Mary challenge!

Design Team.jpg
final 15.jpg

I was super excited about the Hearts & Kisses stamp set in the January to June catty as I loved the sentiments “Happy Galentine’s Day” and “You go, Girl!. I knew right away I wanted to make a special gift with this set.

I honestly think the stand out feature of this card is the True Love Designer Series Paper—don’t these hand trimmed flowers look AMAZING when paired agains the blended Flirty Flamingo background? This paper has unlimited potential as you can feature black & white imagery on literally anything or color this paper with thet variety of color tools we have at our disposal.

For the background, sentiment tag, and heart border (cut with the Floral Heart Dies) I used Flirty Flamingo ink with our new fabulous Blending Brushes.

I tied Blushing Bride twine around the front panel with a Heart Charm attached (LOVE!) and added some Matte Black Dots. This entire product suite is phenomenal!

final+%281%29+8.jpg

My coordinating Love You Always Treat Box is my favorite of this duo. I am going to fill this box with some of my Reese’s Valentines Surprise Cookies that I shared on my blog last Valentine’s Day! You can click this link to go to my recipe or click on my Lifestyle Tab and then Favorite Recipes and you will find it there! Your welcome in advance, these cookies are AMAZING!

Cookie Recipe

I wrapped the box with another pattern from the DSP and added some more of the flowers that I hand trimmed from the paper. This time I also used my Blending Brush to add a pop of color with the Flirty Flamingo ink.

I added some Blushing Bride Metallic Ribbon and some sliver metallic thread to the back of my label. The sentiment is from the Always in my Heart stamp set and the tiny heart is cut using the Kangaroo dies.

I love this project combo and cannot wait to deliver these to some of my special Galentine’s this year!

I love this project combo and cannot wait to deliver these to some of my special Galentine’s this year!

To see what Melissa has created you can click BACK and to see what Connie designed this week you can go NEXT. I hope you hop the whole way through so you don’t miss anything!

Butterfly Bouquet

Hello crafty friends! I am so excited about this brand NEW Butterfly Bouquet bundle that is just being released by Stampin’ Up! This is a limited time promotion available to Demonstrators today (another awesome reason to join my Glitter Girls Team—early access!) and customers on March 2, 2021.

As a member of the Artisan Design Team (dream come true) we were able to work with these fantastic products early so we can surprise and delight you with some fantastic samples!

final 21.jpg

I knew as soon as I saw this product offering that I wanted to create a scrapbook page. Its so easy too when your subject matter is so adorable—this photo is of my son and dog, often referred to as my Number One and my Number Two favorites…can you guess which is which? This is a hilarious inside family joke as I actually have two other kids! hahaha!

02.02.21_SHAREABLE_OOP_Q1_NA.jpg

This new product offering includes the Butterfly Brilliance Cling stamp set, the Brilliant Wings Dies, the Butterfly Bijou 6x6 Designer Series Paper stack and the Natural Touch Specialty Paper—you can order everything individually, as a bundle and as a collection. My understanding is that the two papers are also limited edition, meaning they will not be available like the stamp set and dies in the upcoming Annual Catalogue!


What I love about this new DSP is that the dies will cut out the butterflies from the paper! I used this tip on my page and embellished the butterflies by adding Fine Tip Glue on select areas of their wings. It is hard to capture in a photo but the glue dries shiny so it gives the wings a bit more depth and interest.

BrendaNelsonOOPJan2021.jpg
final (1) 10.jpg

I wanted to use a little bit of everything that was available in this collection. I stamped the butterflies in Whisper White Craft Ink on the background and embossed them with white embossing powder. I used the dies as I mentioned above to cut the butterflies from the DSP and I used the dies to cut out some white butterflies. I really wanted the colorful DSP butterflies to be the showcase of my page.

final 19.jpg
 

I just love the coordination of the dies cutting out the butterflies, I think this is fantastic selling featuring!

The colors in the Butterfly Bijou paper are Bermuda Bay, Blushing Bride, Calypso Coral, Just Jade, Magenta Madness, Mango Melody, Mint Macaron, Misty Moonlight, Poppy Parade and So Saffron! Isn’t that quite the list?

final 21.jpg

I layered a strip of the Natural Touch Specialty paper (it feels like a very thin wood veneer) onto my page followed by a Just Jade card stock photo mat, and two other pieces of DSP from the collection, offsetting them at different angles.

The stamp set itself does not have any sentiments, so I borrowed You are Amazing from the stamp set of the same name and You Mean so Much to Me from the In Bloom stamp set, both in the current January to June catalogue!

I hope this page has inspired you to consider this new product release. If you are not a current Demonstrator I would love to have your join my team if you live in Canada! You can do it with an easy click below or send me a message, I would love to chat with you about the opportunity!

join my team

Color Fusers-February 2021

Hello friends! Welcome to another Color Fusers Blog Hop! I am so excited to be hoping with this talented group of ladies for 2021, especially with these color combos forcing me out of my comfort zone!

The Color Challenge for February includes Gorgeous Grape, Magenta Madness, and Bermuda Bay—three very very bright colors! I was a little intimidated by this color combo!

02_2021 Graphic.jpg

Because these are such bold vibrant colors I new that I needed to begin on a pretty neutral base so I went with Basic White card stock for my base. I had some strips of these colors in my scrap bin which gave me an idea for incorporating them into the background.

The strips of card stock are actually all different random widths which I think helped achieved a whimsical background!

The strips of card stock are actually all different random widths which I think helped achieved a whimsical background!

I decided to use the Pretty Perennials Bundle on this card project as I haven’t had much of an opportunity to stamp with it quite yet. I stamped some of the images from the stamp set on the Magenta Madness and Gorgeous Grape strips on the coordinating ink color.

I really wanted the colors to be the focal point of this card so I used Basic White, Vellum and the new Pearlescent Specialty Paper to embellish the card with flowers and leaves from the Perennial Petals Dies.


The flower on the top right is on a Pearlescent base with Basic White layer on top and Opal Round.

The main flower is on a Basic White base with a Pearlescent layer on top and a large Opal Round in the center.

I cut apart the large vellum leaf/sprig to add in few more sprigs.

final 13.jpg

The word ‘Happy’ is stamped in White Craft Ink and embossed with White Embossing Powder on Bermuda Bay card stock. You will need to hand trim this word as the die set does not include a die to cut it out.

“Sending Lots of Happy” is stamped on another strip of Magenta Madness in the coordinating ink. Both of the sentiments are popped up with Dimensionals.

I hope you are inspired to create a fun project using this color combo yourself!

You can visit Melissa next to see her amazing creation! I know you will be wowed!

Create with Connie and Mary--Love is in the Air!

Can you believe it is the end of January already? Happy that this month is done as it hopefully it means we are another month closer to ‘normal’ life! Where I live, things are still pretty strict and we are in the middle of a cold snap, so its a bit of a rough patch. Luckily I have my stamping hobby to keep me occupied!

This week our theme is Love is in the Air so I wanted to make a card that has a ‘love’ theme but feels airy and light. I hope you enjoy what I designed!

Design Team.jpg
final (1) 4.jpg
 

For my project this week I decided to experiment again with the new Blending Brushes. Playing around is honestly the best way to learn about a new product. The Blending Brushes are actually so user friendly, I am seriously impressed!

The only stamp on this card is from the Always in my Heart stamp set found in the January to June catalogue.

final (1) 5.jpg

The feature of this card is the box I created with my Blending Brush and stencil I made using two Stitched Rectangular dies to create the box/frame. I used Coastal Cabana for that ‘airy’ bright feel I was wanting. I used the Blending Brush to create the Coastal Cabana box. The sentiment is then stamped on top with Momento Ink.

final 10.jpg

The flowers on this card are from the True Love Designer Series paper. I cut them by hand and then isolated a second flower on top after coloring it with the Magenta Madness and Old Olive Stampin’ Blends.

I added in a few Opal Rounds as a finishing touch. I love how they are almost translucent but have a bit of flecking to them for interest.

I really really love how this card turned out and think its an awesome way to showcase off the Blending Brushes!

Can’t wait to see what Melissa has shared (you can go BACK) or what Connie has desgined (NEXT). Enjoy the upcoming month!