A Card a Day in December--Day #18

While this card doesn’t say Merry Christmas I still feel like it is a holiday card that I would give to a close friend. I love the Snowflake Splendor suite as it has some really unique sentiments in it. I created two versions of this card with different colors. Which one do you like better? I can’t even pick!

final (11) 8.jpg

Both of the cards are on bases of Pool Party with snowflakes stamped in the same ink color along the bottom.

I added a small strip of DSP from the Snowflake Splendor collection and then changed up the snowflake colors on each card. So one card leans more purple and the other more blue tones.

The ribbon is the Pool Party Sheer Ribbon from the Annual Catalogue. I love this ribbon and have gone through a couple of rolls already. I added some bling to the middle of a few snowflakes with the Elegant Faceted Gems.

final (7) 11.jpg

If you live in Canada please feel free to shop with me! I would love to support you in your crafting needs and make a new friend across the county!

shop with me

A Card a Day in December--Day #17

Happy Thursday! I am so excited to share this fun combo project with you today! It is a cute decorated pizza box with a mini card and a gift card all inside! Talk about a small package packing a big punch! This is my 18th share in my A Card a Day in December, I hope you are enjoying everything I have shared so far.

 
final (7) 14.jpg
 

I started by decorating the mini pizza box with a piece of designer series paper from the Heart Warming Hugs collection. I added a belly band of Mossy Meadow card stock with the cute little mini cups from the Warm Hugs stamp set stamped in the same ink color. When making a belly band you want it to be snug enough to stay on but loose enough to slip off and on (it would be sad if the recipient had to rip it off to get at what is inside).

I punched a 2 1/4 inch circle in Pear Pizzaz card stock and ran it through the Wrapped in Texture Embossing folder.

The little cup is from the Press On stamp set and is hand cut. I added a little decorative detail to the cup with a piece of DSP and some light coloring with the light Smoky Slate Stampin’ Blend marker.

The sentiment is stamped in Soft Suede ink on Crumb Cake card stock from the Warm Hugs stamp set.

final (1) 3.jpg

On the inside I made a cute little 3x3 card with matching envelope. It has a Crumb Cake layer that is also embossed with the Wrapped in Texture embossing folder and another strip of DSP.

The to go cup is also from the Press On stamp set and looks cute with a little DSP coffee cozy on it. I added “I Like You a Latte” on Crumb Cake with a bit of marker spritz.

The 3x3 mini envelope is dressed up with a trio of little coffee cups!

The card is designed to fit in the bottle of the pizza box and the top of the lid has a gift card—a coffee one of course!

The card is designed to fit in the bottle of the pizza box and the top of the lid has a gift card—a coffee one of course!


If you are looking for a last minute gift for a teacher, neighbor, or coworker I think this would be an easy yet adorable gift left on someone’s door step or mailbox.

Thank you so much for checking out my projects so far this month!

shop with me


final (11) 9.jpg

A Card a Day in December--Day #16

Today I wanted to share a bit of a fun fold card that I recently designed. This is my 16th card share this month so far! I am excited to be sharing with you and am really looking forward to some New Years cards /projects coming your way on Dec 26th!

I am also planning to share a scrapbook page on Christmas Day so if memory keeping is your jam, make sure to pop on over to check it out!


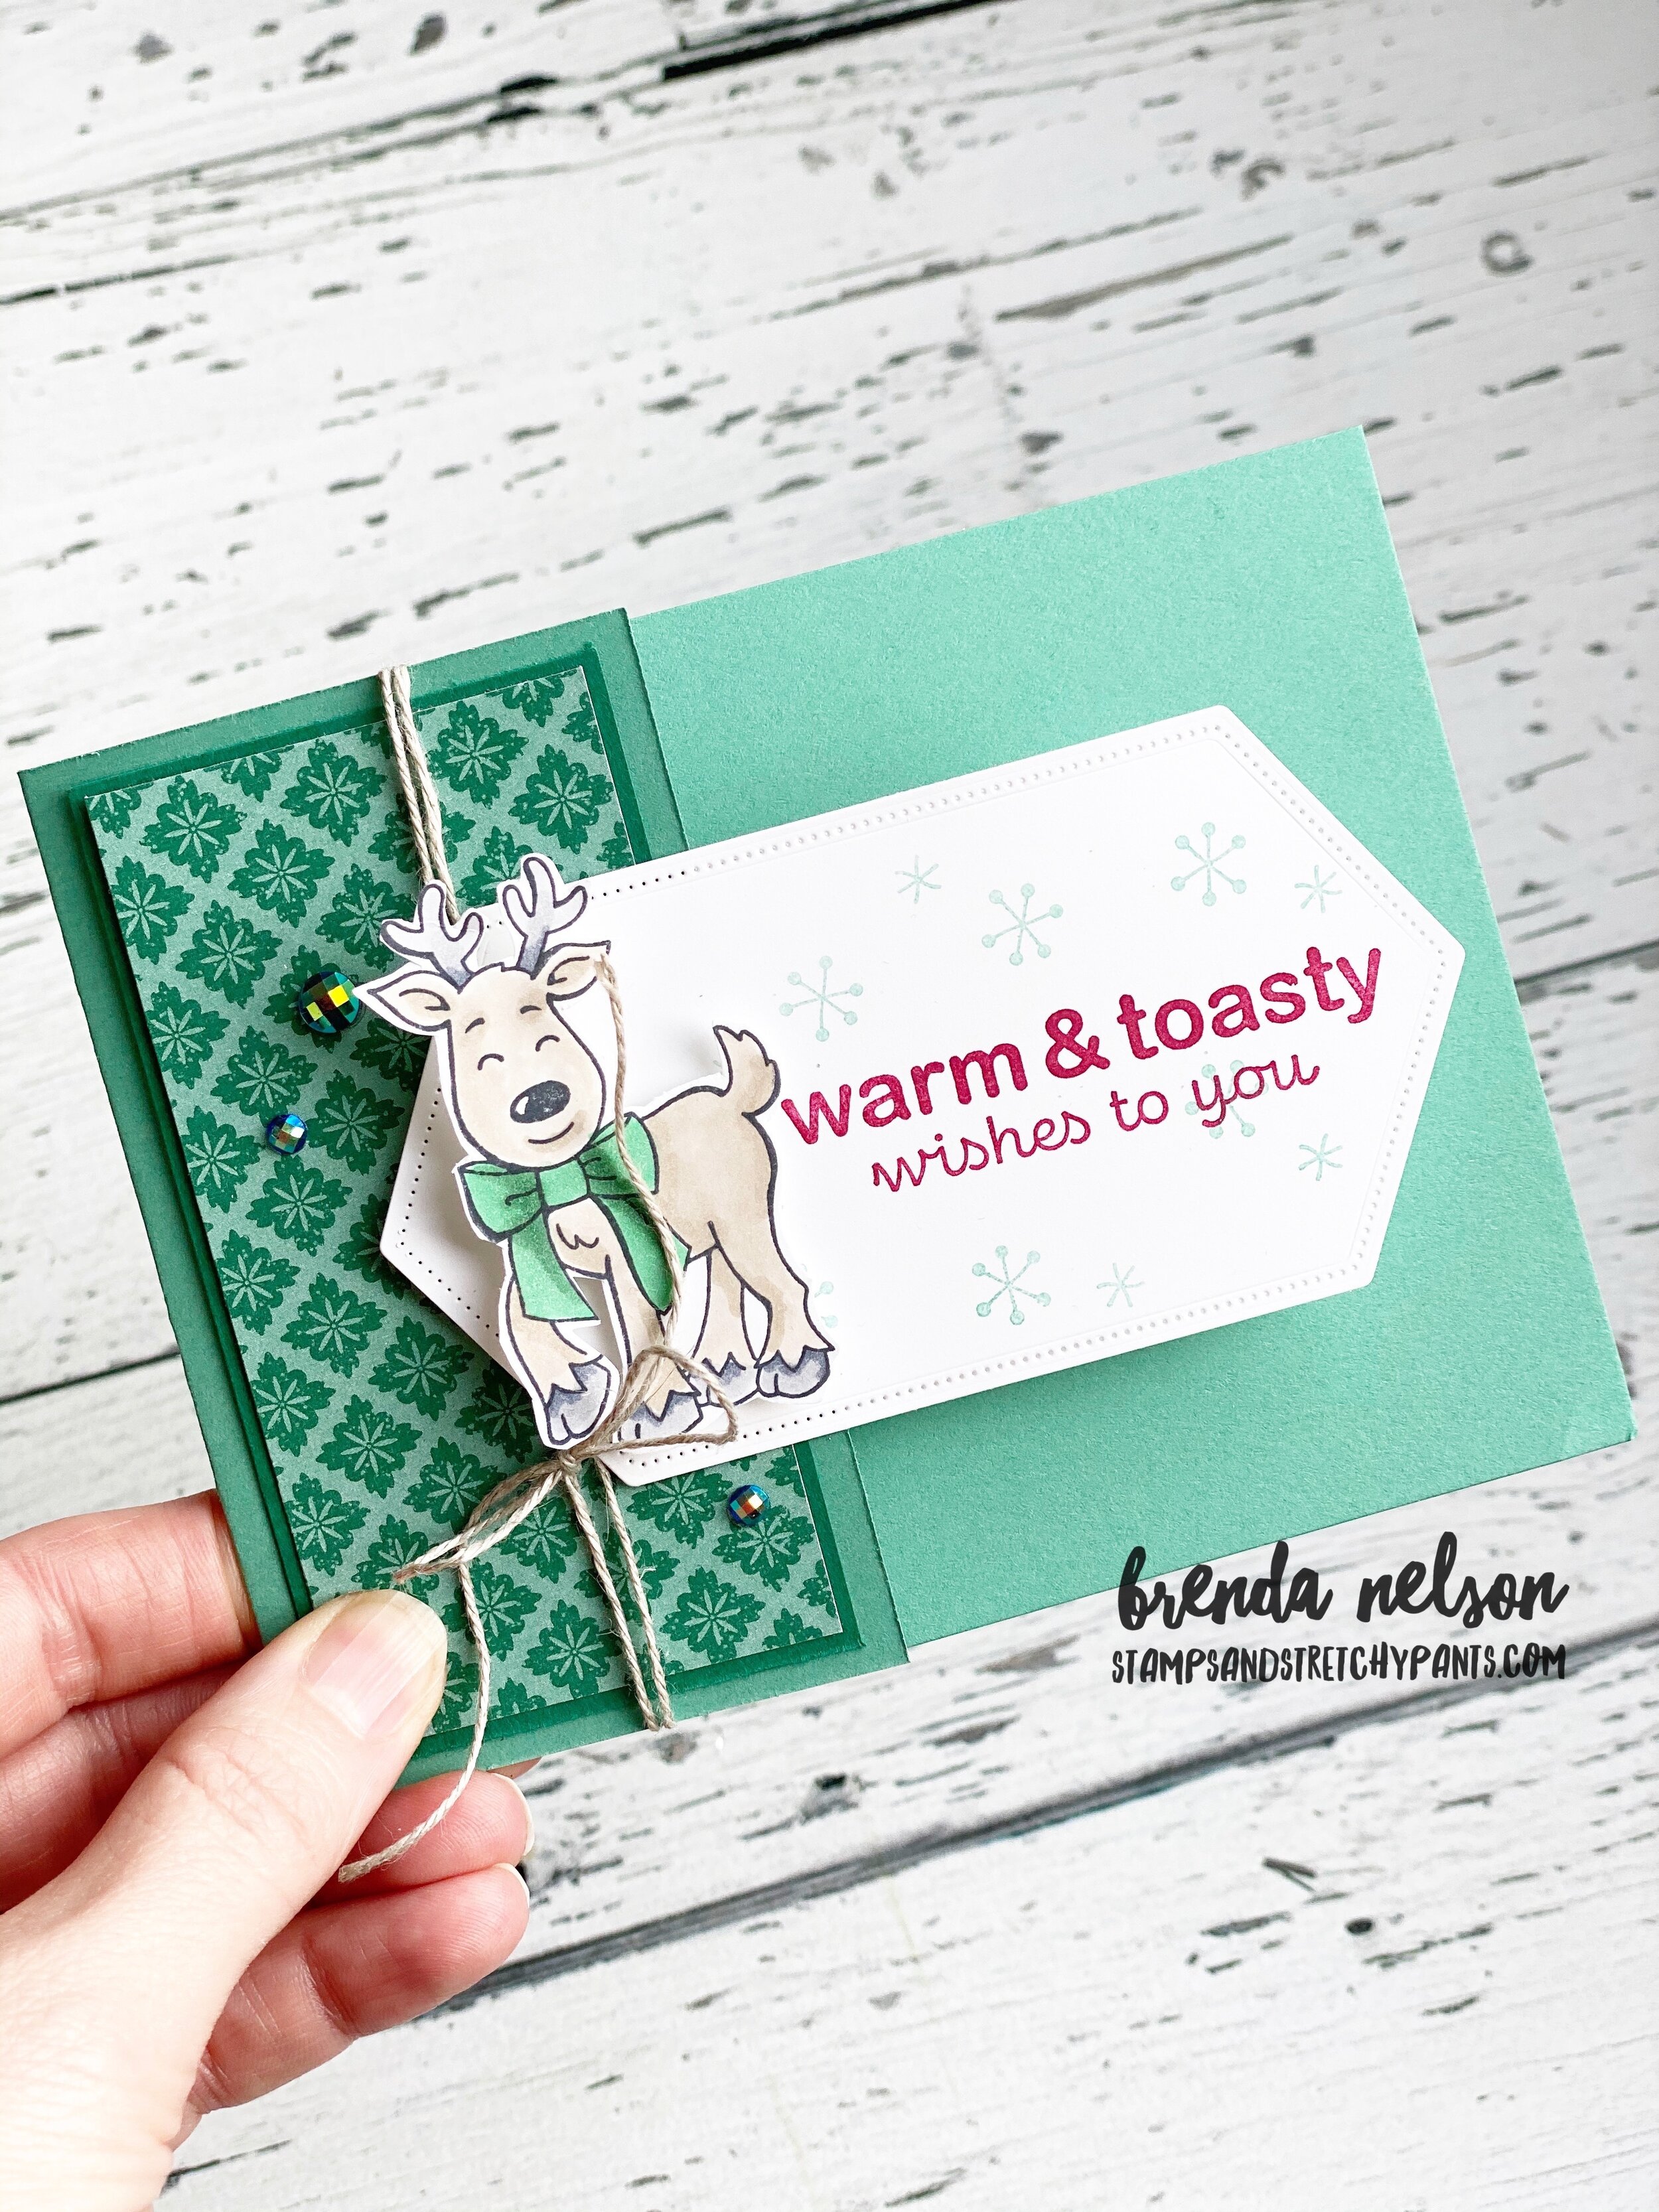
The Just Jade base of this card is 4 1/4 x 8 and is scored on the long side at 2 1/2. That will make the little panel on the front.

I added a piece of DSP from the Tis’ the Season 6x6 stack with a layer of Shaded Spruce card stock behind.

I just LOVE Just Jade and Shaded Spruce together. To me, its the best green duo we have!

final 4.jpg

I cut two Stitched Nested Labels (same size) one you can see on the outside and the second is matched up on the inside of the card.

The little reindeer and sentiment is from the Warm & Toasty stamp set. I colored the reindeer in with Stampin’ Blends and added some Wink of Stella to his green bow.

I stamped a few little snowflakes around the sentiment in Just Jade ink, but I stamped them once on my Grid Paper before I stamped them on the label.

I wrapped some Linen Thread around this front panel (not the whole card) and added some of the Blue Adhesive Backed Gems for a little sparkle!

I wrapped some Linen Thread around this front panel (not the whole card) and added some of the Blue Adhesive Backed Gems for a little sparkle!

final (1) 2.jpg
 

The sentiment on the inside label is from the Dove of Hope stamp set in Cherry Cobbler ink with a few little Just Jade snowflakes sprinked around.

You can see from this photo that the Linen Thread only goes around the panel that flips open.

And you cannot see the inside panel when the card is closed so make sure to perfectly line up the Nested Labels.

shop with me


A Card a Day in December--Day #15

Hey you! It’s me, just over here making a mailing Christmas cards! I have sent out so many this year and it feels so wonderful! And each day I have a few cards in my mailbox too so that is exciting!

My card today is a quick and easy one because sometimes you do need to mass produce or don’t have alot of time to create a card!

final (7) 12.jpg


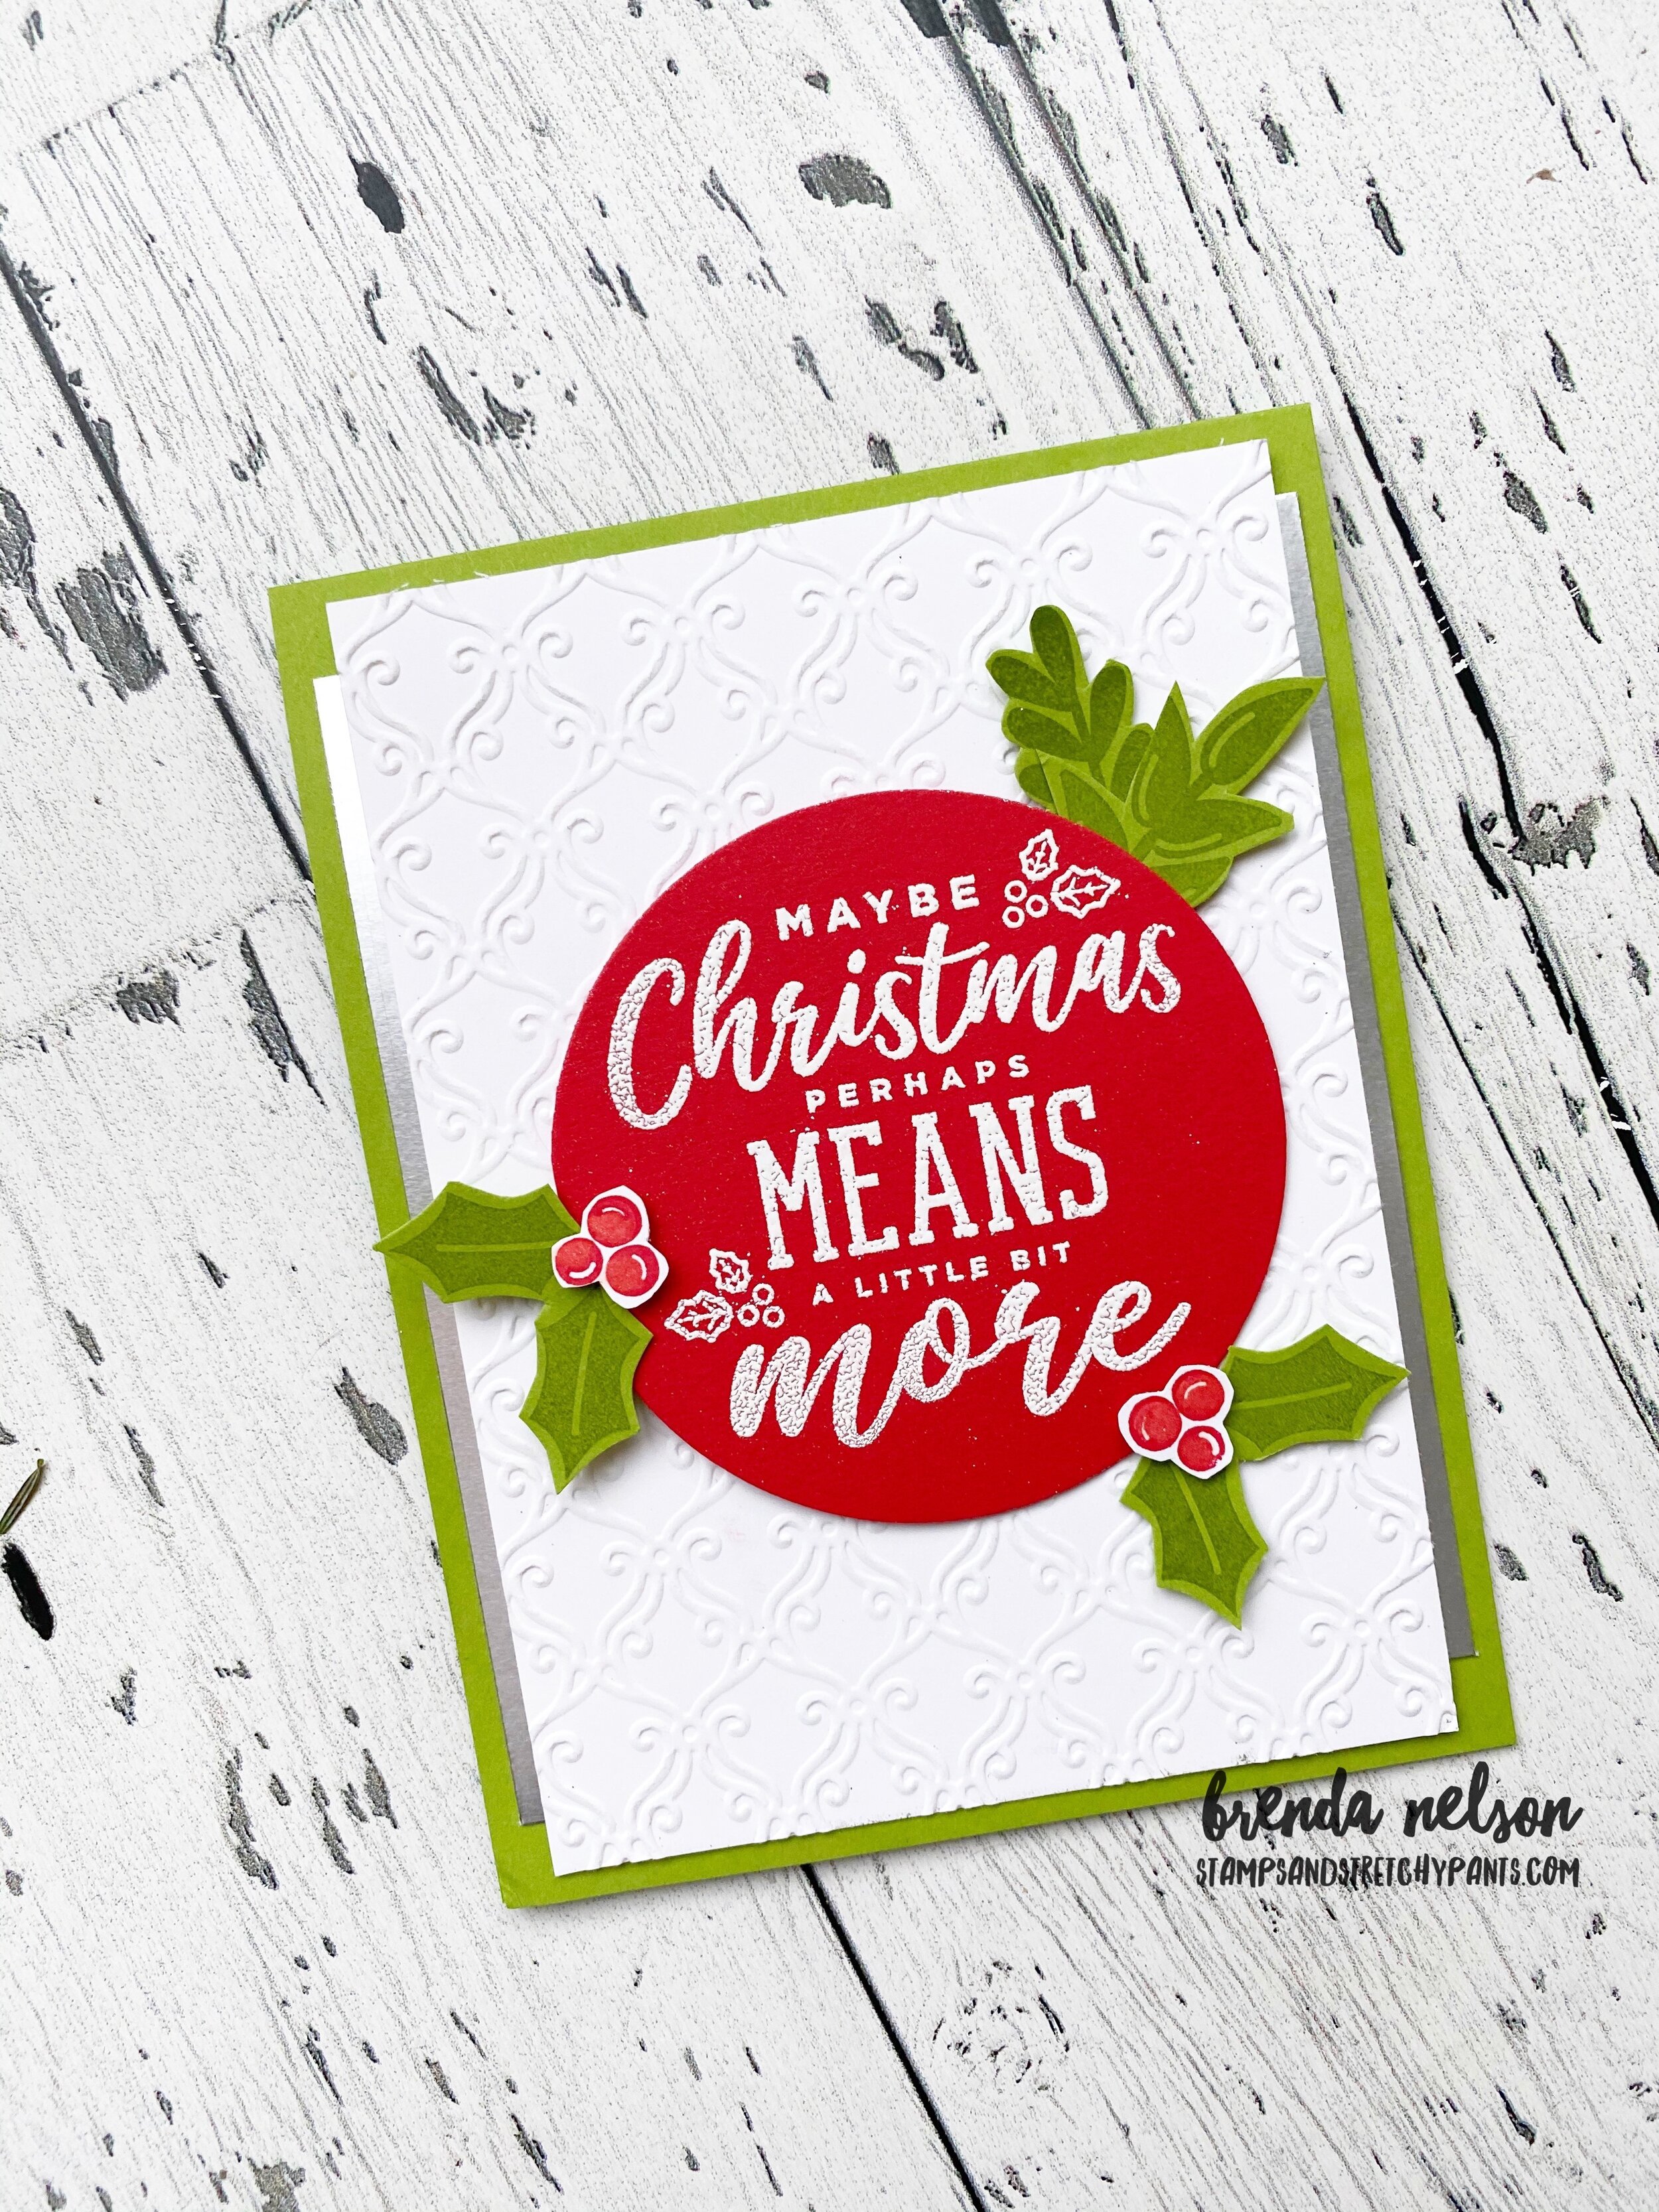
I love the color combo of Granny Apple Green and Poppy Parade together with a splash of white! It is a little bit of a brighter version of traditional red and green holiday cards.

I chose the stamp set Christmas Means More because it has such large sentiments and I wanted to make a quick impact with this card.

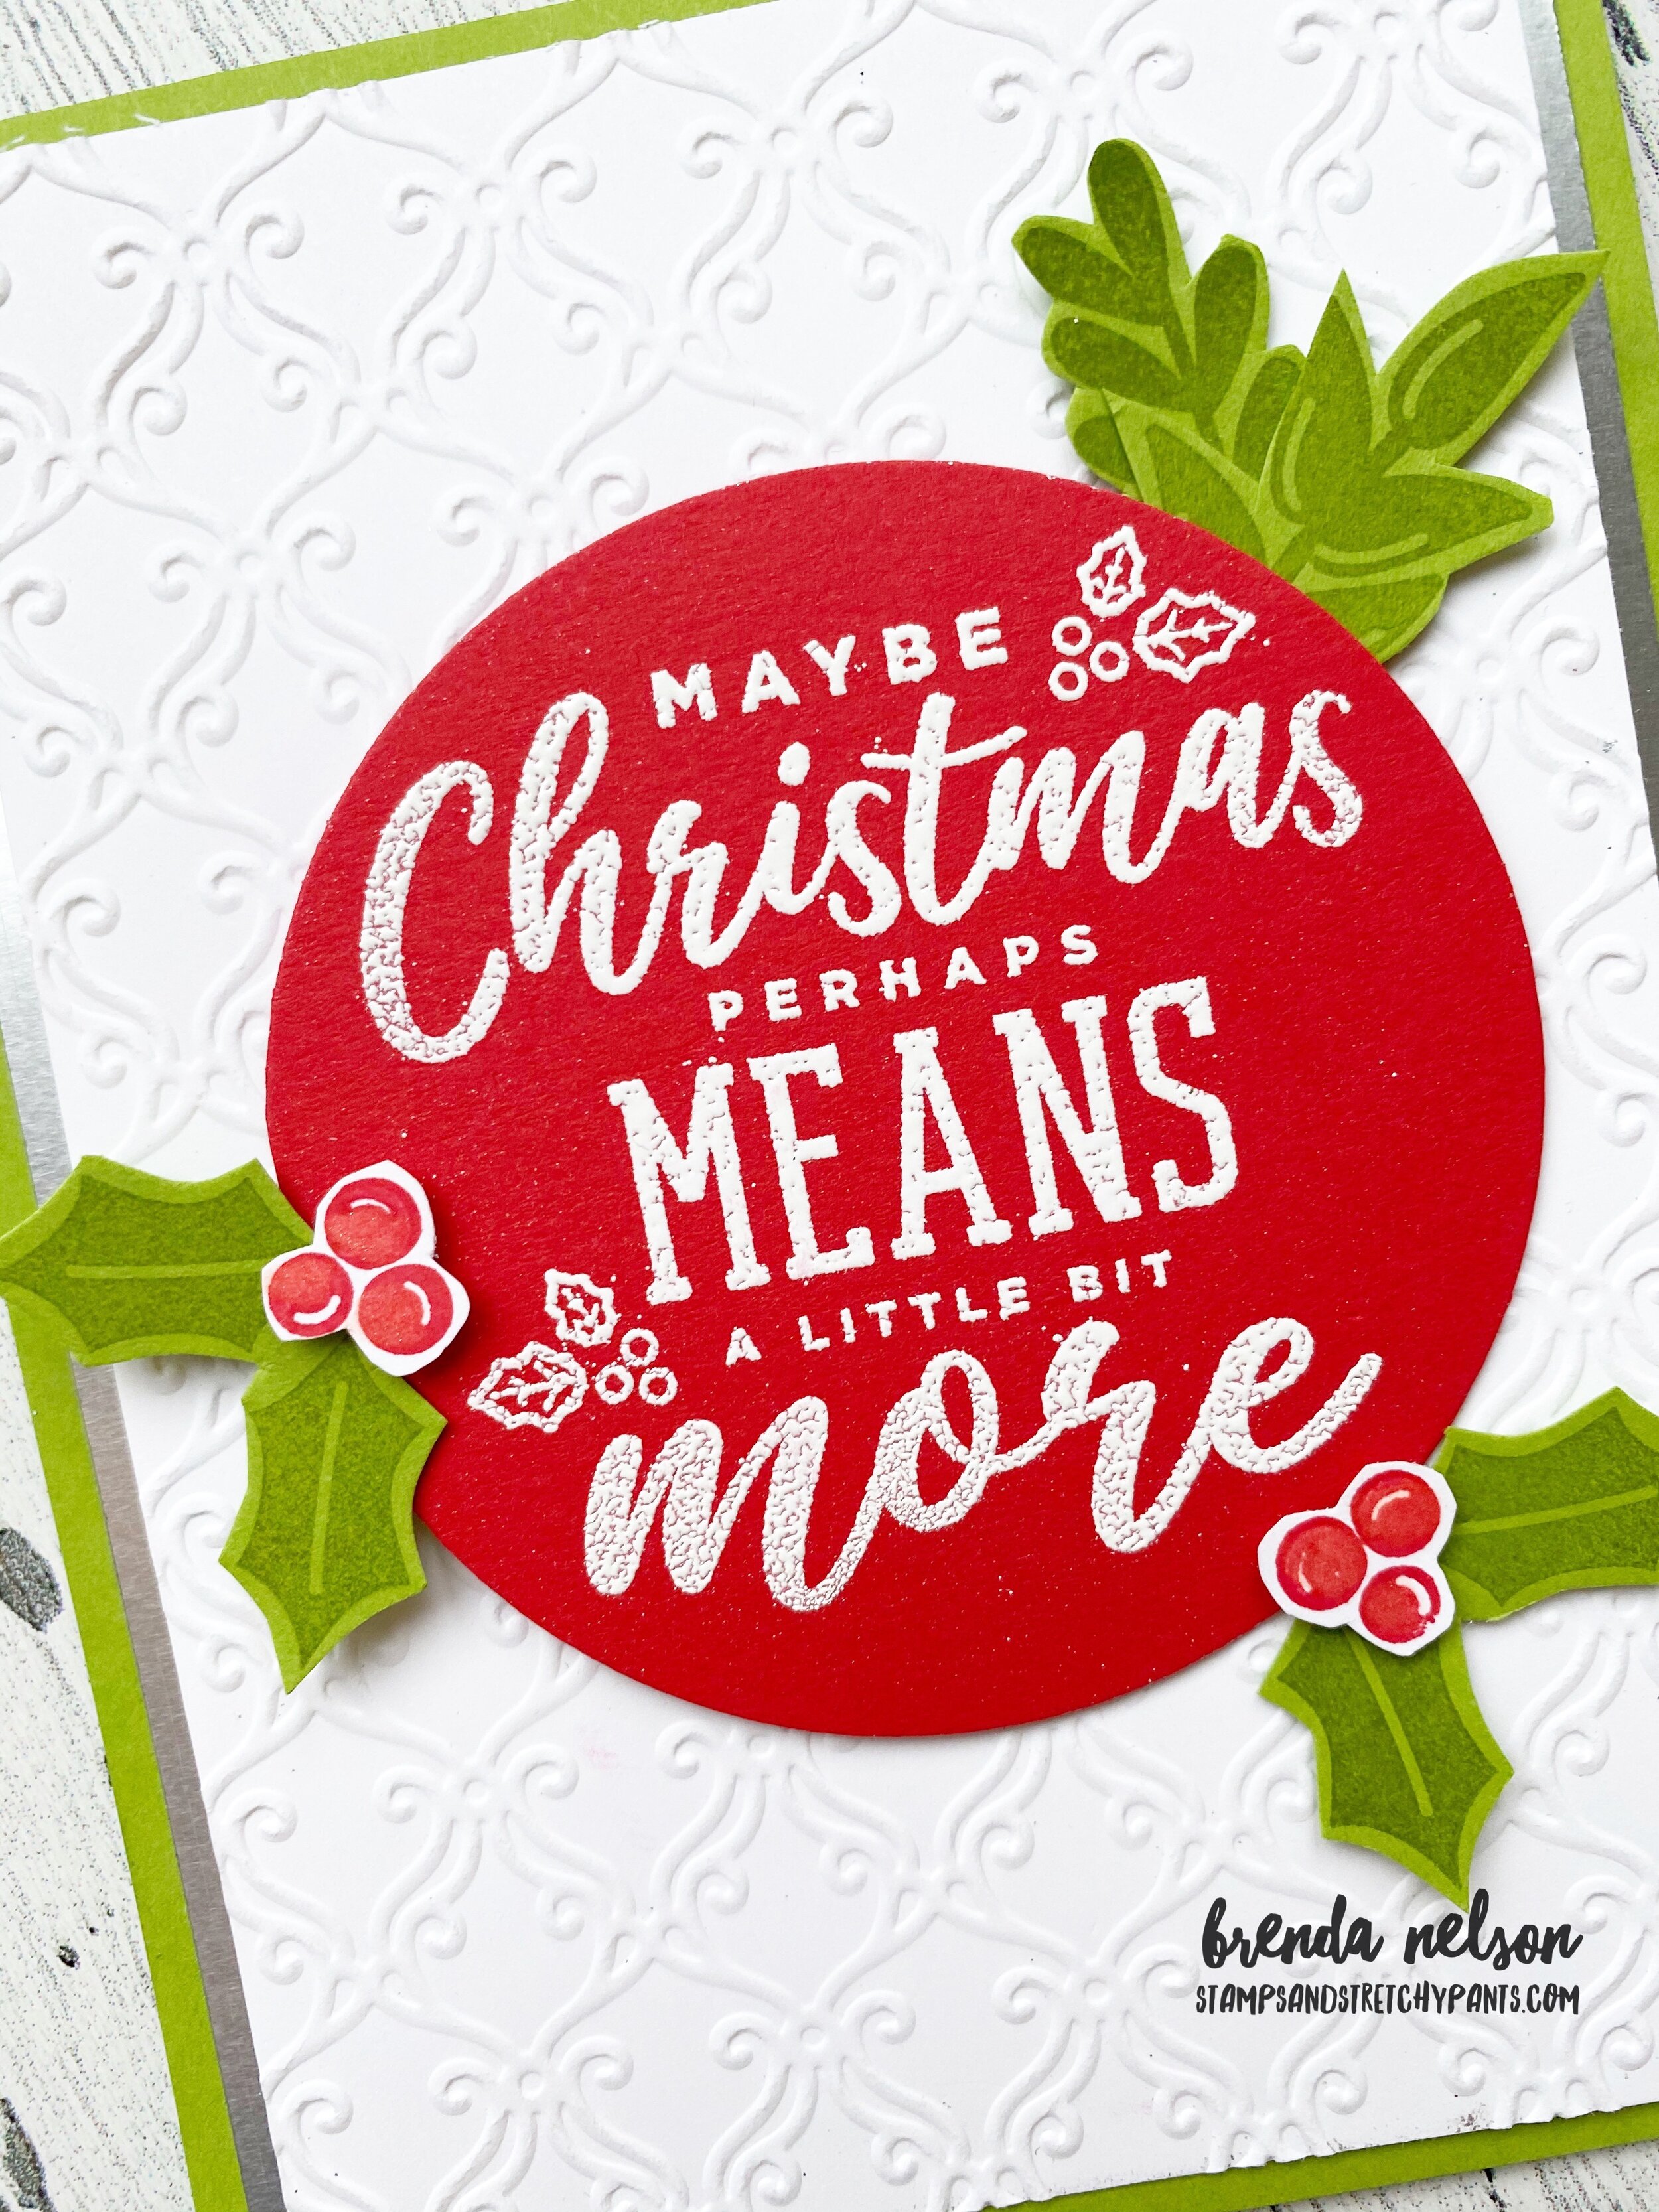
I stamped the sentiment in Whisper White craft ink and embossed it and then cut it with the largest circle die from the Layering Circles die collection. A definite craft room must have!

The greenery and berries are from the Peace & Joy stamp set and will need to be hand trimmed.


I used an embossing folder for a little bit of background interest and along the sides of this panel I added two little strips of Silver Foil paper. It just adds a little sophistication, don’t you think?

I also added a bit of Wink of Stella to the berries.

Both the sentiment and the white panel are raised with Dimensionals.

I hope you are stamping today! Thank you for following along so far this month on my A Card a Day—Holiday Style journey!

final 3.jpg

A Card a Day in December--Day #14

Thanks so much for being a part of my stampin’ journey! I love that I have this platform to share my creative ideas with you! I have enjoyed challenging myself to share A Card a Day in December—25 Christmas cards and a week of New Years cards!

This is my 14th card marking 2 weeks of crafty projects! If you have missed some of my other cards please go back through the month! Lots of inspiration!

final (11) 7.jpg

Sometimes I like to create cards with unusual color combos and I think this card reflects that. Not your traditional holiday card!

I started with a base of Mint Macaron and added a strip of Designer Series Paper from the Poinsettia Place collection. I cut a stitched rectangle in Whisper White to add another panel.

I have loved creating with the In the Pines Bundle this holiday. I stamped three trees in Mint Macaron, Rich Razzleberry and Rococo Rose. When you are adding in the filler stamp, make sure to stamp it off on your grid paper so that the ink is lighter. This makes the perfect contrast between the outside and inside.

The sentiment is from the Tag Buffet stamp set and is stamped in Rich Razzleberry ink on the coordinating card stock. It is then cut with a stitched circle.


Behind the sentiment I added two strips of plaid Rococo Rose DSP from the In Color 6x6 paper stack. A bit of Mint Macaron ribbon and some silver metallic thread finishes off this piece.

I added a little bling with some Rhinestones—a craft room must have!

Did you know you can customize the color of rhinestones with our Stampin’ Blends?

If you are in Canada please feel free to shop with you! I appreciate your business as it helps me LOVE WHAT I DO :)

final (16).jpg
shop with me