A Card a Day in December--Day #13

Hello friends! Welcome to A Card a Day in December—this is my 13th card share so far this month. In fact, today I am actually sharing two projects — a card and an awesome decorated acetate box to share your cards! I love a good coordinating gift and packaging up some cards in an acetate box is such a fun gift to give.


I wrapped a strip of Poinsettia Designer Series paper around the acetate box. Make sure it is tight enough to stay in place but lose enough that you can slide it off and on.

I stamped Merry Christmas from the Poinsettia Petals stamp set and embossed it in gold on a strip of Real Red card stock.

I added a gold piece of foil paper that I cut and embossed with the scallop die from the Peony Die set.

Its one of my favorite ways to add a little extra flair to a project.

final (4).jpg

I needed a ‘base’ to my poinsettia so I die cut a stitched Crumb Cake circle. The poinsettia is cut from Whisper White card stock and I flicked my Wink of Stella marker over top and added one of the Beaded Pearls to the center. A few stamped and die cut leaves behind and this box wrap is complete! So fancy and fun!

final (11) 6.jpg

Both of these cards were designed to coordinate with this acetate box. It makes such a beautiful gift. The white card with the Real Red poinsettia was already shared on my blog.

The Soft Suede card is full of layers and texture. I added a base layer of Soft Suede and stamped some berries in a random pattern in the background in the same ink color. I then added a piece of DSP and another layer in Whisper White.

final (9).jpg

On top of those base layers I added an Old Olive strip of DSP. I love how many options and versatility there is with the Poinsettia Place DSP.

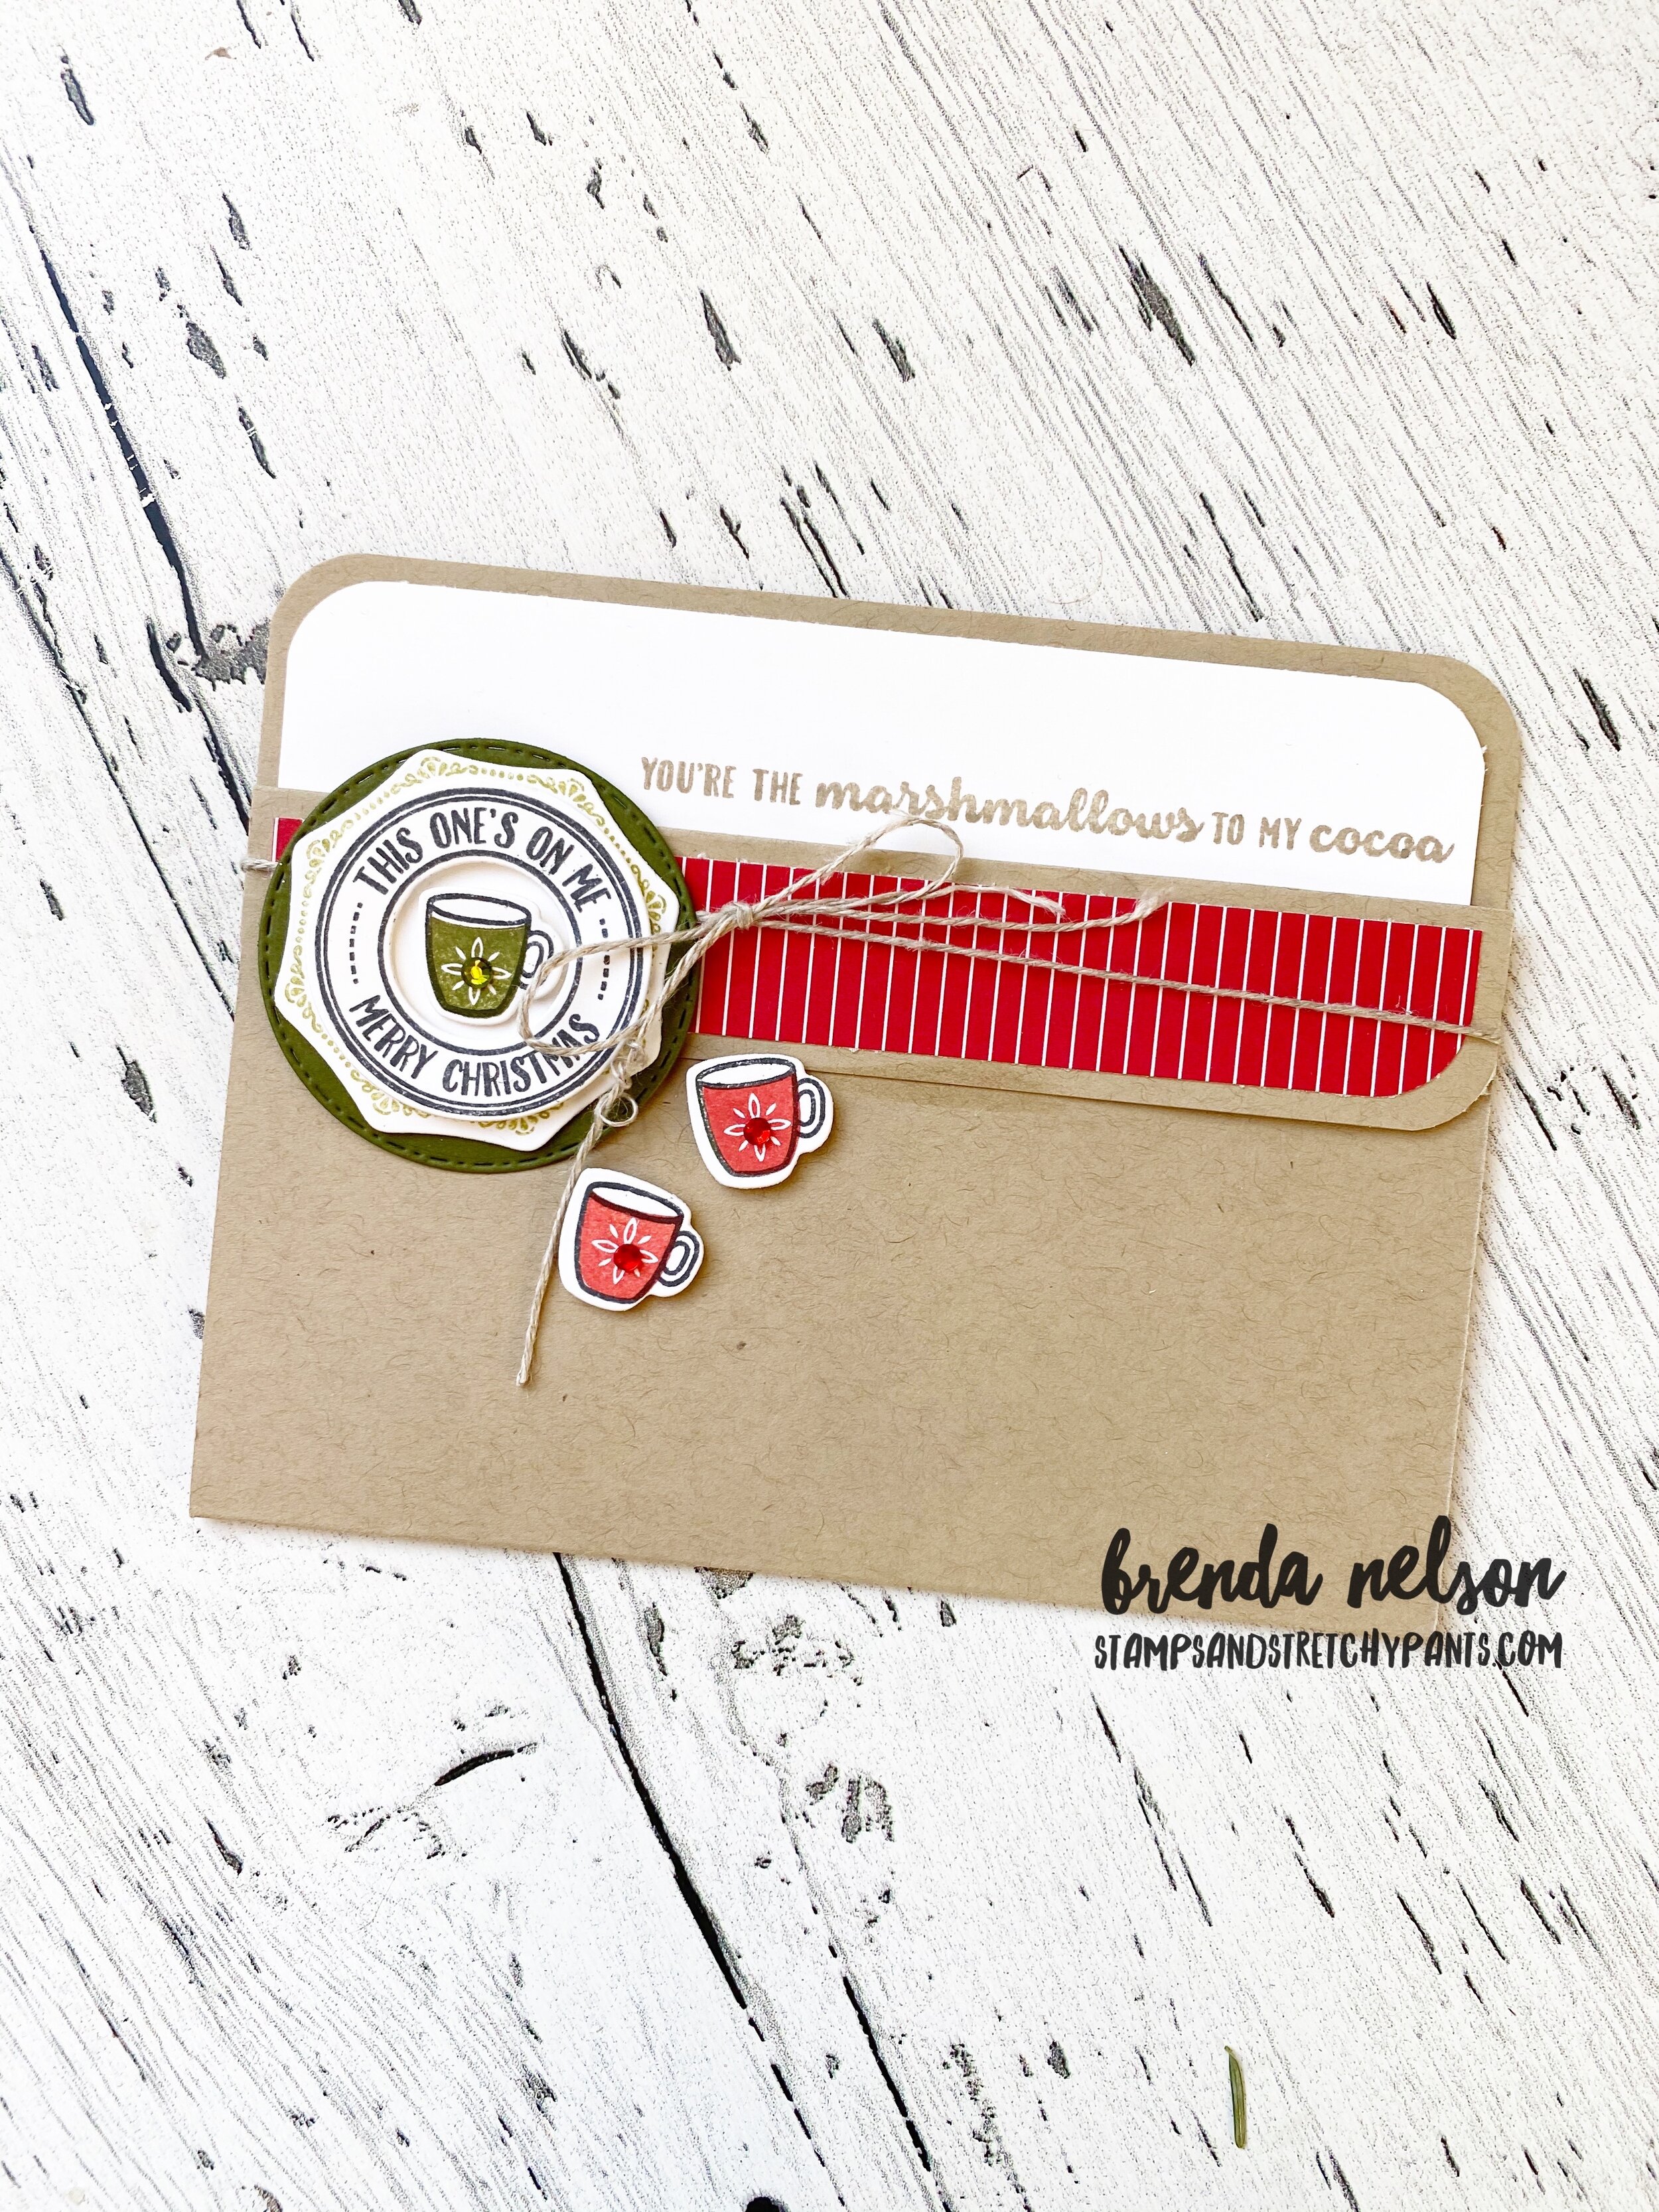
Merry Christmas is stamped on Crumb Cake paper in Soft Suede ink. The leaves are stamped in Old Olive ink on Old Olive paper. Add a little Real Red Sheer ribbon behind the sentiment, a couple teeny Real Red poinsettia’s and some Real Red Rhinestones and you are good to go!

Joy of Sets--Christmas 2020

Welcome to the last official post of the Joy of Sets Blog Hop. This was the FIRST blog hop I joined and I have learned so much since then. I need to give Angie McKenzie a special shout out for all of her behind the scenes assistance she gave me in the beginning! I look forward to sharing creativity with her in some new future projects, so stay tuned for details!

joyofsets.jpg

This month our theme is Christmas songs and it works well as I have been sharing a Card a Day in December all month long, so this will officially also make my 12th holiday card share! One of my favorite Christmas songs is from Michael Buble and his version of White Christmas. We love a good cup of hot chocolate in my home and I always give my husband a Tim Horton’s gift card during the holiday season. I love to listen to Christmas songs together with the fake fireplace on the television and drink yummy drinks together!

My project is a card and a gift card holder. I can be one or the either and is a card design that I use over and over!

You start with your typical card base. 8 1/2 x 5 1/2. Score in half at 4 1/4 and then on one side make a score line at 1 1/4. This become the panel that you will flip forward to create a pocket.

There is no adhesive keeping this pocket closed, however you need to use a ribbon or in this case, Linen Thread, to keep it closed.

I rounded all four edges with the Detailed Trio punch and added a strip of Designer Series Paper from the Heartwarming Hugs to the panel. I also rounded the edges on this.

final (22).jpg

I absolutely loved the sentiment, “You’re the Marshmallows to my Cocoa”, and I knew I needed to add it to the Whisper White card stock pull out piece. It is cut to 4 x 5 1/4. I stamped the sentiment in Crumb Cake ink.

final (23).jpg

The best thing about the Warm Hugs Bundle are the teeny tiny coffee mug, candy canes, and christmas tree that all have little dies to cut them out. I love the layering options in this bundle too and the variety of sentiments.

I added a bit of bling to the middle of the little coffee cups for some glitz! This is the perfect card or gift card holder for those warm drink loving friends or family members in your life.

Thanks for hopping along today! You can keep on going by clicking the button below and to see what Alejandra has created for us today!

Create with Connie and Mary--Christmas Favor

Hello friends! I really love the holiday season as its such a fun opportunity to share little gifts and treats with everyone. I know this season looks very different for many of us, but I was still able to make a few fun things to give away!

Design Team.png

One of my favorite things in the Handmade for You catalogue are the mini coffee cups and little carrier! I have used them for so many things. The possibilities are just endless!


I just knew I had to dress one of these carriers up using a combo of the Heartwarming Hugs Suite (one of my favorite of all time!) and the Sweetest Time Bundle. I just love a good candy cane image!

final (8).jpg

I started in covering the carrier on all four sides with a pattern from the Heartwarming Hugs Designer Series paper. I loved the stripe pattern as it allowed me to use both reds and greens in my design.

I embellished the left side with “Eat Drink and be Cozy” and layered it using the Warm Wraps Dies. I just loved all the possible combinations with this die set. I think it will be a keeper for me! The Real Red Sheer ribbon was a great addition to this layer because it is still light and airy with a wonderful texture to the ribbon.

I added in some stamped and die cut candy canes and some leaves, both stamped and some just die cut. I just love how it all came together.

final (7) 2.jpg

One of the great features of these coffee carriers is that they are sturdy enough to hold a mini bottle of champagne! Whoo Hoo! On one side of my project I have a decorated champagne bottle and on the other I have a mini coffee cup full of Baileys Irish Creme chocolate (you know, for your ‘coffee and baileys’ ).

I wrapped some of the Mossy Meadow Diagonal Stripe ribbon around the bottle neck and added “A Little Something for You” which I embossed with White Craft Ink and embossing powder on Real Red card stock. It is also cut using the Warm Wraps dies.

I wrapped some of the Mossy Meadow Diagonal Stripe ribbon around the bottle neck and added “A Little Something for You” which I embossed with White Craft Ink and embossing powder on Real Red card stock. It is also cut using the Warm Wraps dies.

final (11) 3.jpg
 

Of course I had to decorate the lid of the Coffee Cup and I made a custom coffee cozy using the Festive Felt (what a fun product offering) and the Warm Wraps dies.

On the lid I wanted to keep things traditional red and white, candy cane colors, and I added little candy cane stamps to the top. So cute!

final (11) 2.jpg

I was easily able to cut the Festive Felt with the dies and assemble everything together using a hot glue gun. I think this custom coffee cozy is the best!

I know the other gals have created some amazing projects as well! You can go BACK to see what Melissa has created or you can go NEXT to see what Connie has designed. Please feel free to leave comment! I love getting your feedback!


A Card a Day in December--Day #11

Happy Holidays! Is everyone getting into the holiday spirit? Our house is decorated and I have done a bit of baking, but I have not wrapped any gifts yet! I better make that a priority next week!

I have still been making Christmas cards! How about you? I have put around 80 in the mail this season!

final (1).jpg

I created this card using the Poinsettia Petals bundle and decided to try a softer color combo of Crumb Cake and Petal Pink. I am so happy with how it came out! It has a real soft elegant feel to it in my opinion.

The card stock base is Crumb Cake and I added a base layer of the same color. I loved the wood grain pattern in the Poinsettia Place Designer Series paper and it looked perfect as a border on this card. I stamped a few leaves to poke out on the base layer.

I cut a large circle in Petal Pink from the Stitched Shapes dies. I still remember how excited I was for these when they first came out as a special release. I hardly ever actually put them away as they are getting use so frequently.

final (2).jpg

The sentiment is actually stamped in Calypso Coral ink as i wanted to be sure that it would stand out and I love how the two colors look together.

The poinsettia is stamped and embossed with gold embossing powder and colored in using our Stampin’ Blends in Petal Pink. I added one of the gorgeous Beaded Pearls to the center and a bit of gold metallic thread to the backside. A few gold pearls and this card was complete!

I hope you have been inspired by my 11th card share this month!

shop with me


A Card a Day in December-Day #10

Have you been following along so far? If not, welcome and make sure you go back to see the Holiday card projects that have already shared! I have really been enjoying creating and curating this A Card a Day in December—Holiday Style series for you!

Today I wanted to share a card that is a spin off of one I originally shared on Monday as part of the Color Fusers Blog hop.


This fun card was created using the Warm and Toasty stamp set as I couldn’t resist making something with this adorable little reindeer! Isn’t he just the cutest?

I paired him up with Poinsettia Dies and the Beautiful Boughs Dies (which were a carryover set from last season! I have used them tons this year too).

And I created another custom background using Water Painters and three ink colors! So easy when you can’t find Designer Series Paper that matches with your vision!

final (3).jpg
final (5).jpg

To create this background you need to work on Shimmery White or Water Color paper as they are thick enough to absorb the water from the Water Painter. You are going to use your largest Water Painter and Seaside Spray, Misty Moonlight and Pacific Point ink. Visit my post from Monday to get the technique details.

I colored my reindeer with Stampin’ Blends and hand cut him. The sentiment is stamped on Seaside Spray card stock in Misty Moonlight Ink. These two blues look extraordinary together! The sentiment is cut using the Beautiful Boughs dies.

Lastly I added in the poinsettia in Whisper White, some Metallic Seaside Spray Ribbon and some Frosted & Clear Epoxy Droplets (another great carry over product from last holiday season!).

Please shop for any of these products from my online store!

Shop with me