A Card a Day in December--Day #9
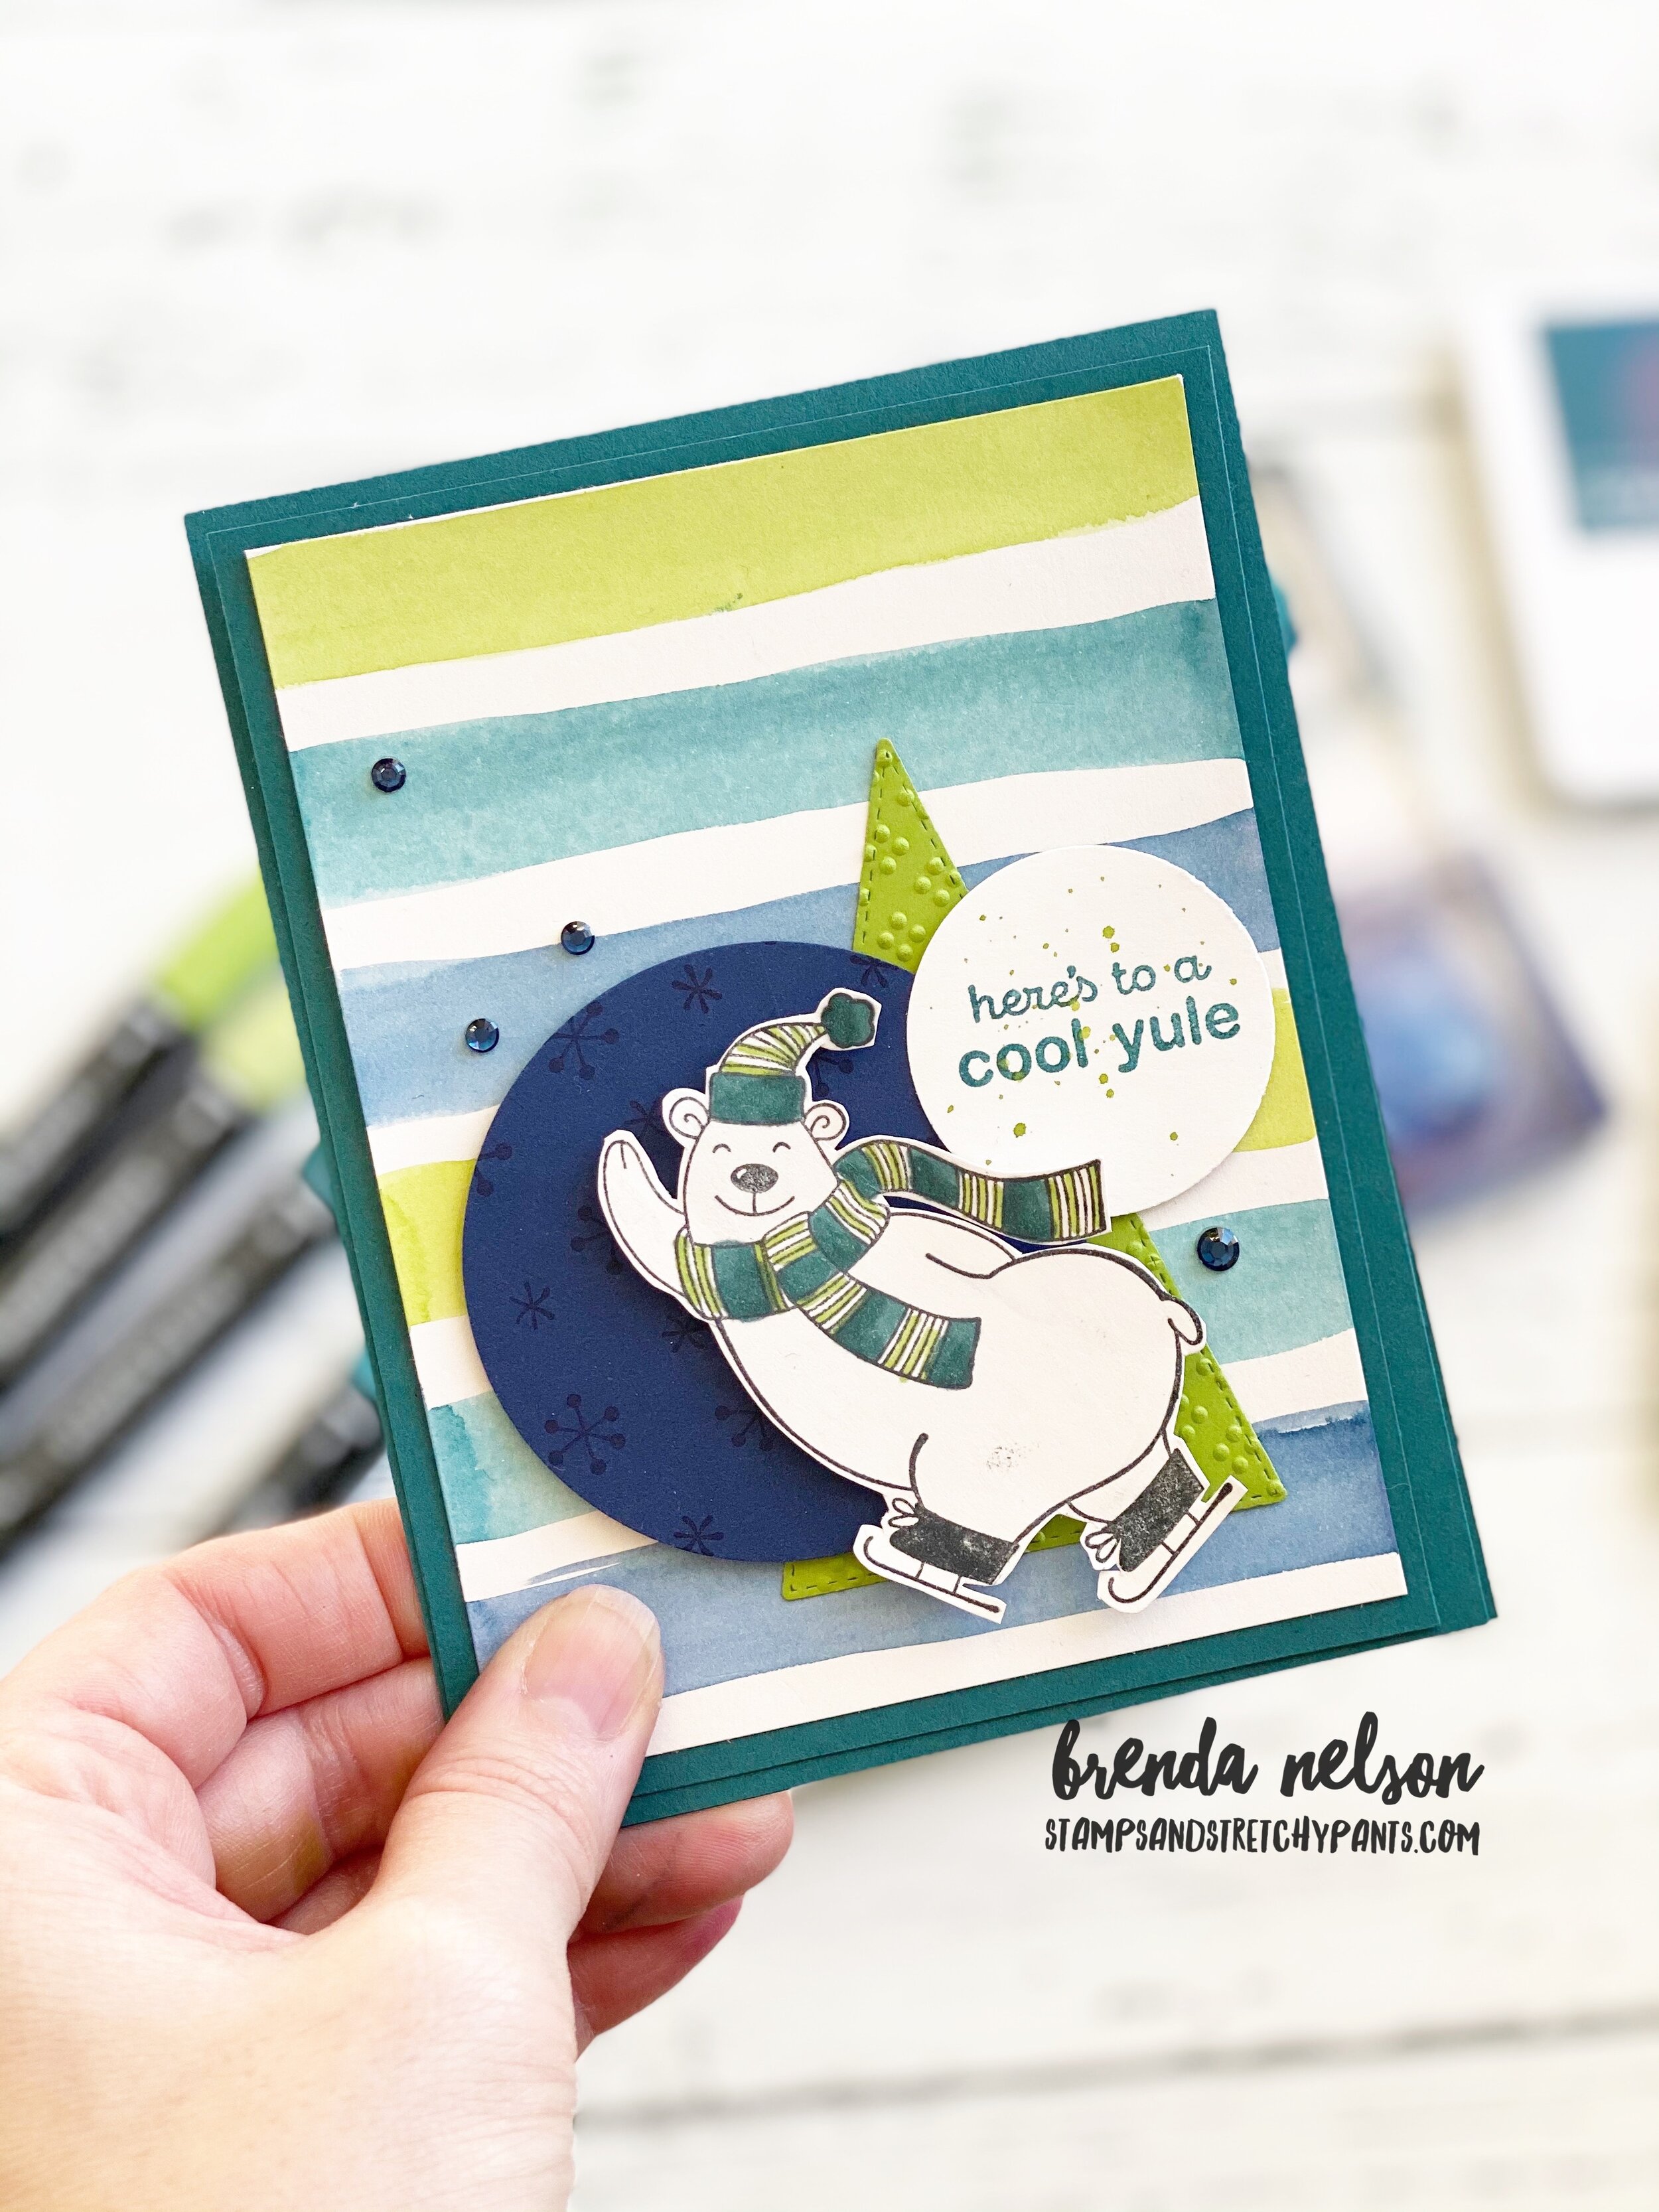
Hello friends! Here is another fun gift card holder idea. It is actually known as a ‘barn door’ gift card holder and I thought it would be a fun project to share as my 9th Holiday card! If you have been following along then you know I do 12 days of Gift Cards for my husband. I actually had him in mind when I created these as they do have more of a masculine feel to them with all of the blue tones.

120087652_3950988378251823_7393277335415621232_o.jpg

What makes this gift card holder unique is it starts with a typical card base size— 5 1/2 x 4 1/4 so you can get 4 bases from one sheet of card stock. Love that!

I wanted to use the Snowflake Splendor Designer Series Paper as the color palette has so many options that you can choose from for card bases! This particular one features Pacific Point.

The Gift Wrapped Bundle was an easy choice to use to create this gift card holder!


To create the ‘barn door’ or flip up section you will cut a piece of card stock to 4 1/4 x 2 1/4 and attach it to the left side of the base. The base designer series is cut so that it covers this ‘seem’ and then beside I added a panel of Whisper White where I did a little stamping and you have a place to write a special message.

I used the Classic Label punch to make a slit on the top flap that your gift card tucks into.

It is then hidden by a front panel that doubles as the card front.

I found this DSP so easy to work with to mix and match the patterns to create a few different gift card variations.

122219011_4031555820195078_4810462249955125759_o.jpg
120135078_3950988631585131_2305485365263012929_o.jpg

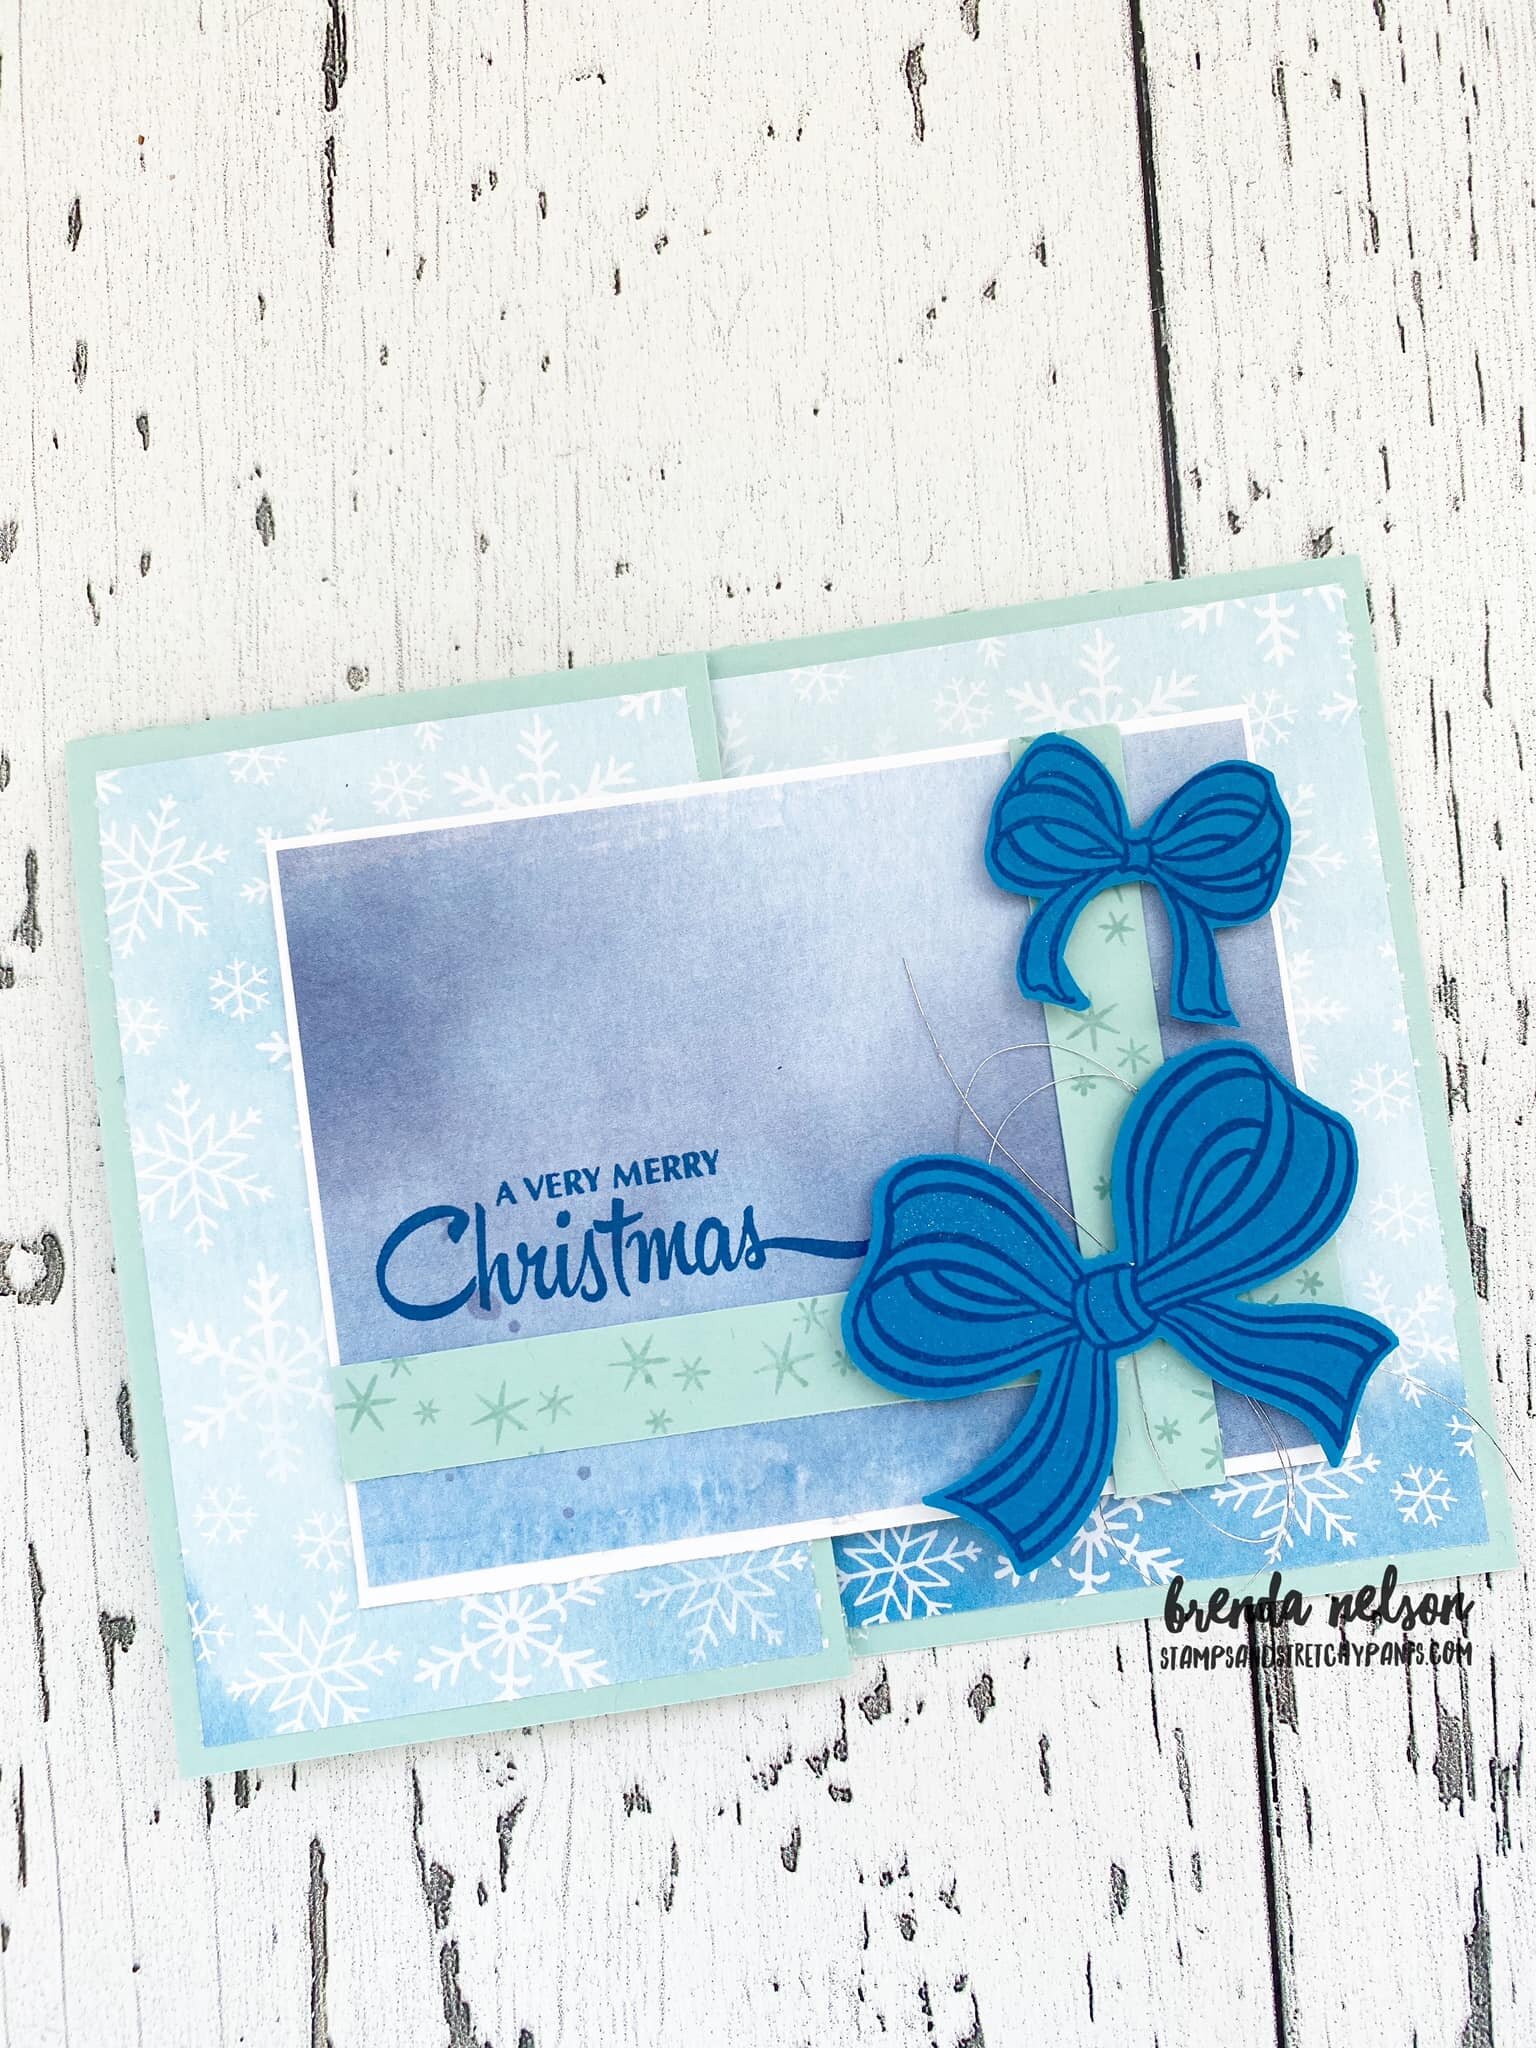
This one is on a Pool Party base. I wanted the front of the gift cards to look like wrapped presents and it was pretty easy with the Gift Wrapped stamp set. There are 5 different bow designs in this set and the font as a nostalgic feel to it.


I hope you have been enjoying all of my projects so far!

IMG_0080.png
shop with me
120164497_3950988304918497_202985258323315200_o.jpg

Around the World On Wednesday--Something Old and Something New

This month’s theme is something old and something new…so I combined some brand new upcoming products with a bundle that is soon to be retired and my favourite item of all time—retired Gold Metallic Thread!

91442295_10216484369808661_2887014979863576576_n.jpg

I was also in the mood to make a scrapbook page as I have been really focused on cards lately so this felt good! Sometimes, if my creativity feels hindered I really just let myself create what it wants, without worrying about the outcome.


I wanted to make a page that felt really clean, crisp and fresh. I started with a 12x12 Whisper White base and I resisted the urge to stamp on the background.

I knew I wanted to use a series of photos I snapped on my daughter’s recent 12th birthday (the last one on the left is my personal favourite!).

And because this was a birthday page, i knew the Gift Wrapped Bundle would be perfect. I love how this stamp set has 5 different bows in it! So much versatility!

final (11).jpg

Have you noticed what is new? The florals, stem, and ‘You are Lovely’ are all from a new upcoming stamp set called Art Gallery. I has coordinating dies called the Floral Gallery Dies. The color palette I chose for this page speaks straight to the colors featured in the Fine Art Floral Designer Series paper. During On Stage it was shared that these images were painted on giant canvases they used to create the DSP! love fun facts like this about our products.


final (10).jpg

I stamped the flowers, which are the two-step stamp design in the following color combos—Bumbleebee and Mango Melody, Flirty Flamingo with Poppy Parade, and Coastal Cabana with Pretty Peacock. I did add a bit of Wink of Stella on top to add a bit of glitz and gold sparkle.

The large bows are stamped on Flirty Flamingo card stock in Poppy Parade ink and then punched out with the Gift Bow Builder Punch. So easy and fun!

I cut Summer’s name from Gold Foil paper and the Foam adhesive sheets. I continued the gold theme by adding in the Gold Glitter Enamel Dots and the Gold Metallic Thread.

final (13).jpg

The sentiment on the left side of the page is from the Gift Wrapped stamp set and is cut with a stitched circle. The mini bow is stamped on Flirty Flamingo card stock with Poppy Parade ink. I did have to hand cut this little bow out.

Behind the sentiment I layered a flower, this time stamped in Bermuda Bay and Pretty Peacock. I also added a circle punched from the Fine Art Floral DSP. A bit of metallic thread and Gold Glitter Enamel Dots finished off this little montage just perfectly.


I hope you enjoy hopping all around the globe with everyone this month! We have 21 people participating in the hop which is so fantastic!

Make sure to leave a comment, I love to read them!

Next up is Tricia Butts from the United States.

A Card a Day in December--Day #8


Hello friends! I can’t believe it has been a whole week already of my A Card a Day in December—Holiday Style program!
I am really loving todays card as it features a bundle I have used a ton this holiday season, the Poinsettia Place bundle.

This bundle just has an infinite amount of possibilities and this card might be one of my favorite creations with it so far!

final 2 2.jpg

I wanted this traditional colored poinsettia to really shine so I paired it against three strips of Whisper White card stock that I ran through two different embossing folders—the Winter Snow folder and the Wrapped in Texture embossing folder.

final 5.jpg

The poinsettia’s leaves are stamped in Mossy Meadow on the coordinating card stock. This was a great chance to add in some of the Mossy Meadow Diagonal Stripe ribbon too.

I decided to stamp Merry Christmas in gold and emboss it. It gives this card a really classy look with the gold metallic pearls and a bit of retired gold thread.

I LOVE this card design as its such a great way to showcase off embossing folders.

SHOP with me


Color Fusers-December 2020


Hello everyone! I am SO EXCITED and honoured to be a new participant in the Color Fusers Blog Hop. The talent line up in this Hop is truly like no other so when they reached out to ask me to join, I had to pinch myself!

colorfusers.jpg

If you haven’t followed along before, welcome! Each month we create projects that feature a trio of colors. There are so many fantastic colors offered by Stampin’ Up! and this is a great way to showcase them and get you stamping with different color combos!

For December we are playing with Night of Navy, Pretty Peacock and Granny Apple Green (my favorite of all our greens!).

IMG_8865.jpg
final 3 4.jpg
 

Because it December I wanted to create a fun holiday card using these colors and the cute polar bear from Warm & Toasty. He is just too much fun!

I started with Pretty Peacock as my card base and first layer. I then took a piece of Shimmery White, its a little thicker and can hold water a bit better, and using the widest brush tip from the Water Painters I made some stripes in the three colors.

Granny Apple Green, Pretty Peacock and finally Night of Navy.

final 3 3.jpg

Its actually quite easy to create custom stripes on your projects. If you don’t have the Water Painters, you can even use your Stampin’ Blends.

However in this instance I used the large Water Painter brush and added the three colors onto our acrylic blocks. I just smash the ink pad a couple of times onto the block to leave some ink behind. You then squeeze a bit of water onto the ink on the block and start creating!

final 3 4.jpg

Once my background was done I colored my polar bear’s scarf and toque with my Stampin’ Blends, which are offered in all three of these colors! You will need to hand cut this little guy as this stamp set does not have coordinating dies.

The tree is cut from Granny Apple Green cards stock with the Stitched Triangle Dies and ran through an embossing folder from the Wrapped in Texture duo.

The circle is the largest offering in the Circle Dies and I stamped little bitty snowflakes in the background with Night of Navy Ink.

The sentiment is stamped in Pretty Peacock and I flicked my Water Paper across it for a splash of green. A few of the Holiday Rhinestones were the perfect touch.

I am really happy with how this card turned out and I have already made a different one with a different color combo that I will be sharing later this month! Thank you for hoping along!


You can head backwards if you are just going in to see what Nicole has created or you can go Next to see what awesome project Melanie has designed! Please feel free to leave a comment!

final 14.jpg


A Card a Day in December--So Many Snowflakes! Day #6

I hope you have been enjoying following along my A Card a Day in December series so far! Yesterday’s project was a gift card holder as part of the Create with Connie and Mary Blog Hop so I hope you didn’t miss it! If you did, make sure you go back and check it out!

I love this card so much as it truly highlights all the amazing features of the Snowflake Splendor suite.

final 4.jpg

I started with a base of Pacific Point. I am so happy for this color to be getting some attention! I added a base layer in Pacific Point that I stamped with snowflakes in the coordinating ink. I LOVE how many different snowflake images there are to choose from in the Snowflake Wishes stamp set. I used the little cluster of snowflakes on my card.

I cut a piece of the Snowflake Splendor Designer Series Paper to 3 1/4 x 4 1/2 and off set it. I also wanted to showcase the Winter Snow Embossing folder so I ran a piece of Whisper White card stock though it. It is cut to 2 3/4 x 4 and is then flicked with my Wink of Stella marker for a little bit of glitz.


As you can see, this card is all about the LAYERS!

I added a strip of the mini snowflakes pattern from the DSP and a solid strip of Pacific Point card stock where I stamped my sentiment.

Behind my sentiment I added a bit of the Coastal Cabana ribbon from the Playing With Patterns Ribbon combo pack.

final 12.jpg

I wanted a mix of stamped and die cut snowflakes on my card and I created those with three different tones, Purple Posy, Highland Heather and Pool Party.

And every card needs some bling and I absolutely love the Blue Adhesive Backed Gems. They work perfectly on this project as it has so many different tones of blue to it!

Shop with me