Create with Connie and Mary--Christmas Favor

Hello friends! I really love the holiday season as its such a fun opportunity to share little gifts and treats with everyone. I know this season looks very different for many of us, but I was still able to make a few fun things to give away!

Design Team.png

One of my favorite things in the Handmade for You catalogue are the mini coffee cups and little carrier! I have used them for so many things. The possibilities are just endless!


I just knew I had to dress one of these carriers up using a combo of the Heartwarming Hugs Suite (one of my favorite of all time!) and the Sweetest Time Bundle. I just love a good candy cane image!

final (8).jpg

I started in covering the carrier on all four sides with a pattern from the Heartwarming Hugs Designer Series paper. I loved the stripe pattern as it allowed me to use both reds and greens in my design.

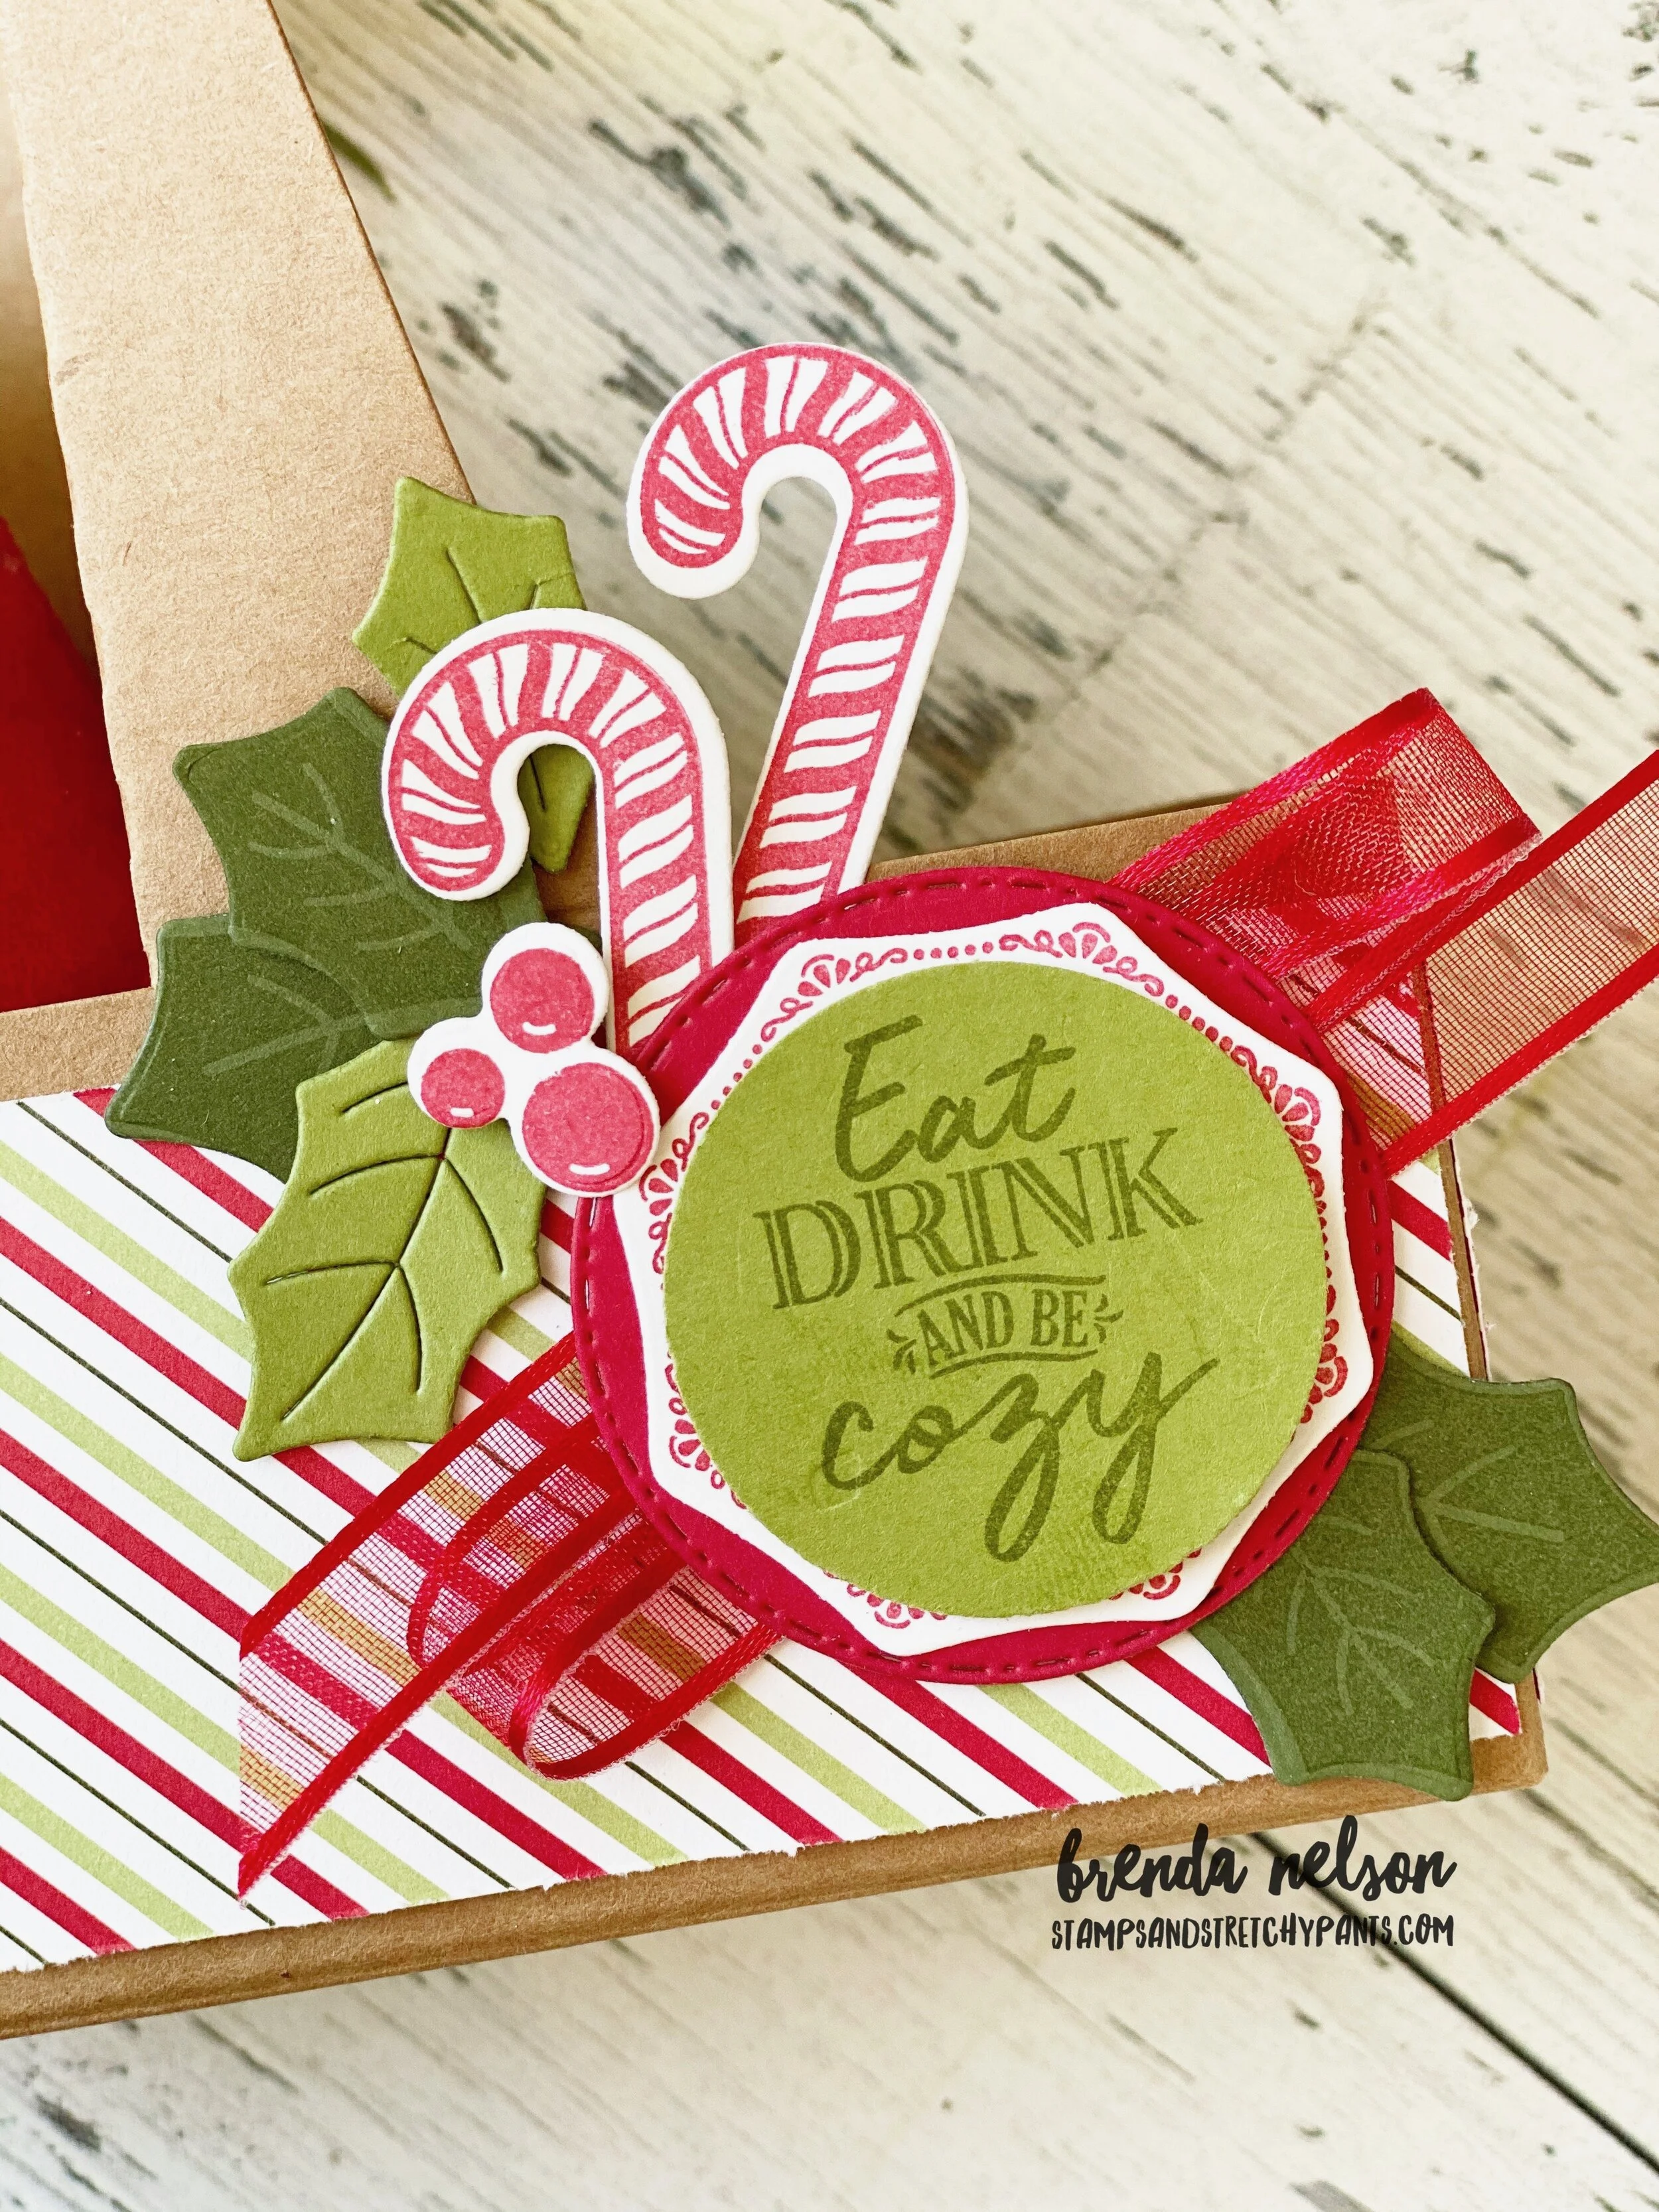
I embellished the left side with “Eat Drink and be Cozy” and layered it using the Warm Wraps Dies. I just loved all the possible combinations with this die set. I think it will be a keeper for me! The Real Red Sheer ribbon was a great addition to this layer because it is still light and airy with a wonderful texture to the ribbon.

I added in some stamped and die cut candy canes and some leaves, both stamped and some just die cut. I just love how it all came together.

final (7) 2.jpg

One of the great features of these coffee carriers is that they are sturdy enough to hold a mini bottle of champagne! Whoo Hoo! On one side of my project I have a decorated champagne bottle and on the other I have a mini coffee cup full of Baileys Irish Creme chocolate (you know, for your ‘coffee and baileys’ ).

I wrapped some of the Mossy Meadow Diagonal Stripe ribbon around the bottle neck and added “A Little Something for You” which I embossed with White Craft Ink and embossing powder on Real Red card stock. It is also cut using the Warm Wraps dies.

I wrapped some of the Mossy Meadow Diagonal Stripe ribbon around the bottle neck and added “A Little Something for You” which I embossed with White Craft Ink and embossing powder on Real Red card stock. It is also cut using the Warm Wraps dies.

final (11) 3.jpg
 

Of course I had to decorate the lid of the Coffee Cup and I made a custom coffee cozy using the Festive Felt (what a fun product offering) and the Warm Wraps dies.

On the lid I wanted to keep things traditional red and white, candy cane colors, and I added little candy cane stamps to the top. So cute!

final (11) 2.jpg

I was easily able to cut the Festive Felt with the dies and assemble everything together using a hot glue gun. I think this custom coffee cozy is the best!

I know the other gals have created some amazing projects as well! You can go BACK to see what Melissa has created or you can go NEXT to see what Connie has designed. Please feel free to leave comment! I love getting your feedback!


A Card a Day in December--Day #11

Happy Holidays! Is everyone getting into the holiday spirit? Our house is decorated and I have done a bit of baking, but I have not wrapped any gifts yet! I better make that a priority next week!

I have still been making Christmas cards! How about you? I have put around 80 in the mail this season!

final (1).jpg

I created this card using the Poinsettia Petals bundle and decided to try a softer color combo of Crumb Cake and Petal Pink. I am so happy with how it came out! It has a real soft elegant feel to it in my opinion.

The card stock base is Crumb Cake and I added a base layer of the same color. I loved the wood grain pattern in the Poinsettia Place Designer Series paper and it looked perfect as a border on this card. I stamped a few leaves to poke out on the base layer.

I cut a large circle in Petal Pink from the Stitched Shapes dies. I still remember how excited I was for these when they first came out as a special release. I hardly ever actually put them away as they are getting use so frequently.

final (2).jpg

The sentiment is actually stamped in Calypso Coral ink as i wanted to be sure that it would stand out and I love how the two colors look together.

The poinsettia is stamped and embossed with gold embossing powder and colored in using our Stampin’ Blends in Petal Pink. I added one of the gorgeous Beaded Pearls to the center and a bit of gold metallic thread to the backside. A few gold pearls and this card was complete!

I hope you have been inspired by my 11th card share this month!

shop with me


A Card a Day in December-Day #10

Have you been following along so far? If not, welcome and make sure you go back to see the Holiday card projects that have already shared! I have really been enjoying creating and curating this A Card a Day in December—Holiday Style series for you!

Today I wanted to share a card that is a spin off of one I originally shared on Monday as part of the Color Fusers Blog hop.


This fun card was created using the Warm and Toasty stamp set as I couldn’t resist making something with this adorable little reindeer! Isn’t he just the cutest?

I paired him up with Poinsettia Dies and the Beautiful Boughs Dies (which were a carryover set from last season! I have used them tons this year too).

And I created another custom background using Water Painters and three ink colors! So easy when you can’t find Designer Series Paper that matches with your vision!

final (3).jpg
final (5).jpg

To create this background you need to work on Shimmery White or Water Color paper as they are thick enough to absorb the water from the Water Painter. You are going to use your largest Water Painter and Seaside Spray, Misty Moonlight and Pacific Point ink. Visit my post from Monday to get the technique details.

I colored my reindeer with Stampin’ Blends and hand cut him. The sentiment is stamped on Seaside Spray card stock in Misty Moonlight Ink. These two blues look extraordinary together! The sentiment is cut using the Beautiful Boughs dies.

Lastly I added in the poinsettia in Whisper White, some Metallic Seaside Spray Ribbon and some Frosted & Clear Epoxy Droplets (another great carry over product from last holiday season!).

Please shop for any of these products from my online store!

Shop with me

A Card a Day in December--Day #9

Hello friends! Here is another fun gift card holder idea. It is actually known as a ‘barn door’ gift card holder and I thought it would be a fun project to share as my 9th Holiday card! If you have been following along then you know I do 12 days of Gift Cards for my husband. I actually had him in mind when I created these as they do have more of a masculine feel to them with all of the blue tones.

120087652_3950988378251823_7393277335415621232_o.jpg

What makes this gift card holder unique is it starts with a typical card base size— 5 1/2 x 4 1/4 so you can get 4 bases from one sheet of card stock. Love that!

I wanted to use the Snowflake Splendor Designer Series Paper as the color palette has so many options that you can choose from for card bases! This particular one features Pacific Point.

The Gift Wrapped Bundle was an easy choice to use to create this gift card holder!


To create the ‘barn door’ or flip up section you will cut a piece of card stock to 4 1/4 x 2 1/4 and attach it to the left side of the base. The base designer series is cut so that it covers this ‘seem’ and then beside I added a panel of Whisper White where I did a little stamping and you have a place to write a special message.

I used the Classic Label punch to make a slit on the top flap that your gift card tucks into.

It is then hidden by a front panel that doubles as the card front.

I found this DSP so easy to work with to mix and match the patterns to create a few different gift card variations.

122219011_4031555820195078_4810462249955125759_o.jpg
120135078_3950988631585131_2305485365263012929_o.jpg

This one is on a Pool Party base. I wanted the front of the gift cards to look like wrapped presents and it was pretty easy with the Gift Wrapped stamp set. There are 5 different bow designs in this set and the font as a nostalgic feel to it.


I hope you have been enjoying all of my projects so far!

IMG_0080.png
shop with me
120164497_3950988304918497_202985258323315200_o.jpg

Around the World On Wednesday--Something Old and Something New

This month’s theme is something old and something new…so I combined some brand new upcoming products with a bundle that is soon to be retired and my favourite item of all time—retired Gold Metallic Thread!

91442295_10216484369808661_2887014979863576576_n.jpg

I was also in the mood to make a scrapbook page as I have been really focused on cards lately so this felt good! Sometimes, if my creativity feels hindered I really just let myself create what it wants, without worrying about the outcome.


I wanted to make a page that felt really clean, crisp and fresh. I started with a 12x12 Whisper White base and I resisted the urge to stamp on the background.

I knew I wanted to use a series of photos I snapped on my daughter’s recent 12th birthday (the last one on the left is my personal favourite!).

And because this was a birthday page, i knew the Gift Wrapped Bundle would be perfect. I love how this stamp set has 5 different bows in it! So much versatility!

final (11).jpg

Have you noticed what is new? The florals, stem, and ‘You are Lovely’ are all from a new upcoming stamp set called Art Gallery. I has coordinating dies called the Floral Gallery Dies. The color palette I chose for this page speaks straight to the colors featured in the Fine Art Floral Designer Series paper. During On Stage it was shared that these images were painted on giant canvases they used to create the DSP! love fun facts like this about our products.


final (10).jpg

I stamped the flowers, which are the two-step stamp design in the following color combos—Bumbleebee and Mango Melody, Flirty Flamingo with Poppy Parade, and Coastal Cabana with Pretty Peacock. I did add a bit of Wink of Stella on top to add a bit of glitz and gold sparkle.

The large bows are stamped on Flirty Flamingo card stock in Poppy Parade ink and then punched out with the Gift Bow Builder Punch. So easy and fun!

I cut Summer’s name from Gold Foil paper and the Foam adhesive sheets. I continued the gold theme by adding in the Gold Glitter Enamel Dots and the Gold Metallic Thread.

final (13).jpg

The sentiment on the left side of the page is from the Gift Wrapped stamp set and is cut with a stitched circle. The mini bow is stamped on Flirty Flamingo card stock with Poppy Parade ink. I did have to hand cut this little bow out.

Behind the sentiment I layered a flower, this time stamped in Bermuda Bay and Pretty Peacock. I also added a circle punched from the Fine Art Floral DSP. A bit of metallic thread and Gold Glitter Enamel Dots finished off this little montage just perfectly.


I hope you enjoy hopping all around the globe with everyone this month! We have 21 people participating in the hop which is so fantastic!

Make sure to leave a comment, I love to read them!

Next up is Tricia Butts from the United States.