Create with Connie and Mary--Thinking of Christmas!

I will admit it, I have been thinking of Christmas! It is actually not that far away and I find this is the busiest time of year with other holidays along the way and one of my kids celebrating a birthday. Plus we have On Stage to look forward to as well.

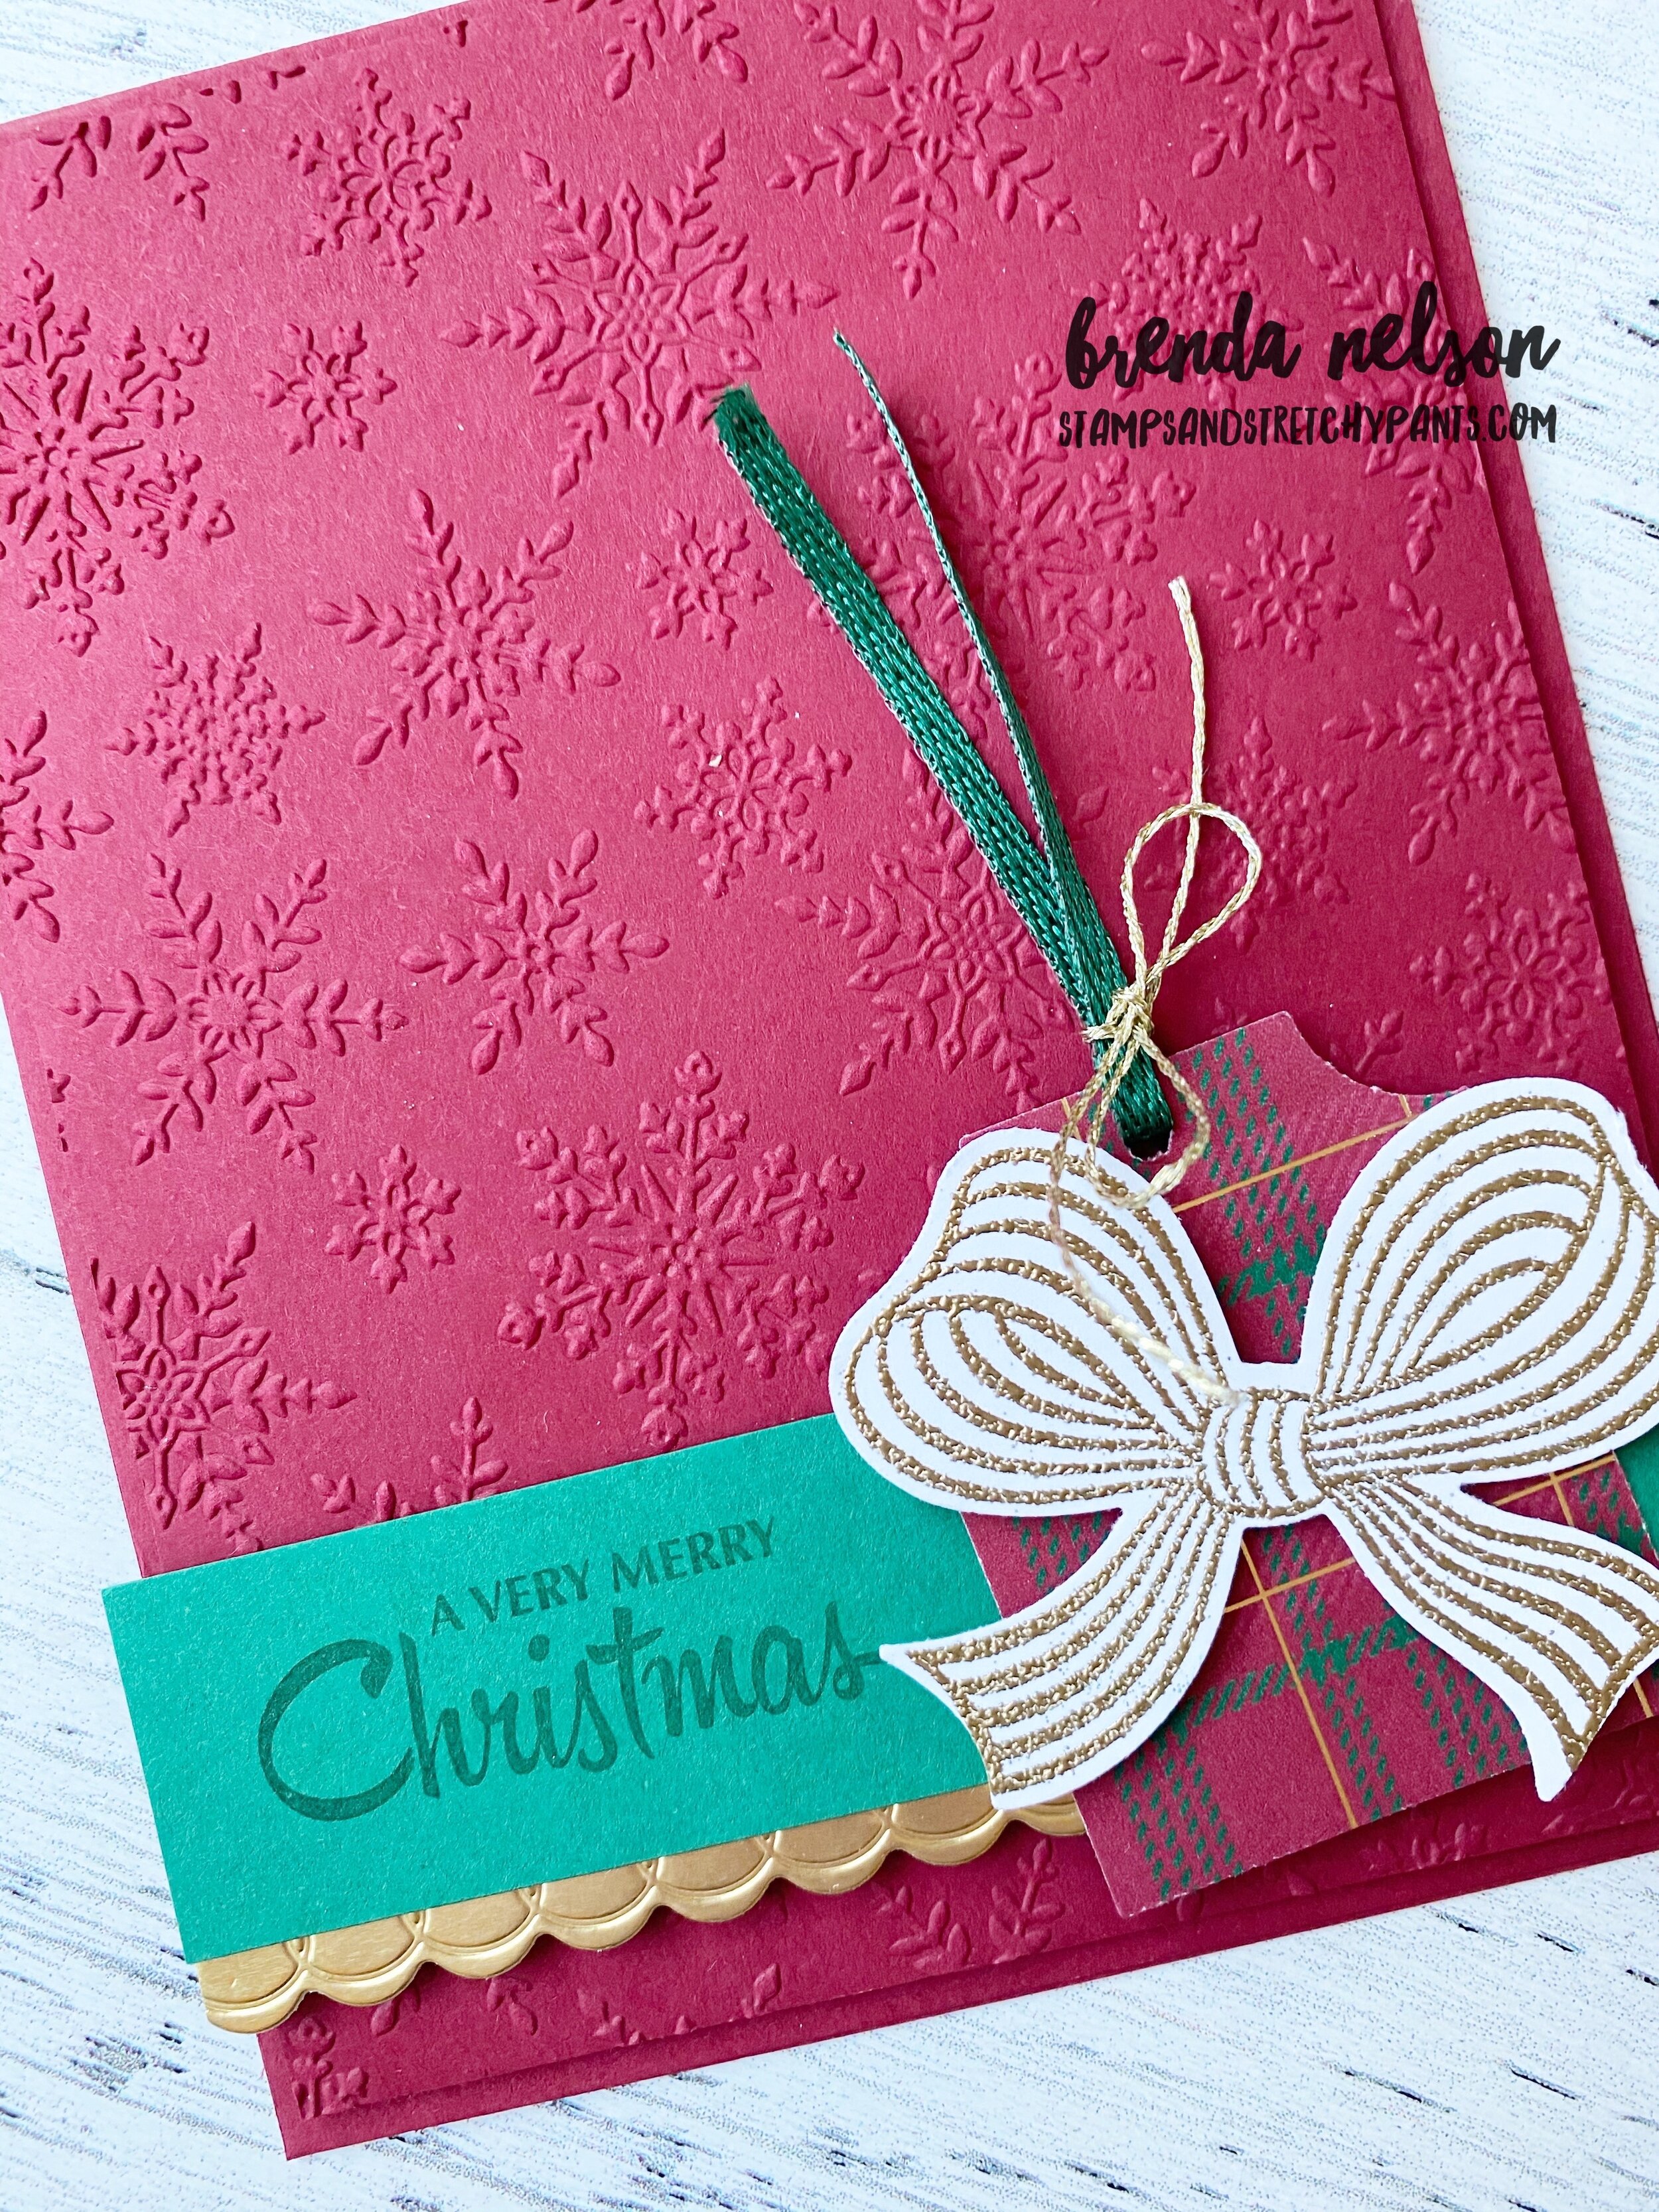
The theme this week is “Thinking of Christmas” and I created this pretty traditional card to reflect the holiday.

 
final.jpg
Saturday Blog Hop.png

I really love mixing and matching products as shown in this card here. I featured the Gift Wrapped Bundle with accents from the Snowflake Splendor Suite and the Everything Essential Bundle.

final.jpg

I started with a base of Cherry Cobbler and ran a layered piece of card stock through the Winter Snow Embossing Folder for a subtle winter feel. I used the Essential Tag punch with some retired DSP (there I said, it, I have it and I still use it when it works) to create a base for the gift bow. I stamped the bow and embossed it with gold embossing powder. I love Gift Bow Builder punch! I added in bit of Shaded Spruce Ribbon (also retired) with some of the gold thread included in the Tag Buffet kit (waste not, want not!).

A Very Merry Christmas is stamped in Shaded Spruce card stock in the same ink. I added in another gold detail by cutting some of our Gold Foil paper with the scallop die from the Peony Dies.


This card design has such great potential. I will definitely be using it again and will just mix up some of the elements.

Can’t wait to see what the other girls have created! You can go BACK to see what Melissa designed or NEXT to see what Connie has made this week.

final.jpg


Merry Christmas Wreath

Okay, so I will admit that I am late to the game here with the Arrange a Wreath Bundle…and I LOVE it! I recently took advantage of a 50% off item to get this bundle and its so fabulous! I decided to pair up the wreath with the In Good Taste Designer Series Paper to mimic a rustic front door.

final.jpg

I loved this card so much I decided to make a bunch for a card swap I have on the horizon. I started by choosing Just Jade and Shaded Spruce to be my wreath colors and added in some Very Vanilla poinsettia’s , both cut from the Wreath Builder dies.

Merry Christmas is stamped in Just Jade ink with a bit of ink flicking done in the same color. I added some Blue Adhesive Backed Gems to the wreath as well. Don’t let the description fool you, these gems have a magical quality of reflecting the surface they are on, so you can see on the wreath how they pick up the green tones! Sometimes, the only way to figure these things out is by playing around.

final.jpg

You may notice I added another little strip of DSP to the side of the woodgrain DSP. It from the Tis’ the Season 6x6 stack and it combines Real Red and Cherry Cobbler together. The base of my card is Cherry Cobbler which helped that little strip just pop off the page.


I absolutely love how this finished card turned out. It is traditional holiday colors and Christmas feel to me and I hope you will give this bundle a try!

If you are in Canada, you can shop my online store by following the link below or using my host code on the side of my blog. I would love to send you a thank you card so make sure you don’t click NO CONTACT when you are ordering (unless you want to be anonymous).

Have a fabulous day!

final.jpg

Create with Connie and Mary-Spooky Halloween

Have I said it enough this month how much I love Halloween? Well if today is your first stop by, then I will share it again, its my Favourite Holiday (after my birthday!!!). This week our theme is ‘Spooky’ Halloween and I knew right away I wanted to share one of my families favourite treats, Oreo Popcorn, with a Halloween Twist!

This is my Halloween version of my Oreo Popcorn. The original recipe is under my Lifestyle Tab, Favorite Recipes (I will share a link at the end of this post). I just added in some orange candy balls from Wilton and some candy eyeballs for that ‘spo…

This is my Halloween version of my Oreo Popcorn. The original recipe is under my Lifestyle Tab, Favorite Recipes (I will share a link at the end of this post). I just added in some orange candy balls from Wilton and some candy eyeballs for that ‘spooky’ feel!

 
fullsizeoutput_12d57.jpeg

One batch of this popcorn filled at least a dozen bags with some left over for my family to snack on. This recipe lasts for a few weeks in a sealed container or bag, so it is something you can make ahead of time too. I have all of my bags packed to share at my kids Halloween classes!

final.jpg

I filled our Mosaic cello bags with popcorn (I hope you have spotted these in the Handmade for You catty) and topped the bag off with the largest of the Celebration Labels dies cut from Basic Black card stock and then ran it through the Cobwebs 3D embossing folder for that spooky touch!

final.jpg

Happy Haunting is stamped in Momento Ink on Smoky Slate card stock with the background cobweb in Smoky Slate ink—both of the images are from the Celebration Tidings stamp set. You can find this awesome bundle on page 58 of the Handmade for You. Do not overlook its potential! The dies are the BEST if you are someone who gives a lot of treats. The 5 sizes are all ‘notched’ so you can easily fold them in half to make a bag topper!

final.jpg

Because our theme this week was ‘spooky halloween’ I thought, what is more creepy than spiders in your popcorn? Haha! It would actually scar me for life if it was a reality! Luckily these are just cute glitter spiders that I cut using the Little Treat Box Dies and the Black Glitter Paper. I LOVE this glitter paper as it does not ‘shed’, no glitter on my cutter, hands or Stampin’ Cut & Emboss machine! Win win!

I added in a couple strips of the Terracotta Tile Scalloped Lined Ribbon and coloured the Crinkled Seam Binding Ribbon with the dark Rich Razzleberry Stampn’ Blend marker.

Click on the link for my Oreo Popcorn recipe and watch for a Christmas Twist version coming this holiday season!

I can’t wait to see what the other girls in the Hop have created this week! Next week we start sharing Christmas projects so make sure you mark your calendars for all the Saturday’s!

You can go BACK to see what Melissa has created or NEXT to see what Connie has designed! Have a safe and healthy Halloween everyone!


Man's Best Friend

Recently a dear friend of mine lost her beloved dog after many years of being a beloved family member. She asked me to create a scrapbook page in his memory.

She asked me to use the Playing with Patterns Designer Series paper and the new Playful Pets stamp set. I decided to add in a retired set, Happy Tails, into the design too because it has some really special elements. I also borrowed the phrase “We’re the Best of friends” from the Bird Ballad stamp set.

final.jpg

I chose the color palette of Misty Moonlight, Seaside Spray, and Crushed Curry but you could easily reproduce this page with more feminine colors using the same 6x6 stack (Purple Posy and Calypso Coral).

I cut a large heart using the Stitched Be Mine dies to be the focal point of where Jake’s name was to go. This could also be customizable too. I added lots of stamped hearts and paw prints. This page is an eclectic mix of new products, older favourites and retired stamp sets. Some sets you just can’t part with!


A few different ribbons helped create this focal area. I used the Bumblebee Gingham ribbon, the blue from the Playing with Patterns Ribbon Combo pack and some silver twine I had laying around.

I really loved the sentiment “ A Best Friend” and it worked perfectly right above the Seaside Spray heart.

final.jpg

I actually loved how this turned out so much that I decided to turn it into a card too. Do you ever do that? I often do when I create something I love.

final.jpg

To create the card, I kept many of the same elements as the scrapbook page, but decided to stamp and color with Stampin’ Blends the cute dog from the Pampered Pets stamp set in Smoky Slate with a Crushed Curry collar to coordinate. I kept the ribbons and added in a couple embellshments from the Frosted & Clear Epoxy Droplets collection.

I hope both of these projects inspire you today and I am blessed my friend asked me to create such a meaningful memento.


Create with Connie and Mary--Halloween Favors!

Halloween is definitely my favourite holiday, I just love the home decor and seeing all the little kids dressed up, and making fun treats! This year we are still hosting our annual halloween party and I have been making some special treats for the MOMS to take home! Why should kids get all the fun?

I can’t wait to see what everyone creates this week as I know there will be some good ideas I can use too!

fullsizeoutput_12d57.jpeg

I am absolutely LOVING the mini coffee cups! The possibilities are endless with what you can create featuring these fun cups and the carrier! So I knew that I wanted to use them to create a spooky treat!

I think this project is just so fun and the cups can be filled with so many things! Candies and chocolates or for a more mature audience mini alcohol bottles :)

I think this project is just so fun and the cups can be filled with so many things! Candies and chocolates or for a more mature audience mini alcohol bottles :)

I used the Magic in this Night Designer Paper to decorate the coffee carrier and the cups. You can deconstruct a coffee cup and use it as a tracer to get the shape right to wrap around the cups. And we literally have a plethora of options we can use to decorate these cups Halloween style!

final.jpg

I used a variety of stamp sets to decorate a literal TOWER of cups! Once I got started I couldn’t stop! I used the Celebration Tidings, Festive Post and Banner Year stamp sets plus a variety of dies to decorate and embellish these cups. I used the Autumn Essentials, Playful Alphabet and Celebration Labels dies.


The black glitter spider is cut using the Little Treat Box dies and is just the perfect little touch. I also added some rhinestones from the Holiday Rhinestones beside the BOO (which is cut from Gold Foil paper and the Foam Adhesive Sheets)

final.jpg
 

You can see from my tower how much fun I was having decorating all of these cups. I used twine from the Playful Pets trim combo and coloured (with Stampin’ Blends) the Crinkled Seam Binding ribbon along with some wraps cut using the Warm Wraps dies to help dress up the cups. I even cut some bats right from the Magic in this Night DSP!

final.jpg

I can’t wait to share these with my friends at Halloween! I have turned the carrier option into a kids class, and I am so excited to have some kids back in my studio stamping and being creative! I hope you are inspired to see what you can create with these cups! I have some awesome ideas in mind for Christmas too!

Enjoy the rest of the Blog Hop today! Thanks for stopping by. You can head BACK to see what Melissa has created and NEXT to see what Connie has created.