You're Amazing (heart)

Last week I shared an amazing double page layout featuring the Prized Peony suite and I am still having fun creating with it! This was the page my scrapbook class made this week. Once a week, last Wednesday of the month, I have a group of gals come to make a single page layout. They had requested doing some colouring with the Stampin’ Blends and I feel like this bundle just has so many options. Pairing it with the scripty soft font of the Ornate Thanks stamp set was a perfect match along with the Beautiful World stamp set.

final.jpg

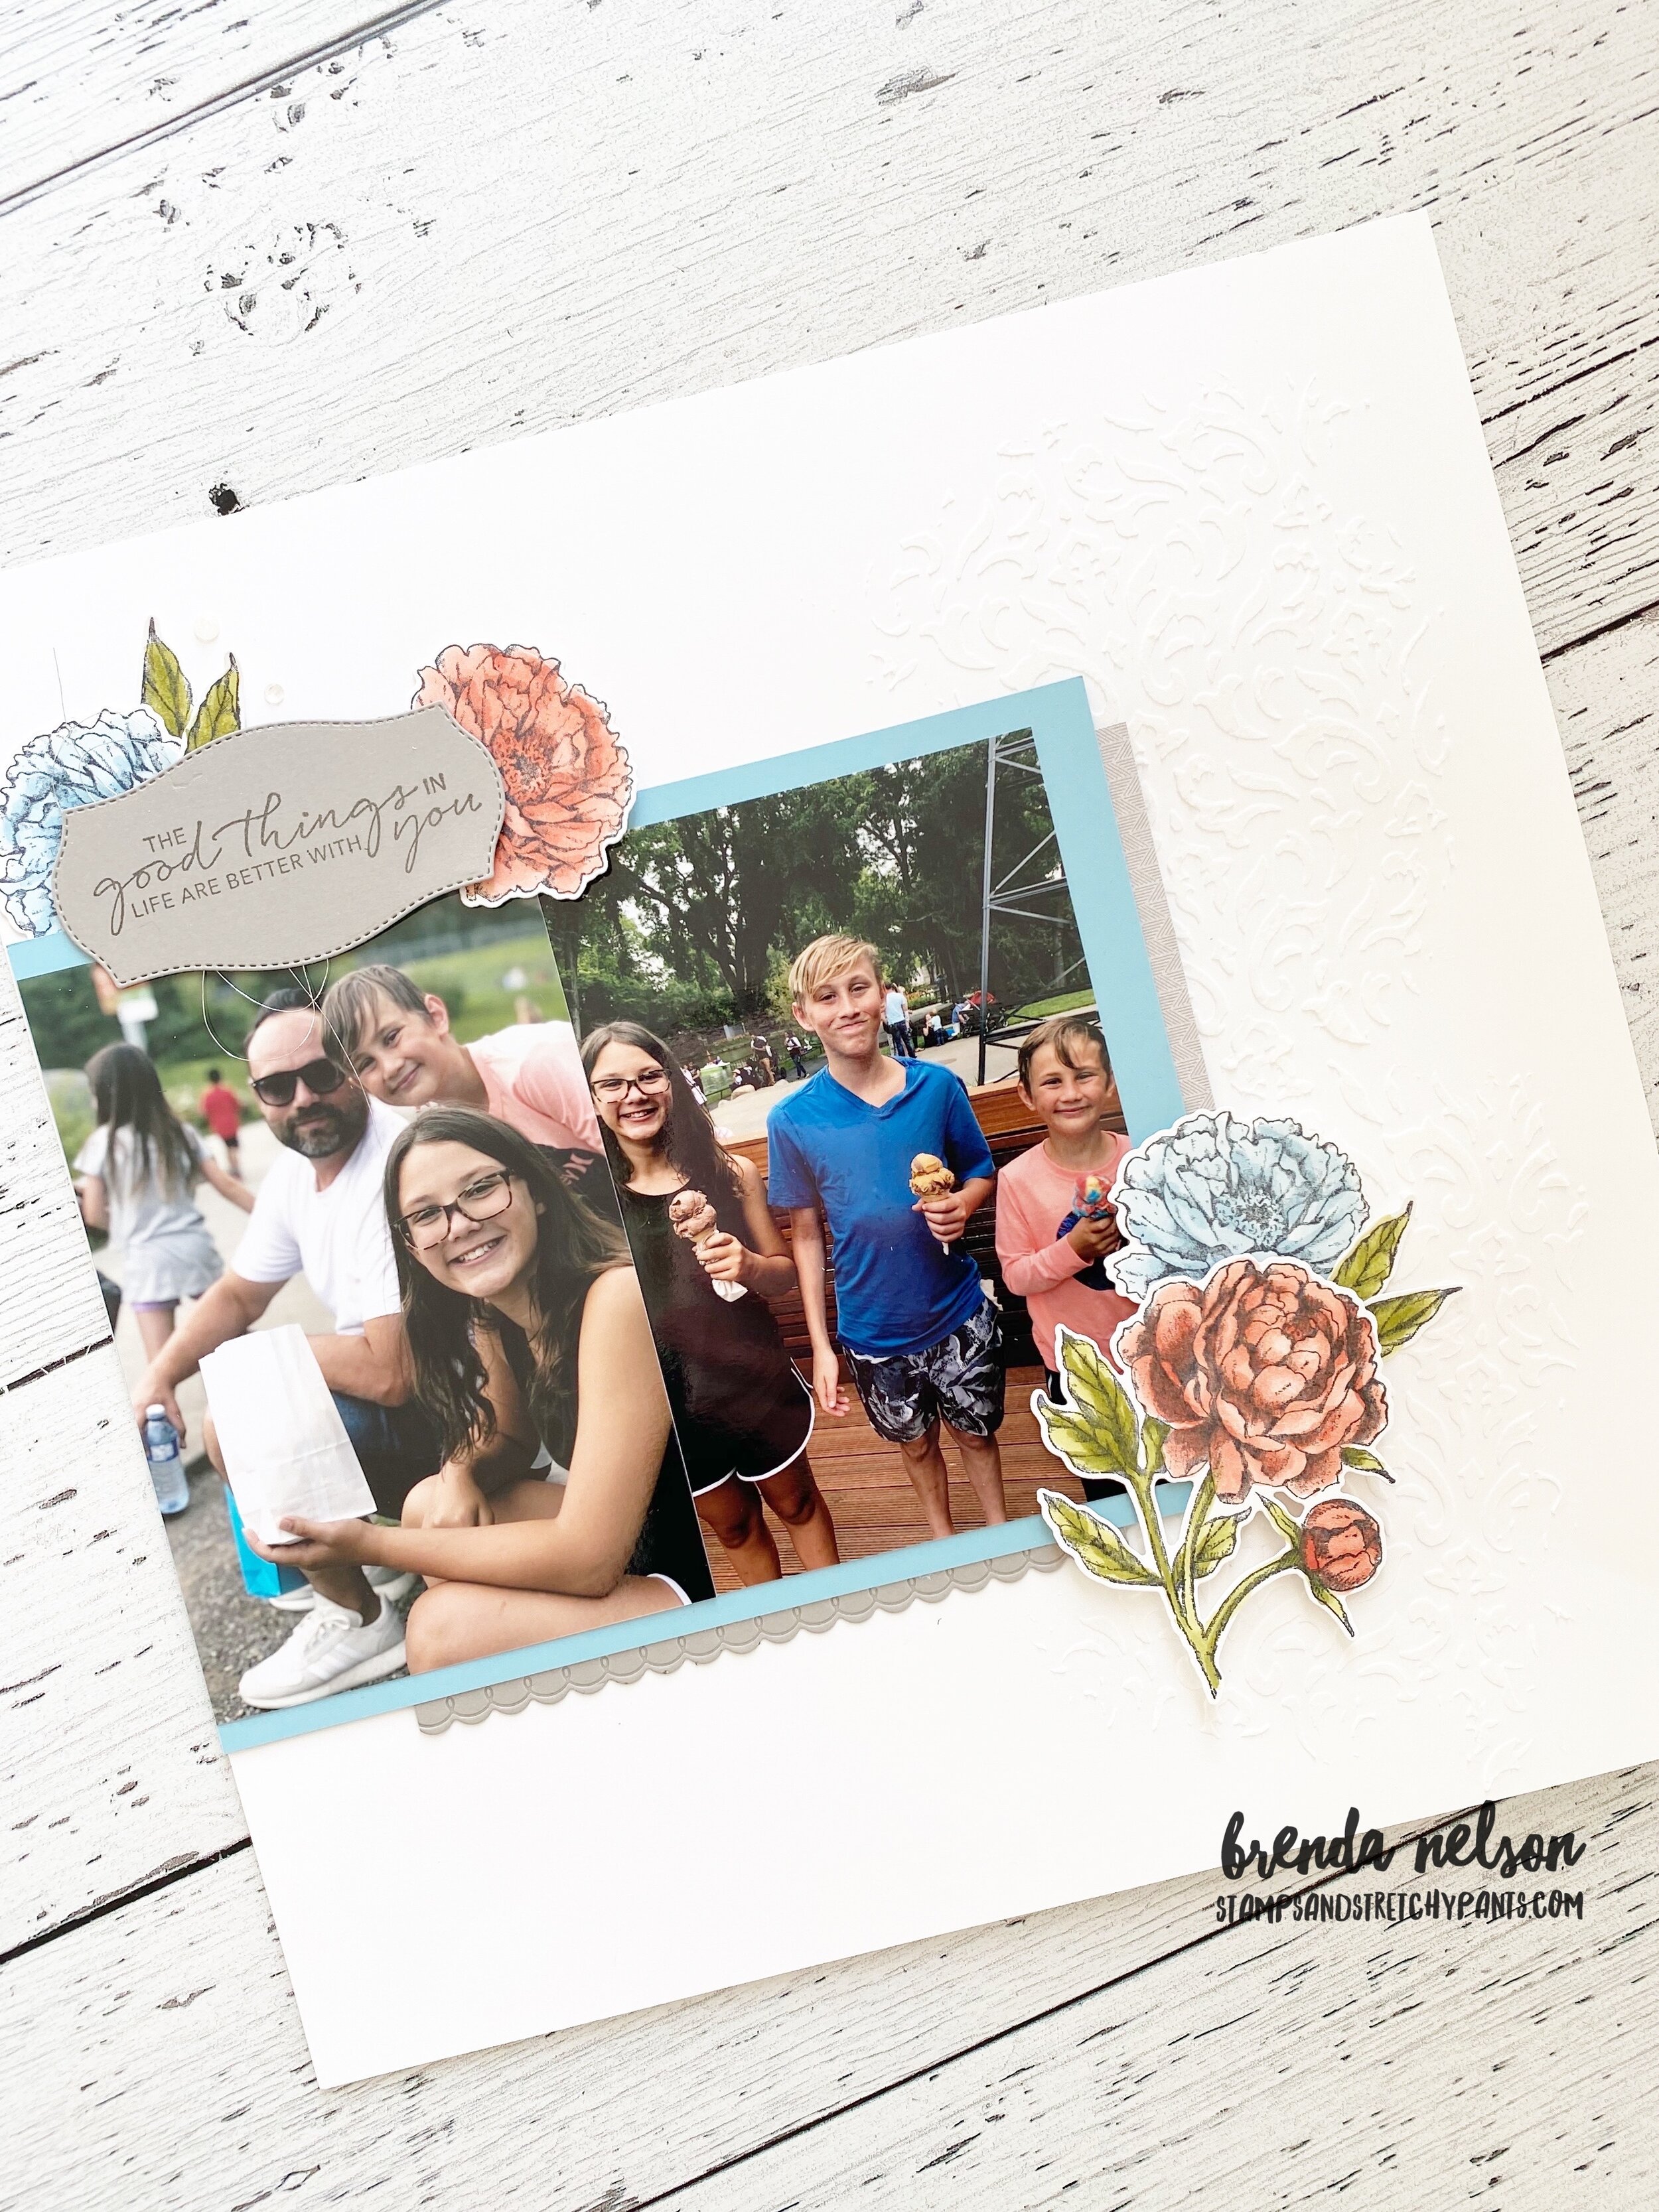
I really love this soft color palette that was inspired by the Peony DSP and having my oldest son in the photo. I wanted this page to feel soft and masculine at same time. No one ever said you can’t use flowers with boys!

I started by embossing some of the mid sized peony blooms on the Whisper White background with white embossing powder. The effect is soft and subtle and draws your eye from the top of the page down.


Sometimes a background doesn’t need much, but I always find it needs something!

Embossing such an easy way to add detail to your projects.

final.jpg

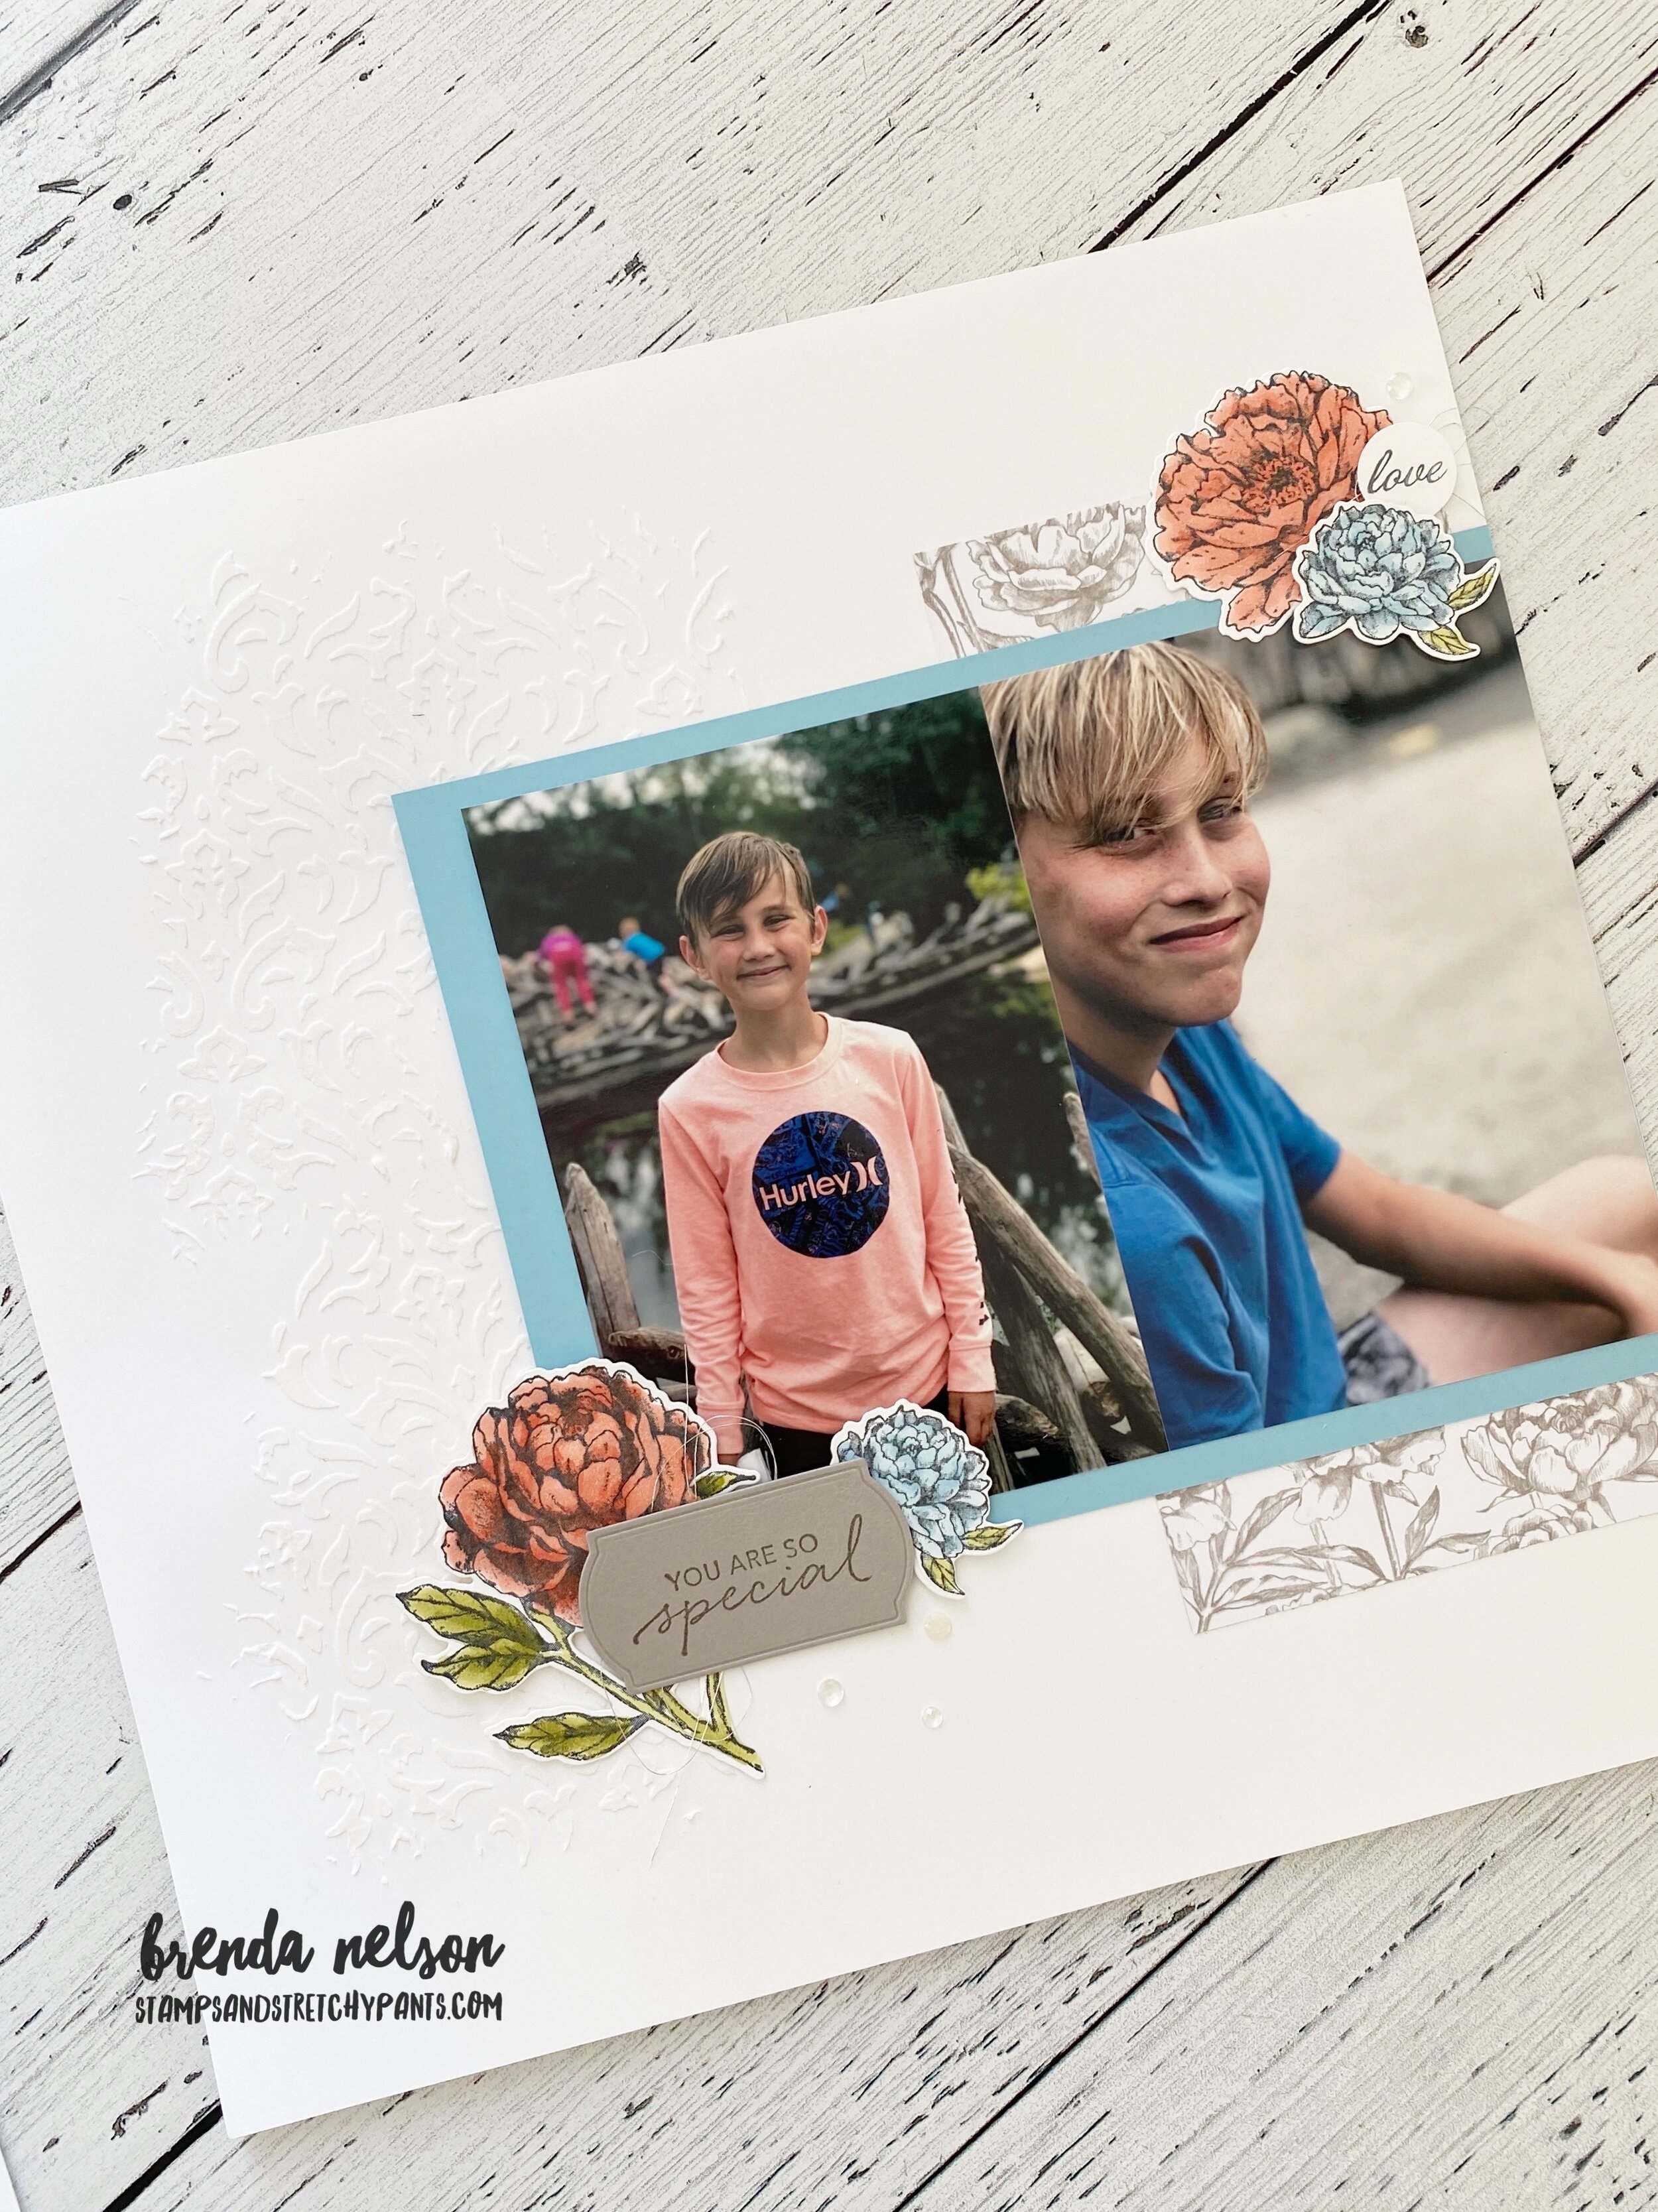
I really love how the Prized Peony dies include outline dies, dies to make a 3 D flower and the scalloped embossed edge piece is perfection. I used it here to bring in that touch of blue with Seaside Spray. I feel this blue has a bit of a grey undertone so it worked perfectly on this project. I coloured the peonies in Seaside Spray, Petal Pink and Old Olive Stampin’ Blends.

final.jpg

I used the Grey Granite 1/4 shimmer ribbon and the Seaside Spray 1/4 metallic ribbon to draw interest and attention to the sentiment. I love our metallic pearls and they helped add an elegant feel to this page.

The lace detail is from the Fabulous Florals dies and worked so perfectly with this page!


final.jpg

I love this little corner at the right hand top of the page. I stamped the little background in Smoky Slate and cut one of the cute stitched shapes from the Hippo & Friends dies in the same color. I trimmed it down in half and added the small peony and You’re Amazing. Sometimes it really is all in the details!

I hope you love this page as much as I do! I absolutely LOVE to scrapbook and feel so blessed to have this platform to share my creations with you! Please feel free to shop with me or leave me a comment! I love to see them in my Inbox!

shop with me

Create with Connie and Mary--Cute Critters!

This week our creative theme is Cute Critters and if you have looked through the catalogue at all you know, there are quite a few options? So how could I pick just one. I decided to make ONE card template and FOUR critter cards from it! I think this shows how versatile a great card design can be!

fullsizeoutput_12d57.jpeg

What is also worth noting is that on each of the four cards, they only use ONE stamp set per card! This is also important to our customers because it shows the value and potential in a single stamp set.

This little zebra is just too cute for words! You can find him and two other zebra friends in the Zany Zebra stamp set. I added a bit of extra color to his stripes with my light Smoky Slate Stampin’ Blend and Magenta Madness Stampin’ Write Marker.

This little zebra is just too cute for words! You can find him and two other zebra friends in the Zany Zebra stamp set. I added a bit of extra color to his stripes with my light Smoky Slate Stampin’ Blend and Magenta Madness Stampin’ Write Marker.

I absolutely could not choose just one stamp set to use as all of these sets have so much potential and are all ‘cute critters’, even the whale by my definition!

I started with a Coastal Cabana base and layer. I chose one sentiment out of each set to stamp in the background and then I used my Water Painter brush with the matching ink to create a splatter effect in the background. Each card has a strip of DSP from the Flowers for All Season 6x6 collection in a Just Jade polkadot pattern. I love how Just Jade and Coastal Cabana look together, they pair up perfectly! I wanted a little punch of color so I decided to add in Magenta Madness as an accent color. I cut little strips of the woodgrain pattern from the In Color 6x6 collection to add behind the critter on each card along with some Just Jade ribbon. The Playful Patterns Resin dots in Coastal Cabana were the perfect finishing touch!

Each critter is on a white stitched circle and I found one little stamp in each set to add to the circle in Magenta Madness! It could not have worked out better to choose these four stamp sets and this is going to make the perfect class in September!

This little cutie is from the Pampered Pets Bundle and is coloured with the Smoky Slate Stampin Blends!

This little cutie is from the Pampered Pets Bundle and is coloured with the Smoky Slate Stampin Blends!

This was actually my first play with the Hippo Happiness Bundle. What I really love about this bundle are the Hippo & Friends dies. There are 25 dies in this set including 3 different types of labels. It really is a tremendous value!

This was actually my first play with the Hippo Happiness Bundle. What I really love about this bundle are the Hippo & Friends dies. There are 25 dies in this set including 3 different types of labels. It really is a tremendous value!

And finally Mr. Whale as I have nicknamed him from the Whale Done bundle. I love that he is a punch and you can stamp him and punch him out or create him using punch art!

And finally Mr. Whale as I have nicknamed him from the Whale Done bundle. I love that he is a punch and you can stamp him and punch him out or create him using punch art!

I hope this card collection inspires you to take one design and create different projects from it! Now you can go back on our hop to see what Melissa created or you can keep going forward to see what Connie has designed! Either way, I know you will be inspired! Have a wonderful Saturday! And if you want to shop my store for any of these projects, please do and use the August Host Code! Thank you!

`

`

Shop with me by clicking this button if you live in Canada!

shop with me

C is for Cookie...

And it’s good enough for me, oh C is for Cookie and its good enough for me because COOKIE COOKIE COOKIE COOKIE starts with C!

Hahaha! How many of you learned your ABC’s from Sesame Street? Can you guess who my favourite character was? Cookie Monster! And ya, maybe I still do eat my cookies like he does! hahahaha! I also really liked Grover and when they occasionally showed you glimpses inside Oscar’s garbage can…man, that was a good day!

So needless to say I love the Nothing's Better Than bundle and could not wait to make a fun cookie treat. I will be giving these out to everyone who places an order with me next month and I absolutely cannot wait!

final.jpg

I have to say the best thing about having a tweet is their willingness to do things for money, so I employed my daughter to cut out 48 ‘cookie’ words for me the other day. Then we worked together to cut the other parts and I stamped the ‘Today’s Plan Consume’ in Soft Suede on Sahara Sand card stock and flicked the background with a Water Painter and Sahara Sand ink. I added some retired Baker’s Twine (use that stash up) between the stitched circle and scallop circle layers and added the labels to a package of Dad’s Cookies (bough at Costco!).

I can’t wait to share these with all of my group members in September! Ask me about joining one of my monthly groups if you live in the YEG area!

I can’t wait to share these with all of my group members in September! Ask me about joining one of my monthly groups if you live in the YEG area!

Prized Peony Perfection

Have you been stamping and creating with the Prized Peony Bundle? I actually love it as Peony’s are one of the few flowers I can actually keep alive from year to year, although I do wish they had a longer life span! I love how in the Peony die collection you get dies that cut out the stamped images and you get dies that cut out and layer together to create a beautiful peony flower. It is a really unique die set.

I recently created this page to share with my stampers at our monthly scrapbook group. If you live in the Edmonton area and are interested in scrapbooking, this is an example of what we make at each of our monthly meetings. Please reach out to me if you are interested. I would love to share my love of memory keeping with you!

I chose the colors for this page based on the colors in my sons tee shirts! This is all apart of my creative process as I do like things to have coordination and its often helps me get my color palette figured out.

I chose the colors for this page based on the colors in my sons tee shirts! This is all apart of my creative process as I do like things to have coordination and its often helps me get my color palette figured out.

If I could have one wish granted it would be that Stampin’ Up! would offer all of our amazing colors in 12x12 sheets. However, it is not the reality, but I did feel that a crisp white background would help the peonies pop off the page. I also knew that I wanted to use embossing paste on the background as it is a fun and easy technique. It is really easy to do in a class setting. I just have all of the participants do the embossing paste step one after another and then I rinse the stencil and palette knife in warm water when they are done. So don’t be afraid to try its with a group!

I used the Basic Patterns Decorative Mask with White embossing paste too create this subtle background.  You can find both items and the Palette Knives on page 146 of the Annual Catalogue. If you look close you can see I also added in some of the El…

I used the Basic Patterns Decorative Mask with White embossing paste too create this subtle background. You can find both items and the Palette Knives on page 146 of the Annual Catalogue. If you look close you can see I also added in some of the Elegant Faceted Gems near the top of the page.

This page has quite an elegant feel to it which is kind of funny, as my kids were at our local zoo! This page would look amazing with wedding or anniversary photos too!

This page has quite an elegant feel to it which is kind of funny, as my kids were at our local zoo! This page would look amazing with wedding or anniversary photos too!

The Peony images are stamped in Moments Black Ink and coloured with the Old Olive, Calypso Coral and Balmy Blue Stampin’ Blends. The sentiments are stamped in Grey Granite ink on coordinating card stock and are cut with the Tasteful Labels dies and are from the Tasteful Touches stamp set. I think this whole bundle is a must have! I added a few pieces of the Peony Garden DSP to bring in that grey tone.

On each page I used two vertical 4x6 pictures that I butted up to each other, you could use one larger horizontal photo on the Balmy Blue photo mat as well. I like to give my group members options when selecting their photos. And my favourite die in the Peony set might be the long scallop border as its cuts and embosses and is just the perfect finishing piece.

If you would like any of the supplies to create this create this scrapbook page please click on the link below to shop with me in Canada!

Shop with me

Create with Connie and Mary--Back to School!

Typically around this time of year I find myself thinking, wow, its time to start getting ready for school to start! And then I procrastinate on actually buying school supplies and getting anything organized. I mean, it’s not like my kids are even thinking about back to school, they are in summer mode. Even though its been a 5 month summer because of Covid!

fullsizeoutput_12d57.jpeg

So I was excited when this week’s theme was shared as ‘Back to School’ as putting my project together helped remind me I really need to get organized this year! I knew that I had some pictures of my kids that I had not scrapbooked yet as I never follow any kind of order when I decide what pictures to use. I am however, someone that regularly prints pictures—I have bins and bins of them that I have somewhat categorized and labelled. I am someone that almost always needs a photo to get my creative juices going!

 
final.jpg
 

The Harvest Hellos and Apple Builder punch were my go to craft supplies to create this page! I have no idea why apples feel like back to school but they just do! I also knew that I wanted to incorporate the Plaid Tidings DSP as well as plaid feels like fall to me too.

This page actually didn’t require too many supplies like some of my scrapbook pages! I kept all of the phrases from the Bundle which I do find helps my stampin’ customers feel inspired to make a purchase, knowing they can make a page with one stamp …

This page actually didn’t require too many supplies like some of my scrapbook pages! I kept all of the phrases from the Bundle which I do find helps my stampin’ customers feel inspired to make a purchase, knowing they can make a page with one stamp set.

I coloured the apples in with my Stampin’ Blends using the Poppy Parade and Granny Apple Green. I also decided to use one of the gold hoops to create a little focal area on the left of the page. Because I was using three pictures, I made sure that each picture had a ‘phrase’ attached to it as well to help draw the eye across each photo. And a little background stampin’ and maker flicking helped fill in the right side of the page!

I added a little extra greenery from the Forever Fern bundle on the hoop and a little bit of Real Red ribbon

I added a little extra greenery from the Forever Fern bundle on the hoop and a little bit of Real Red ribbon

final.jpg

Thanks for hoping along with all of us again this week! And if you are new to our blog hop, we share a project every Saturday! So mark us on your calendar!

You can click BACK to see what Melissa has created and NEXT to see what Connie has crafted for us! She mentioned she was really excited about her project this week so I can’t wait to see it myself!