Create with Connie and Mary--Hot Summer Days!
/When I think of “Hot Summer Days” I definitely think of ice cream! I hope you enjoying this weeks Create with Connie and Mary Blog Hop theme! Make sure you visit everyone on the Hop!
We have been having some super hot days here in Alberta and I am LOVING every minute of it! And summer ice cream calories don’t count I have decided!


Have you been following along with my blog regularly? Are you noticing a trend…maybe with the Playing with Patterns Suite? Hahaha, I don’t even notice I am using it half the time! It just seems to work with EVERYTHING! Hopefully I have you hooked on it too and you can use my August Host Code to shop for anything you need!
What is unique about this page, is all of the DSP strips of paper are actually from 6x6 DSP stacks! You would never know though as I strategically hid the seams behind the photos. I used the Playing With Patterns, In Color, Whale of a Time and Flowers for Every Season 6x6 collections. I used my finger nail to soften the edges of the DSP to give it some added texture when I added it to the 12 x 12 Whisper White.
I used a trusty old favourite, the baby wipe technique, to create this soft background. I then used my Water Painter to flick the Coastal Cabana ink all over.

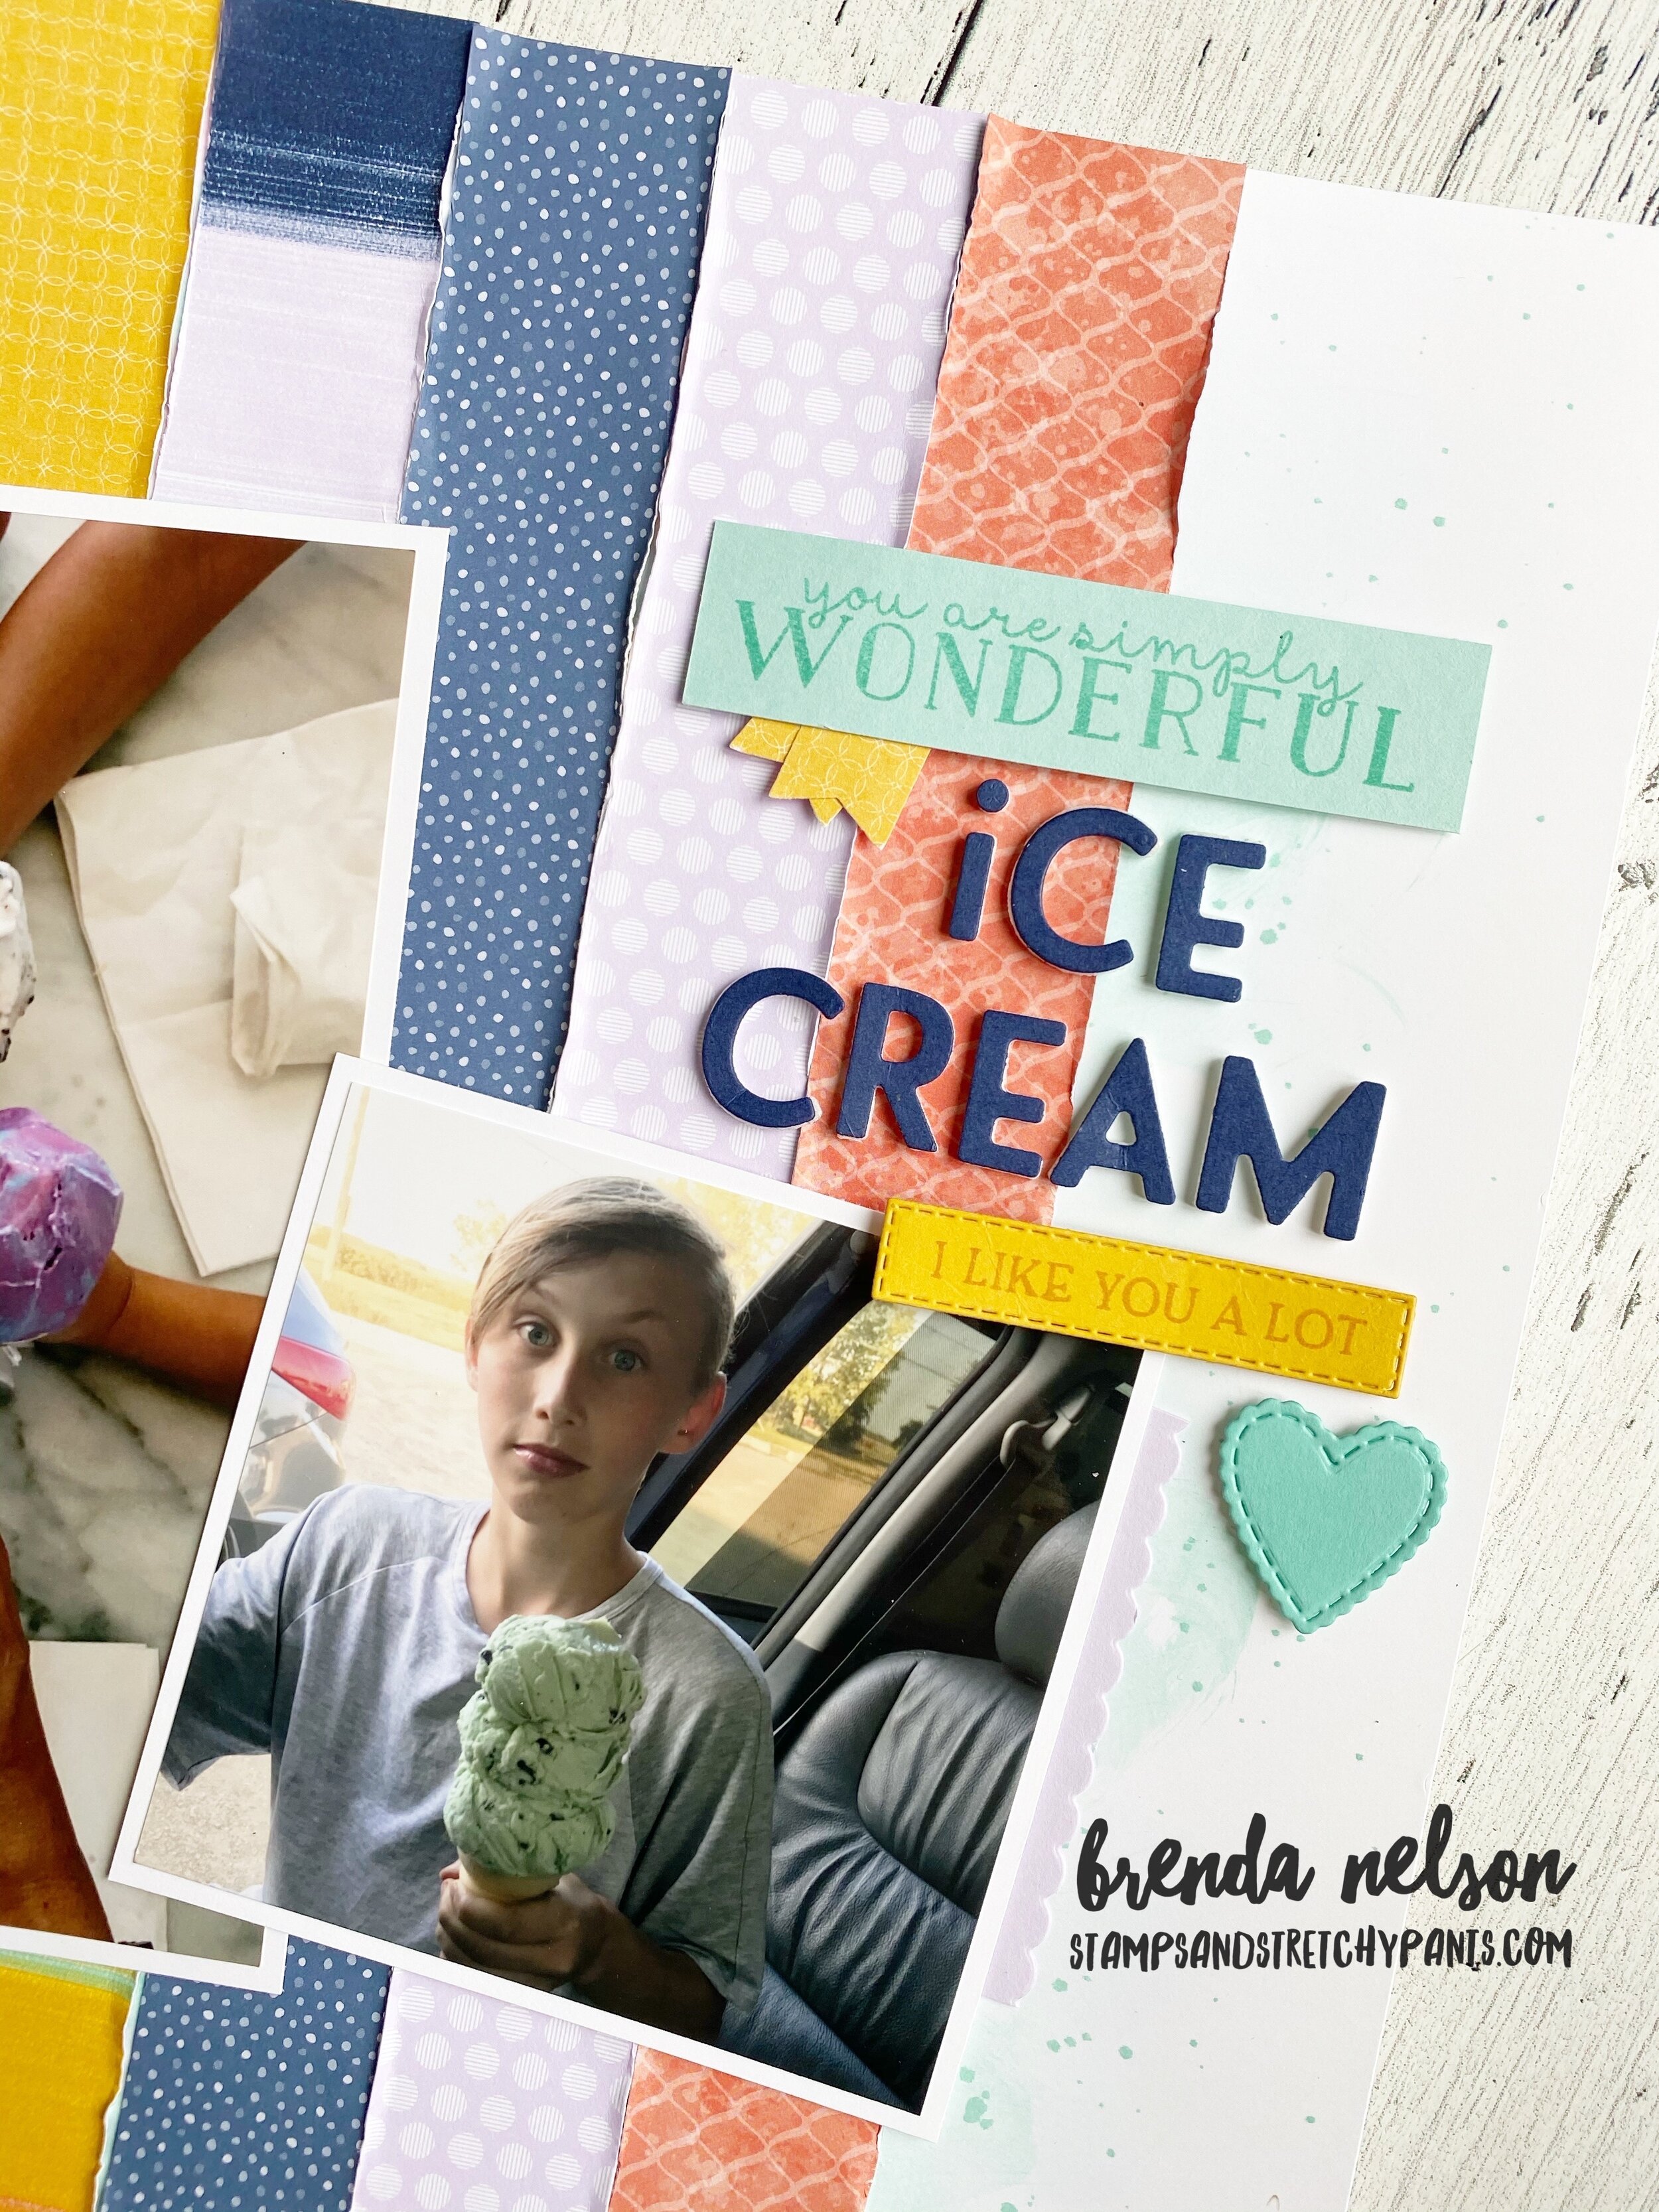
I don’t know how you feel about ice cream but I think the sentiments on this page describe my feelings for it perfectly! Hahaha! And my sons expression on his triple scoop ice cream cone is just priceless!
I used a bunch of different sentiments from three different stamp sets to enhance this page. I used Nothings Better Than, Blossoms in Bloom, and Bloom and Grow. And of course, the Playful Alphabet dies!
I hope you enjoy what the other gals have created this week for you and I hope you are having an awesome summer yourself! You can go back to see what Melissa has created and next to see what Connie has designed!