Seven Days of Scrapbooking--Day #5
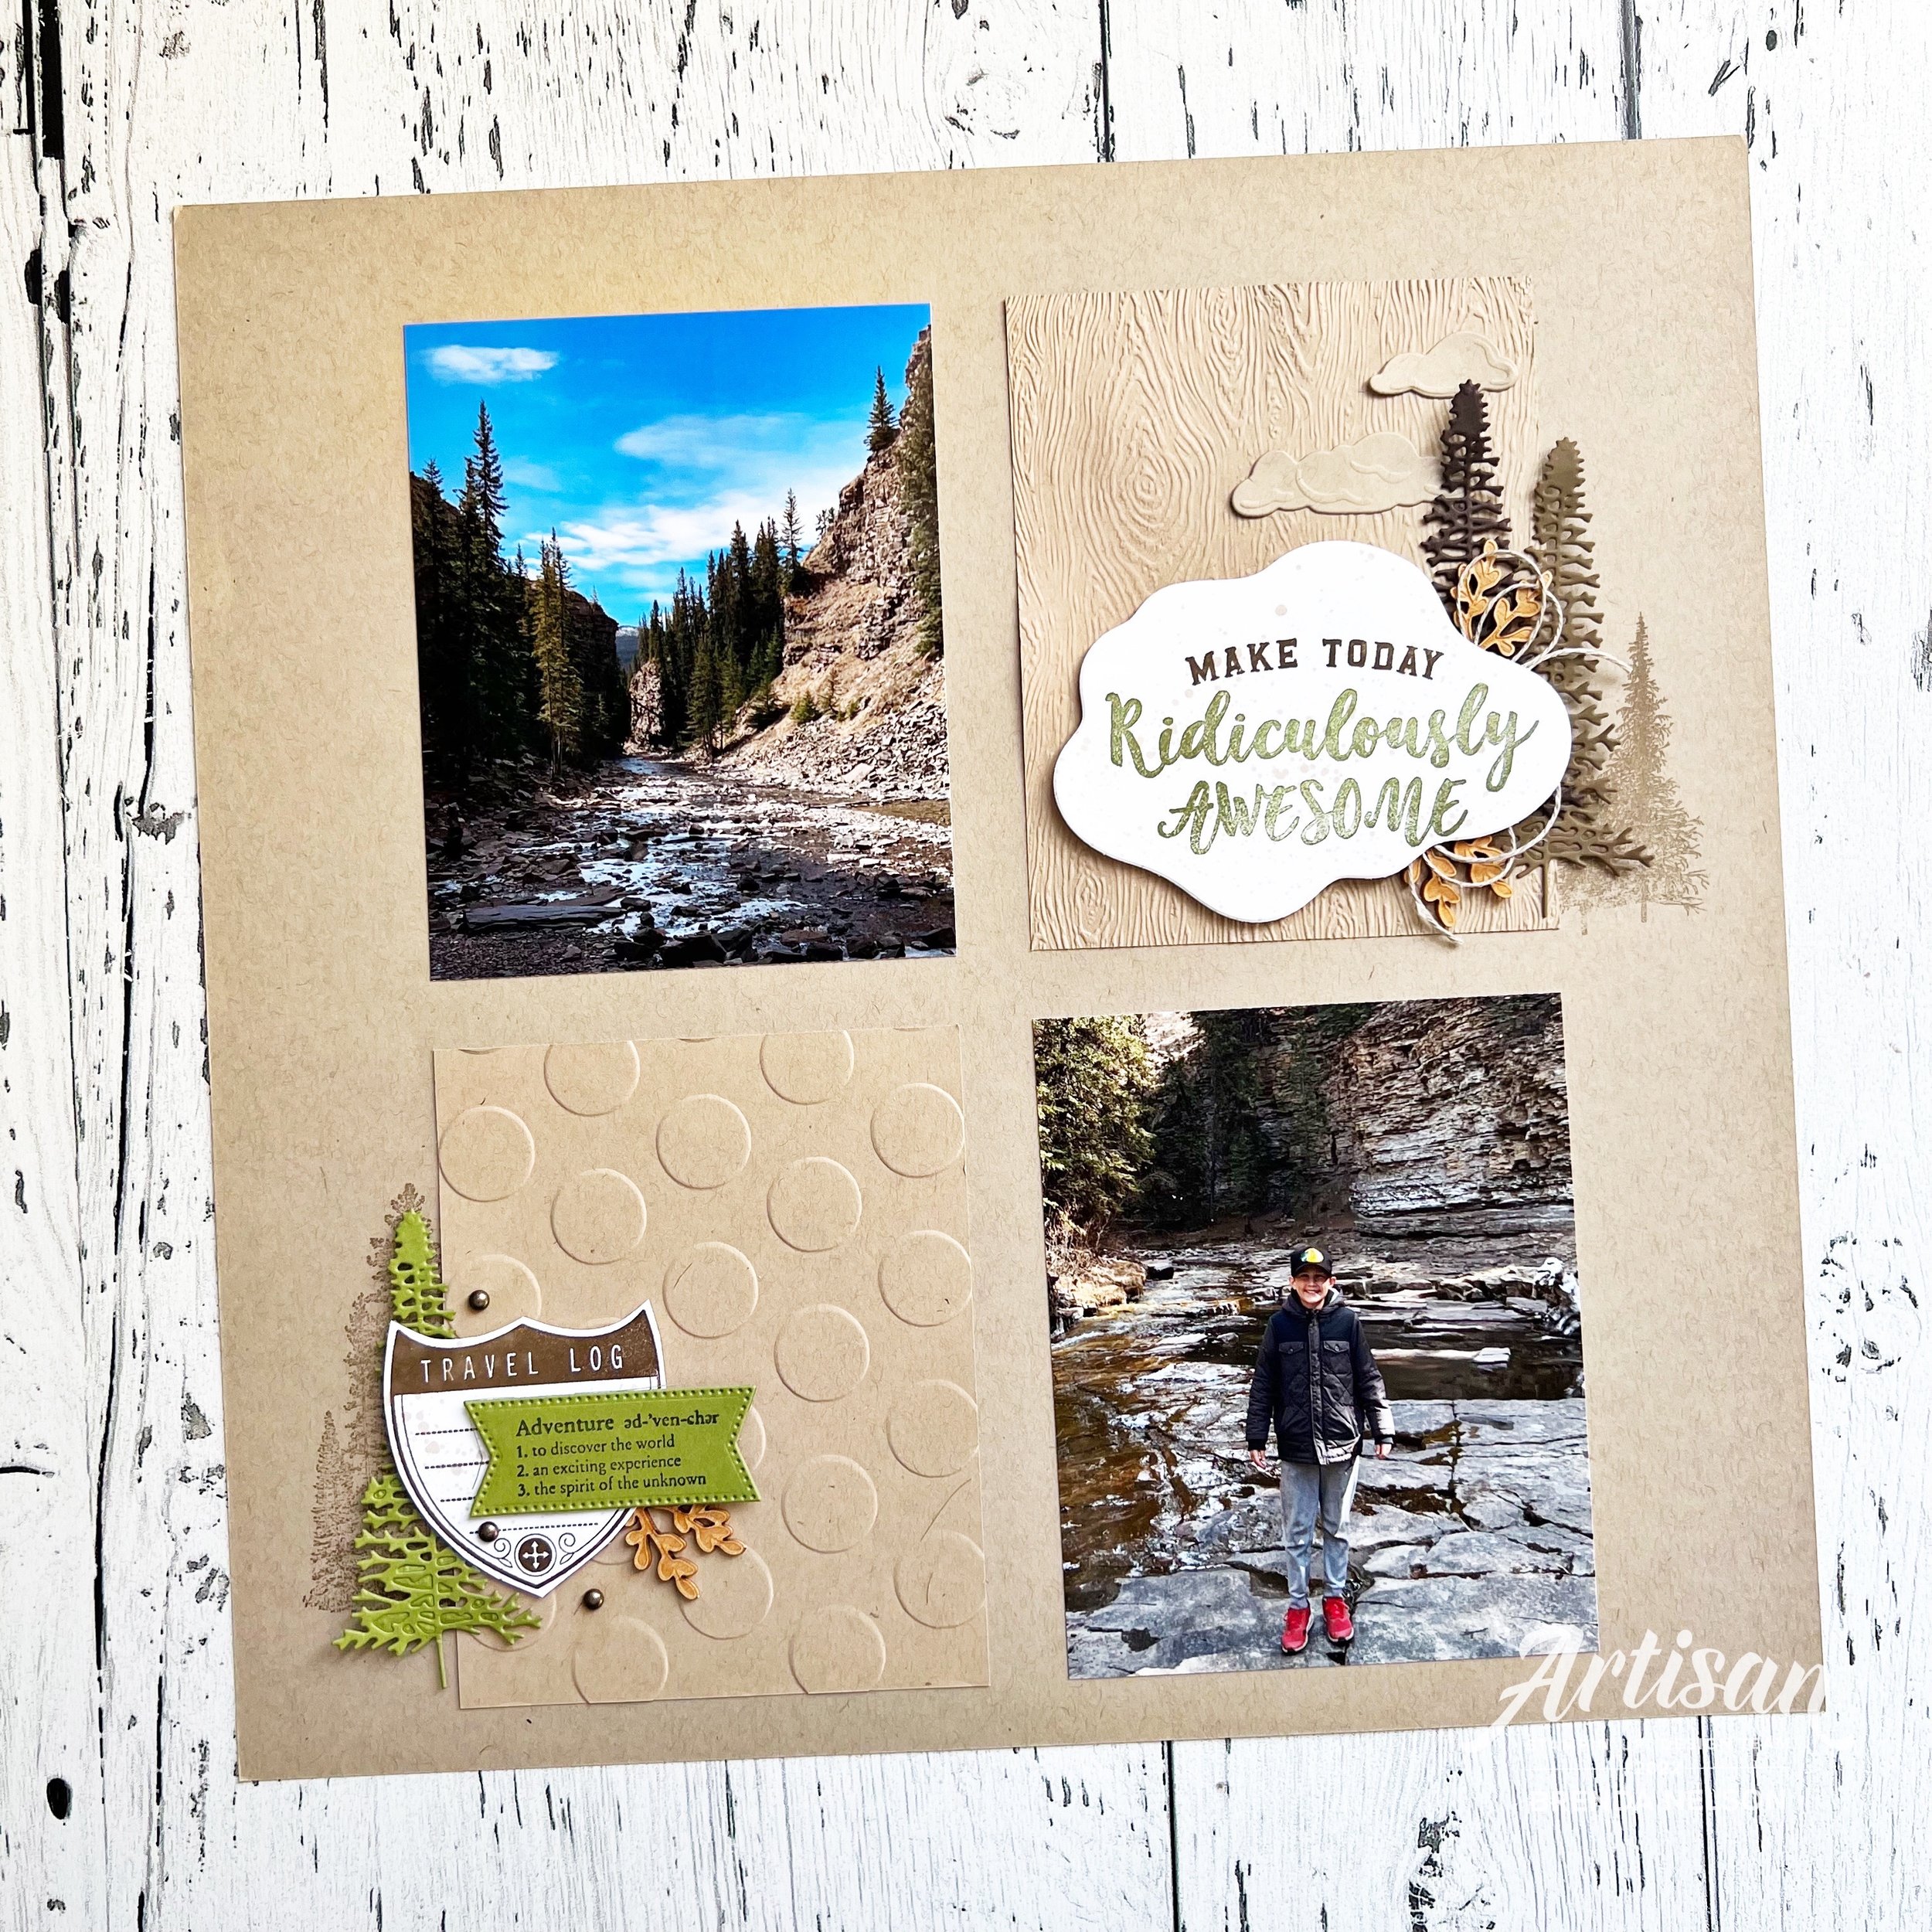
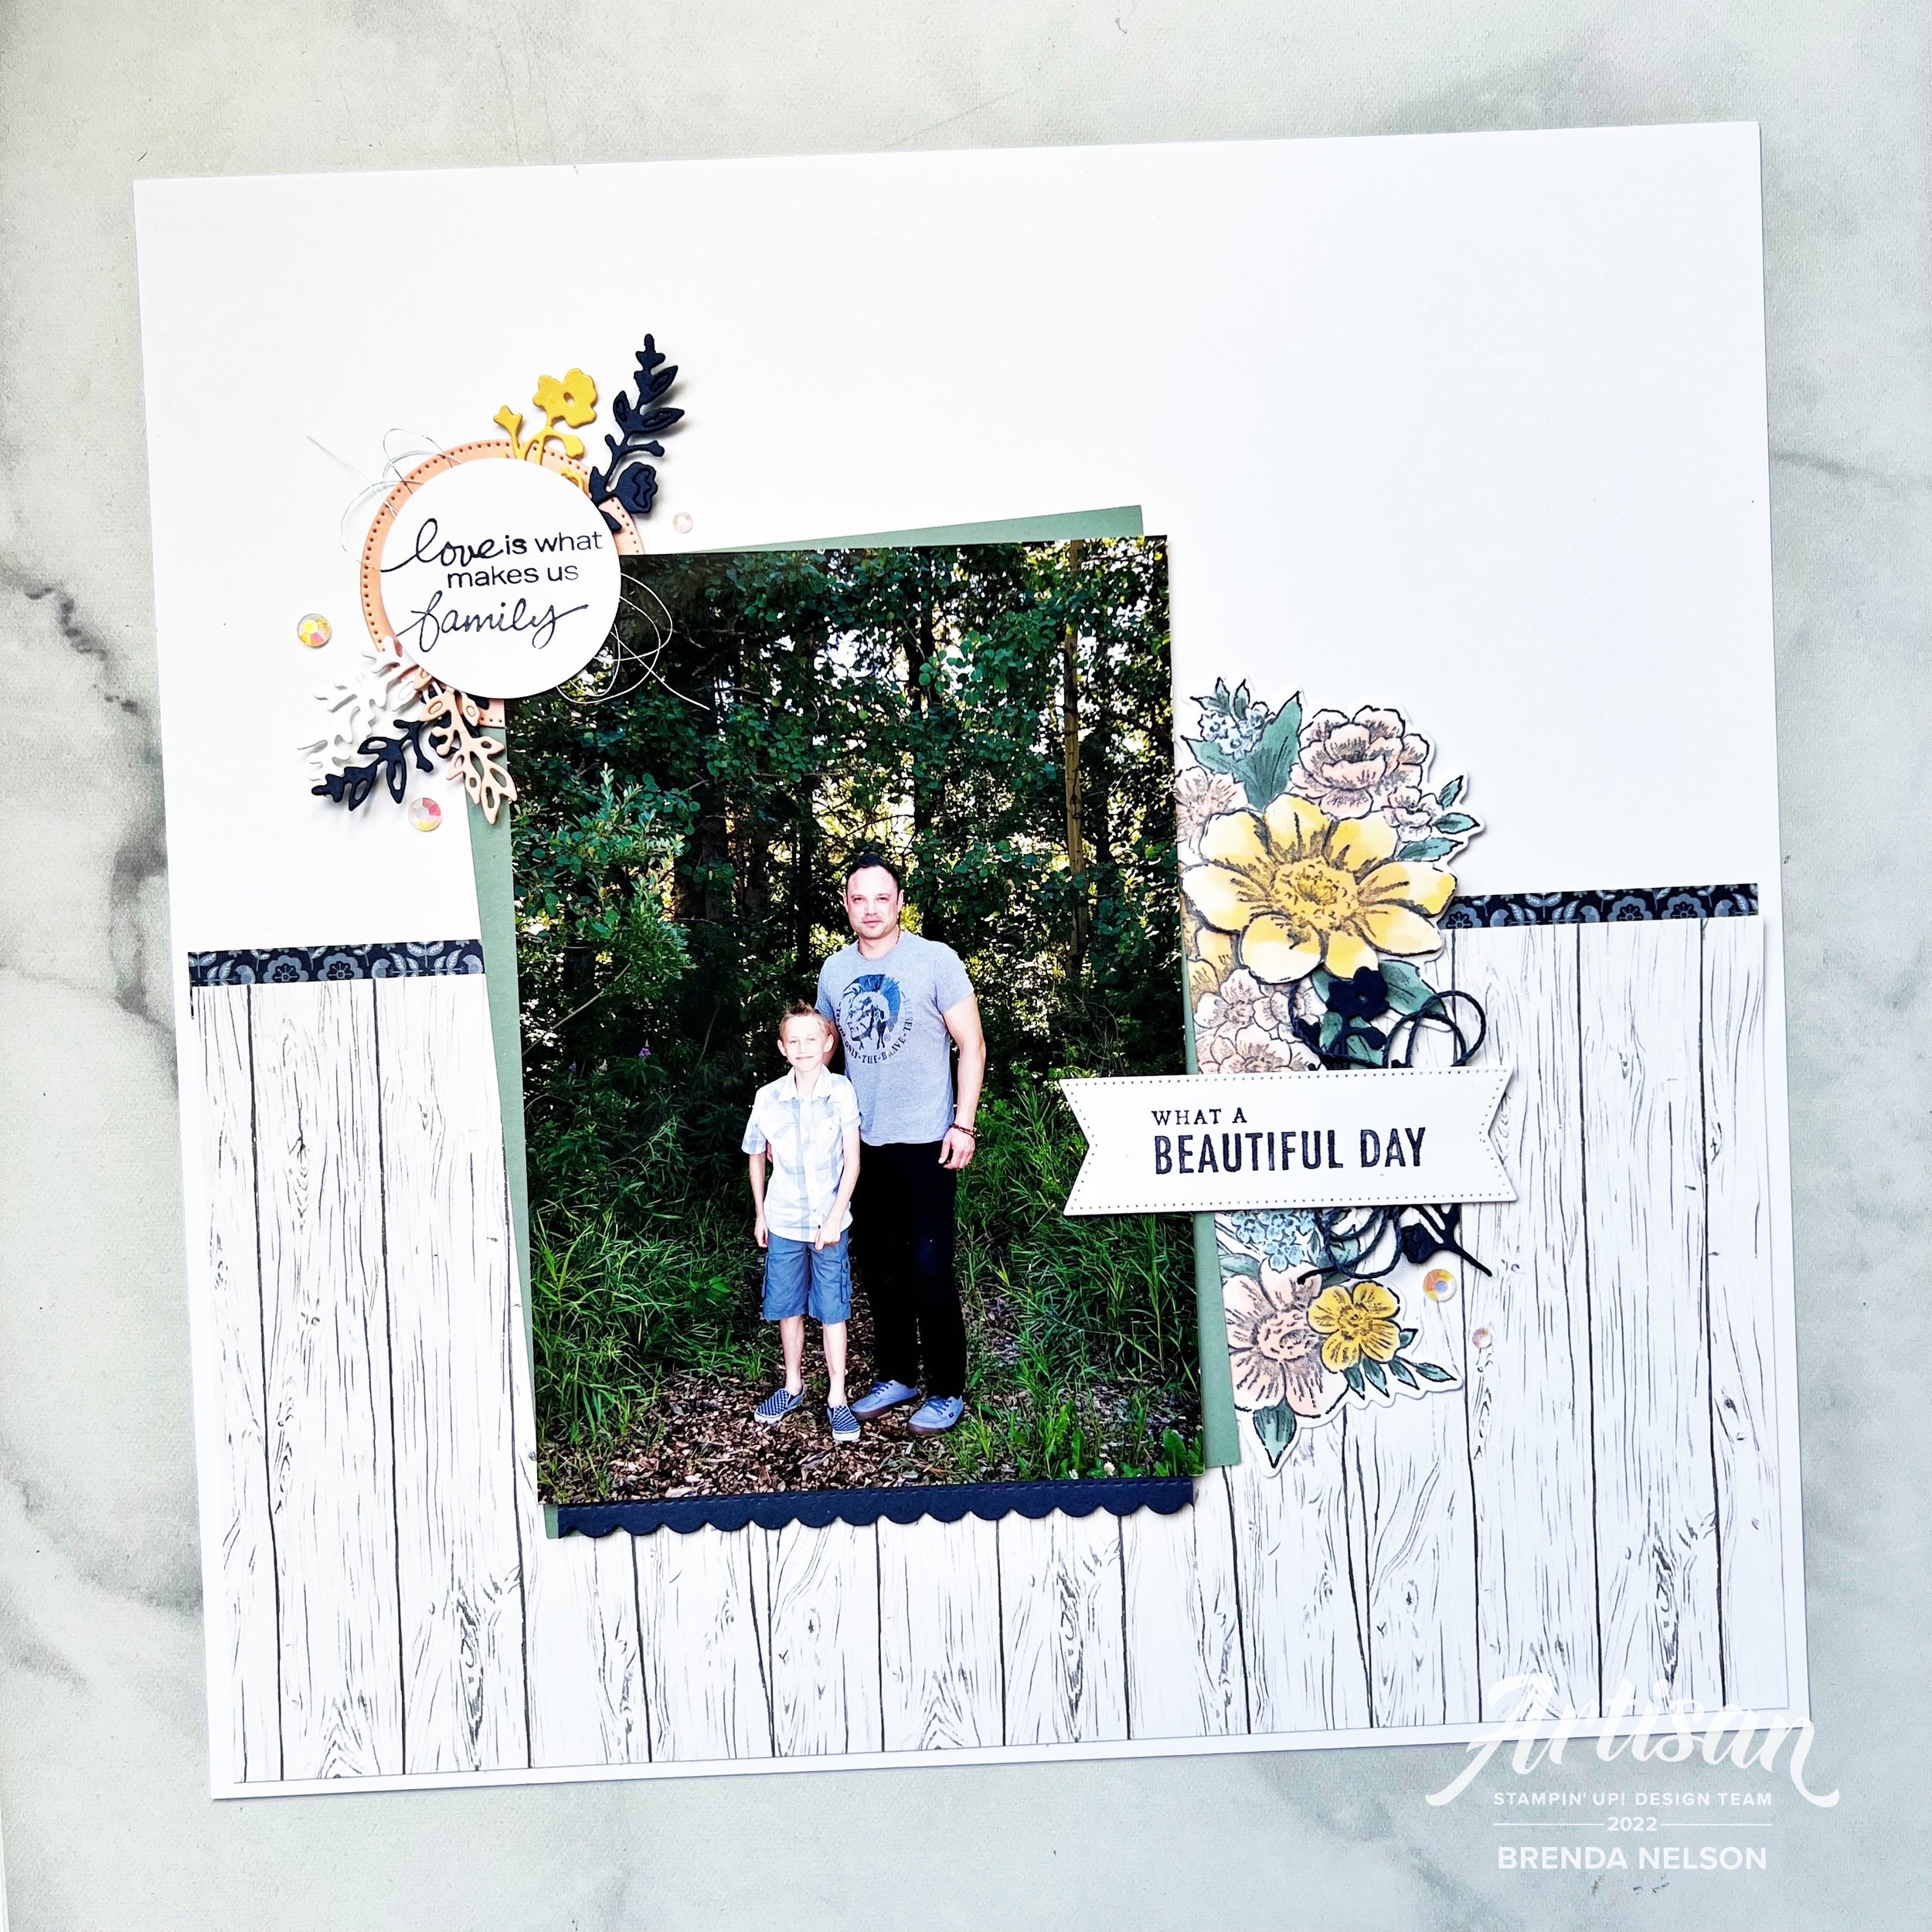
Hello friends! Today I am sharing a fun page I made using some of my favorite RETIRED and current things! In fact, there are more retired items on this page than current! And remember I said I would try and make a page with more than once picture? Well I can now say I did!

This page is on a base of Crumb Cake card stock with the two embossed panels also being Crumb Cake. I used the Timber 3D folder that is current and a really old polkadot folder for the other. Polka dots have really nothing to do with camping or nature…but I like them!

My youngest son and husband recently took a tent camping trip to the mountains in Alberta :)

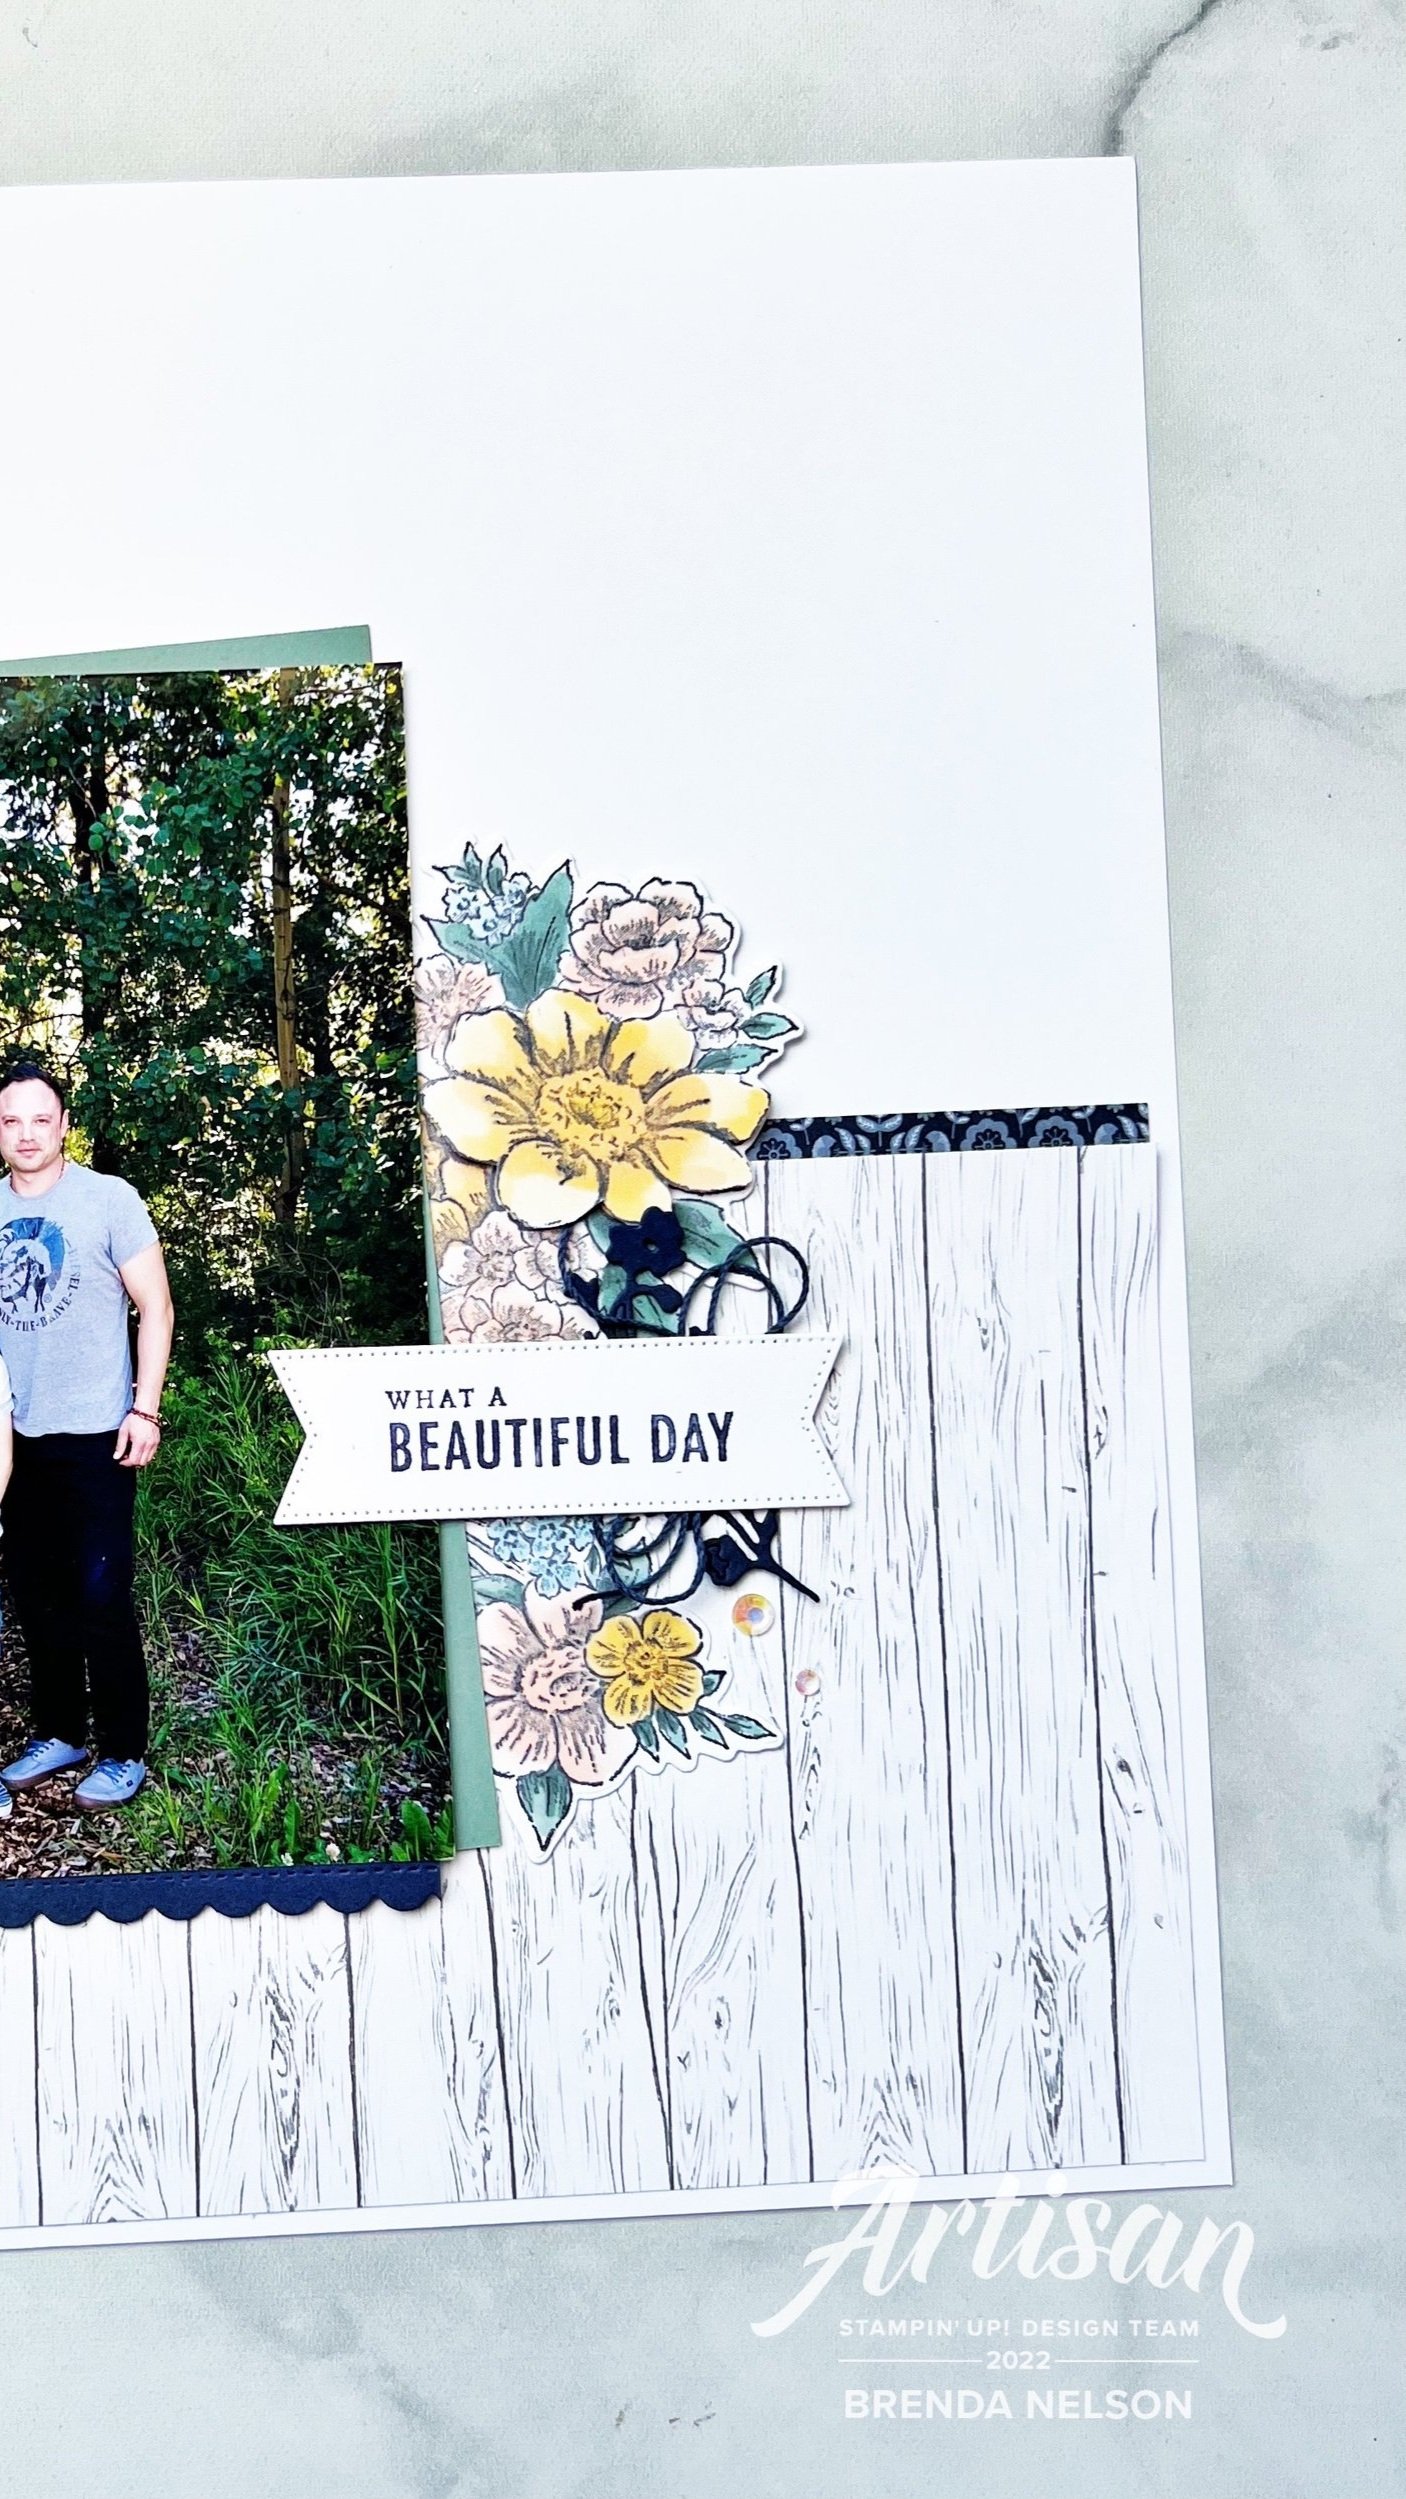
Ridiculously Awesome was one of my FAV stamp sets so I still have it in my collection and I was so happy to pull it off the shelf for this page! I think the sentiment is absolutely perfect for this page and looks so good cut out using the Diorama Dies! I added a little Linen Thread behind as well.

The little clouds added above the trees are from the Waves Dies. I like how these clouds have an embossed design to them versus some of the other cloud shaped dies we have.

Another one of my fav sets is Mountain Air and I am so happy it gets another turn in our Annual Catalogue. It is actually a set I will hang onto no matter what. I love the accompanying Majestic Mountain Dies as I have use the tree dies on so many camping/nature projects! These are cut using Early Espresso and Soft Suede card stock.

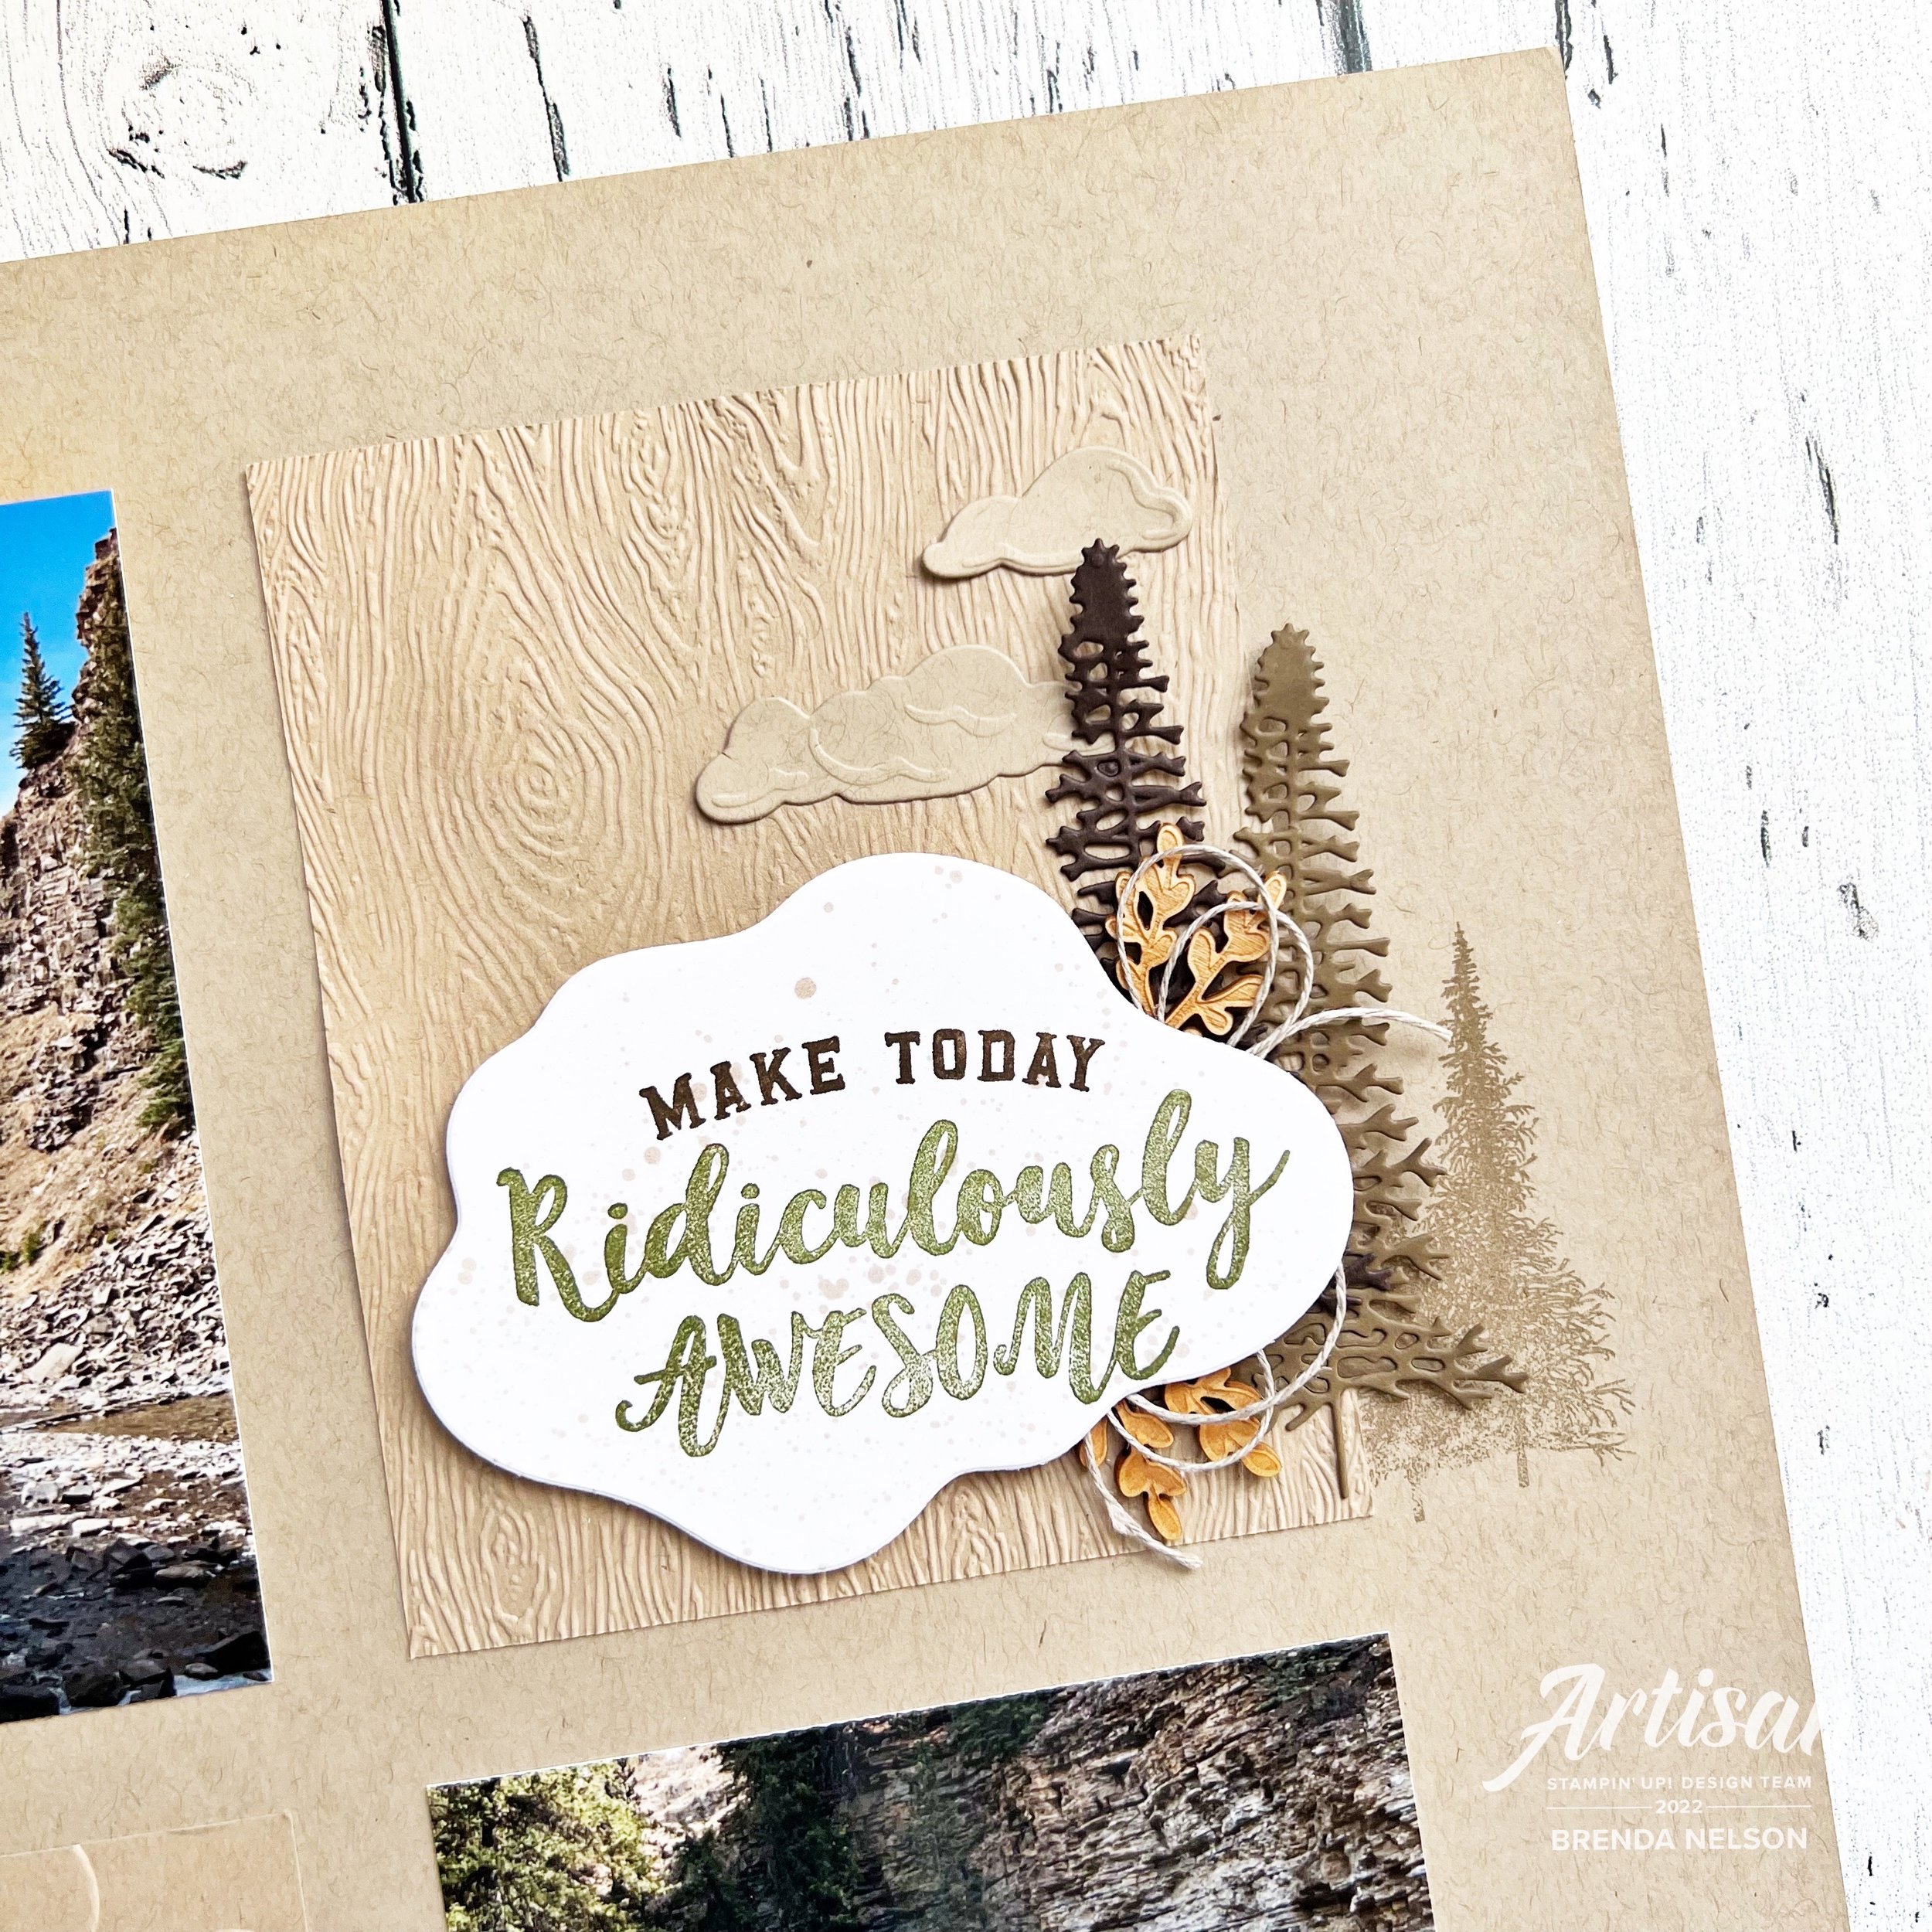
I think the little wooden accents were from In Good Taste and I had just enough in my massive stash to add them to this page!

The trees that are stamped just behind the Timber 3D panel are from the Campology set that is also getting another run in the Annual Catalogue. I stamped it tone on tone in Crumb Cake ink.

I used another retired set on this page too called Travel Log. Basically I keep any sets that have to do with travel and adventure as we don’t always have a current option so I like to have them in my stash for projects like this.

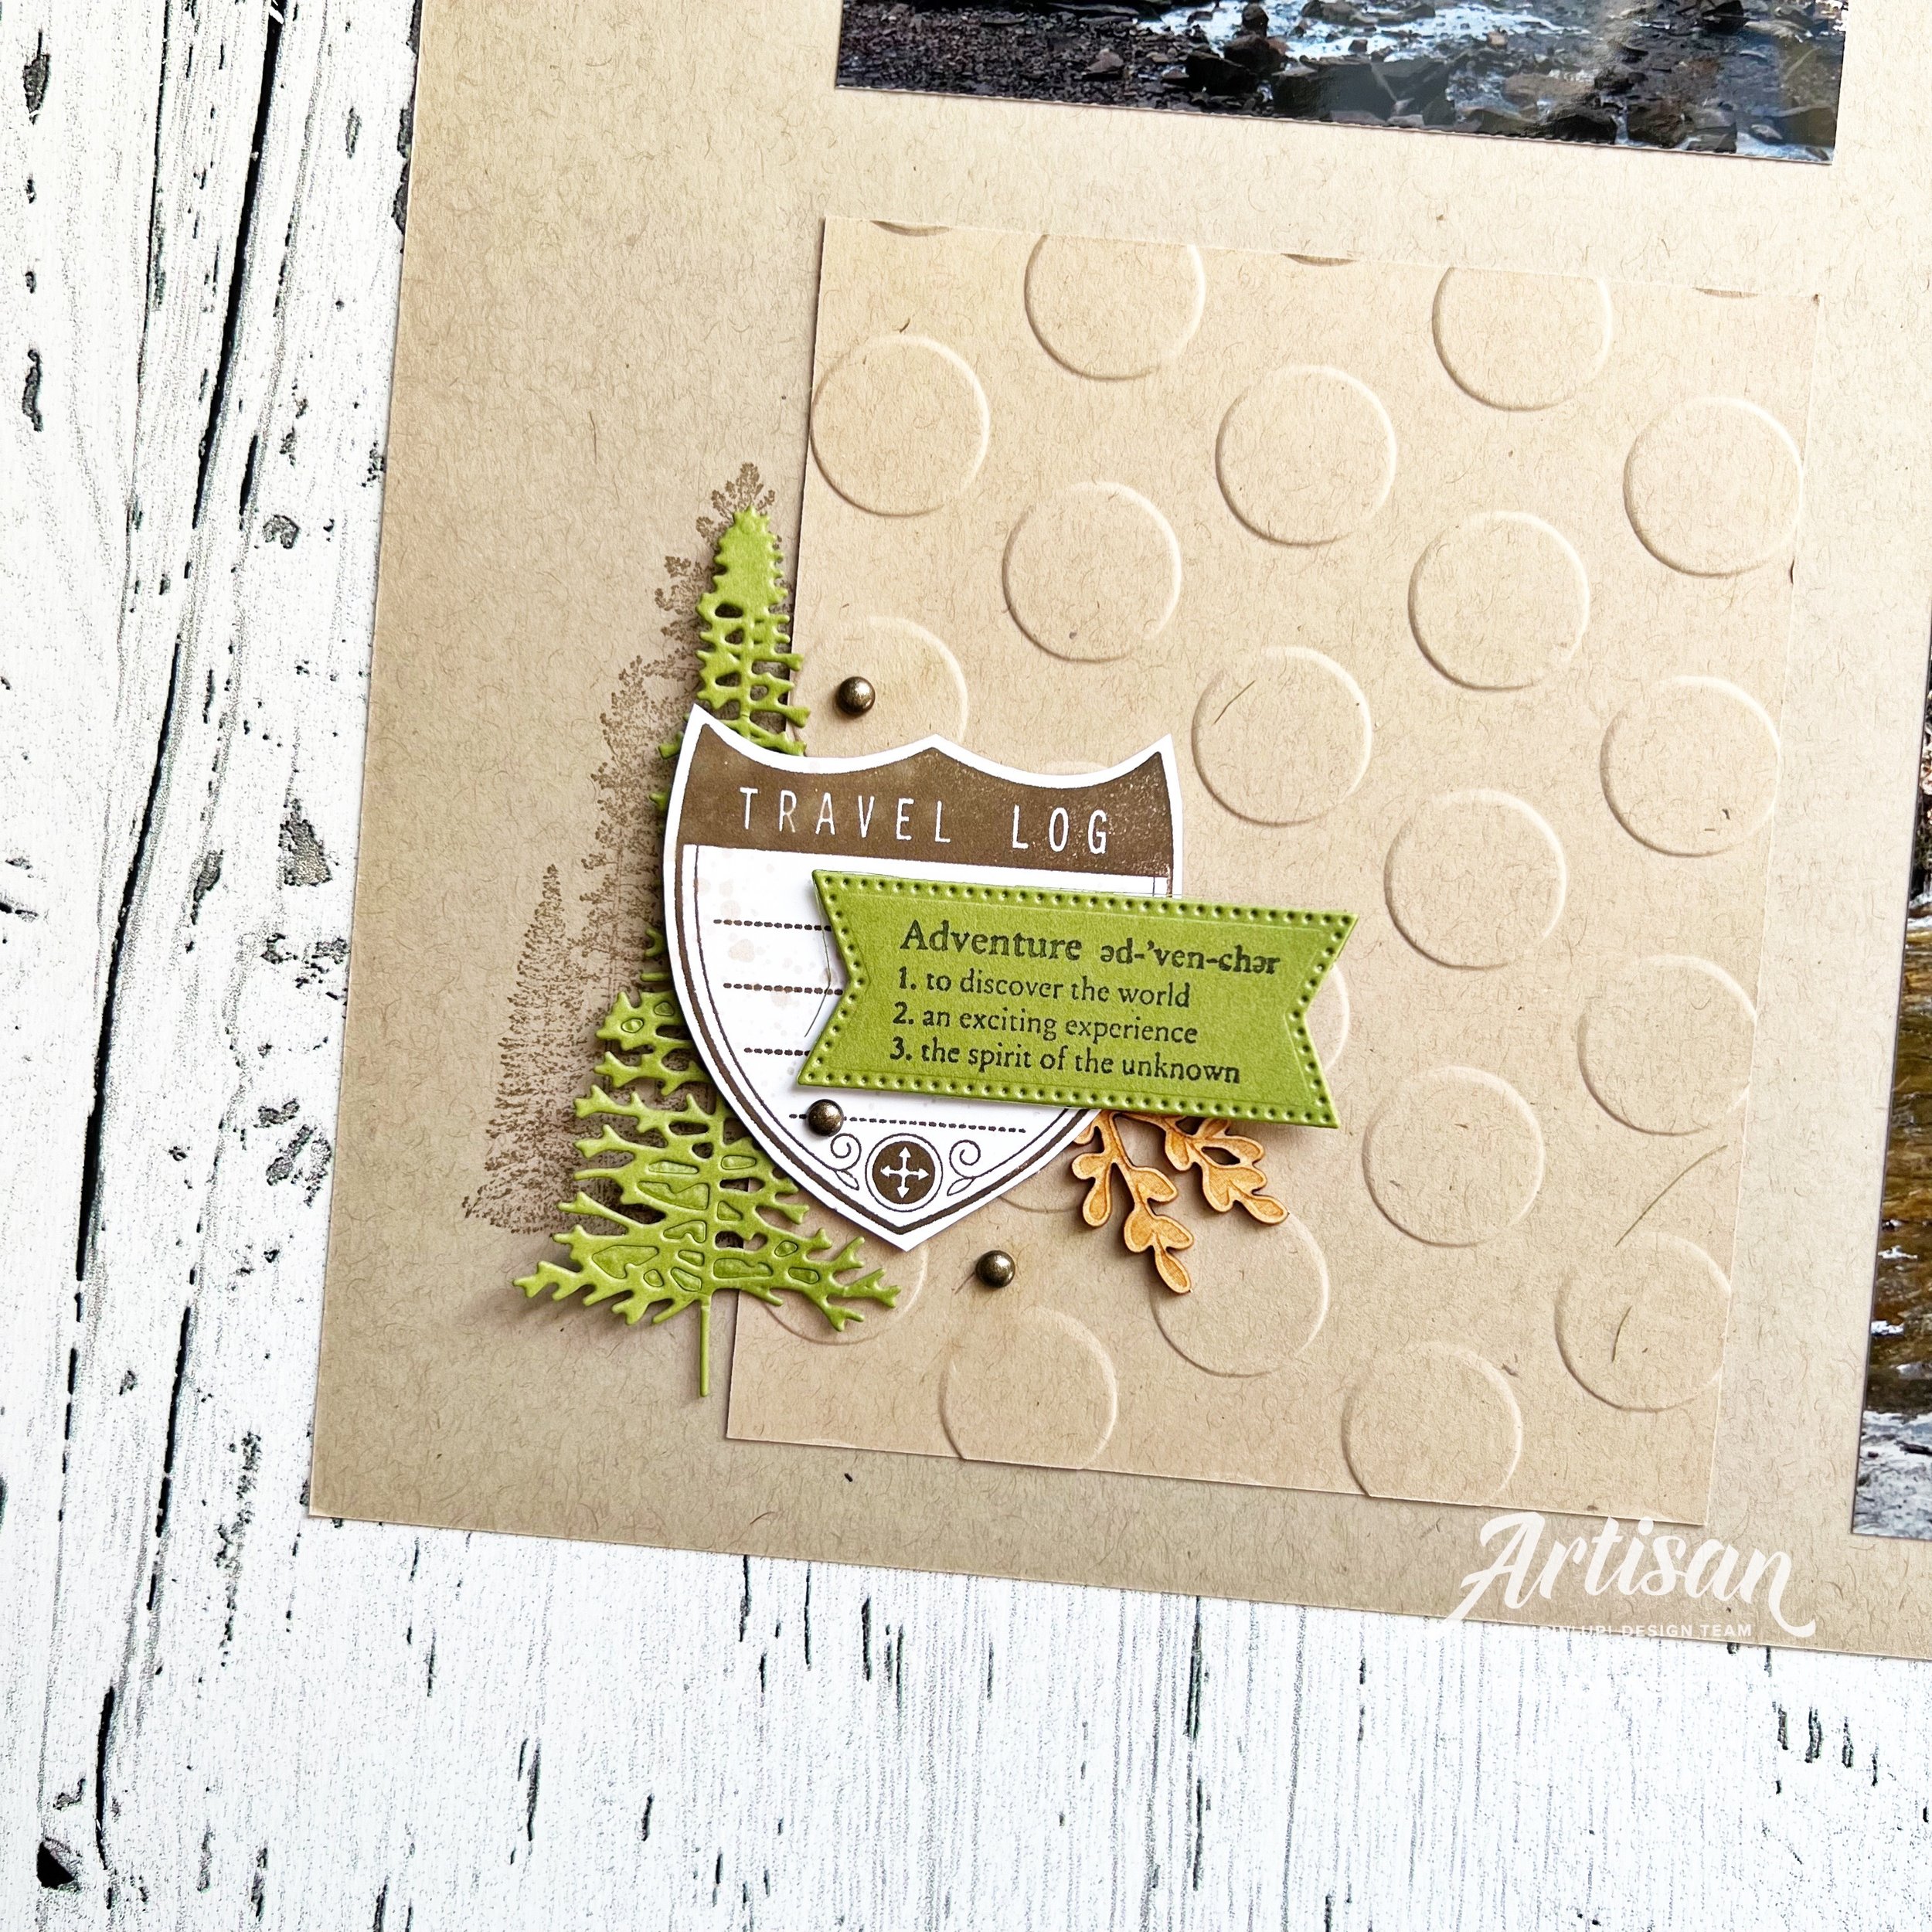
I stamped the trees from Campology again behind the polkadot panel and this time I cut out the fun travel log image by hand. It was stamped with Soft Suede ink and both of my sentiment areas got a flicking of ink using a Crumb Cake Stampin’ Blend. The ‘adventure’ definition is stamped w Mossy Meadow ink on Old Olive paper and is cut using the Stylish Shapes Dies. I also decided to add a wooden element, Metallic Dots and an Old Olive tree to this side.

I really really love how this page came together especially because I made it just for myself! Its not for a class or event display or anything. Just for me and that makes my heart happy as its actually a luxury for me at this point!

I would love to share my passion for scrapbooking with you at one of my many classes! Please reach out!

Seven Days of Scrapbooking--Day #4

Hello friends! Are you enjoying following along? I hope so as I have loved creating these pages and am so happy to share them!

My page today uses Crumb Cake and the awesome Abigail Rose Suite! I love this suite and I am hosting a Summer Stamp Camp with Honeybee Stampers in July featuring this product suite. I will also be offering a ‘Scrapbookers Add On’ class as well post event, so if you are interested please look under my events tab or send me a DM!

What I love about the Abigail Rose DSP is its neutrality and how you can turn it into any color you like by spritzing, blending and coloring. I also love the designs of the flowers and how easy it is to die cut or hand trim them out as well.

This is another picture of my husband and I on the Green Incentive trip. When in Rome, hire a photographer to do a photo shoot!

I think the whole highlight of this page is the DSP—I colored the flowers and leaves in using the ‘lazy watercoloring’ technique. I have coined this term because I honestly don’t always have time to fuss about and color things with Stampin’ Blends. So instead, I smash my ink pad onto one of our acrylic blocks and use my Water Painter to swiftly color things in. You have to be quick and not use a ton of water as this is not water color paper! Keep that in mind!


I used Blushing Bride and Old Olive to color in these flowers. I actually hand trimmed them because I wanted to cut a little closer to the line I also layered the flowers by cutting out just a few individual flowers and adding them over top of a larger image.

The sentiment is stamped in Blushing Bride as well and I die cut it with a shape from the All That Dies. I added a little Heart Pearl beside the phrase and some Linen Thread underneath.

I stamped some of the large flowers from Cottage Rose on the base of the page in Crumb Cake ink and added some die cut flowers and leaves in and around my colored DSP flowers. A few of the retired Metallic Dots were a perfect addition.

Everything is concentrated on the right side of this layout and I love how the flowers sort of cascade down much like the greenery in our photo. Tucking die cut shapes in all the layers also helps develop texture as well.

I love this page and hope you are enjoying everything being shared so far! Please feel free to join in by using the tag #sevendaysofscrapbooking and following my Instagram Stories to see what everyone is making! You will be amazing and hopefully inspired to start your own creative journey!

Seven Days of Scrapbooking--Day #3

Are you having fun yet seeing all of these amazing scrapbooking projects? I know I am beyond inspired by what everyone is sharing and creating! Make sure to check out my Instagram Stories each day for a recap of what everyone has shared!

Today I am sharing a page that uses one of my favorite bundles. It was originally shared in our January to June catalogue and is now available in our Annual Catalogue for 2022/23—the Blessings of Home Bundle I don’t even know how many packages of the Heart & Home DSP I have ordered!

I am trying to be strategic about the pages I share during this challenge so you can get a sense of my scrapbooking style. I teach a variety of classes each month so if you are local to Edmonton, I would LOVE to have you come scrapbook with me. Please reach out if you are!

Would you believe that this handsome little boy is graduating TODAY! Be still my heart and time, please slow down (I think every mom in the history of moms has wished for this).

The base of this page is a nice crisp Basic White and I layered a good sized piece of DSP from the Heart & Home collection along the bottom. The DSP needed a defining edge so I stole a nice piece of a Night of Navy design from the recently retired Sweet Symmetry collection. The photo mat is Soft Succulent and there are die cut and colored images in Petal Pink and So Saffron.

Who says boys can’t be scrapbooked with flowers? I do it all the time!

The sentiment “Love is What Makes us Family” is from the enduring stamp set Lovely You. Now its original form was not going to work in a circular shape so I used my Stampin’ Write marker in Night of Navy to modify it. It is layered on a Petal Pink circle from the Stylish Shapes Dies with some retired Metallic Thread behind. Now, truth—Metallic Thread was probably my favorite embellishment of ALL TIME. When it retired…well I won’t even disclose how many rolls I bought. If you want to sandbox bringing it back, please DO!

Of course I also had to add some die cut flowers and sprigs around my sentiment and I did so with the Flowers of Home Dies and finished off this little section with some Iridescent Rhinestone Basic Jewels.


I love this large floral image from the Blessings of Home stamp set. I think our Concept Designers did such an amazing job with it. I colored it in m Stampin’ Blends and then stamped it a second time to color in the large So Saffron flower again to pop it up on Dimensionals. This just gives it a bit more of a dynamic look and feel.

The original sentiment has ‘for love’ underneath which is a beautiful sentiment but it didn’t work for the content or picture on my page. Remember how I shared I always let my photo guide my design?

I used the Stampin’ Write marker again to just modify the sentiment. I added a second small stamped and colored flower below the sentiment to fill in the whole side of the photo mat.

A bit of twine and a die cut flower underneath my sentiment finished it off nicely,

I hope you are enjoying everything I have shared so far! Please feel free to check out my page Gallery and leave me any comments you may have!

Seven Days of Scrapbooking--Day #2

Hello friends and welcome back! If you missed the dozen amazing scrapbooking projects shared yesterday on my Instagram Stories just search the hashtag #sevendaysofscrapbooking and you can see all of the amazing projects! I am really excited to share my page today as it focuses on the Textured Chic Memories & More cards. I used these card packages quite frequently to make traditional scrapbook pages and I hope this sparks a creative idea in yourself!

With a few additional supplies I was easily able to make this amazing page to capture this moment in Rome with my husband. This picture was taken on the Greece Incentive trip using a photographer we booked through Flytographer and was one of the best experiences we have ever had on a holiday!

Fun Fact: We were at our photography location at 6 am to take these pictures! It was worth the early hour to not have a soul around in our pictures!

Let me start by saying what I LOVE about our Memories & More cards—the thickness and style of the cards, a little stiffer than our regular card stock and DSP so they immediately add texture. The VALUE of the cards is amazing! You get double of everything which allows you the freedom to cut up a card and layer it if you need to (on the word ‘days’ for example), and finally the variety of phrases and sentiments in the collection of cards. I find there are some really unique sentiments not found in our stamp sets. And the concept designers have been knocking the collections out of the park over the past few catalogues!

And if there are coordinating Cards & Envelopes, make sure to get those too! I often use them as layering pieces—the envelopes are decorative so cut them apart for layering!

For this page I actually did add in a few stamped florals and greenery from the Framed Occasions stamp set so this is actually a hybrid project of sorts. The top left corner of this page truly represents all that I love about M&M cards. For example, I have die cut a circle using Petal Pink card stock and the Stylish Shapes dies and on top have added a sticker (yes! the cards come with stickers too which is brilliant) and then CUT APART one of the 3x4 cards to make a whole new sentiment. I layered some of the new Natural Finish ribbon behind along with some stamped flowers, another sticker and the cute little Flower Trinkets!

On the bottom left of the page I used 2 more stickers (like seriously, how perfect are they?) that I mounted on a piece of Mango Melody card stock and part of the M&M card that was left over after I snipped out those words. Don’t let anything go to waste! A couple more flowers and some greenery tied this area together with the first one—this is a design key. You always want to have repeating elements on your scrapbook page (in my opinion or style of memory keeping at least). :)


My favorite thing to do with this style of memory keeping is to cut one of the duplicate cards apart to layer on top of the original. By adding ‘days’ that is hand cut and popped up with a Dimensional we have truly brought this one dimensional card to life. And don’t get rid of the extra left over, if you look along the left side of the photo mat I have tucked it there to bring this color across the page! Its a pro tip for sure!

I also added a few of the Elegant Faceted Gems to this section with more stamped flowers and a Flower Trinket. Its the best way to add this color trio over to this side of the page.

If you haven’t tried Memories & More cards yet on a traditional scrapbook page I really encourage you to give it a try! The investment isn’t steep and its fun to play around with the many card options in your design!

Make sure to check out my stories so you can see what everyone else is creating and sharing! If you are in Canada and would like to order anything, please visit my store with sincere thanks in advance and send me a message if you are interested in joining in any of my classes!

#sevendaysofscrapbooking

Seven Days of Scrapbooking--Day #1

Hello all of my friends! I am so happy you are here to spend Seven Days of Scrapbooking with me! Some of my crafty friends and I were talking about my A Card a Day in May Challenge and got on the topic of scrapbooking and how fun that would be to make a page a day! Well I don’t have the luxury of that amount of creative time but we thought that Seven days could be manageable! So make sure to follow my Seven Days of Scrapbooking on Instagram and here on my blog!

I also have a Scrapbooking Gallery that you are welcome to enjoy!

My first page to share with you just makes me so happy! I love the colors of the page and the picture is one of myself and my kids at our local zoo. Memory keeping is honestly the best thing I have ever prioritized in my life. I would rather make scrapbook pages than cards and I truly cherish my many many many albums I have created over the years.

The most important things we have in life are the people we have and the memories we make together.

I miss this fun age of my kiddos! Time goes too quickly and with my son graduating on Friday, I am definitely feeling all the feels!

The base of this page is Pool Party (one of my fav colors) and I used our new Hostess Designer Series Paper—Design a Daydream to guide the color palette.

I stamped some flowers from the Fresh Cut Flowers stamp set in the background (do not overlook this stamp set in the new Annual Catalogue) in Pool Party ink so it was a subtle detail to flank my photo. I have noticed that I tend to use 5x7 photos the most frequently in my designs. So I am going to challenge myself during this Seven Days of Scrapbooking to break free from that.

The rest of my design is a mash up of the Sweetest Cherries and Sending Smiles stamp sets.

The little teeny hearts are from the Teacup Dies and the adorable Heart Pearls!

I tend to create what I called ‘Vignettes’ to support my photos. After all, my picture is truly the most important thing on my page and I rarely create a page without a photo! My photo completely guides my design process.

So for this page at the bottom right I decided to create the sentiment “Life is Sweet with you in it” from the Sweetest Cherries stamp set. In fact when I am picking stamp sets to purchase I do look at them through the lense of scrapbooking and how I can incorporate them into page design.

The ‘Life is” portion of my sentiment is die cut using the Teacup Dies. I also stamped the floral image from Fresh Cut Flowers onto the circle (cut from the Stylish Shapes Dies) to tie in the imagery with the background of my page. This is a subtle way to take away the ‘whiteness’ of the Basic White circle as well.

Because this picture was taken during the summertime I also wanted to add some greenery so I reached for the Forever Flouring Dies to cut some shapes in Old Olive and the Vellum Layering Designs.


At the top left corner of my page this little ‘vignette’ also includes the Forever Flourishing Dies along with the new Natural Finish Ribbon and sentiment from the Sending Smiles Bundle.

Both vignette areas have elements that repeat for connection and a cohesive feeling on the page.

I hope the Seven Days of Scrapbooking encourages and inspires you to make some pages for yourself! And if you live in the YEG area, I teach tons of scrapbooking classes each month. Please message me if you are interested in getting started or joining in the fun!

If you need any supplies, please consider shopping with me so I can continue to do what I love!

Check back tomorrow to see another scrapbook page!