Color Fusers--October Blog Hop!
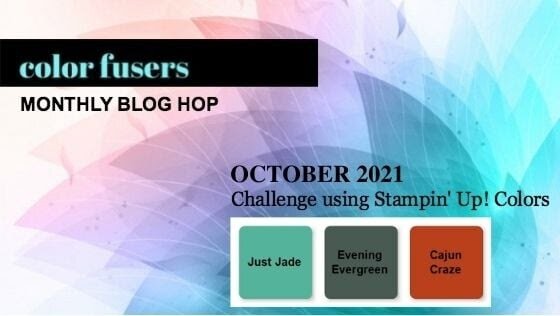
Hello friends! Welcome to the most SPOOKTACULAR month of the year! Our Color Fusers Blog Hop this month is featuring the color combo of Just Jade, Evening Evergreen and Cajun Craze and it was a good challenge to create a Halloween Project—since that is the theme of my blog this month!

colorfusers oct.jpeg

The project I created to share this month is a mashup of the Detailed Pumpkins Dies, the Adorning Designs Decorative Masks and the Banner Year stamp set. All of these elements came together to create a unique Halloween card!

final (1) 7.jpg

I started with a card base of Just Jade and used one of the masks or stencils with my Just Jade ink pad and Blending Brush to create a fun tone on tone design on my card front. I also angled the mask so that it was a diagonal for something a little bit different!

I cut a thin strip of Evening Evergreen card stock and attached it following this diagonal to bring more attention to that detail. After I stamped out the sentiment, Happy Haunting (in Evening Evergreen ink) I used the same stencil over top with Just Jade ink. This is a really fun way to jazz up your sentiments and to blend these two greens together. I added some retired Cajun Craze Twine (I seriously need to quit being a hoarder) and some of the new awesome Chevron Evening Evergreen Ribbon behind the sentiment.

final (4) 5.jpg

The two Cajun Craze pumpkins are from the Detailed Pumpkins Dies. Both of the dies, in their original form, have area that you can ‘see’ through. I wanted my big pumpkin to be more solid so I glued it to another piece of Cajun Craze card stock and then trimmed around the edges with my paper snips!

final (1) 8.jpg

Bling makes everything better of course, so I couldn’t resist adding some In Color Jewels in Evening Evergreen for a little sparkle!

If you are just joining our awesome hop here you can go back to see what my fellow Artisan Design Team member, Tami Hewlett, has designed or you can keep going forward and loop around. Next up on the hop is the amazing Melanie Hockin!!! Whatever route you take I hope you visit everyone along the way!

Happy Birthday Summer!

Yesterday we celebrated a milestone birthday at our house! My daughter Summer turned 13, which means I am the mom to two teenagers now! Honestly, how did that happen so fast?

So obviously I needed to make her a special card for her birthday. Pear Pizzazz was the perfect color to coordinate with her Baby Yoda birthday cake we had made and all of my birthday celebration decor was gold so that is where my color palette came from.

final (1) 2.jpg

I wanted to make a shaker card for Summer as something extra fun. The inside ‘shaker’ stars actually came from my wedding, which was 21 years ago! I recently came across some wedding decor I had stored in a box and I had a whole container of these stars which we had used to sprinkle on our head table. I am really glad that I saved them for so long! hahaha! They finally came in handy!

final (5) 2.jpg

As you can see, I used the Stitched Rectangles to cut the ‘window’ for my shaker card and layered a Window Sheet behind. I used the Foam Adhesive Strips to elevate the front panel.

On the base of the card I stamped “You Are Amazing” using the retired stamp set of the same name. The sentiment “Happy Birthday” is from Itty BItty Greetings and I used a retired punch that I modified to create just the perfect size for my greeting. I love punches that can work beyond what you initially see or think.


I ran the first window layer through the Timber 3D embossing folder before I put the shaker aspect together. I love this folder and find it so versatile.

My 13 is cut from the another retired die set that I will keep forever and ever! Sometimes you need to hang onto the dies that don’t come around very often, you never know when they might come in handy!

Behind the 13 I layered a Basic White circle and some Gold Fine Art Ribbon with some Linen Thread and Gold Metallic Thread. I finished off the front with some Gold Shimmer Gems.

final (9) 5.jpg

I was really happy with how this card turned out especially because I felt under pressure to make Summer a really special card to celebrate this milestone birthday!

September Class to Go Kit!

Hello friends! Wow, what a summer right? Its officially fall, Pumpkin Spice season, sweater weather, and my favorite time of year for crafting! I don’t know why, but I just love the colors of fall, they feel cozy and like home. I grew up on the prairies and fall is absolutely gorgeous. I got married in September and the leaves had started turning but the weather was still warm!

I think all of these things helped to inspire this September Class to Go Kit featuring the Harvest Meadow Bundle found on page 54-55 of the Holiday JJ 2021 Catalogue. This gorgeous Thank You card project features fantastic embellishments such as vellum, Gold Foil paper and Metallic Dots. It is a perfect gift to give or to have waiting at your Thanksgiving table!

final (13) 3.jpg

Historically my Class to Go Kits have only included a written tutorial with photos, however, in the spirit of trying something NEW I am going to make a video of how to assemble these gorgeous projects as well! SO you will get both options with all 3 registration options. Only 3 ink pad colors are required to make these amazing cards—Calypso Coral, Bumblebee and Soft Suede!

Option 1: Stamp Set Only $39. This option includes the Nature’s Harvest stamp set and supplies to create 2 of each card shown, for a total of 6 cards. You will receive all of the die cut pieces and embellishments

Option 2: Bundle (stamp set and Harvest Dies) for $82. You will receive all of the card making supplies PLUS the Kraft Gift Box and products to make the belly band! This is an amazing add on value!

Option 3: Kit Only $25. This option includes only the materials you will need to create the cards and the Kraft Gift Box.

final (10) 4.jpg

As you can see this is a gorgeous Thank You card project. The design of the cards provides you with inspiration for further crafting projects and the Kraft Gift Box has become one of my favorite projects as you will see over the month with some other projects being shared on my social channels!

I can ship this kit for a nominal expense anywhere in Canada or you can partake in local pick up! Please bear with me as I am working to get my website more order efficient. In the meantime, leave me a comment or click on SIGN UP NOW and I will reach out to you with payment arrangements. You can message me on Instagram @stampwithbrenda or by email at bsparkles@me.com as well!

Around the World on Wednesday--Let's Shake Things Up!

Our theme this month is NOT a shaker card, well it could be, but it is really to shake up your creativity by creating something new with a technique or such that you have not tried in the past. This was the perfect time for me to experiment with the Alcohol Stampin’ Blends technique that is super popular!

91442295_10216484369808661_2887014979863576576_n.jpg

I want to thank my friend Alanna Wharf as she shared how to create this technique during a recent Summer Stamp Camp that I was co-hosting and it inspired me to try it out! I wanted to use this Blends technique on a holiday card—tis’ the season! Okay, well it is still summer but you can never be too ahead for the holidays!

final (31).jpg

The base of my card is on Shimmery White and you must use Vellum to create this alcohol Blends technique. You also need a Stampin’ Blend in a color (s) of your choice, in my case I used Light Cherry Cobbler, and some Isopropyl Alcohol (or Rubbing Alcohol). I used an old Aqua Painter (I knew I kept those for some reason, haha!) to apply drops of the Isopropyl Alcohol. The internet is full of a ton of videos (not my specialty) on how you can execute this technique. It is surprisingly easy!

I created my little area and then cut the star shape from the Seasonal Swirls Dies in Cherry Cobbler card stock. I added some yellow stars from the Jolly Felt and Christmas Cheer Dies. I was so happy that felt returned to the Holiday Catalogue this year again!

“Jingle” is from the Holly Jolly Wishes stamp set—this is a fantastic stamp set full of holiday greetings!

Here is a close up of how fun this technique looks like.  I will definitely be experimenting with this technique again!

Here is a close up of how fun this technique looks like. I will definitely be experimenting with this technique again!

I wanted to create another fun little area at the top of my card and one of my favorite little dies as the moment is the ‘ticket’ die from the Bloom Dies in the Annual Catalogue. I used it to cut some of the Sweet Stockings DSP and then trimmed the ticket down in size. I found “Happy Christmas” in the Words of Cheer stamp set.

Another little felt star and some Matte Decorative Dots completed this fun little area!

Another little felt star and some Matte Decorative Dots completed this fun little area!

I don’t typically add anything to the insides of my cards, but I thought it would be fun in this case to add the complete ‘Jingle’ phrase and another star die cut.

final (32).jpg

I can’t wait to see what the rest of the Around the World Design Team creates based on this theme! I love how you can ‘Hop’ all over the world to see everyone’s unique styles! I live in Edmonton, Alberta, Canada! Tricia Butts is up next and resides in the United States. Click on the button below to hop to her page!


Color Fusers--August Blog Hop!

IMG_0110.jpg

Hello friends and welcome to another fun hope featuring the Color Fusers Design team and this awesome color combo! I really love purples and Just Jade has been permanently living on my craft table lately so I was super excited to create something with these four colors!

final 13.jpg

This card is all about the layers beginning with a base of Basic Grey! I cut a base layer out of Basic Grey as well and stamped some little flowers from the In Bloom stamp set in Basic Grey ink. A great tip for background stamping is to add all of the images , in this case little bitty flowers, on the block at once! It is a great time saver!

final 14.jpg

This card is an eclectic mix of items from the Annual Catalogue, the July-January Holiday Catty and Sale-a-bration! I just couldn’t resist using a little bit of something from all three of our publications!

The next layer on top of the Basic Grey is some Just Jade DSP from the Penguin Playmates collection in the Sale a bration catalogue. Off set to that I added some Basic White card stock that I ran through the new Timber 3D Embossing Folder from the July-January Catty and lastly, the Highland Heather DSP print is from the Hand-Penned collection.

final 10.jpg
 

Have you ordered this new Highland Heather 1/2 Grosgrain Ribbon yet? If not add it to your cart now! I love the shimmer to this ribbon and its easy to fold and tie and was the perfect add on behind the sentiment “Congrats You’re so Fancy Now”.

I die cut flowers from the Pierced Blooms dies in Gorgeous Grape and Highland Heather. A few of the purple toned pearls from the Pastel Pearls were an awesome finishing touch!

I also die cut some leaves for a little more Just Jade using the In Symmetry DSP and the Pierced Blooms dies.

final 8.jpg

I hope this card inspires you to play around with this fun color combo. If you look through our many fantastic Designer Series Papers you will see how many awesome options you have to create with!

Up next on the Hop is Melanie! I love her style and am always inspired by her creations! You can visit her next by clicking on the button below!

If you are just joining in her too you can always go back and see what Bonnie has designed as well! Either way, make sure you go all the way around our Design Team!