Country Sunflowers

I hope you have been enjoying my “A Card a Day in May” challenge. This is a personal challenge that set for myself to stretch my creative wings! It has been a source of excitement for me every day, getting into my craft room, expanding my blogging skills, and finding joy in this time of quarantine.

My 26th card features the Celebrate Sunflowers stamp set again (I couldn’t resist) and this time I coloured it with Calypso Coral, Pumpkin Pie, Soft Suede and Bronze Stampin’ Blends.

The card base is Soft Suede and I ran the Whisper White Layer through the Coastal Weave embossing folder. Sadly it is not carrying over into the new catalogue :(. I used a 2 1/2 circle punch to create a bit of a peek-a-boo window to layer a piece of the In Good Taste DSP behind. I chose one of the soft light natural wood pieces of DSP. I wrapped a bit of linen thread around the window for a bit of rustic feel.

The sentiment comes from the ‘A Wish for Everything’ Bundle which will be available in the new catalogue.

 
final.jpg
I felt like colouring the sunflower in this way gave it a bit of rustic or country feel

I felt like colouring the sunflower in this way gave it a bit of rustic or country feel

Double Front Card

It has been a while since I have made a Double Front Card (at least that is what I know it as) and I thought I would kick off the last week of my “A Card a Day in May” challenge with something fun! I also used all new products on this card as well and am so happy with the end result!

The base of my card is the new In Color, Cinnamon Cider which is cut to 6 3/8 x 5 1/2. Score at 4 inches on the long side. I cut a layering strip of Cinnamon Cider card stock to 1 7/8 x 5 1/4 which I ran through the new Tasteful Textile 3D embossing folder. This adhered to the little flap on the base of the card front.

The base for the inside card, Whisper White, is 8 x 5 1/2 scored at 4 inches on the long side.

I cut two pieces of Misty Moonlight to 2 3/4 x 4 1/4 for the front and inside decorative panels.

Cut two pieces of Whisper White to 2 1/2 x 4 to layer on top. This is where I did my fun stamping!

On the inside flap I added some DSP from the Flowers for Every Season 6x6 stack. It is 2 x 5 1/4. I added a second little strip to the card base which peeks through when the card is closed. It is 1 x 5 1/4.

Adhere the Whisper White card base to the Cinnamon Cider base making sure to keep a little bit of space between the folds. You can then add the two Misty Moonlight panels making sure that the second one (attached to the Whisper White base) is hidden behind the first one. Embellish your card as desired!

I used the Lovely You and Field of Flowers stamp sets on my card. The sentiments on Just Jade are stamped with Versamark and embossed with Clear Embossing Powder. I cut both out using the Tasteful Labels dies.

I added threads behind my sentiments that I deconstructed from the open weave ribbon found in the Forever Greenery Trim Combo pack. It might just be my favourite new trick. I have to replace that Metallic Thread with something! And finally the little green gems on the front are from the Flowers for Every Season gems collection. They really do finish off the front panel.

 
final.jpg
This is the inside view of the first panel.  You can see how I added in the DSP and have attached the two Misty Moonlight panels so they line up.  The second one is hidden until you open the card.

This is the inside view of the first panel. You can see how I added in the DSP and have attached the two Misty Moonlight panels so they line up. The second one is hidden until you open the card.

And finally the next flip takes you to the back base of the card where I included another sentiment found in the Lovely You stamp set.

And finally the next flip takes you to the back base of the card where I included another sentiment found in the Lovely You stamp set.

Isn’t the detail in the thread and gems just the perfect touch? It really elevated the sophistication of this card!

Isn’t the detail in the thread and gems just the perfect touch? It really elevated the sophistication of this card!


Miles Apart

The sentiment on today’s card, my 24th card this month, is even more meaningful in the times we are living. Like many of you, I have not seen alot of my friends in the past couple of months. I have tried to stay connected by sending cards. So far, since March I have mailed over 170 cards to friends, coworkers, family members, to senior centers, and more! So I feel especially connected to this sentiment.

You can find the sentiment in the Lovely You stamp set which will be released at the start of June. I paired it up with the In Good Taste paper stack. It is photographic Designer Series Paper in various wood, tile and texture prints in neutrals. I cut them into strips of various widths and adhered them in an overlapping pattern. The sentiment is also stamped on a strip of DSP.

I added a vellum circle that I stamped and embossed in Whisper White the little stem from the stamp set. I stamped it once more on Grey Granite and fussy cut it out. I added a few of the clear gems from the Flowers for Every Season Gems collection. They almost look like a water droplet on the card! I love the 3D effect that they add.

final 31.JPG

You are my favourite! Create with Connie and Mary

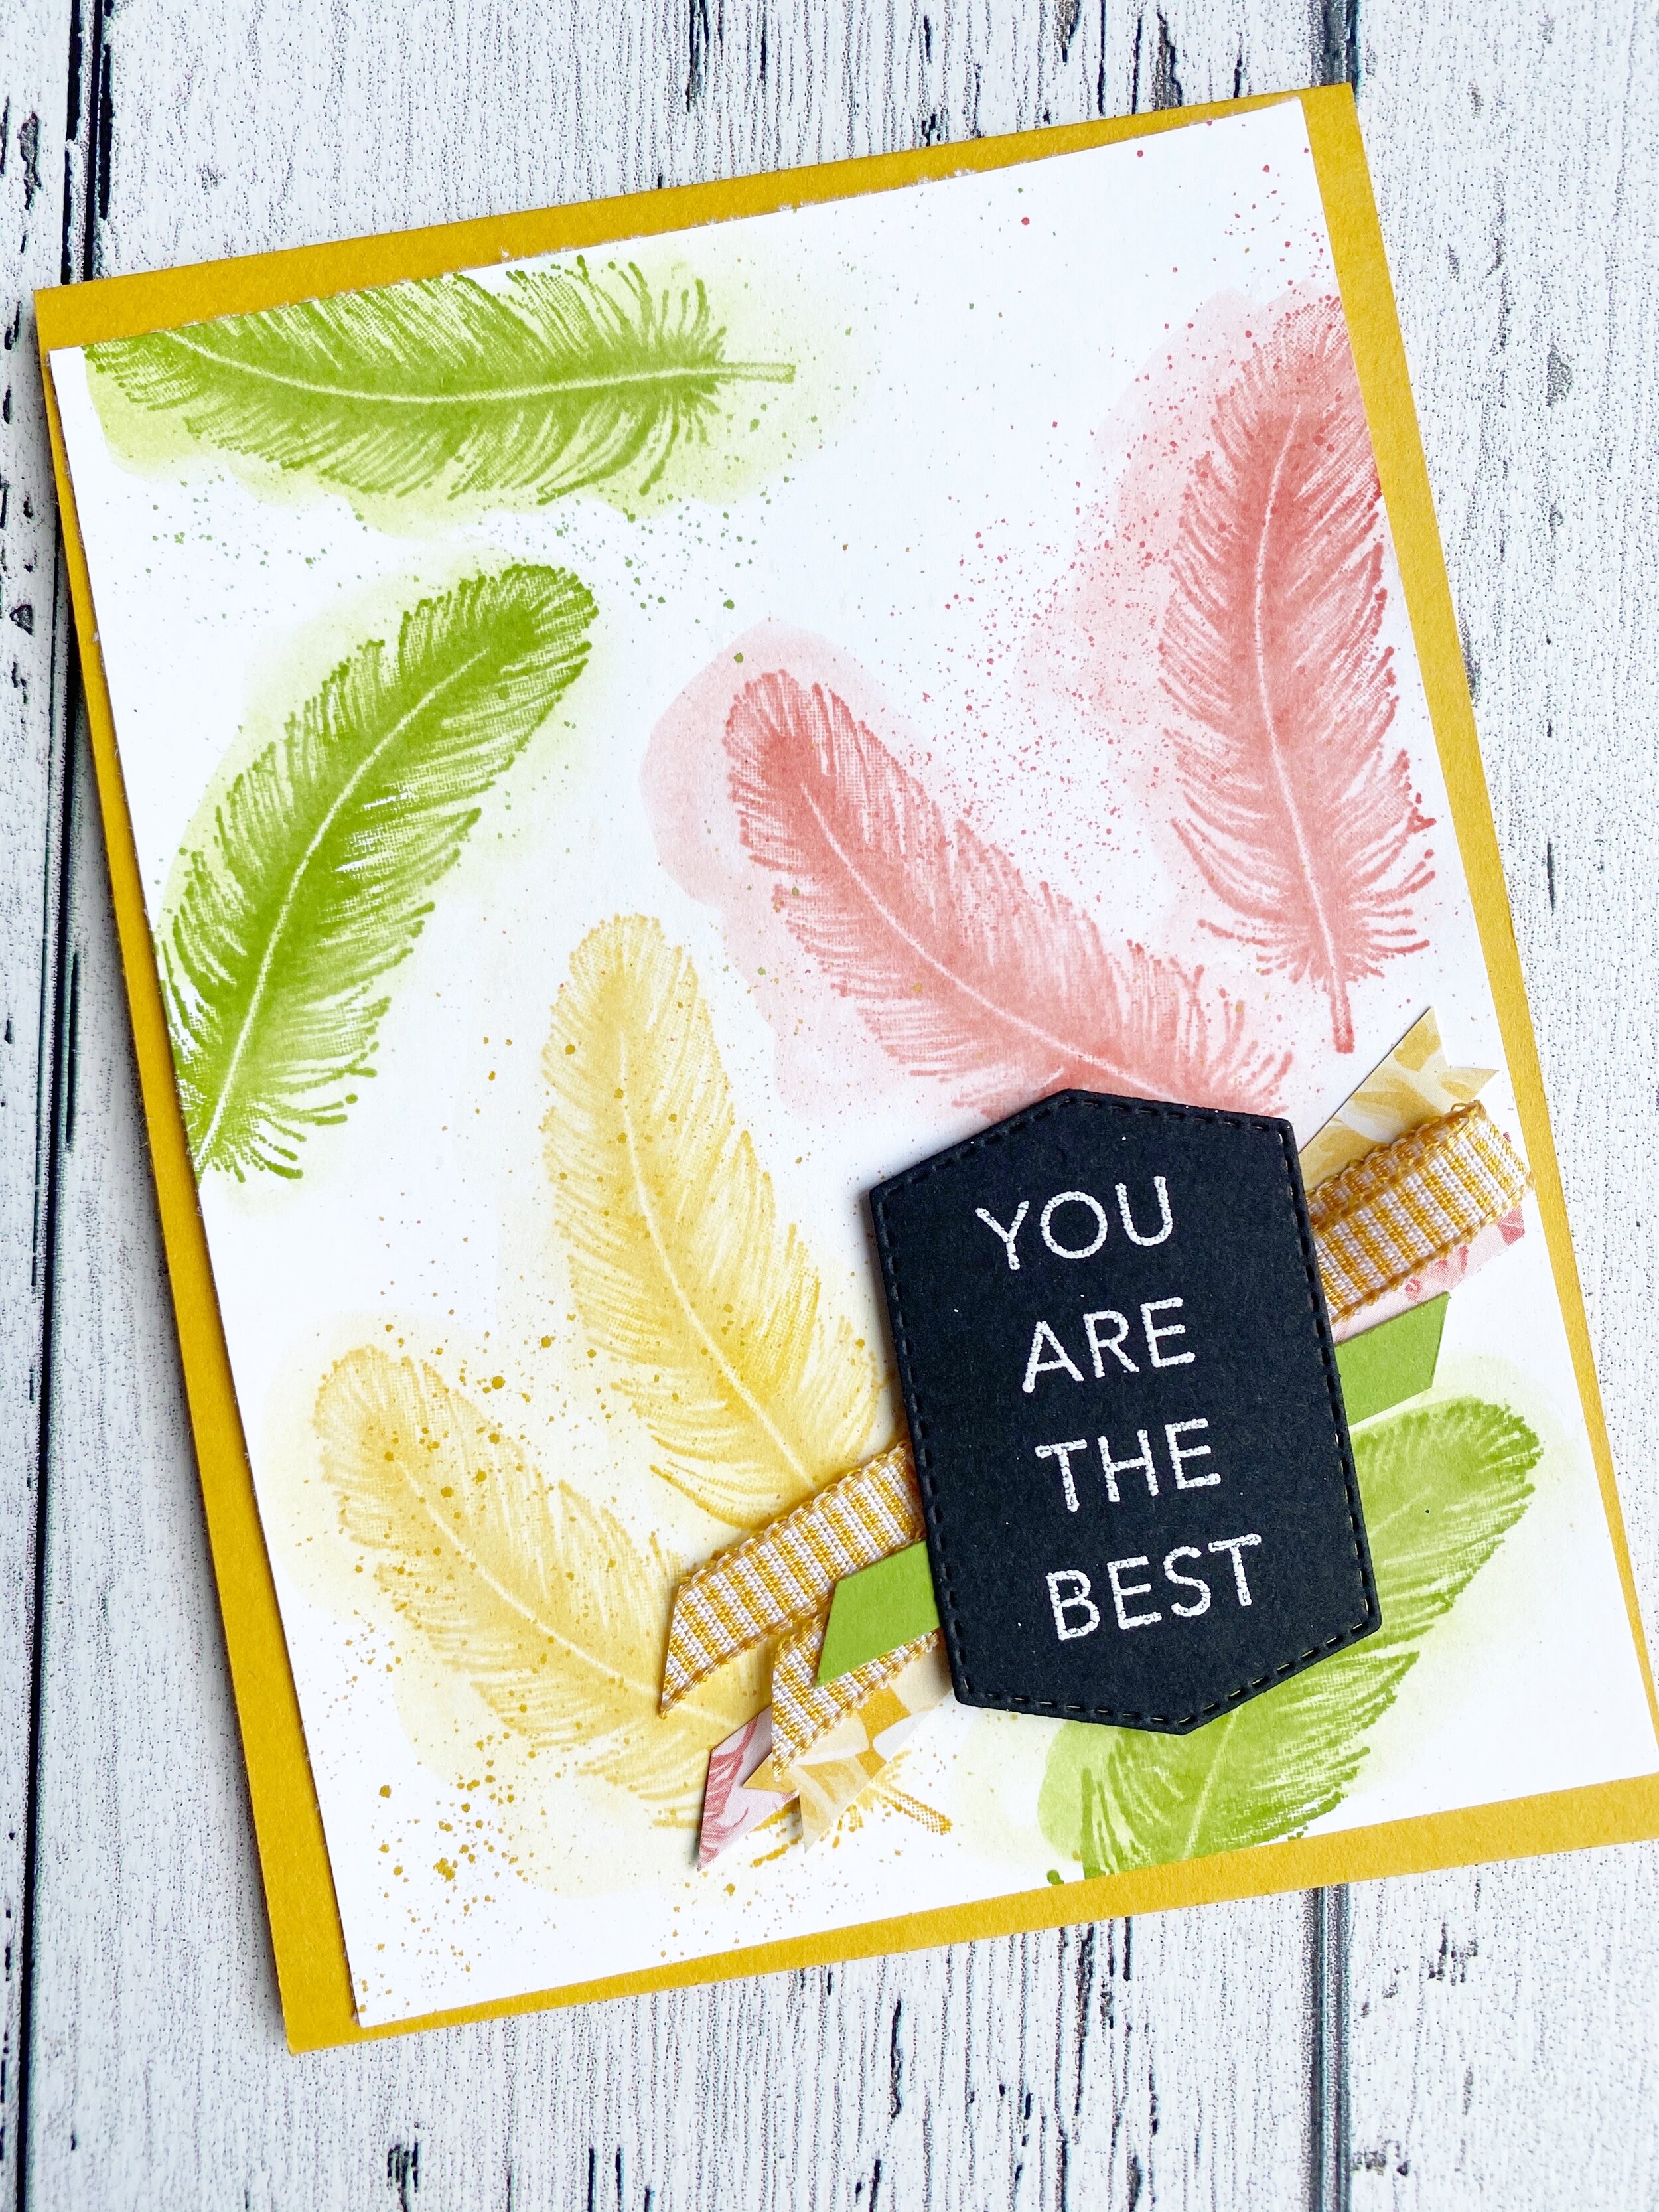
This week we are sharing our favourite NEW stamp set from the Stampin’ Up! demonstrator pre-order (best part about being a demo, getting the inside scoop and getting stuff early!). I am really loving the Tasteful Touches stamp set. It is also a part of a bundle with the Tasteful Labels dies. The feather is my favourite image in this stamp set.

The feathers are so bright and vibrant that I wanted to keep the focus on them by keeping the sentiment neutral. The sentiment is stamped and embossed in Whisper White on Basic Black card stock. I added I a few ribbon and paper scraps behind for a little interest. You are the Best is cut out with a die from the Tasteful Labels die. Both the stamp set and the dies will be available in June with the new catalogue release.

 
fullsizeoutput_11c60.jpeg
Image 2020-04-27 at 6.31 PM (1).jpg
I stamped the feathers in Calypso Coral, Crushed Curry and Granny Apple Green.  After stamping I went over the feathers with my Aqua Painter to soften the stamped image.  I then flicked my coordinating Stampin’ Write marker over each feather.Hop bac…

I stamped the feathers in Calypso Coral, Crushed Curry and Granny Apple Green. After stamping I went over the feathers with my Aqua Painter to soften the stamped image. I then flicked my coordinating Stampin’ Write marker over each feather.

Hop back to see Melissa’s favourite pre-order stamp set and Hop forward to see what Connie is loving!


April Showers Bring May Flowers

You know this childhood sentiment! I was channelling little flowers and a rainbow today when I came up with this card. I used the new Confetti Flowers Border Punch to create this rainbow arch. This is card #22 in my “A Card a Day in May” challenge series.

To construct the rainbow, I stamped the sentiment first. This is a great tip for spacing AND I did’t want to risk making this awesome tedious rainbow and then stamp crooked. Haha! It happens and it’s devastating! So I stamped first in Poppy Parade and then started with the Highland Heather layer of flowers and worked my way up and out. The sentiment is from the stamp set Tasteful Touches and will be available with the new catalogue release.

I used Tombow Multipurpose glue to adhere all the little flowers. My Take a Pick Tool was a lifesaver as it made it so easy to pick up the flowers and place them onto the glue without having sticky fingers.

 
The colors used to create this rainbow arch are Poppy Parade, Daffodil Delight, Soft Seafoam, Balmy Blue and Highland Heather

The colors used to create this rainbow arch are Poppy Parade, Daffodil Delight, Soft Seafoam, Balmy Blue and Highland Heather

The Confetti Flower Punch punches out three different sizes of flowers that made putting this rainbow arch together so easy!

The Confetti Flower Punch punches out three different sizes of flowers that made putting this rainbow arch together so easy!