Create with Connie and Mary--Welcome Fall!

I believe the first official day of fall is September 21st, so we are almost there officially! Unofficially, I think as soon as September ONE hits we are bringing out blanket scarves, drinking our Pumpkin Spice Lattes and crafting with all things fall colors and pumpkins! At least that is what I am doing as there has been a definite chill in the air, especially on those early morning school drop offs!

That is why this weeks theme is Welcome Fall! I hope you don’t mind but I am on a scrapbooking ROLL so be prepared to see another page layout this week from me!
fullsizeoutput_12d57.jpeg
 
final.jpg
 

Out of all the seasons, crafting and home decorating for Fall and Halloween, are my absolute favourites! I especially love making layouts because there are just so many awesome ways to stamp and cut out leaves. This page looks so crisp with the white background and the medley of leaves, pumpkins. leaves and wheat sheaves.

For the color palette I cut or stamped leaves out in Crushed Curry, Soft Suede, Crumb Cake, Old Olive with Mossy Meadow edges, Cajun Craze with Merry Merlot edges, Crushed Curry with Merry Merlot edges, Terracotta Tile and of course, Pumpkin Pie.

We have so many fantastic options for fall creating! I used the Love of Leaves Bundle, Gather Together Bundle and the Autumn Essentials dies from the Handmade for You catalogue. I did sneak in one retired leaf too as I just can’t part with it…can you see it?

Notice that big leaf on the left? I cut it from the Festive Felt and then spritzed it with a mix of Crushed Curry and rubbing alcohol. I quick blast with my heat tool and it was dry.

Notice that big leaf on the left? I cut it from the Festive Felt and then spritzed it with a mix of Crushed Curry and rubbing alcohol. I quick blast with my heat tool and it was dry.

I wanted to create sort of a fun boarder running underneath my pictures with all my favourite fall images, leaves, pumpkins and wheat sheaves. When I was mixing two colors together, like on the green leaves, I stamped in Old Olive first and then used a finger dauber in Mossy Meadow around the edges. I used the same technique with the Cajun Craze, Crushed Curry and Merry Merlot leaves. And I want to give a shout out to Merry Merlot, its definitely getting a good work out in my craft room as it is perfect leaf tone!

I added in a little splatter with Crushed Curry ink and my Water Painter across the background of both pages. I love the feel it gave, softening up the crisp white a bit.

I added in a little splatter with Crushed Curry ink and my Water Painter across the background of both pages. I love the feel it gave, softening up the crisp white a bit.

This page had so many highlights with the leaves and pumpkins that I found it didn’t need much in the way of embellishments. I bit of Bumblebee Gingham ribbon and some Gilded Gems were all I added to this page.

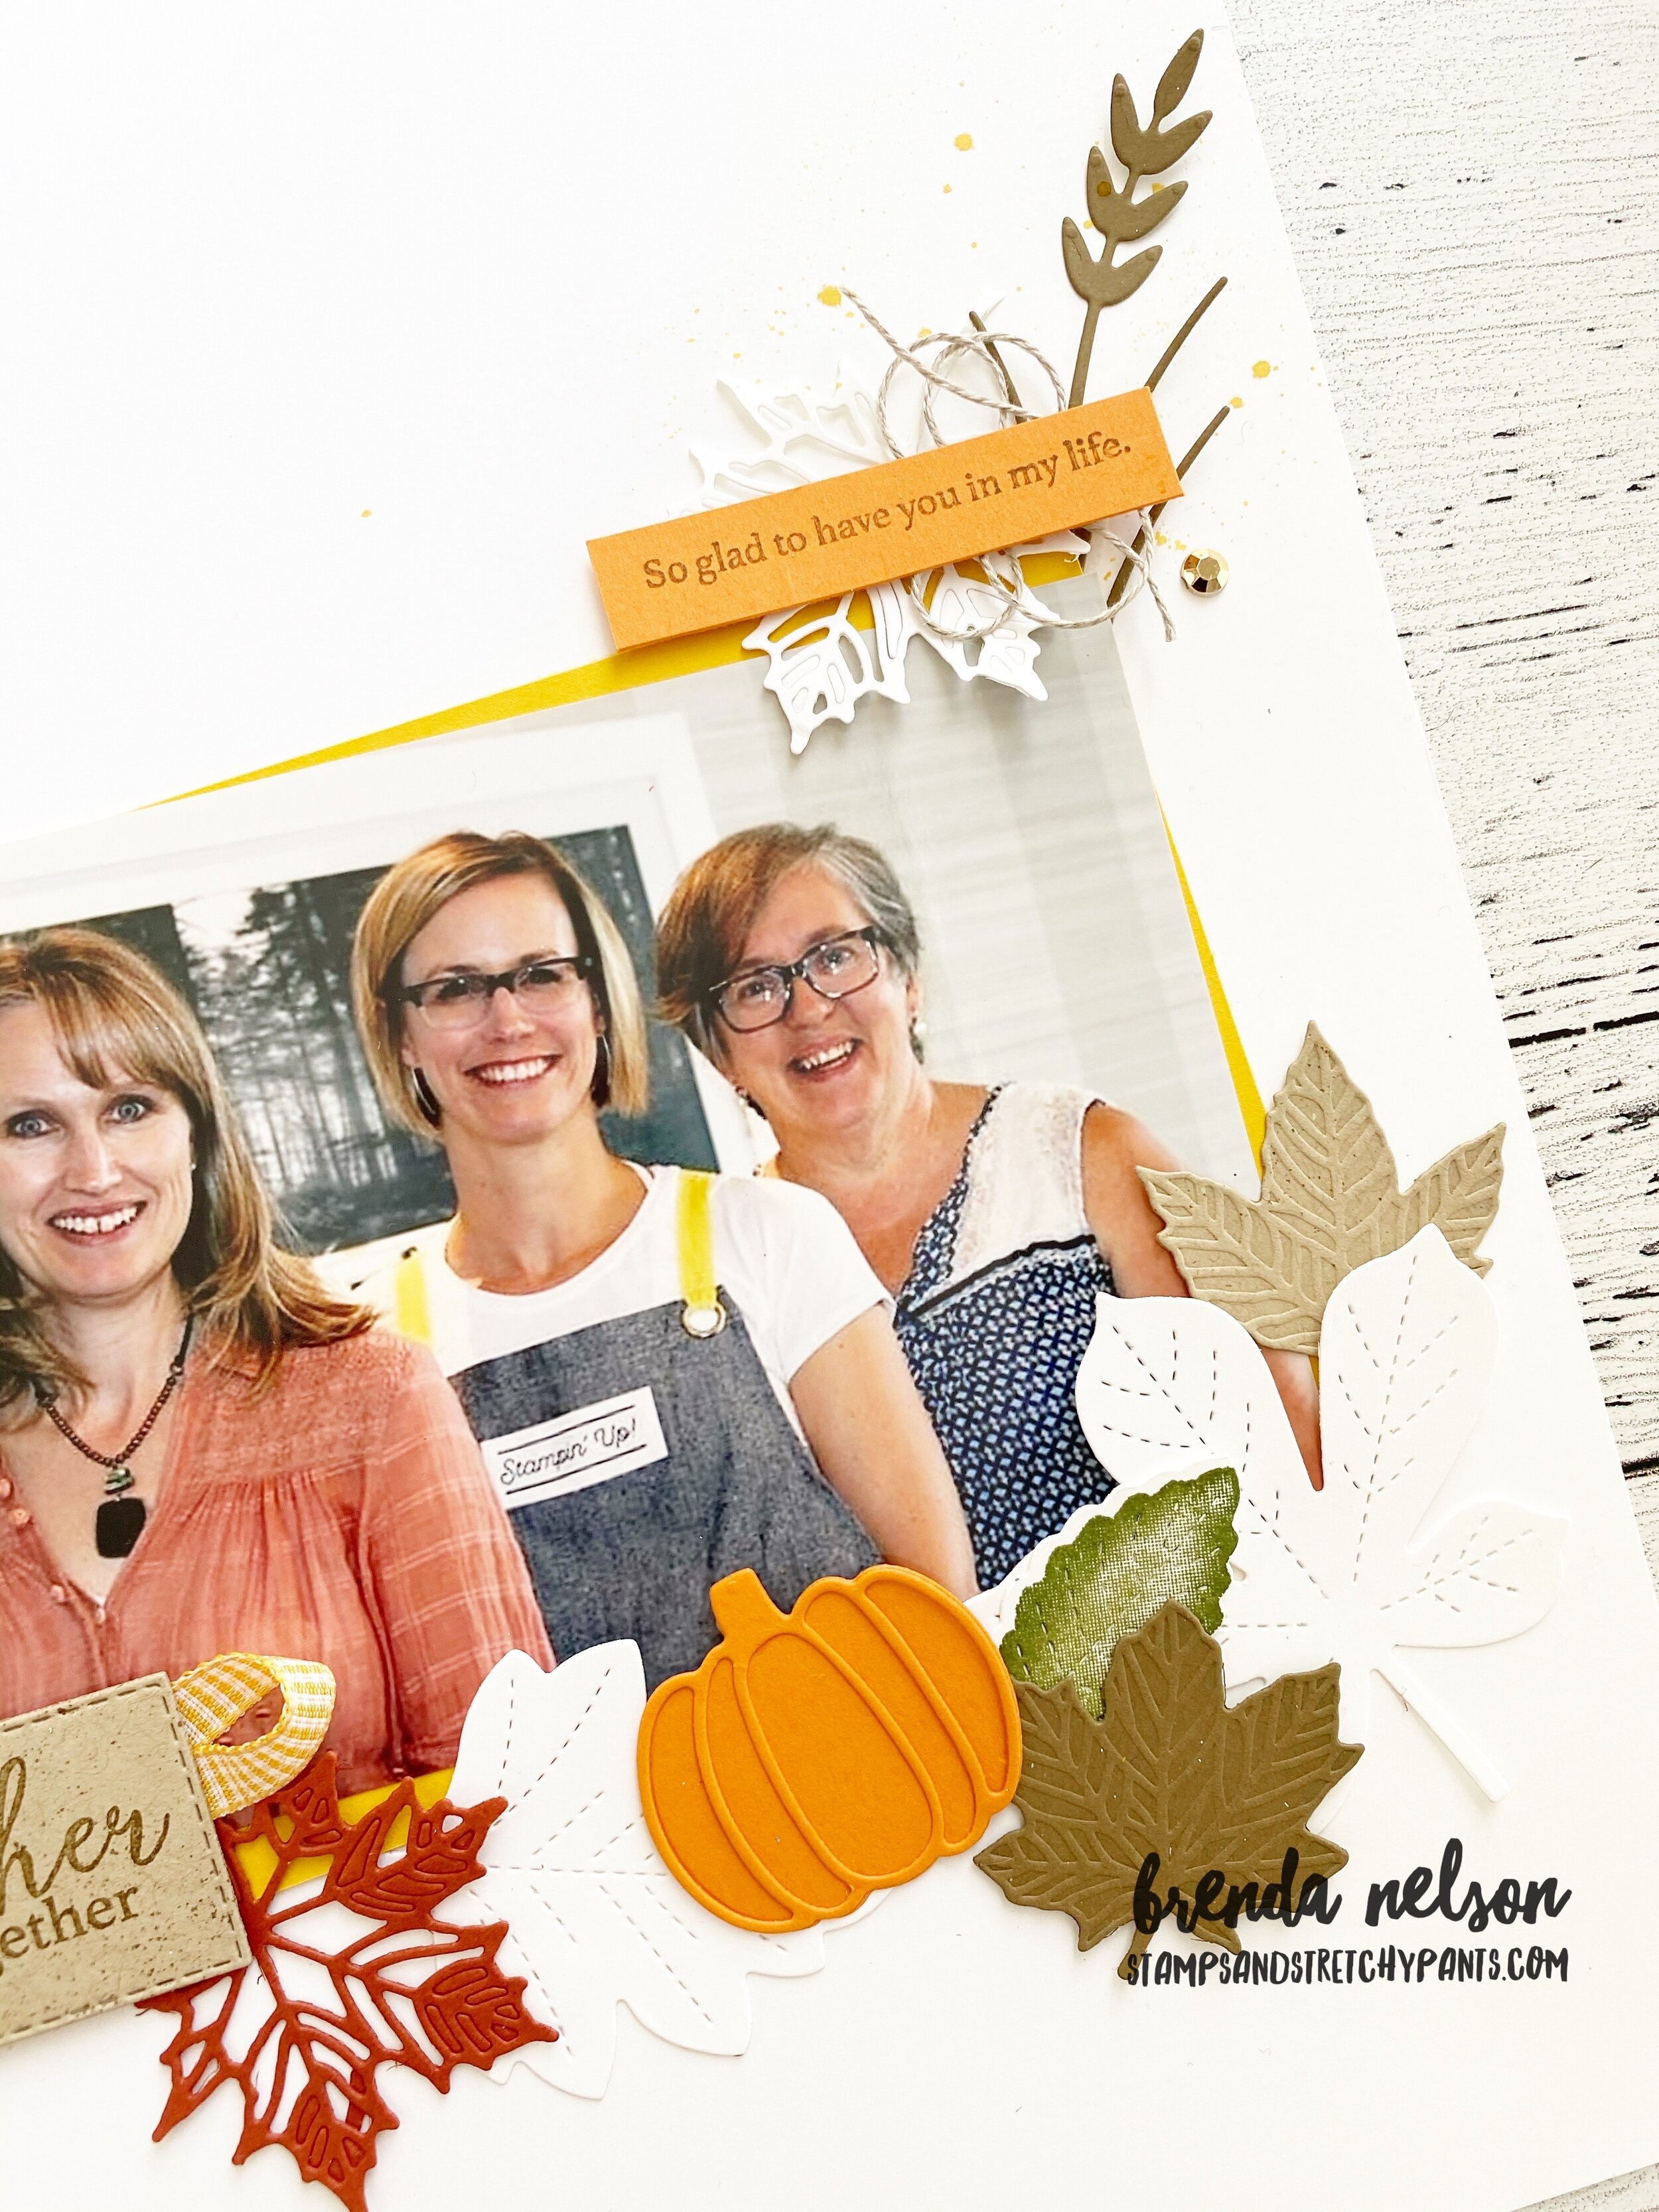
I like to create little focal points on my pages, I often say “Its all in the details”, which is reflected here with the ‘friendship’ and ‘So glad to have you in my life’ areas. I used the same maple leaf on each, with a gem, and twine to create continuity between the pages.

I hope you have enjoyed my fall pages! I will probably have more to share with you over the coming weeks so make sure you check back! And if you are in Canada and need to shop for any supplies you can follow the link on the side bar to my store!

If you are starting here on our blog hop you can go BACK to see what Melissa has designed for us this week and NEXT to see what Connie has created for us! Thank you for hopping by!

Create with Connie and Mary--Fall Flowers

fullsizeoutput_12d57.jpeg

Hello my friends! So happy to see you again this Saturday, welcome back! And if this is your first time joining in on this weekly hop, please feel free to go back through my blog and see all of my weekly creations!

This week our theme is Fall Flowers and I knew right away I wanted to use the Autumn Greetings Bundle from the Handmade for You catalogue. What really sold me on this bundle was the Autumn Essentials Dies. I love the pumpkins and the wheat sheaves dies.

I decided to use my Stampin’ Blends to color the large image from the Autumn Greetings stamp set as we have so many beautiful fall colours that we can use.

I decided to use my Stampin’ Blends to color the large image from the Autumn Greetings stamp set as we have so many beautiful fall colours that we can use.

I used the following Stampin’ Blends colors—Old Olive, Pumpkin Pie, Mango Melody, Rich Razzleberry, Cherry Cobbler and Cinnamon Cider.

I used the following Stampin’ Blends colors—Old Olive, Pumpkin Pie, Mango Melody, Rich Razzleberry, Cherry Cobbler and Cinnamon Cider.

I also added in a bit of Designer Series Paper from the Plaid Tidings collection which has definitely been a fan favourite! The pumpkins are created using two dies from the set in Pumpkin Pie and Terracotta Tile and the wheat sheaves are cut in Bumblebee, Crushed Curry and Mango Melody to get a range of golden tones.

I started my page on an Early Espresso base and added in a photo mat of Cinnamon Cider. Adding in the Bumblebee tone brought out the fall leaves in my photo and added a brightness to the page. And I found the Champagne Rhinestones were the perfect tone of bling to add to the page. I love that I created this whole scrapbooking page using ONE bundle!

Remember how popular these were? Don’t forget about them, they are the perfect fall embellishment and will take you back to the Annual Catalogue!I can’t wait to see what the other gals have created this week! You can go NEXT to visit Connie and BACK…

Remember how popular these were? Don’t forget about them, they are the perfect fall embellishment and will take you back to the Annual Catalogue!

I can’t wait to see what the other gals have created this week! You can go NEXT to visit Connie and BACK to visit Melissa! Enjoy your day and please feel free to leave a comment!

If I have inspired you with my page and you want to order any of these amazing products, please click on the Shop Now button to head directly to my store in Canada!

final.jpg

Create with Connie & Mary--Thinking of Fall!

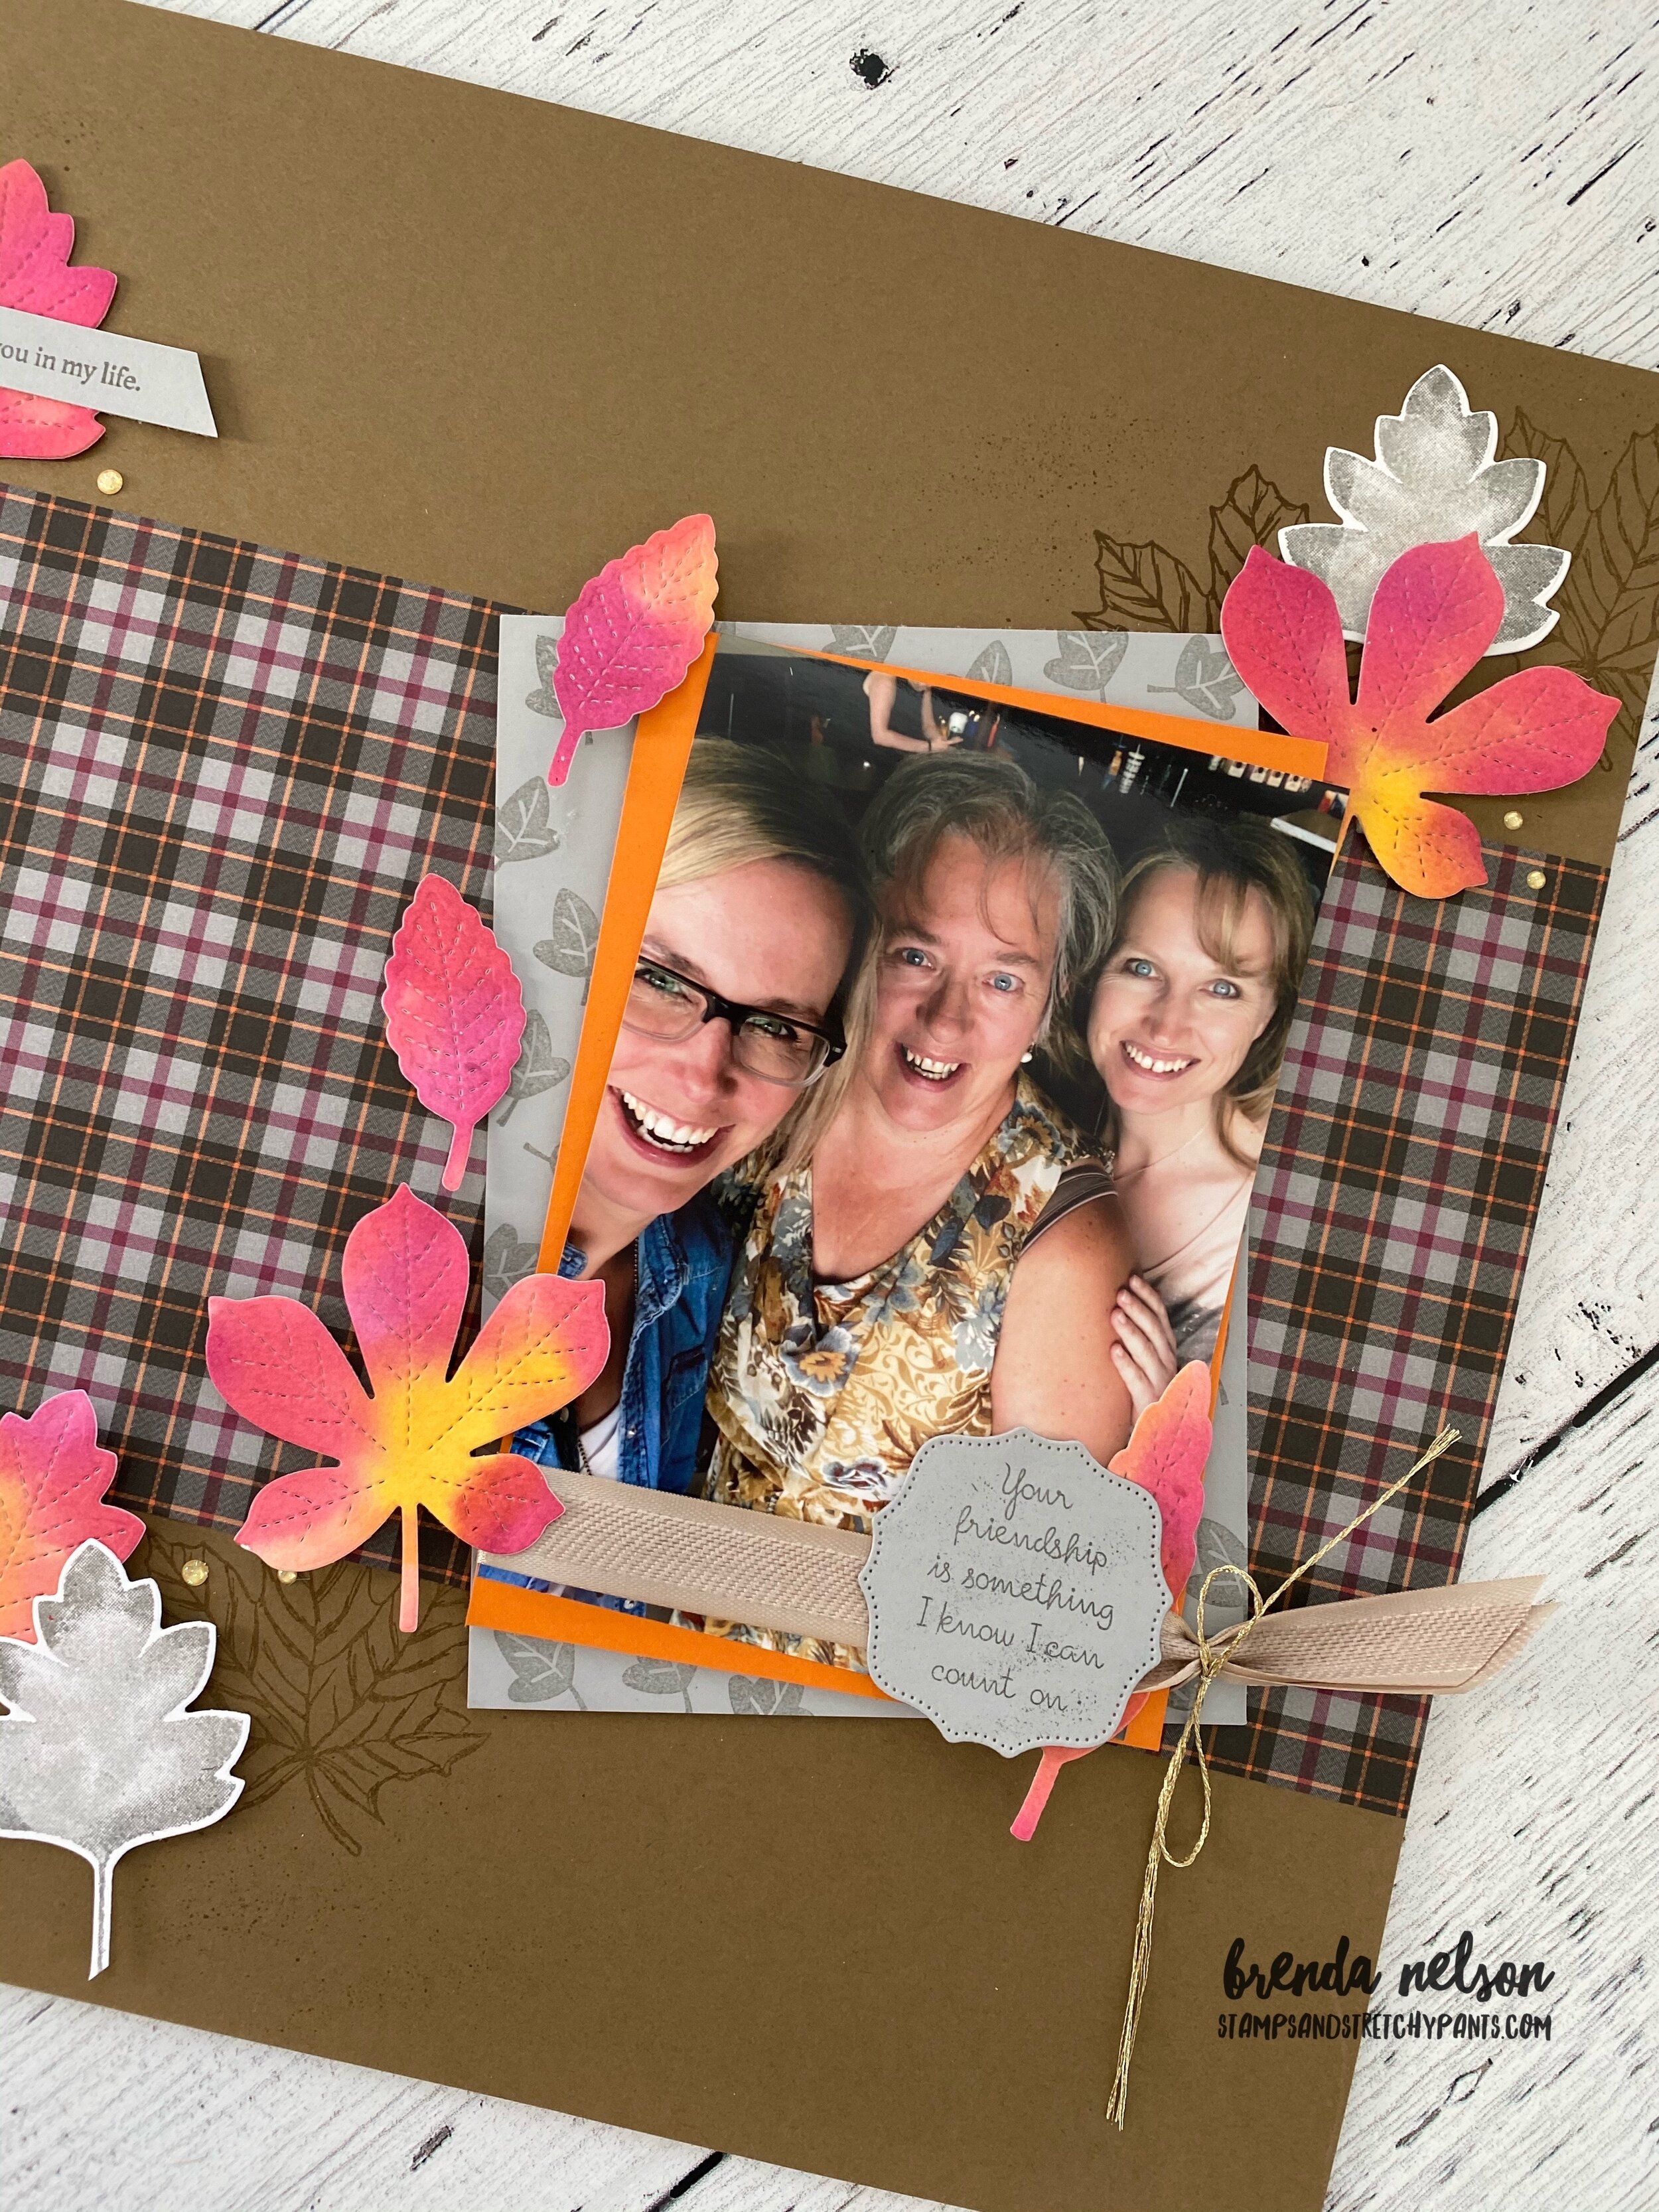
I will admit, as much as I don’t want it to be so, there is a little fall chill in the evening air! I am so blessed to live in a part of the world where we experience 4 distinct seasons. I love summer so much, but the beauty of fall is just spectacular here in Alberta. I love when all the leaves start to change and that is what influenced the design of my scrapbook page for this weeks theme—Thinking of Fall!

fullsizeoutput_12d57.jpeg
I love this photo of my two friends Donna and Karina.  For the past several years we have worked together to offer 3 large group events each year called Creative Day Getaway, to local demonstrators and stampers.  We are hosting our 20th event this S…

I love this photo of my two friends Donna and Karina. For the past several years we have worked together to offer 3 large group events each year called Creative Day Getaway, to local demonstrators and stampers. We are hosting our 20th event this September so I thought featuring them on this page was perfect!

fullsizeoutput_12dbb.jpeg

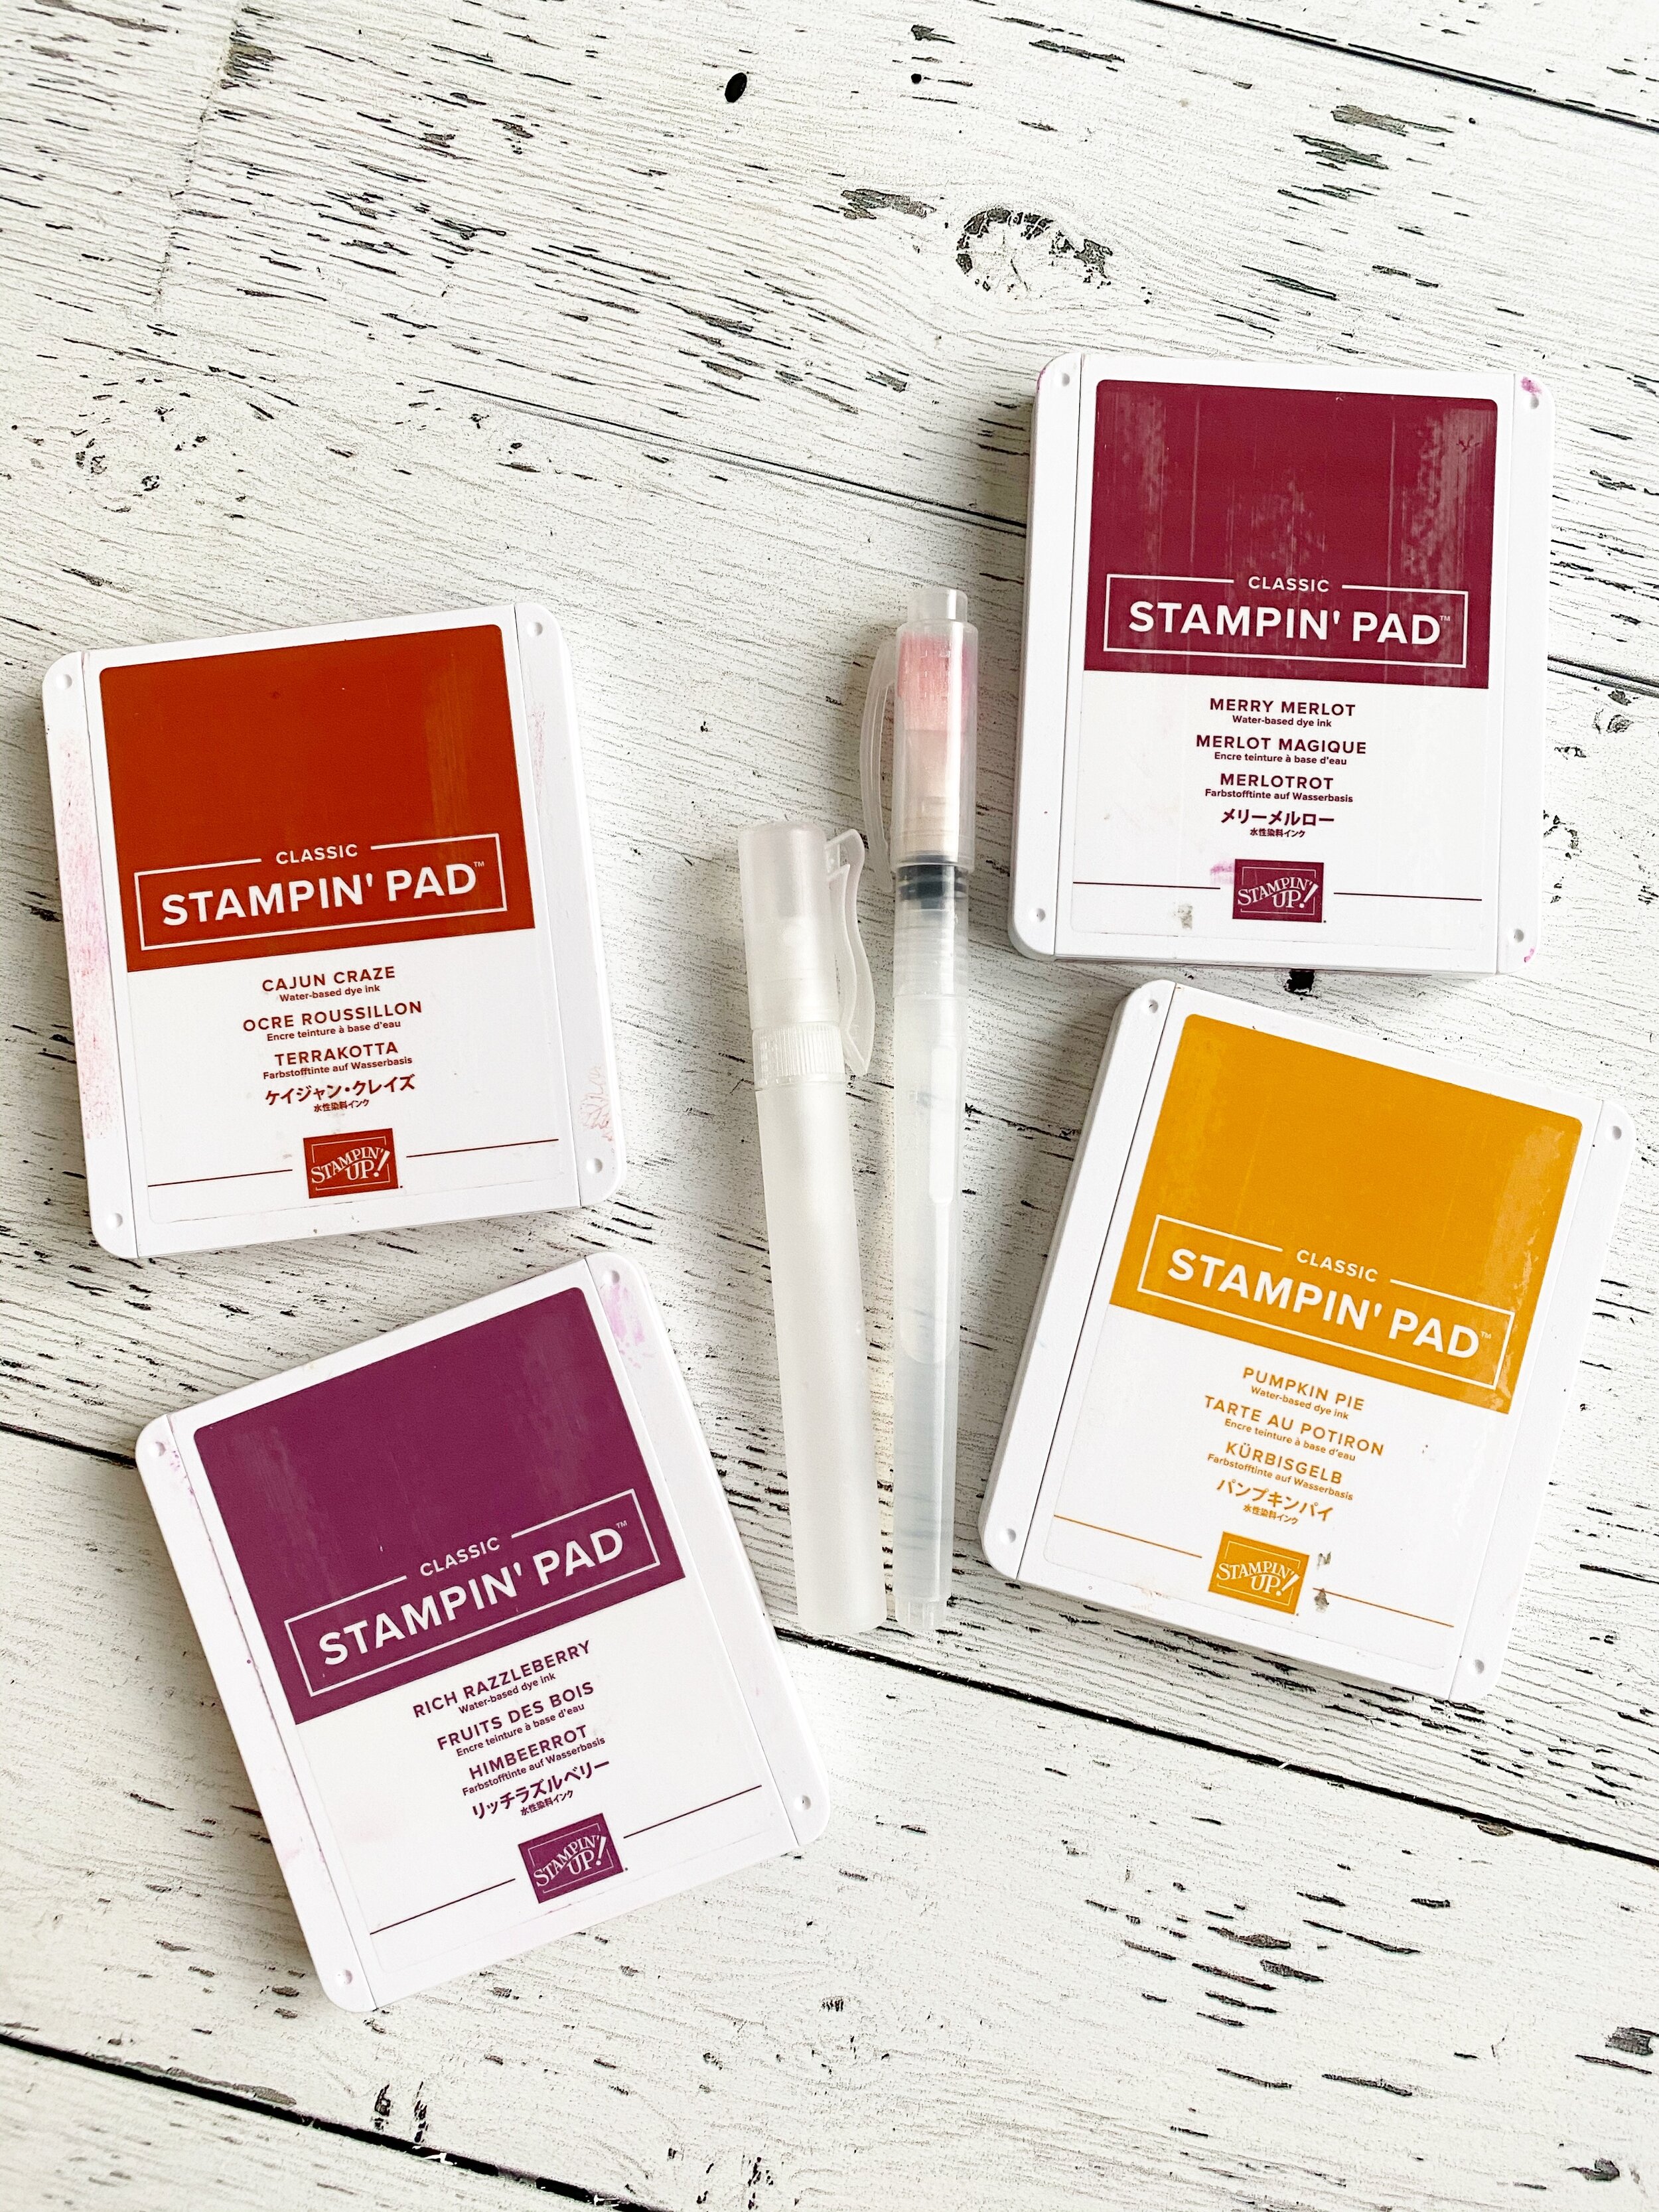
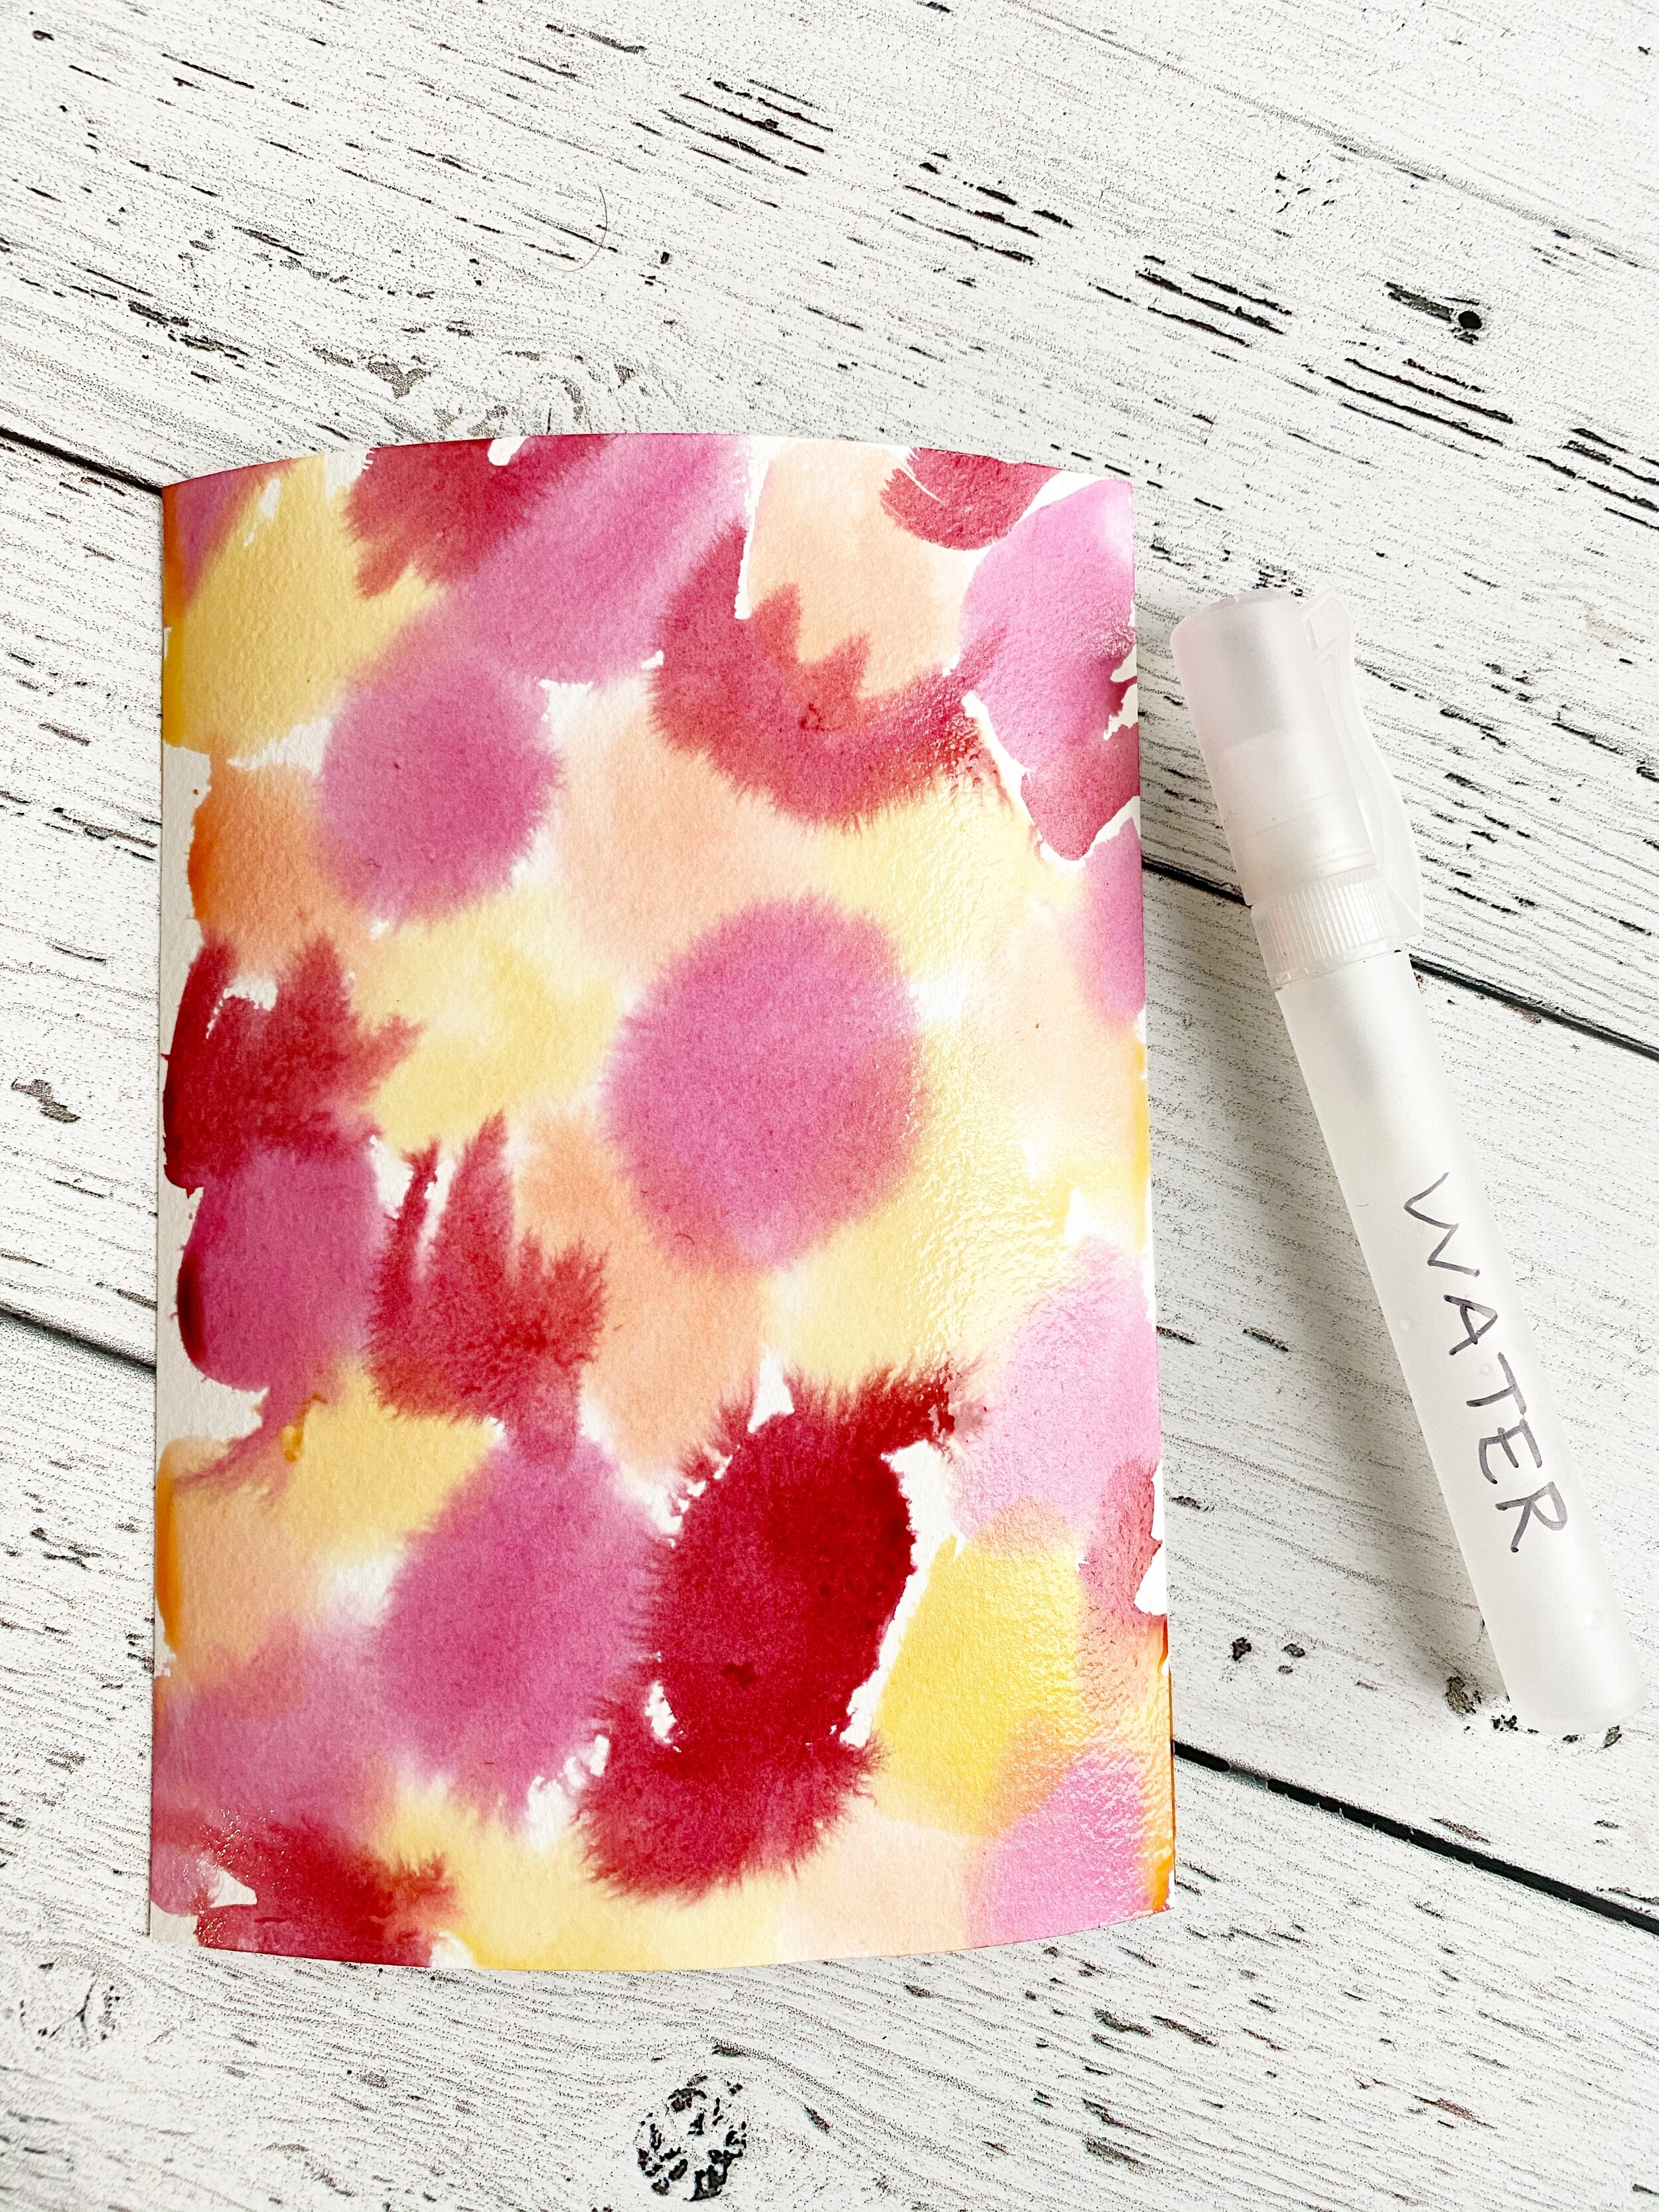
I used a really fun and easy watercoloring technique to create these leaves! Something similar was shared on the Stampin’ Up! Instagram page recently as well. I love how our Stampin’ community shares and inspires each other!

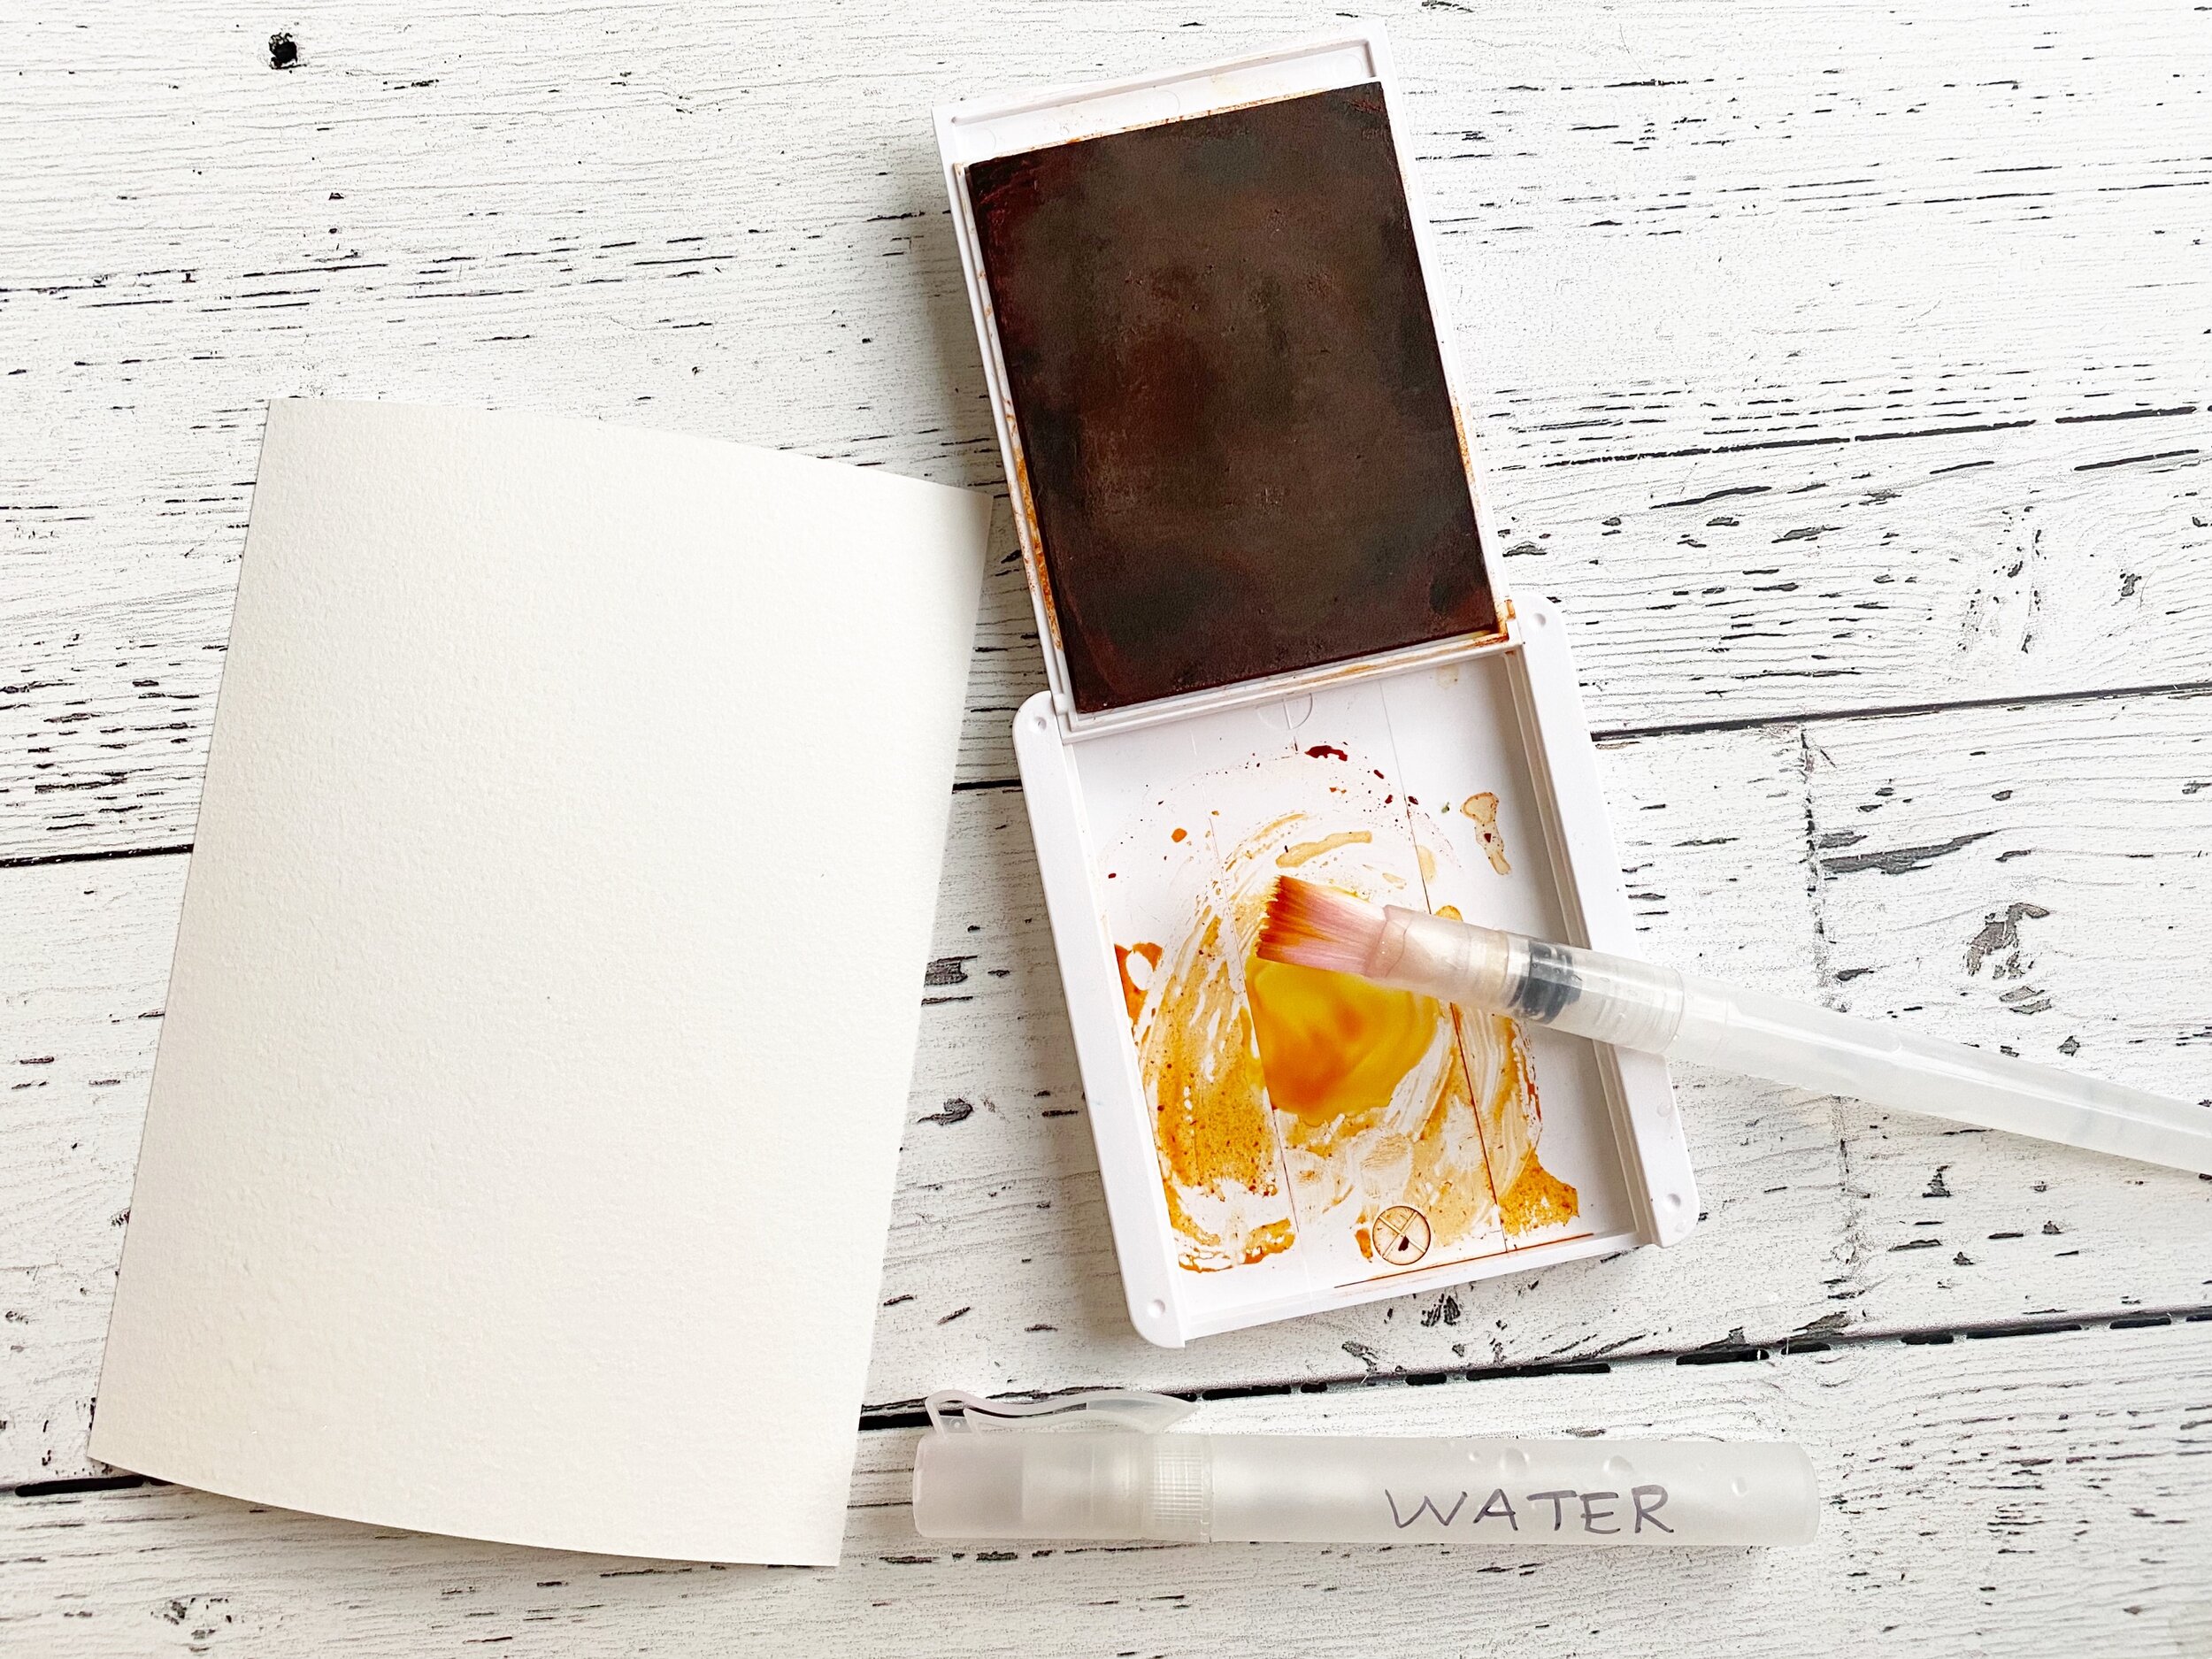
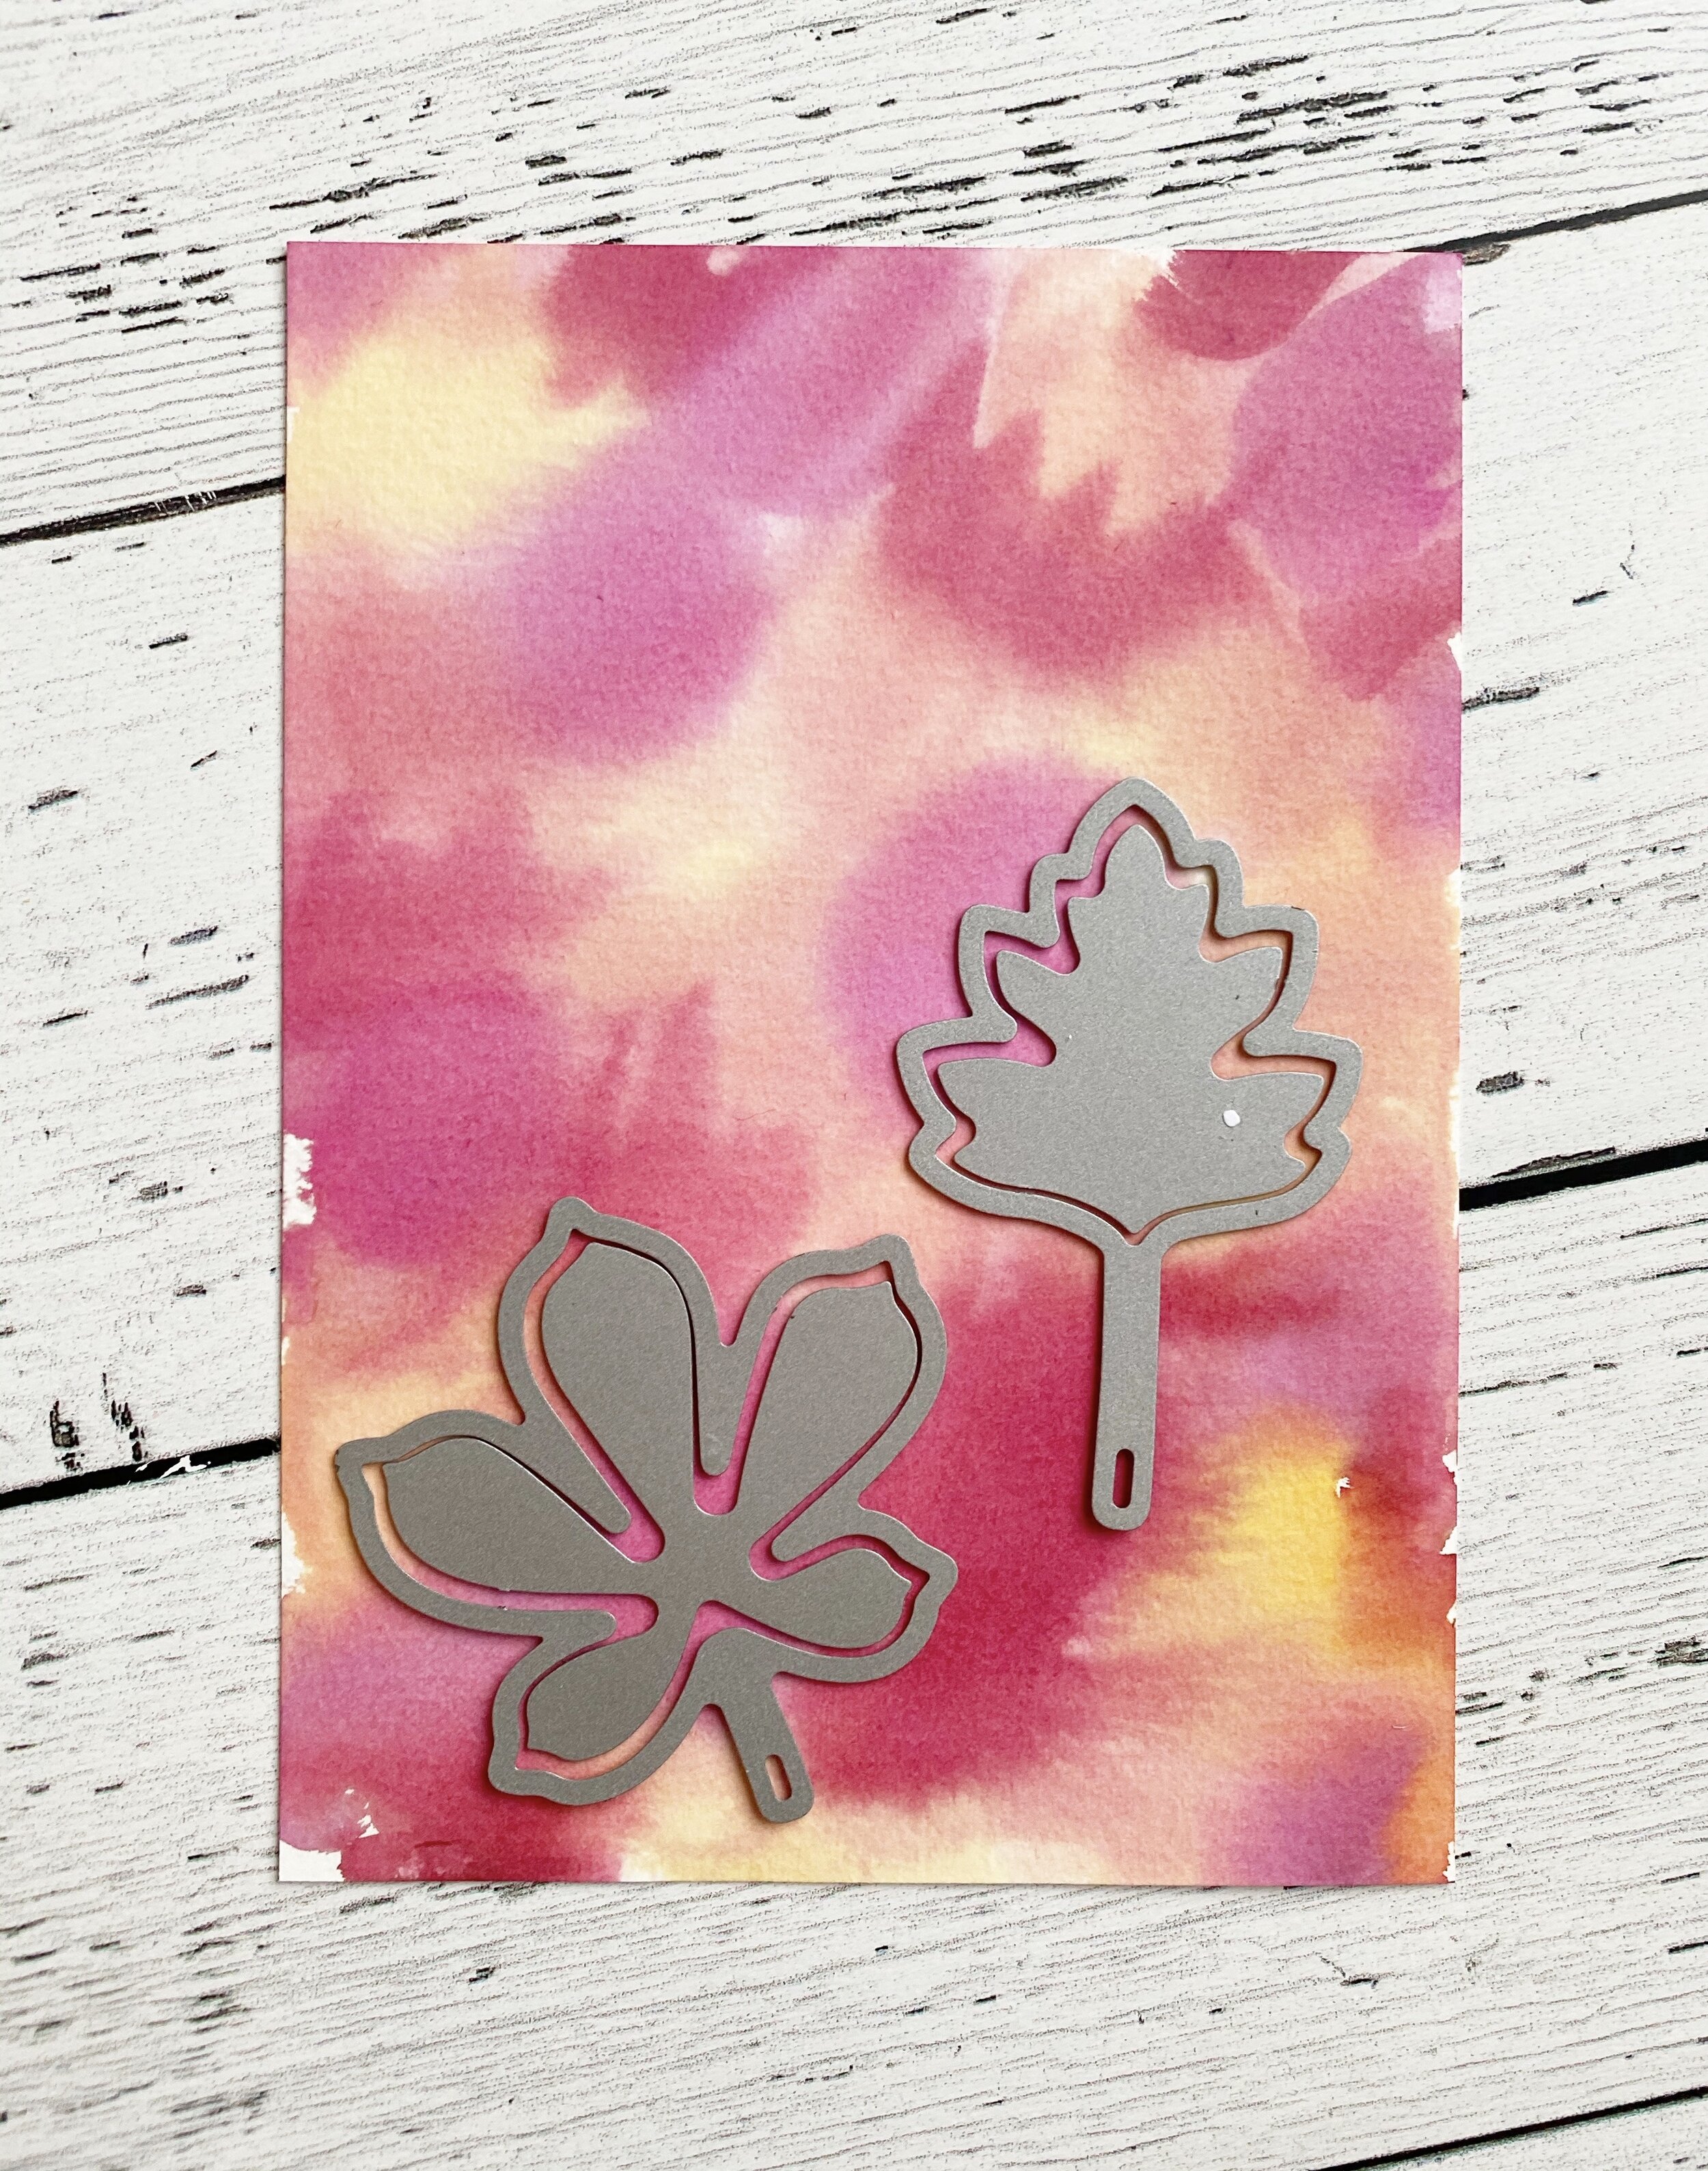
I chose the colors Cajun Craze, Rich Razzleberry, Merry Merlot and Pumpkin Pie. You will need a piece of water color paper, the large Water Painter Brush (I used the same one moving from light ink to dark ink), a Stampin’ Spritzer and the Stitched Leaves Dies.

Start by spritzing the water color paper with water and starts adding in your color. It may look a little weird but after you spritzer it one more time at the end and either let dry or use your heat tool it blends all the colors together. Cut out your desired leaf shapes for your project.

fullsizeoutput_12dc2.jpeg

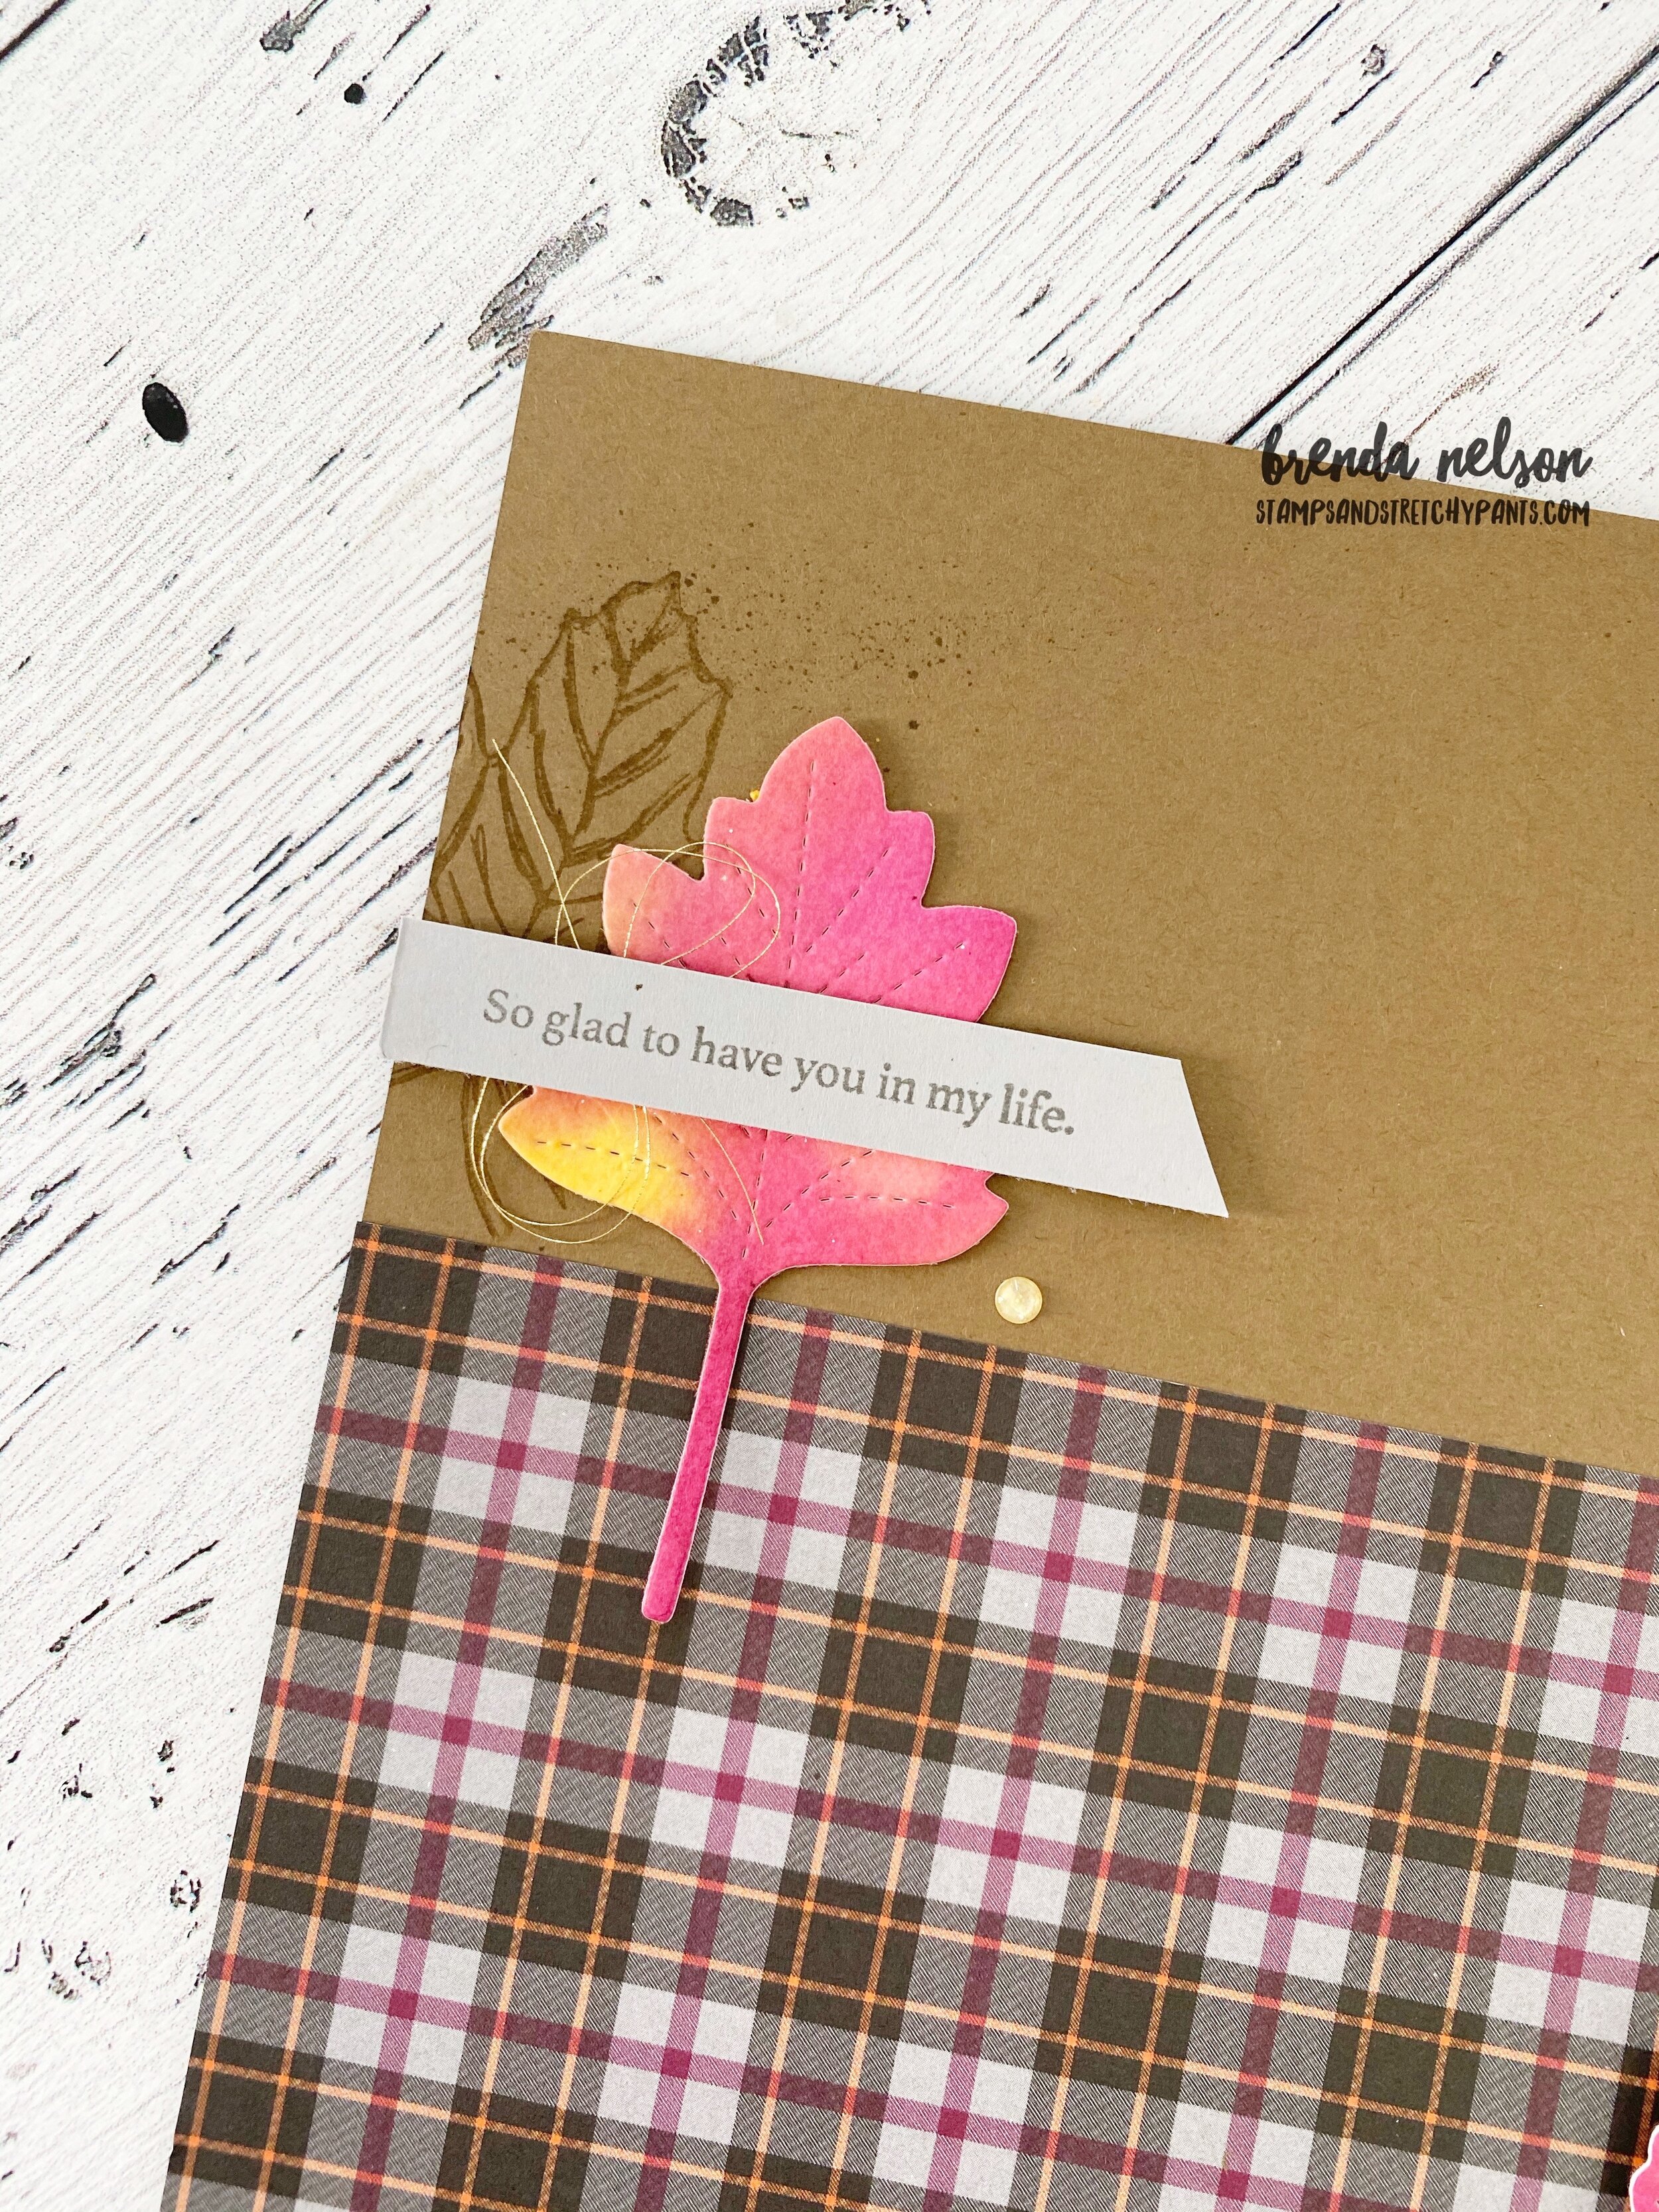
I also wanted to play off of the grey tone in the Plaid Tidings DSP with the photo mat and some grey leaves. The photo mat has little leaves stamped on it in Smoky Slate ink to coordinate with the paper. The stamp set I used is Banner Year, don’t overlook it at the back of the Handmade for You catalogue! pg 65! It has tons of potential!

I used the old school Rock’n Roll technique on my grey leaves. Stamp them in Smoky Slate and then ‘roll’ the edges in Basic Grey Ink.

I also pulled in the large maple leaf image from the Gather Together stamp set for some background stamping. And I love the stitched look of the leaves so I decided to use the Hippo & Friends dies to cut out the sentiment with a stitched detail.


When I am creating scrapbook pages I find the magic is all in the details. Adding in different threads, textures, embellishments, layering stamps and colors. This little corner is a perfect example!

If you are in Canada and want to recreate this page you can order all the supplies from my online store! Just click below to head right there!


fullsizeoutput_12dbe.jpeg

Thanks for hopping along with us this week as we are wrapping up August and heading into September. You can go back to see what Melissa has made if you are just joining in here or continuing hopping forward to see what Connie has designed! See you next week!

You're Amazing (heart)

Last week I shared an amazing double page layout featuring the Prized Peony suite and I am still having fun creating with it! This was the page my scrapbook class made this week. Once a week, last Wednesday of the month, I have a group of gals come to make a single page layout. They had requested doing some colouring with the Stampin’ Blends and I feel like this bundle just has so many options. Pairing it with the scripty soft font of the Ornate Thanks stamp set was a perfect match along with the Beautiful World stamp set.

final.jpg

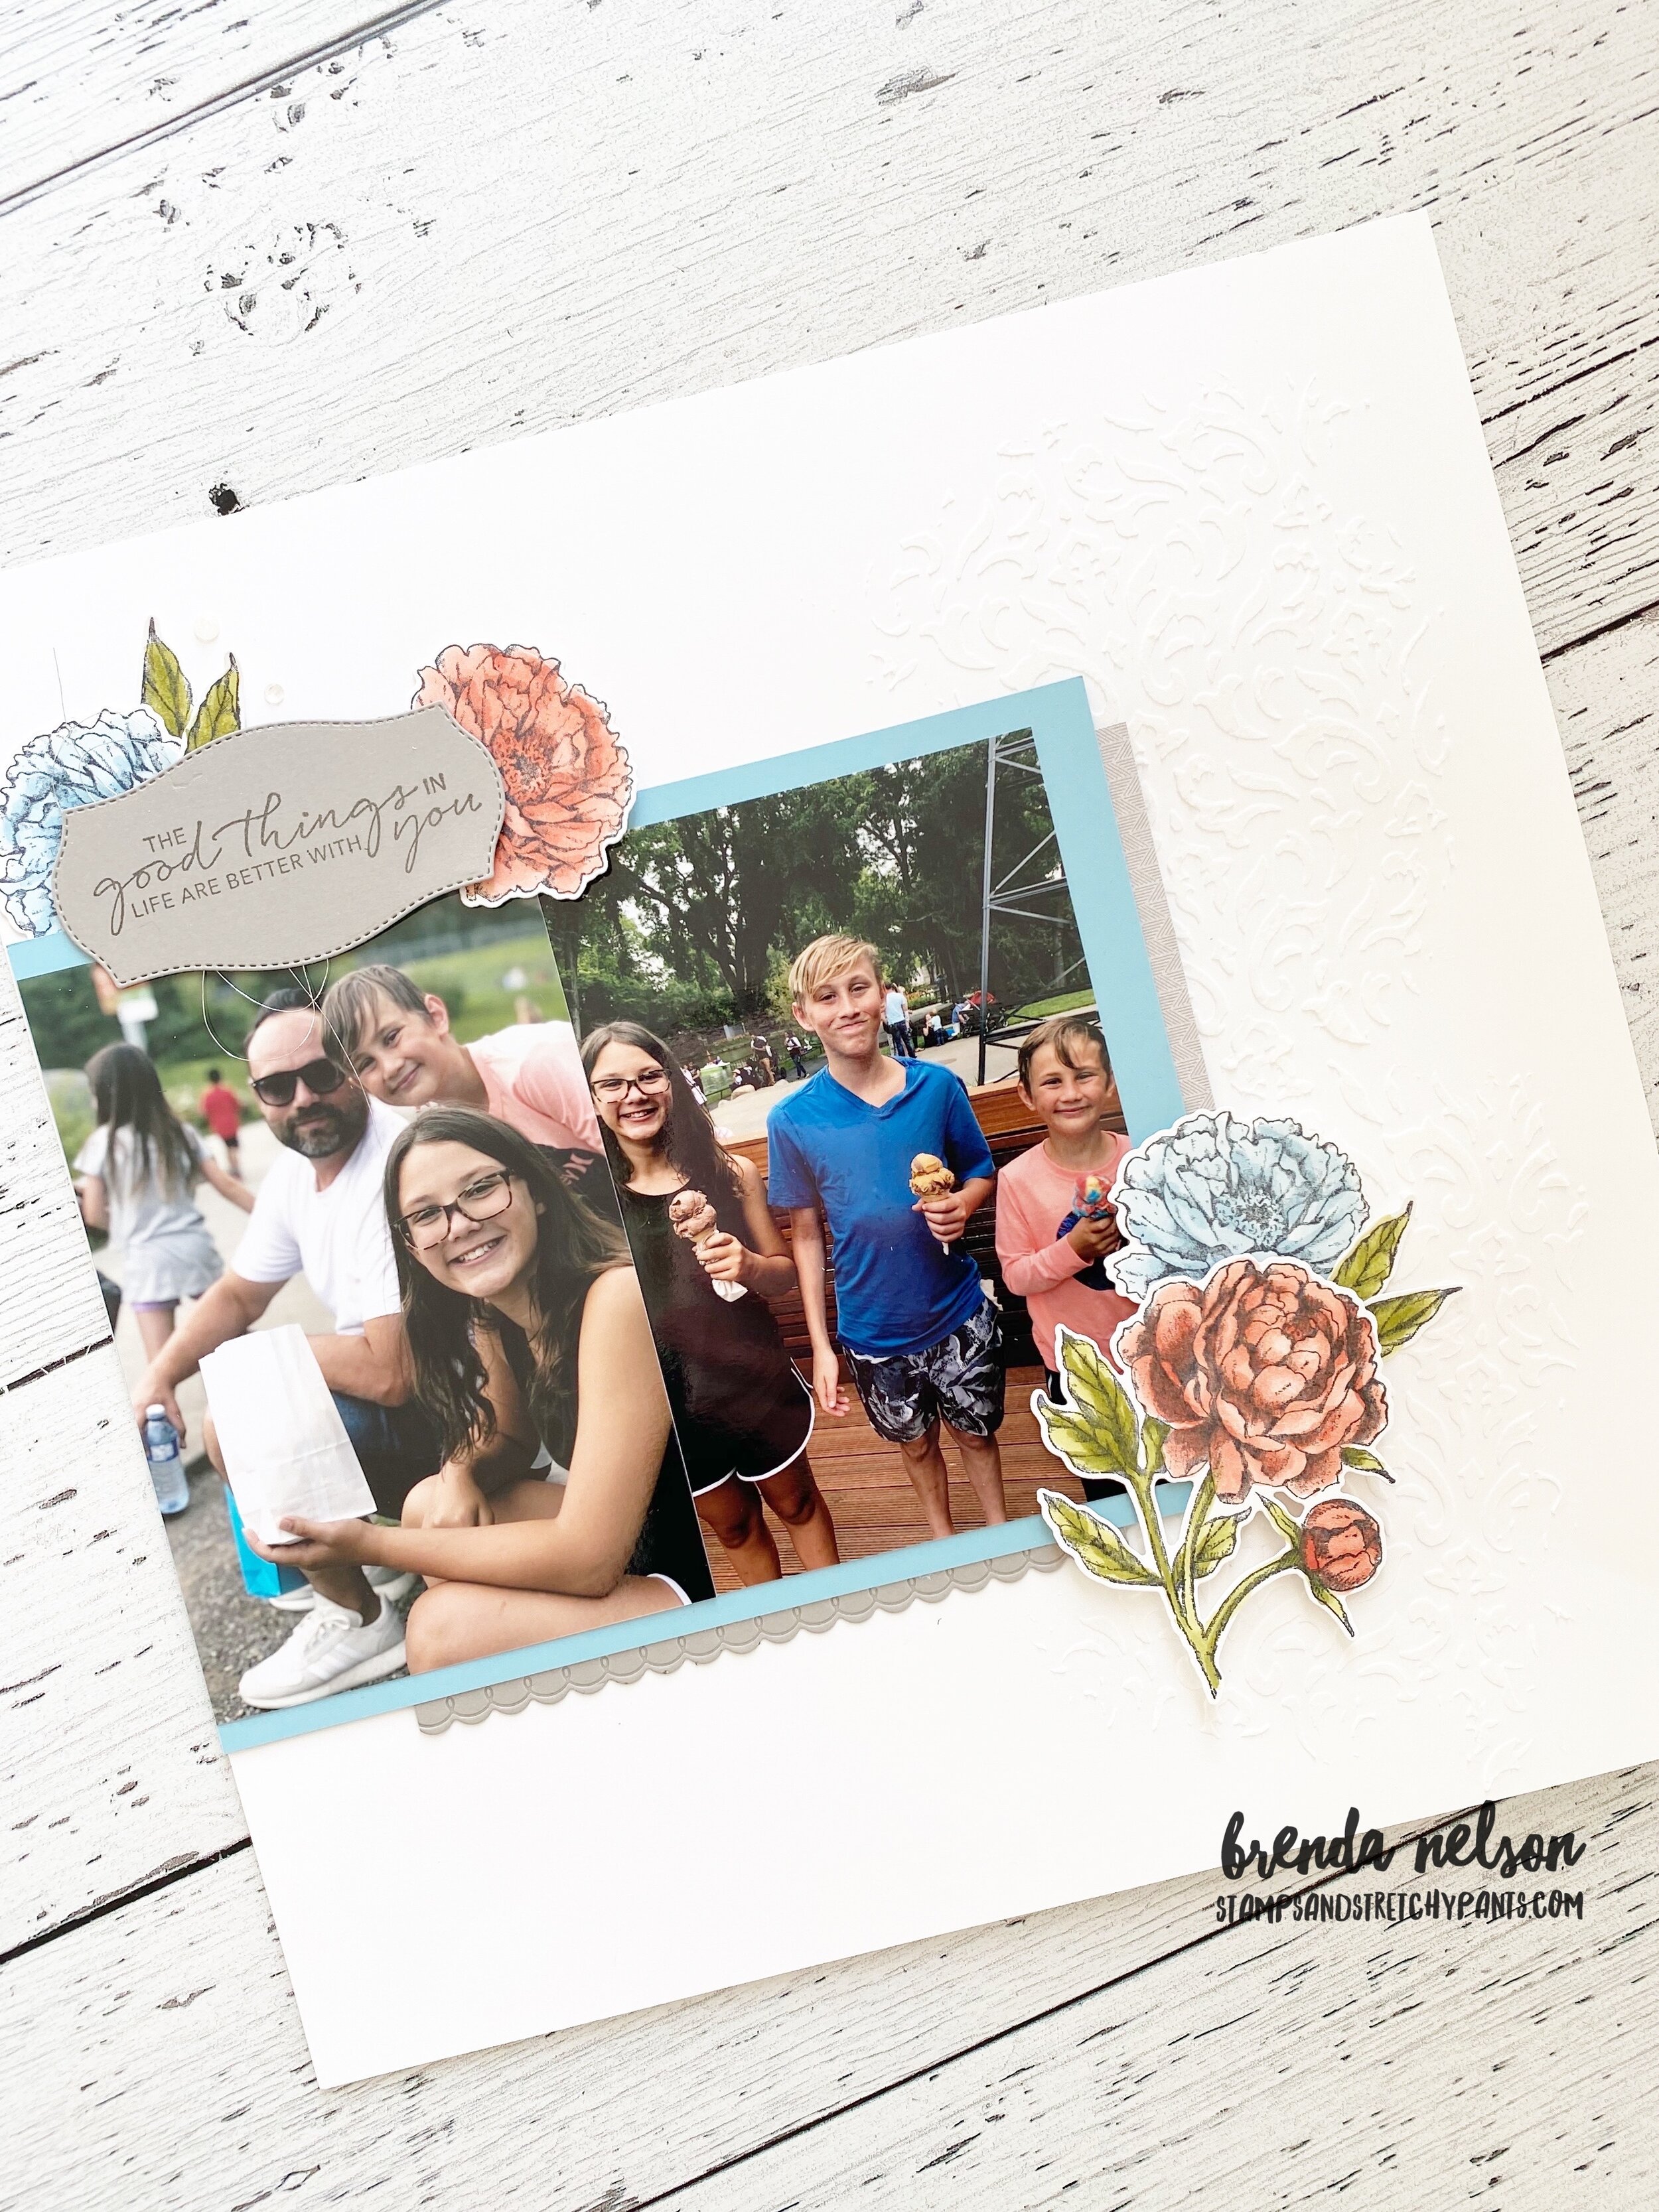
I really love this soft color palette that was inspired by the Peony DSP and having my oldest son in the photo. I wanted this page to feel soft and masculine at same time. No one ever said you can’t use flowers with boys!

I started by embossing some of the mid sized peony blooms on the Whisper White background with white embossing powder. The effect is soft and subtle and draws your eye from the top of the page down.


Sometimes a background doesn’t need much, but I always find it needs something!

Embossing such an easy way to add detail to your projects.

final.jpg

I really love how the Prized Peony dies include outline dies, dies to make a 3 D flower and the scalloped embossed edge piece is perfection. I used it here to bring in that touch of blue with Seaside Spray. I feel this blue has a bit of a grey undertone so it worked perfectly on this project. I coloured the peonies in Seaside Spray, Petal Pink and Old Olive Stampin’ Blends.

final.jpg

I used the Grey Granite 1/4 shimmer ribbon and the Seaside Spray 1/4 metallic ribbon to draw interest and attention to the sentiment. I love our metallic pearls and they helped add an elegant feel to this page.

The lace detail is from the Fabulous Florals dies and worked so perfectly with this page!


final.jpg

I love this little corner at the right hand top of the page. I stamped the little background in Smoky Slate and cut one of the cute stitched shapes from the Hippo & Friends dies in the same color. I trimmed it down in half and added the small peony and You’re Amazing. Sometimes it really is all in the details!

I hope you love this page as much as I do! I absolutely LOVE to scrapbook and feel so blessed to have this platform to share my creations with you! Please feel free to shop with me or leave me a comment! I love to see them in my Inbox!

Prized Peony Perfection

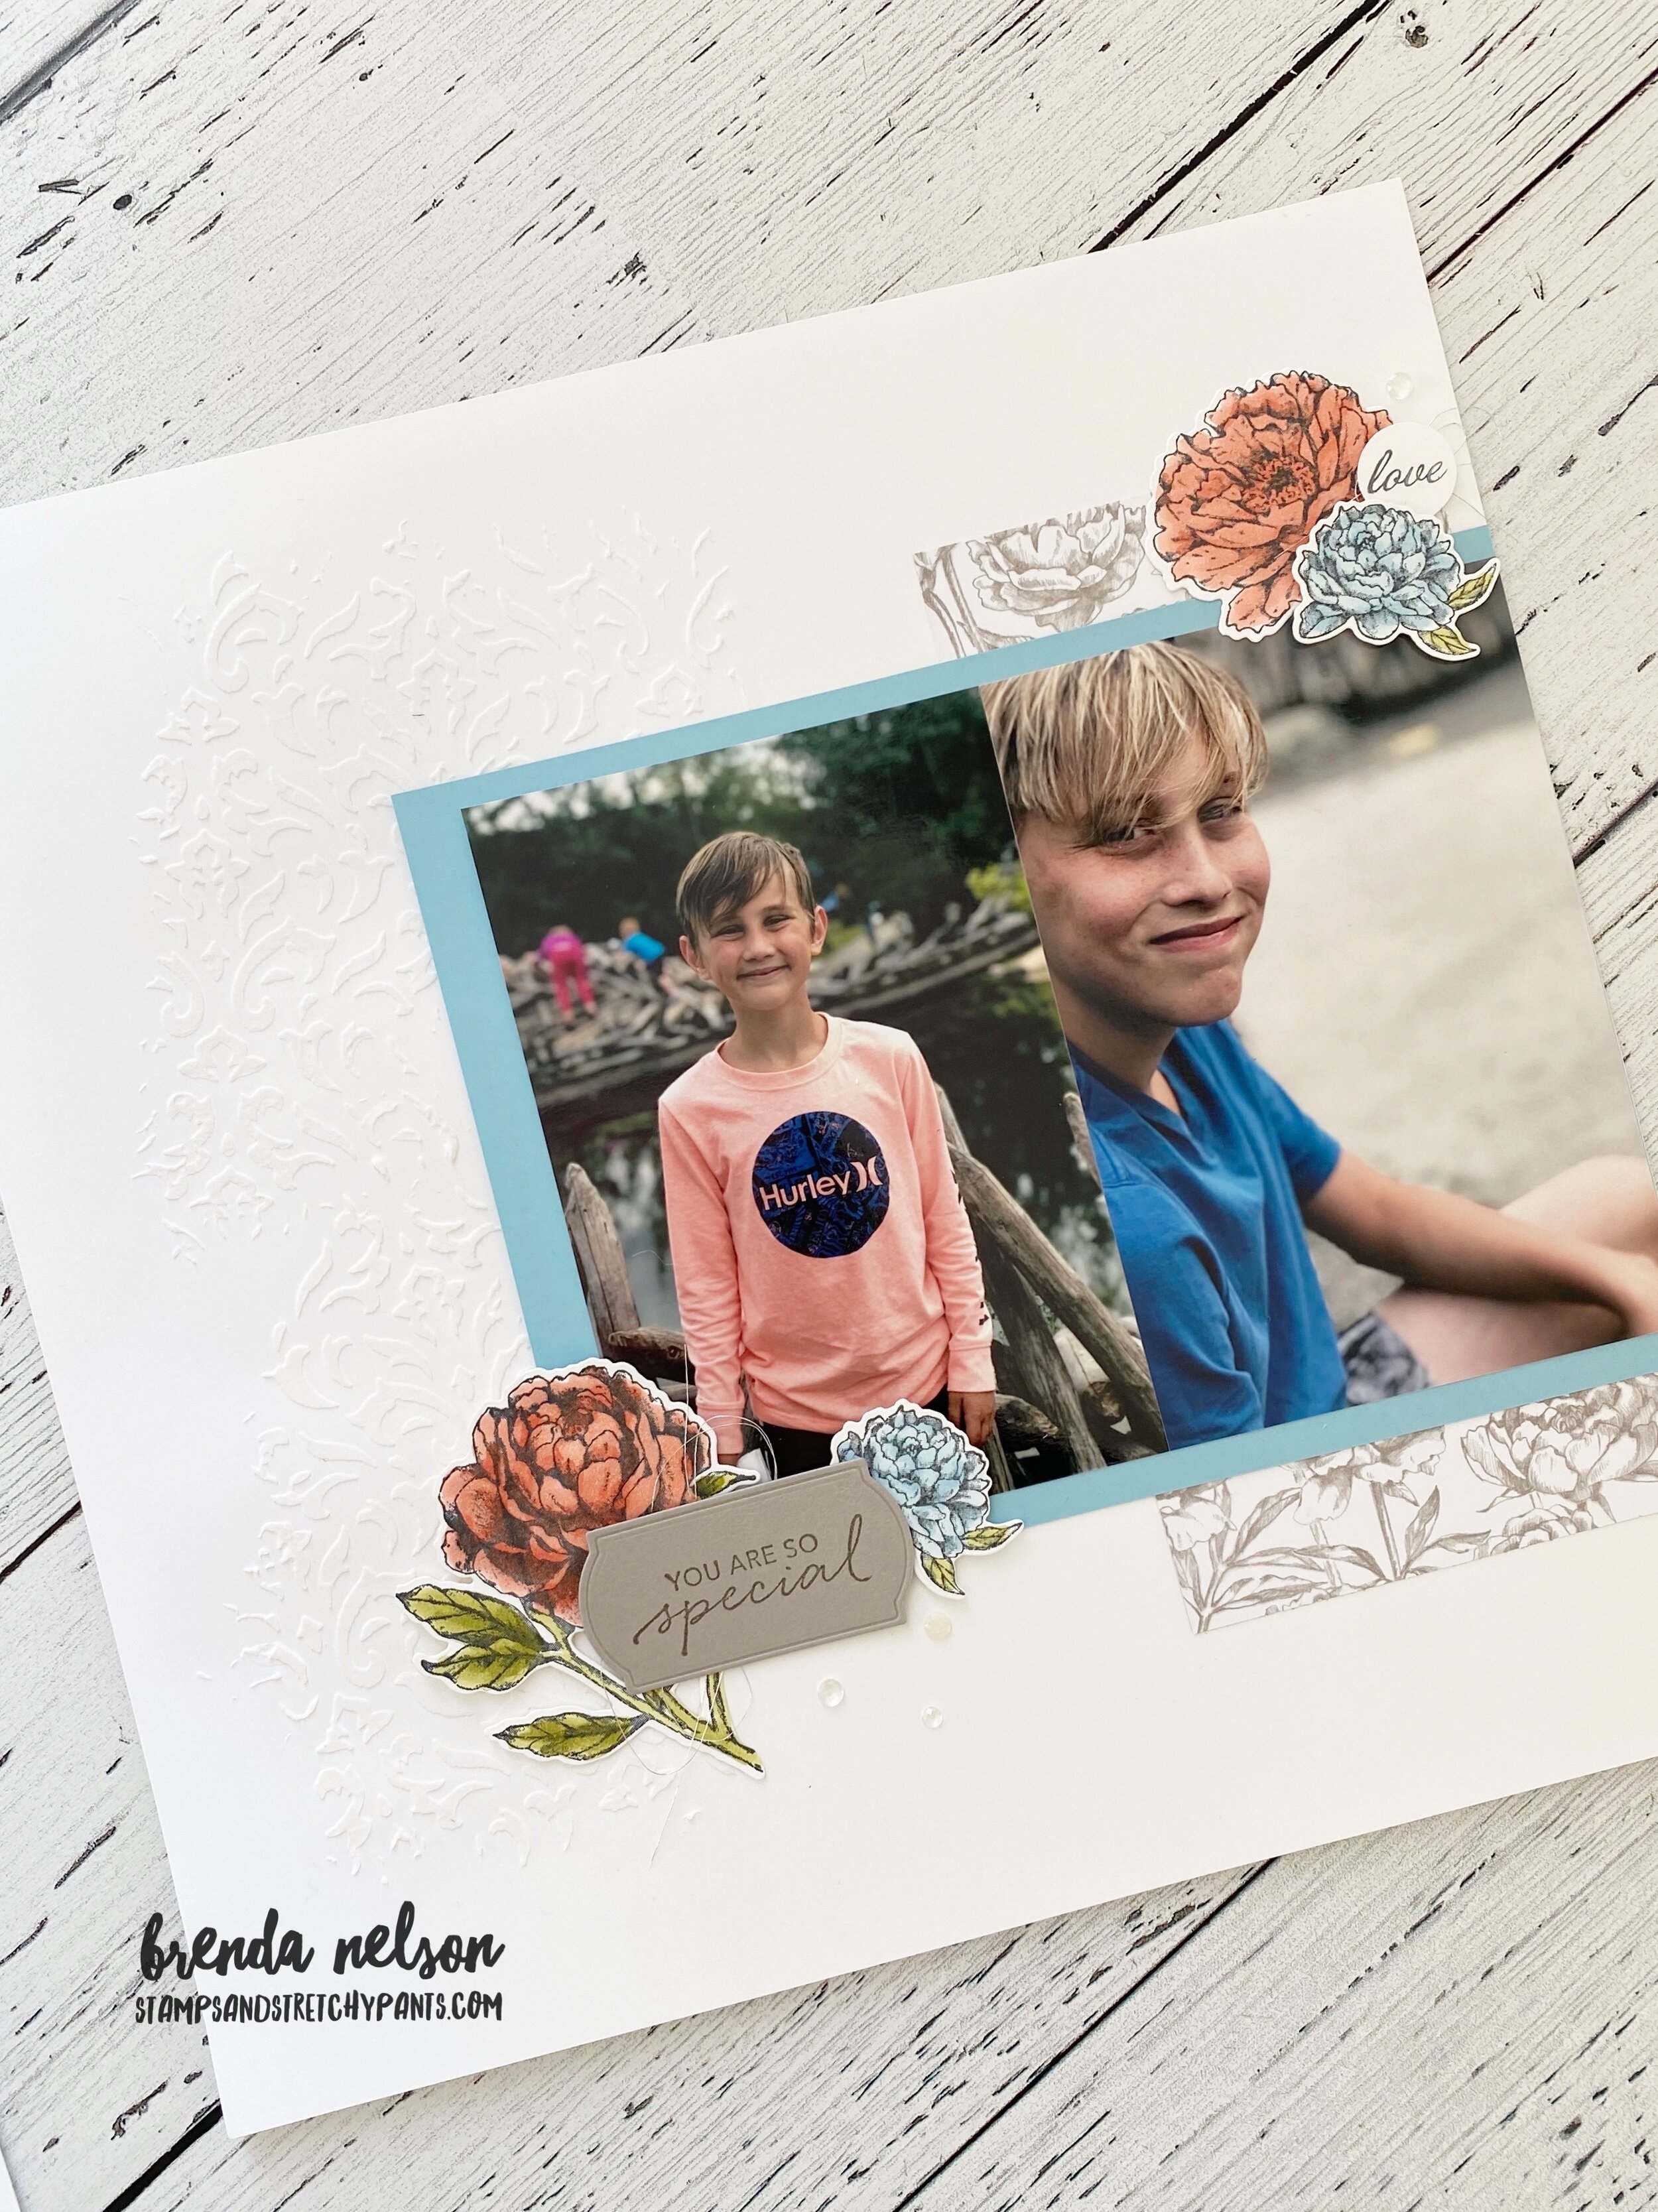
Have you been stamping and creating with the Prized Peony Bundle? I actually love it as Peony’s are one of the few flowers I can actually keep alive from year to year, although I do wish they had a longer life span! I love how in the Peony die collection you get dies that cut out the stamped images and you get dies that cut out and layer together to create a beautiful peony flower. It is a really unique die set.

I recently created this page to share with my stampers at our monthly scrapbook group. If you live in the Edmonton area and are interested in scrapbooking, this is an example of what we make at each of our monthly meetings. Please reach out to me if you are interested. I would love to share my love of memory keeping with you!

I chose the colors for this page based on the colors in my sons tee shirts! This is all apart of my creative process as I do like things to have coordination and its often helps me get my color palette figured out.

I chose the colors for this page based on the colors in my sons tee shirts! This is all apart of my creative process as I do like things to have coordination and its often helps me get my color palette figured out.

If I could have one wish granted it would be that Stampin’ Up! would offer all of our amazing colors in 12x12 sheets. However, it is not the reality, but I did feel that a crisp white background would help the peonies pop off the page. I also knew that I wanted to use embossing paste on the background as it is a fun and easy technique. It is really easy to do in a class setting. I just have all of the participants do the embossing paste step one after another and then I rinse the stencil and palette knife in warm water when they are done. So don’t be afraid to try its with a group!

I used the Basic Patterns Decorative Mask with White embossing paste too create this subtle background.  You can find both items and the Palette Knives on page 146 of the Annual Catalogue. If you look close you can see I also added in some of the El…

I used the Basic Patterns Decorative Mask with White embossing paste too create this subtle background. You can find both items and the Palette Knives on page 146 of the Annual Catalogue. If you look close you can see I also added in some of the Elegant Faceted Gems near the top of the page.

This page has quite an elegant feel to it which is kind of funny, as my kids were at our local zoo! This page would look amazing with wedding or anniversary photos too!

This page has quite an elegant feel to it which is kind of funny, as my kids were at our local zoo! This page would look amazing with wedding or anniversary photos too!

The Peony images are stamped in Moments Black Ink and coloured with the Old Olive, Calypso Coral and Balmy Blue Stampin’ Blends. The sentiments are stamped in Grey Granite ink on coordinating card stock and are cut with the Tasteful Labels dies and are from the Tasteful Touches stamp set. I think this whole bundle is a must have! I added a few pieces of the Peony Garden DSP to bring in that grey tone.

On each page I used two vertical 4x6 pictures that I butted up to each other, you could use one larger horizontal photo on the Balmy Blue photo mat as well. I like to give my group members options when selecting their photos. And my favourite die in the Peony set might be the long scallop border as its cuts and embosses and is just the perfect finishing piece.

If you would like any of the supplies to create this create this scrapbook page please click on the link below to shop with me in Canada!