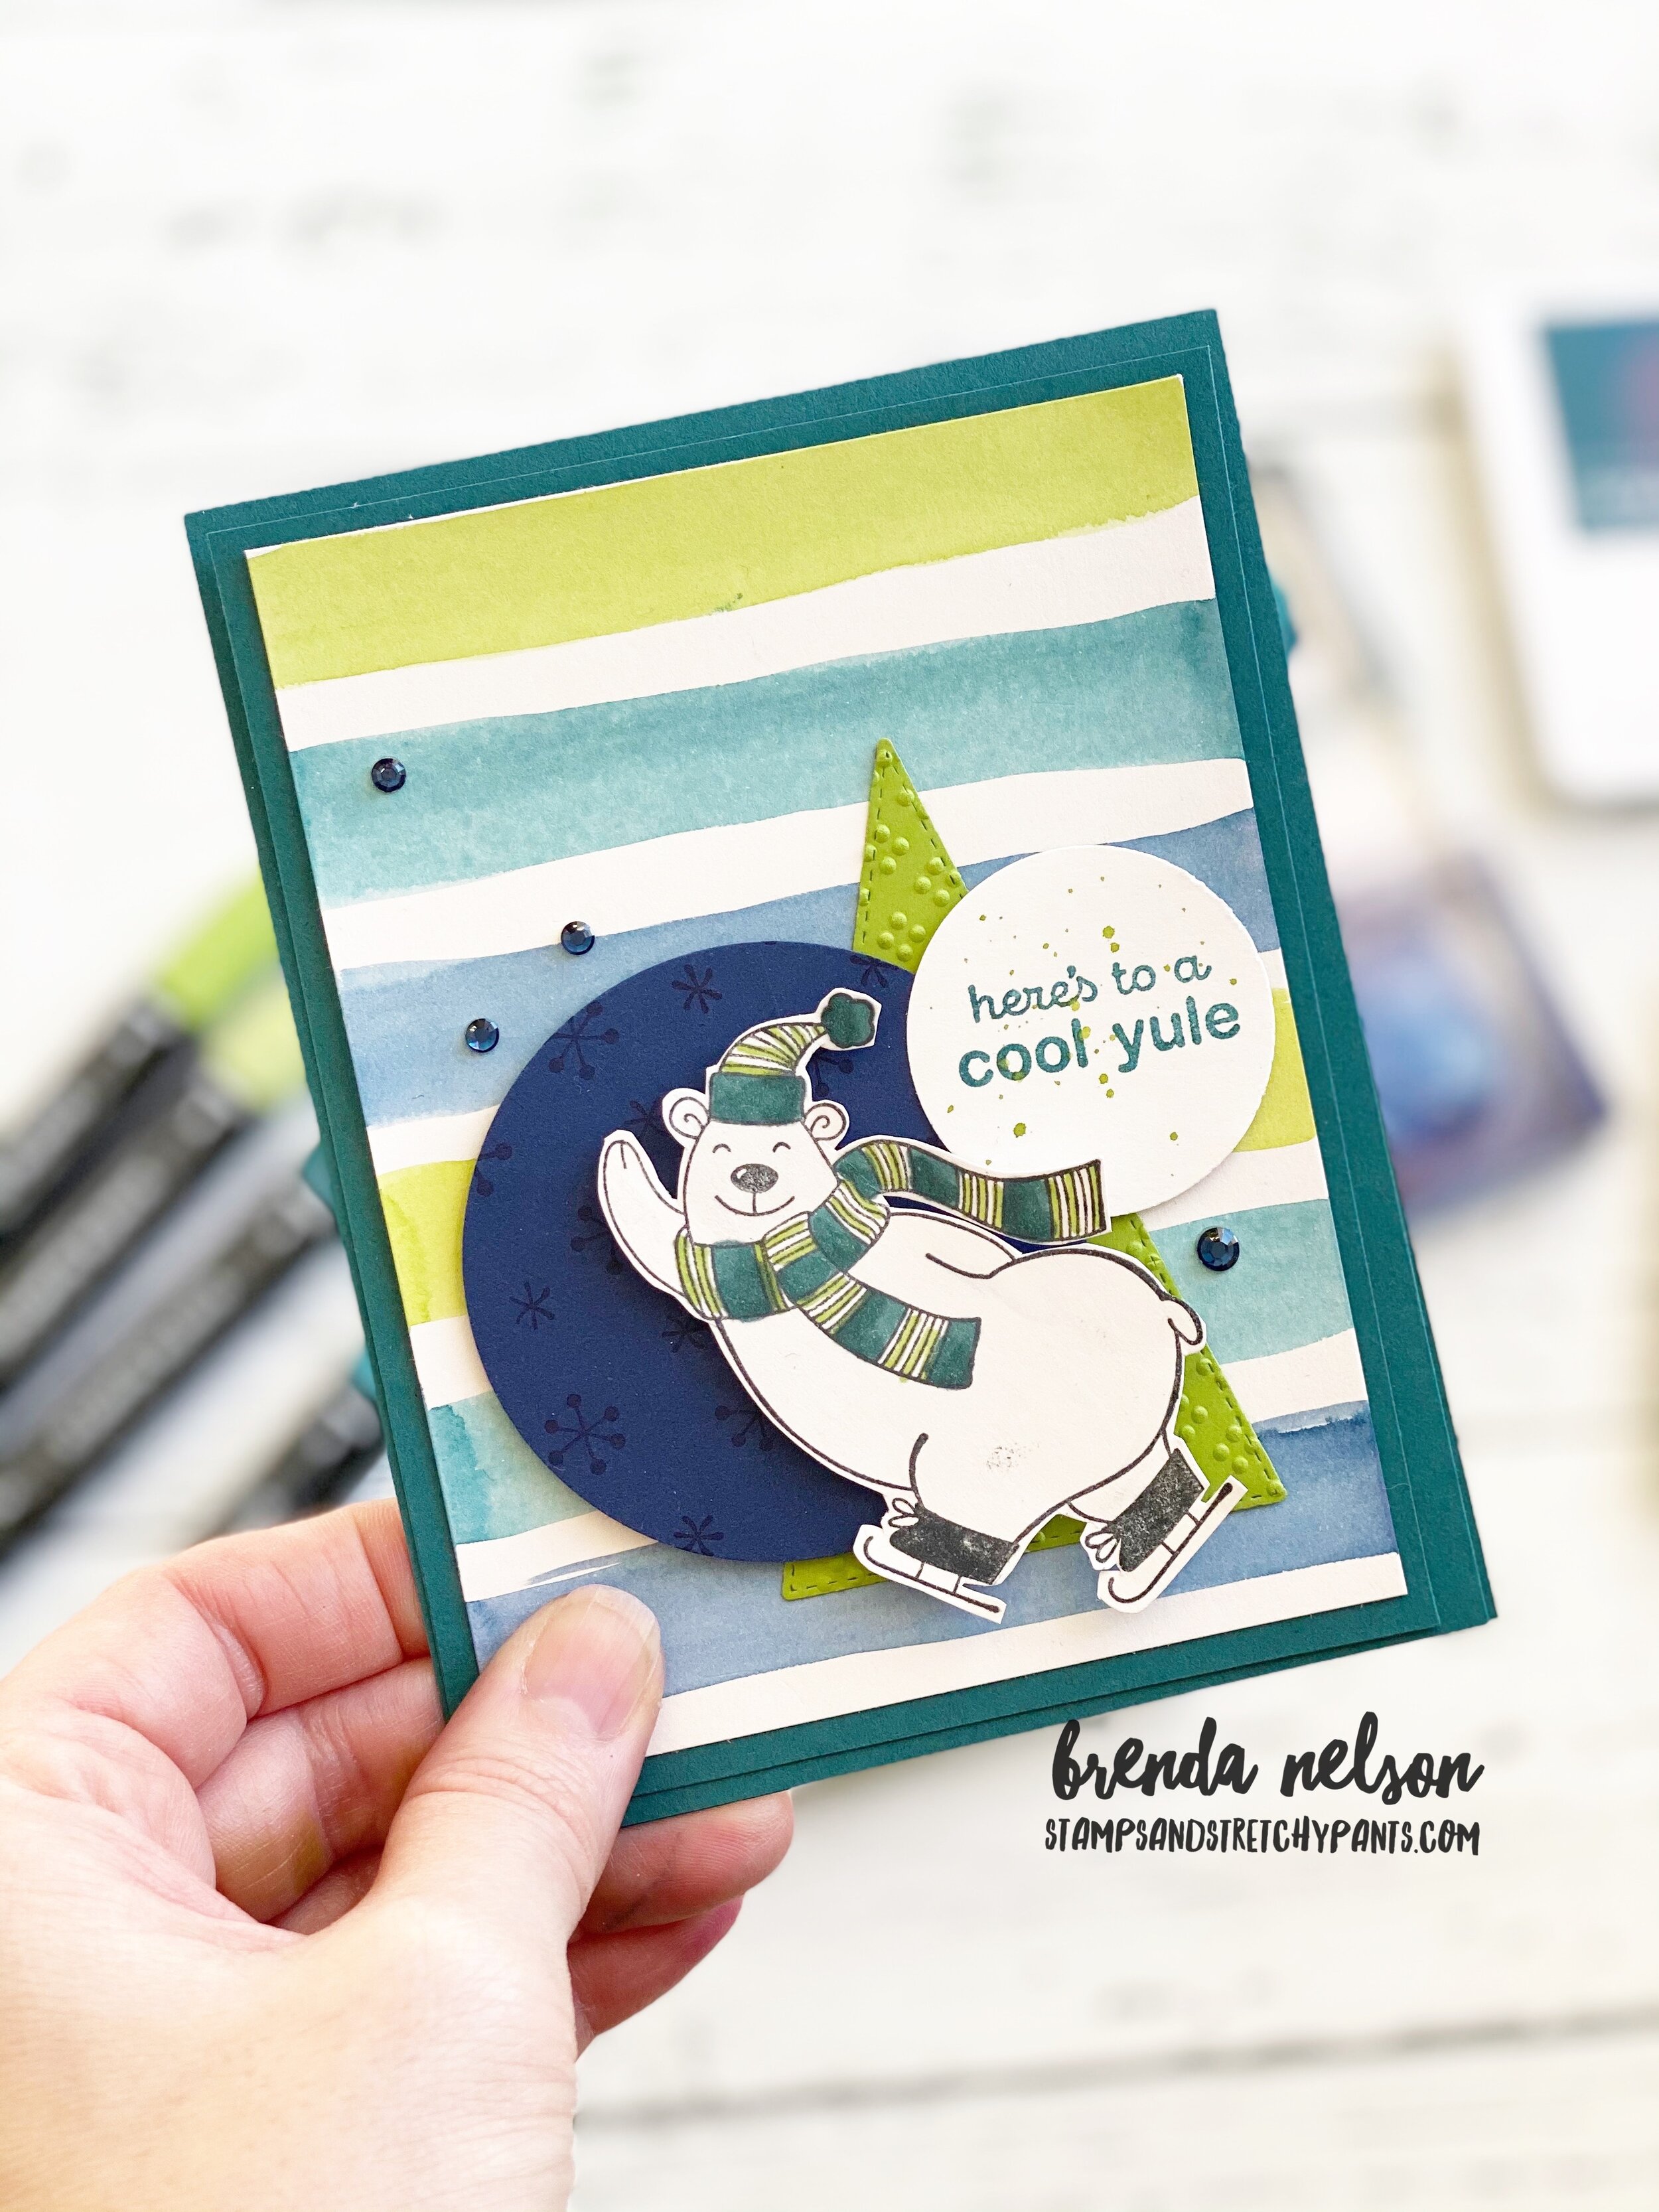
A Card a Day in December--Day #11

Happy Holidays! Is everyone getting into the holiday spirit? Our house is decorated and I have done a bit of baking, but I have not wrapped any gifts yet! I better make that a priority next week!

I have still been making Christmas cards! How about you? I have put around 80 in the mail this season!

final (1).jpg

I created this card using the Poinsettia Petals bundle and decided to try a softer color combo of Crumb Cake and Petal Pink. I am so happy with how it came out! It has a real soft elegant feel to it in my opinion.

The card stock base is Crumb Cake and I added a base layer of the same color. I loved the wood grain pattern in the Poinsettia Place Designer Series paper and it looked perfect as a border on this card. I stamped a few leaves to poke out on the base layer.

I cut a large circle in Petal Pink from the Stitched Shapes dies. I still remember how excited I was for these when they first came out as a special release. I hardly ever actually put them away as they are getting use so frequently.

final (2).jpg

The sentiment is actually stamped in Calypso Coral ink as i wanted to be sure that it would stand out and I love how the two colors look together.

The poinsettia is stamped and embossed with gold embossing powder and colored in using our Stampin’ Blends in Petal Pink. I added one of the gorgeous Beaded Pearls to the center and a bit of gold metallic thread to the backside. A few gold pearls and this card was complete!

I hope you have been inspired by my 11th card share this month!


A Card a Day in December-Day #10

Have you been following along so far? If not, welcome and make sure you go back to see the Holiday card projects that have already shared! I have really been enjoying creating and curating this A Card a Day in December—Holiday Style series for you!

Today I wanted to share a card that is a spin off of one I originally shared on Monday as part of the Color Fusers Blog hop.


This fun card was created using the Warm and Toasty stamp set as I couldn’t resist making something with this adorable little reindeer! Isn’t he just the cutest?

I paired him up with Poinsettia Dies and the Beautiful Boughs Dies (which were a carryover set from last season! I have used them tons this year too).

And I created another custom background using Water Painters and three ink colors! So easy when you can’t find Designer Series Paper that matches with your vision!

final (3).jpg
final (5).jpg

To create this background you need to work on Shimmery White or Water Color paper as they are thick enough to absorb the water from the Water Painter. You are going to use your largest Water Painter and Seaside Spray, Misty Moonlight and Pacific Point ink. Visit my post from Monday to get the technique details.

I colored my reindeer with Stampin’ Blends and hand cut him. The sentiment is stamped on Seaside Spray card stock in Misty Moonlight Ink. These two blues look extraordinary together! The sentiment is cut using the Beautiful Boughs dies.

Lastly I added in the poinsettia in Whisper White, some Metallic Seaside Spray Ribbon and some Frosted & Clear Epoxy Droplets (another great carry over product from last holiday season!).

Please shop for any of these products from my online store!

A Card a Day in December--Day #9

Hello friends! Here is another fun gift card holder idea. It is actually known as a ‘barn door’ gift card holder and I thought it would be a fun project to share as my 9th Holiday card! If you have been following along then you know I do 12 days of Gift Cards for my husband. I actually had him in mind when I created these as they do have more of a masculine feel to them with all of the blue tones.

120087652_3950988378251823_7393277335415621232_o.jpg

What makes this gift card holder unique is it starts with a typical card base size— 5 1/2 x 4 1/4 so you can get 4 bases from one sheet of card stock. Love that!

I wanted to use the Snowflake Splendor Designer Series Paper as the color palette has so many options that you can choose from for card bases! This particular one features Pacific Point.

The Gift Wrapped Bundle was an easy choice to use to create this gift card holder!


To create the ‘barn door’ or flip up section you will cut a piece of card stock to 4 1/4 x 2 1/4 and attach it to the left side of the base. The base designer series is cut so that it covers this ‘seem’ and then beside I added a panel of Whisper White where I did a little stamping and you have a place to write a special message.

I used the Classic Label punch to make a slit on the top flap that your gift card tucks into.

It is then hidden by a front panel that doubles as the card front.

I found this DSP so easy to work with to mix and match the patterns to create a few different gift card variations.

122219011_4031555820195078_4810462249955125759_o.jpg
120135078_3950988631585131_2305485365263012929_o.jpg

This one is on a Pool Party base. I wanted the front of the gift cards to look like wrapped presents and it was pretty easy with the Gift Wrapped stamp set. There are 5 different bow designs in this set and the font as a nostalgic feel to it.


I hope you have been enjoying all of my projects so far!

IMG_0080.png
120164497_3950988304918497_202985258323315200_o.jpg

A Card a Day in December--Day #8


Hello friends! I can’t believe it has been a whole week already of my A Card a Day in December—Holiday Style program!
I am really loving todays card as it features a bundle I have used a ton this holiday season, the Poinsettia Place bundle.

This bundle just has an infinite amount of possibilities and this card might be one of my favorite creations with it so far!

final 2 2.jpg

I wanted this traditional colored poinsettia to really shine so I paired it against three strips of Whisper White card stock that I ran through two different embossing folders—the Winter Snow folder and the Wrapped in Texture embossing folder.

final 5.jpg

The poinsettia’s leaves are stamped in Mossy Meadow on the coordinating card stock. This was a great chance to add in some of the Mossy Meadow Diagonal Stripe ribbon too.

I decided to stamp Merry Christmas in gold and emboss it. It gives this card a really classy look with the gold metallic pearls and a bit of retired gold thread.

I LOVE this card design as its such a great way to showcase off embossing folders.


Color Fusers-December 2020


Hello everyone! I am SO EXCITED and honoured to be a new participant in the Color Fusers Blog Hop. The talent line up in this Hop is truly like no other so when they reached out to ask me to join, I had to pinch myself!

colorfusers.jpg

If you haven’t followed along before, welcome! Each month we create projects that feature a trio of colors. There are so many fantastic colors offered by Stampin’ Up! and this is a great way to showcase them and get you stamping with different color combos!

For December we are playing with Night of Navy, Pretty Peacock and Granny Apple Green (my favorite of all our greens!).

IMG_8865.jpg
final 3 4.jpg
 

Because it December I wanted to create a fun holiday card using these colors and the cute polar bear from Warm & Toasty. He is just too much fun!

I started with Pretty Peacock as my card base and first layer. I then took a piece of Shimmery White, its a little thicker and can hold water a bit better, and using the widest brush tip from the Water Painters I made some stripes in the three colors.

Granny Apple Green, Pretty Peacock and finally Night of Navy.

final 3 3.jpg

Its actually quite easy to create custom stripes on your projects. If you don’t have the Water Painters, you can even use your Stampin’ Blends.

However in this instance I used the large Water Painter brush and added the three colors onto our acrylic blocks. I just smash the ink pad a couple of times onto the block to leave some ink behind. You then squeeze a bit of water onto the ink on the block and start creating!

final 3 4.jpg

Once my background was done I colored my polar bear’s scarf and toque with my Stampin’ Blends, which are offered in all three of these colors! You will need to hand cut this little guy as this stamp set does not have coordinating dies.

The tree is cut from Granny Apple Green cards stock with the Stitched Triangle Dies and ran through an embossing folder from the Wrapped in Texture duo.

The circle is the largest offering in the Circle Dies and I stamped little bitty snowflakes in the background with Night of Navy Ink.

The sentiment is stamped in Pretty Peacock and I flicked my Water Paper across it for a splash of green. A few of the Holiday Rhinestones were the perfect touch.

I am really happy with how this card turned out and I have already made a different one with a different color combo that I will be sharing later this month! Thank you for hoping along!


You can head backwards if you are just going in to see what Nicole has created or you can go Next to see what awesome project Melanie has designed! Please feel free to leave a comment!

final 14.jpg