Around the World on Wednesday--We Are Shaking Things Up!

Happy Wednesday! Thank you for travelling around the world on this virtual blog hop! I love how we have so many people participating from the many corners of the crafting world! So thank you for hopping along with us! I live in Edmonton, Alberta, Canada!

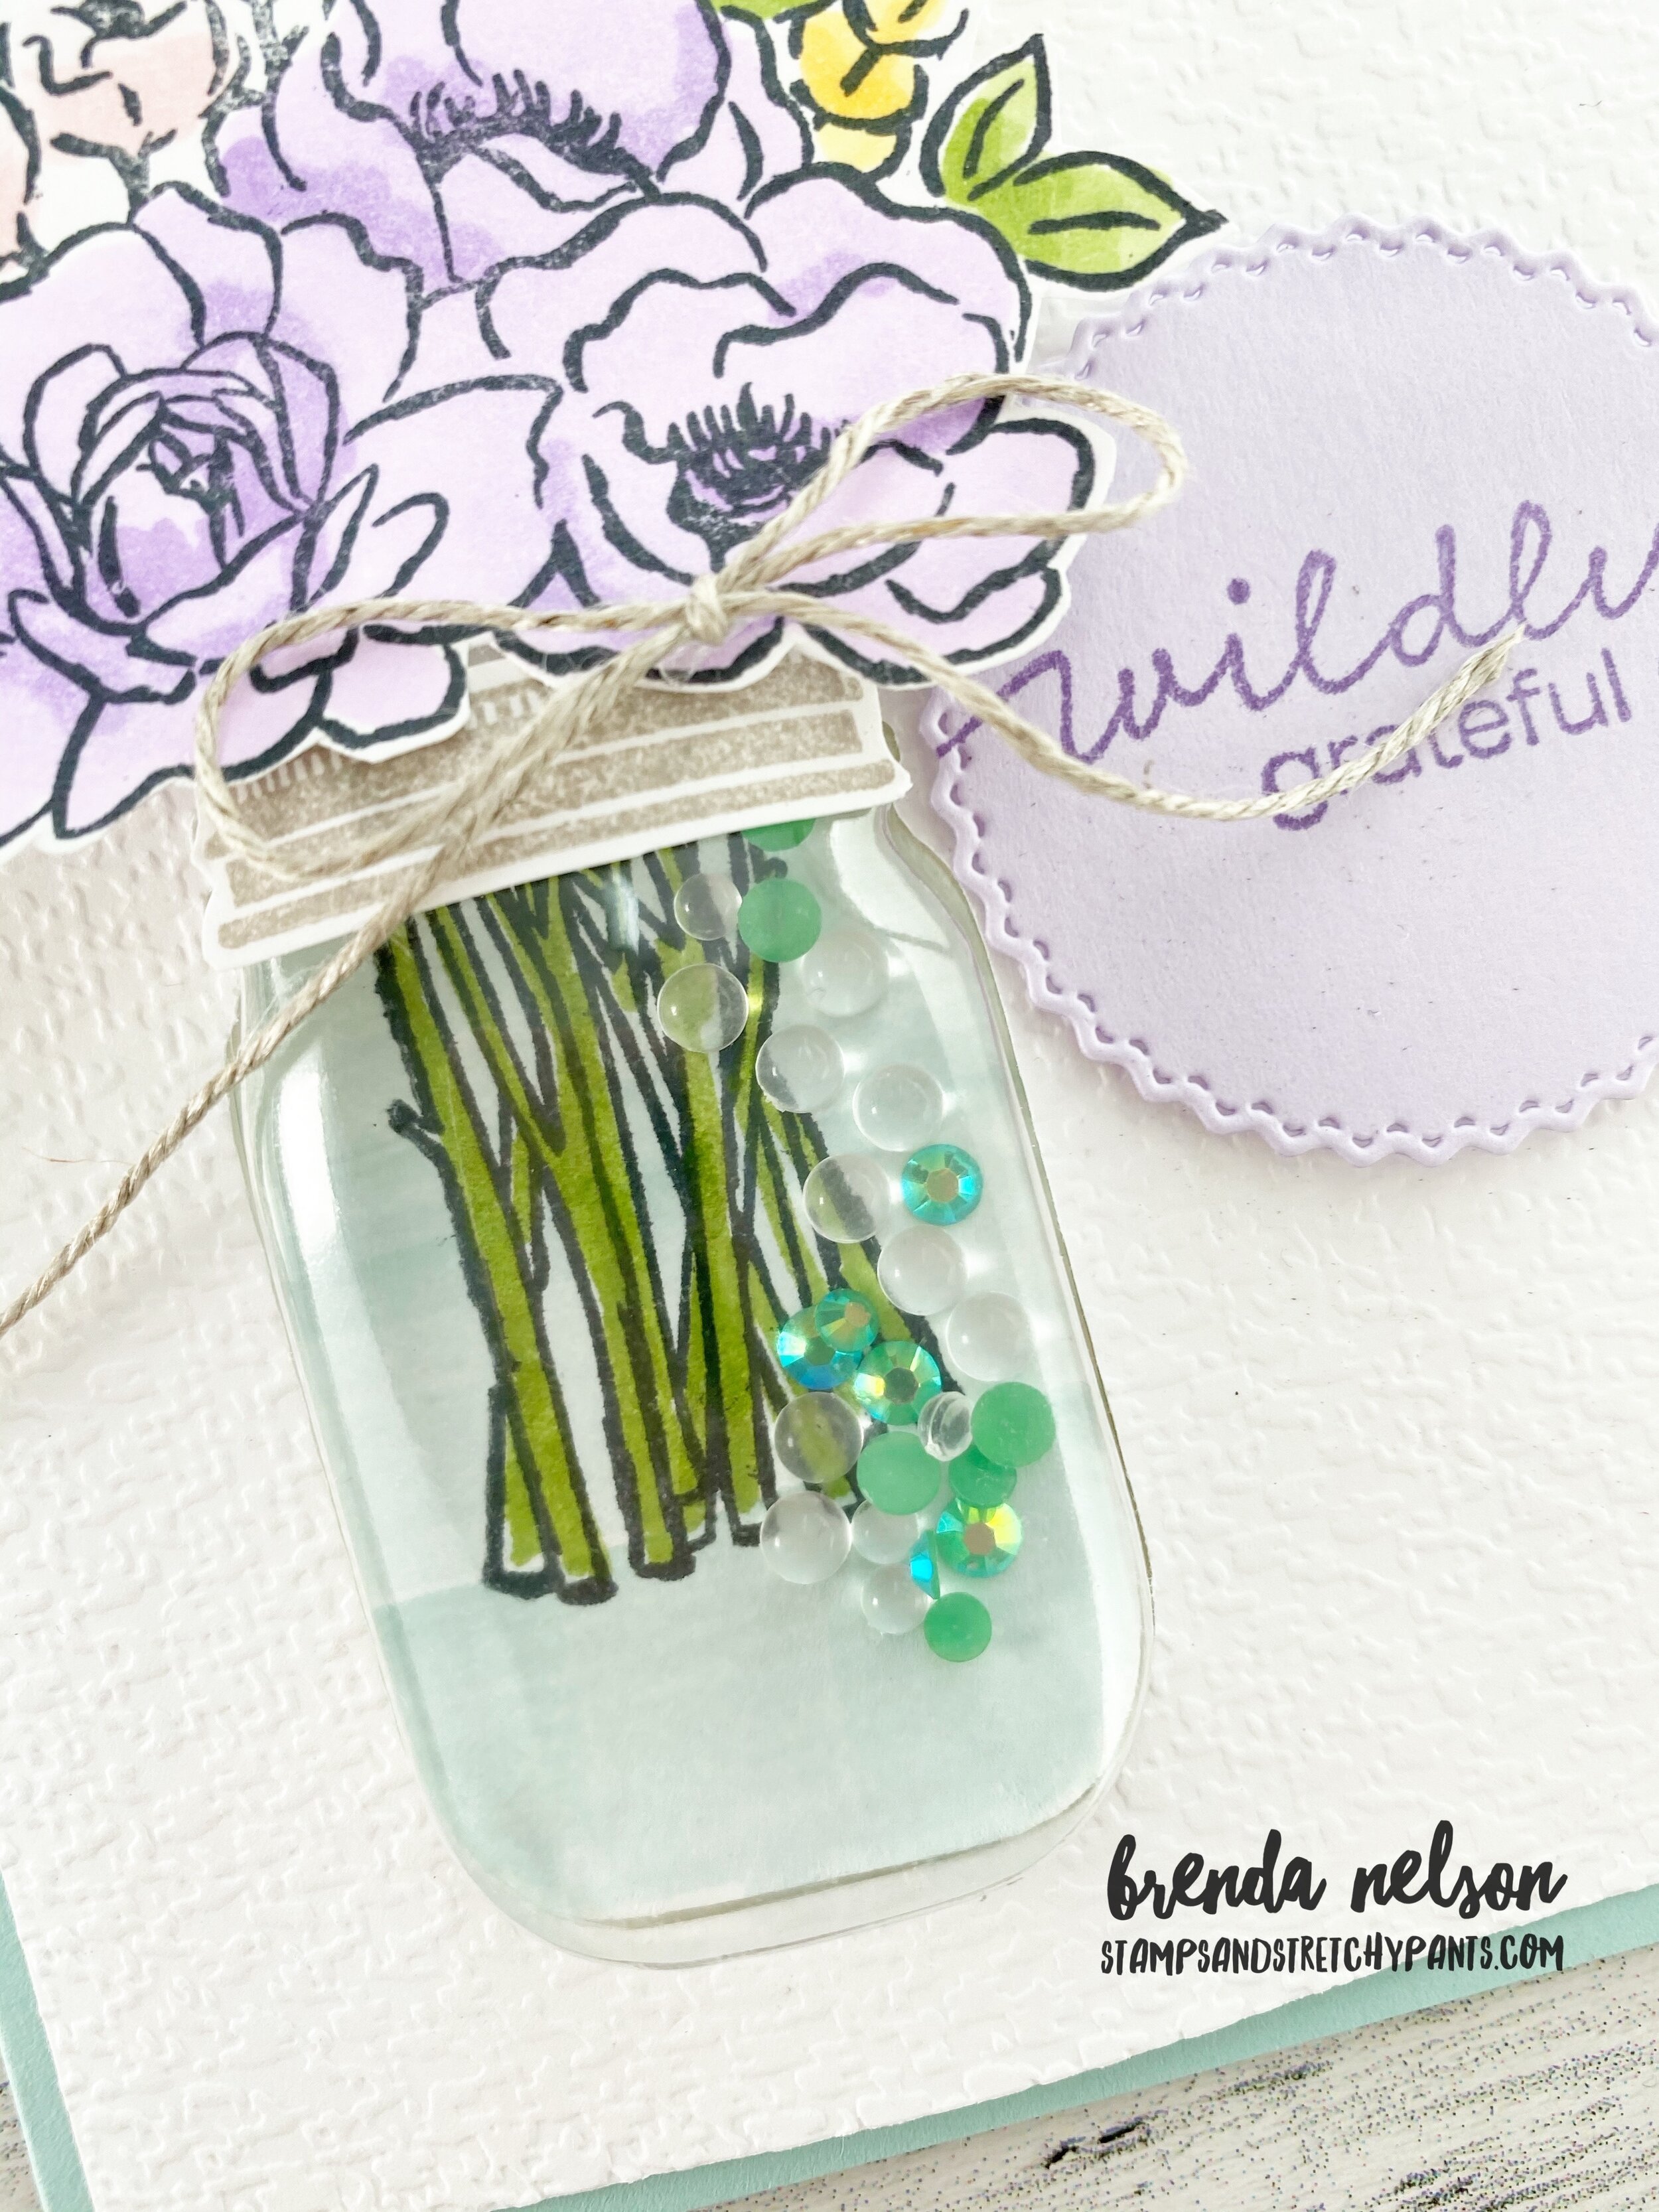
This month, our theme was SHAKE THINGS UP—-I took this literally, haha! To create a shaker card! Its actually been a while since I have played with this fun card style.

91442295_10216484369808661_2887014979863576576_n.jpg

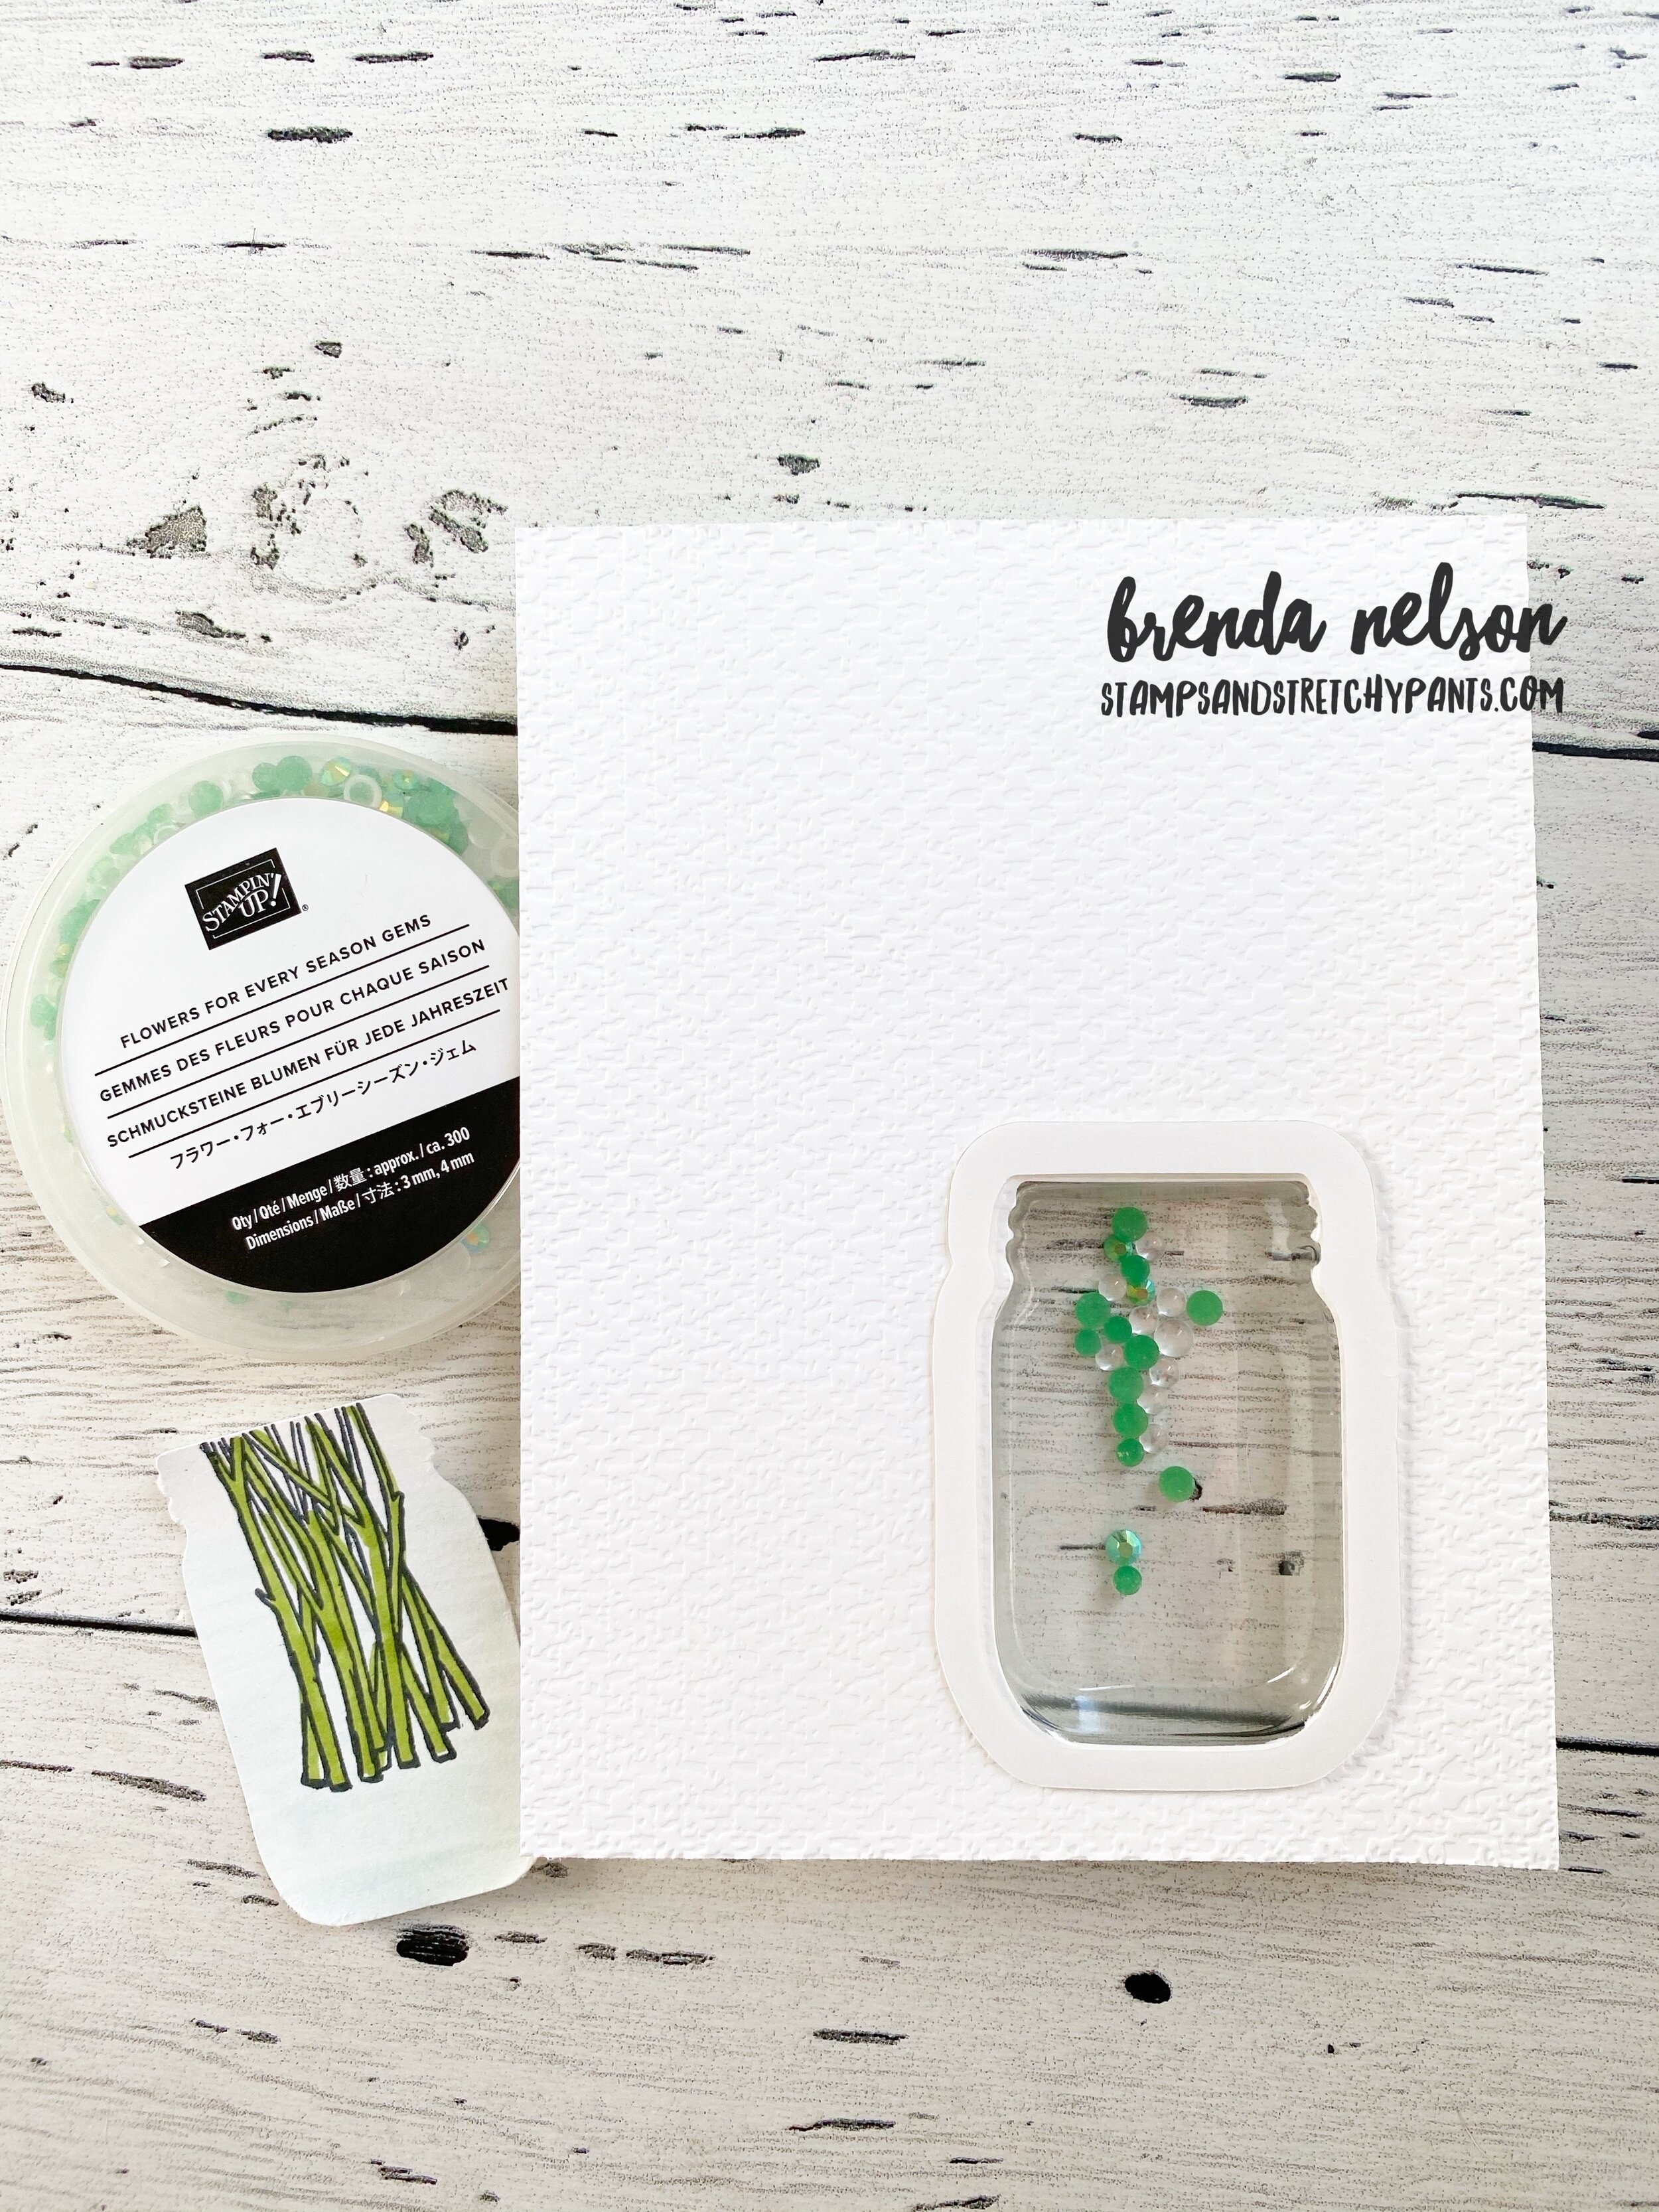
I actually wanted to create a ‘simple’ shaker card and the easiest way to do this is to use our clear envelopes. You can find these in the catty with our medium envelopes on page 153. I use them for card pieces (my stampers have lovingly referred to these bags as their Brenda Bag!), as a glossy surface for water colouring techniques and to create shaker cards!

final 74.JPG

I took one of these clear envelopes and stuffed it with a piece of Whisper White card stock that was run through the NEW Stampin’ Cut & Emboss Machine with the Tasteful Textile 3D embossing folder. Ok, let’s stop right there! The NEW machine is a dream, its like butter! Even my stampers commented how smoothly things run through and how easy it is to use with all of the plaforms being labelled! So well done, SU, well done!

Now I knew I needed some filler for my shaker card and I ended up using the Detailed Hearts Die on some Gold Foil paper. I was thinking convenience people, haha! I knew this die would cut out a ton of hearts and would leave me with a fun piece I could use on a future project! I dropped all of my hearts into the clear envelope, folded it in half and sealed it shut. Seriously, this could NOT be easier and is such a fun way to create a shaker card, especially for new stampers!

I really wanted to play with some new stamps so I decided to embellish the front of my card with the Love of Leaves Bundle and the Plaid Tidings DSP. The little ‘hello’ is stamped and embossed in gold and is then cut out using the itty bitty tag that is a part of the Gift Bow Builder punch. Its literally too cute for words!

I love all of the texture you get with the Love of Leaves stamp set.  The dies are fabulous as you can use them to add a stitched detail to your leaves if you choose or just to cut out the image! You can use my Hostess Code if you want to add them t…

I love all of the texture you get with the Love of Leaves stamp set. The dies are fabulous as you can use them to add a stitched detail to your leaves if you choose or just to cut out the image! You can use my Hostess Code if you want to add them to an order!

Next up on your virtual world tour is to visit Tricia Butts from the United States. I can’ wait to see what she has created for us, I know you will be inspired! Just click on the Next Blog and it will take you there! Have a wonderful day!

Flowers for Every Season

I recently had a creative swap challenge with my Team, we needed to pick a suite from the catalogue and create a card project using the elements in that suite. I chose the Flowers for All Seasons Suite (pg 10-11 of Annual Catty) to create with because sadly, I have had all of these supplies and had not used them since I got them in May/June. Who can relate?

I will admit, when a new catalogue is released I go a little crazy ordering everything that inspires me! But there are only so many hours in the day to craft, so sometimes awesome stuff like this product suite sit on my shelf not getting any love!

I did add in a few elements from outside of this suite, the sentiment and the die to cut it out. The sentiment is from Lovely You (pg 22) and the dies are the Tasteful Labels dies (pg 179). I also used the Tasteful Textile 3D embossing folder on the white card front layer.

final 65.JPG

I actually chose a bit of a softer color palette as well for my card than what is showcased in the catalogue as well. I wanted something that felt peaceful and relaxing unlike the bold colors of the suite. I started by choosing the flower collection I liked in the Jar of Flowers stamp set. There are 4 options and I liked this one because it felt the fullest. I chose to color it with some soft Stampin’ Blends in Purple Posy, Highland Heather, Pink Pirouette (retired I know, sad face), Pool Party, Mango Melody and Granny Apple Green. There are no dies with this stamp set, just the cutest jar punch! So you will have to hand cut any of the bloom images.

Creating the ‘shaker’ part of this card took a few steps. After I ran the Whisper White card stock through the Tasteful Textiles embossing folder I used the jar punch to create the shaker space. I added in the Mason Jar Shaker Dome (pg 158). I dropped a few of the Flowers for Every Season gems inside the dome. I wanted it to look like there was water in the shaker dome so I used my Water Painter brush and Pool Party ink to swipe some color on scrap white card stock. I then stamped the stems and coloured them with the Granny Apple Green Stampin’ Blends. I punched this out with the Jar Punch and added it into the space created by the dome. Now this will not seal this shaker dome up, you will need to use another piece of scrap paper (3 x 2.5 should do it) to seal this up after you take off the adhesive strip around the shaker dome.

final 66.JPG

I decided to add a few white sprigs from the Sunflowers dies as it helped fill in the flower arrangement. I also had to double stack my Dimensionals on the back of the flowers to get them to sit up high enough to match the Mason Jar dome. The rim of the jar is stamped in Grey Granite and hand cut. I added it on with Glue Dots.

I really really love how these cards turned out, especially because I had to make 14 of them! It was actually a relaxing way to spend my weekend, colouring and fussy cutting!

Prized Peony Project

I was really intrigued with this Prized Peony bundle when I received it in my last order. The Peony dies has 17 pieces to it and I won’t lie, it did take me a bit to figure out how to assemble this 3 D peony as it is a bit different from any other dies Stampin’ Up! has had. Once I got my mind around it they became very easy to put together. I created a fun project using our new Mini Paper Pumpkin boxes and two note-sized cards. My only complaint would be that these boxes don’t fit a full sized card. However, I will just have to get used to making note sized cards!

 
final.jpg

I created this handy chart to quickly illustrate the order of assembly the peony. If you use the bottom of the flower as a visual aid it also will help you with the assembly. And because the layers nestle quite snuggly you don’t actually need that much adhesive.

There are also 3 leaves included in the Peony Dies so I added those onto the guide so you can see which pieces layer together to create the final leaf. I hope it helps!

I labeled the flowers in the order that they slip inside each other.  You can fold back the paper along the slit to help create more dimension in your flowers.

I labeled the flowers in the order that they slip inside each other. You can fold back the paper along the slit to help create more dimension in your flowers.

fullsizeoutput_1225e.jpeg

I love the size of these mini paper pumpkin boxes! They are just so fun and have unlimited potential. I wanted this project to look ‘fancy’ so I added a tab using the Stitched Rectangular dies to create a tab that gives the illusion of keeping the box closed. I added one of the Elegant Faceted Gems to it as well.

final.jpg

The Smoky Slate card has a light background stamped using one of the images in the Prized Peony stamp set. I stamped it off first so it was very faint and then I used my Water Painter dipped in some Basic Grey ink to create a splatter. I stamped the large peony on Smoky Slate card stock and cut it out with the coordinating die. It is popped up on Dimensionals. The sentiment is stamped in Petal Pink and cut out with a die from the Tasteful Labels dies.

The Basic Grey card has the large single bloom (no stem) stamped as the background. I then cut the peony pieces out of vellum and sponged the edges in Petal Pink ink. I added a very thin strip of DSP and the scallop edge is cut from a piece of the Basic Grey card stock (about 1.2 inch in thickness). A few silver metallic pearls completes the look!


Rainbow Glimmer Paper!

I recently hosted a Zoom bingo with some of my stampin’ friends and one of the items they got to take home is the new Rainbow Glimmer paper. Have you seen this in person yet? Its AMAZING and has endless potential! When I host a bingo I always make a fun tag of some sort to attach to their Swag, so this is how I used the Rainbow Glimmer paper and the Playful Alphabet dies. It can double as a name plaque on their desk or craft room.

final.jpg
To create this tag/name plate cut a piece of Whisper White to 5 1/2 x 4 and score at 2 on the short side.  I stamped the bloom in Staz On from the Hand-Drawn Blooms stamp set. I then cut the letters out of the Rainbow Glimmer paper and attached with…

To create this tag/name plate cut a piece of Whisper White to 5 1/2 x 4 and score at 2 on the short side. I stamped the bloom in Staz On from the Hand-Drawn Blooms stamp set. I then cut the letters out of the Rainbow Glimmer paper and attached with Tombow glue. I stamped Hello in Just Jade ink on Just Jade card stock and hand cut. I added it to the tag with a Dimensional. And the final touch was a few of the Artistry Blooms Sequins

Creating this tag was the perfect way to keep these two Swag treats together! I used a Dimensional on each side which can easily be removed when the recipient wants to repurpose the tag

Creating this tag was the perfect way to keep these two Swag treats together! I used a Dimensional on each side which can easily be removed when the recipient wants to repurpose the tag

Double Front Card

It has been a while since I have made a Double Front Card (at least that is what I know it as) and I thought I would kick off the last week of my “A Card a Day in May” challenge with something fun! I also used all new products on this card as well and am so happy with the end result!

The base of my card is the new In Color, Cinnamon Cider which is cut to 6 3/8 x 5 1/2. Score at 4 inches on the long side. I cut a layering strip of Cinnamon Cider card stock to 1 7/8 x 5 1/4 which I ran through the new Tasteful Textile 3D embossing folder. This adhered to the little flap on the base of the card front.

The base for the inside card, Whisper White, is 8 x 5 1/2 scored at 4 inches on the long side.

I cut two pieces of Misty Moonlight to 2 3/4 x 4 1/4 for the front and inside decorative panels.

Cut two pieces of Whisper White to 2 1/2 x 4 to layer on top. This is where I did my fun stamping!

On the inside flap I added some DSP from the Flowers for Every Season 6x6 stack. It is 2 x 5 1/4. I added a second little strip to the card base which peeks through when the card is closed. It is 1 x 5 1/4.

Adhere the Whisper White card base to the Cinnamon Cider base making sure to keep a little bit of space between the folds. You can then add the two Misty Moonlight panels making sure that the second one (attached to the Whisper White base) is hidden behind the first one. Embellish your card as desired!

I used the Lovely You and Field of Flowers stamp sets on my card. The sentiments on Just Jade are stamped with Versamark and embossed with Clear Embossing Powder. I cut both out using the Tasteful Labels dies.

I added threads behind my sentiments that I deconstructed from the open weave ribbon found in the Forever Greenery Trim Combo pack. It might just be my favourite new trick. I have to replace that Metallic Thread with something! And finally the little green gems on the front are from the Flowers for Every Season gems collection. They really do finish off the front panel.

 
final.jpg
This is the inside view of the first panel.  You can see how I added in the DSP and have attached the two Misty Moonlight panels so they line up.  The second one is hidden until you open the card.

This is the inside view of the first panel. You can see how I added in the DSP and have attached the two Misty Moonlight panels so they line up. The second one is hidden until you open the card.

And finally the next flip takes you to the back base of the card where I included another sentiment found in the Lovely You stamp set.

And finally the next flip takes you to the back base of the card where I included another sentiment found in the Lovely You stamp set.

Isn’t the detail in the thread and gems just the perfect touch? It really elevated the sophistication of this card!

Isn’t the detail in the thread and gems just the perfect touch? It really elevated the sophistication of this card!