Gumball Goodness-Artisan Design Team Project

Hello friends! Welcome to a brand new year of Artisan Design Team projects! I am so happy to be a part of the team again for 2022. I think it took me most of 2021 to get my bearings so I am happy to have another opportunity! One area that I didn’t do the best at was creating a blog post to go with my monthly assignments. There are often lots of fun things to share with you that go along with our monthly posts that don’t always come across in the 2 photos we submit!

Fun fact, we submit 2 photos but I usually take like—30! hahaha! Then I narrow them down to the two best, edit them and all that jazz, and then fingers crossed they get approved! Sometimes we do have to make little tweaks and since I photograph my projects in natural light, even an hour difference can make the whole series of pictures look very different!

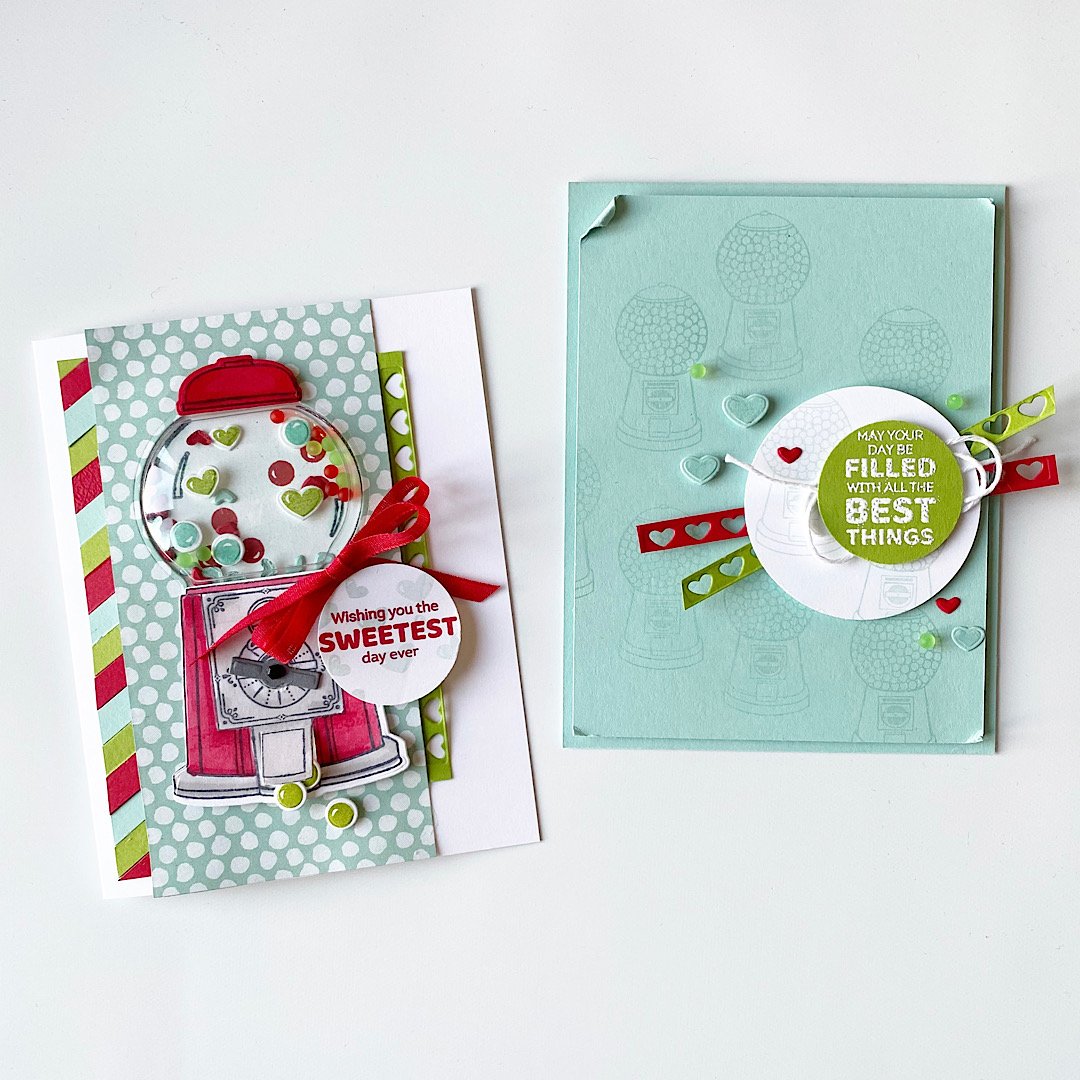
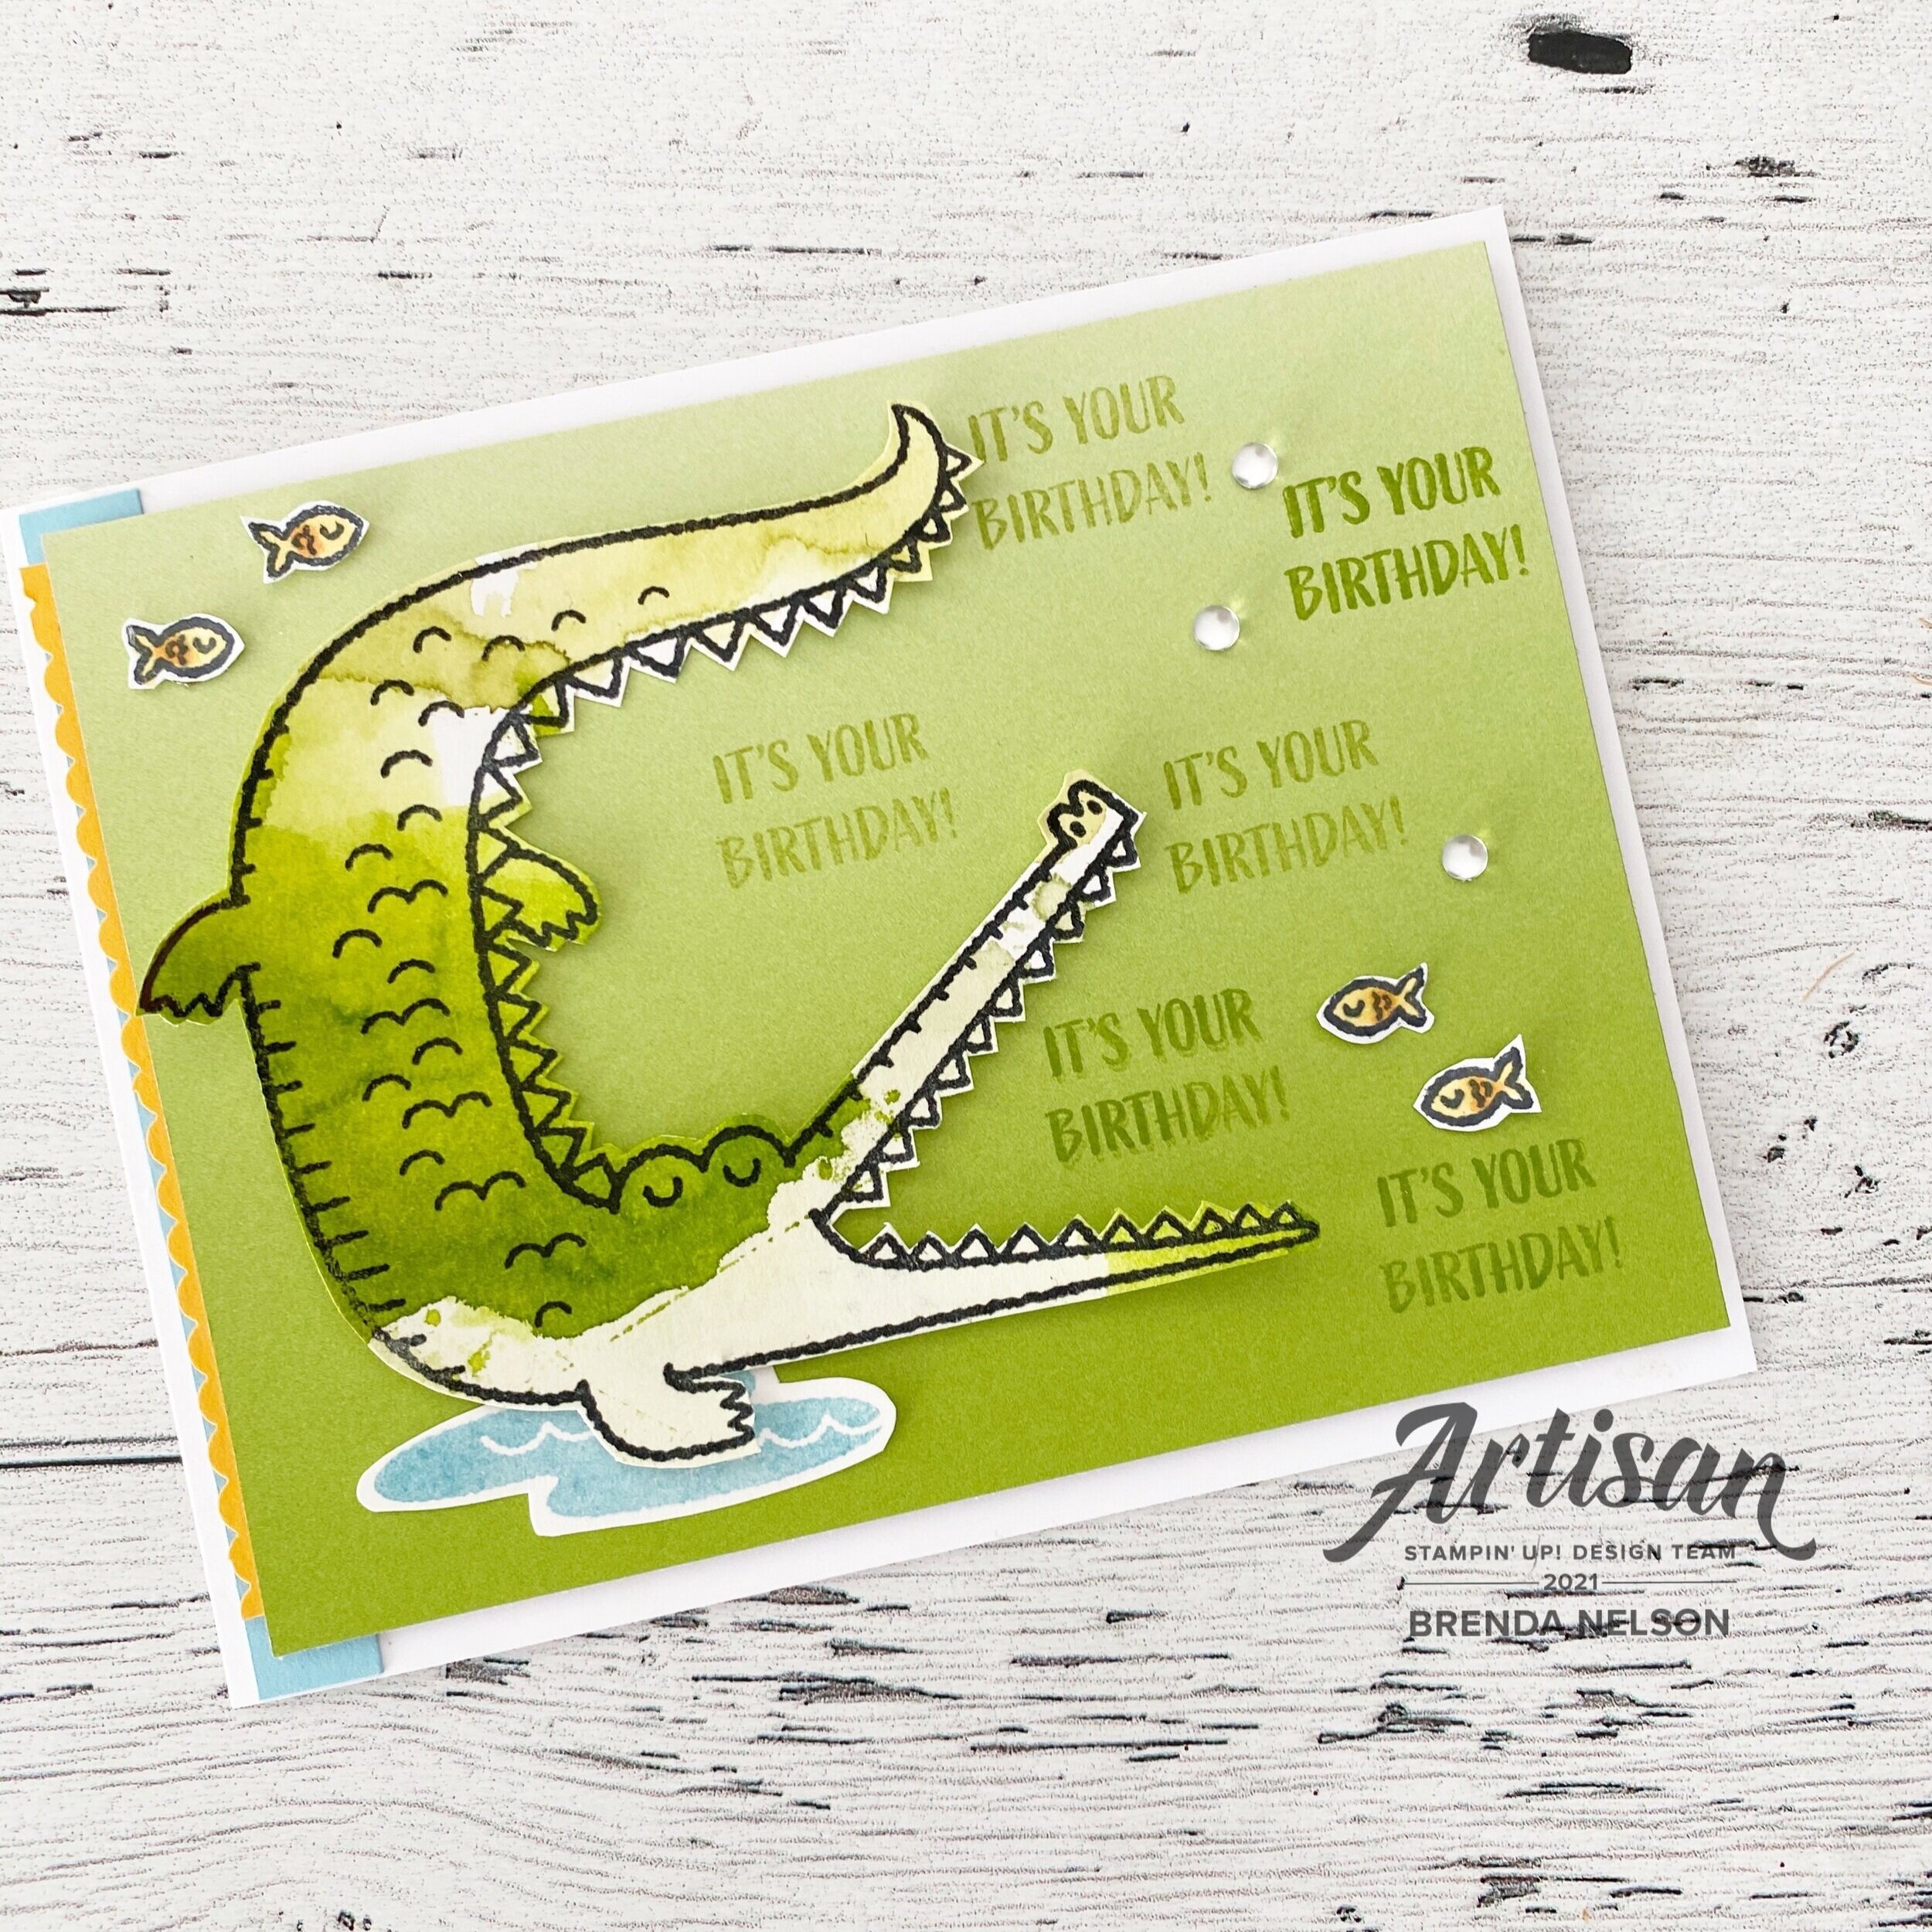
These cards feature the awesome Gumball Greetings Bundle from the new January to June Mini Catalogue—or the JJ catalogue!

My first assignment for 2022 was the Gumball Greetings bundle in the new JJ catalogue—the bundle can be found on page 12 and includes some really unique accents—the Gumball Machine Shaker Domes and the little Frosted Beads Assortment! I used these beads in two ways—-as filler for my gumball machine and as an accent or embellishment on my card front!

Now truth be told, I did actually struggle with this assignment! I spent alot of mental time thinking about my projects and ripped apart several attempts until I landed on these two cards. I think they are a good representation of the stamp set and the dies.

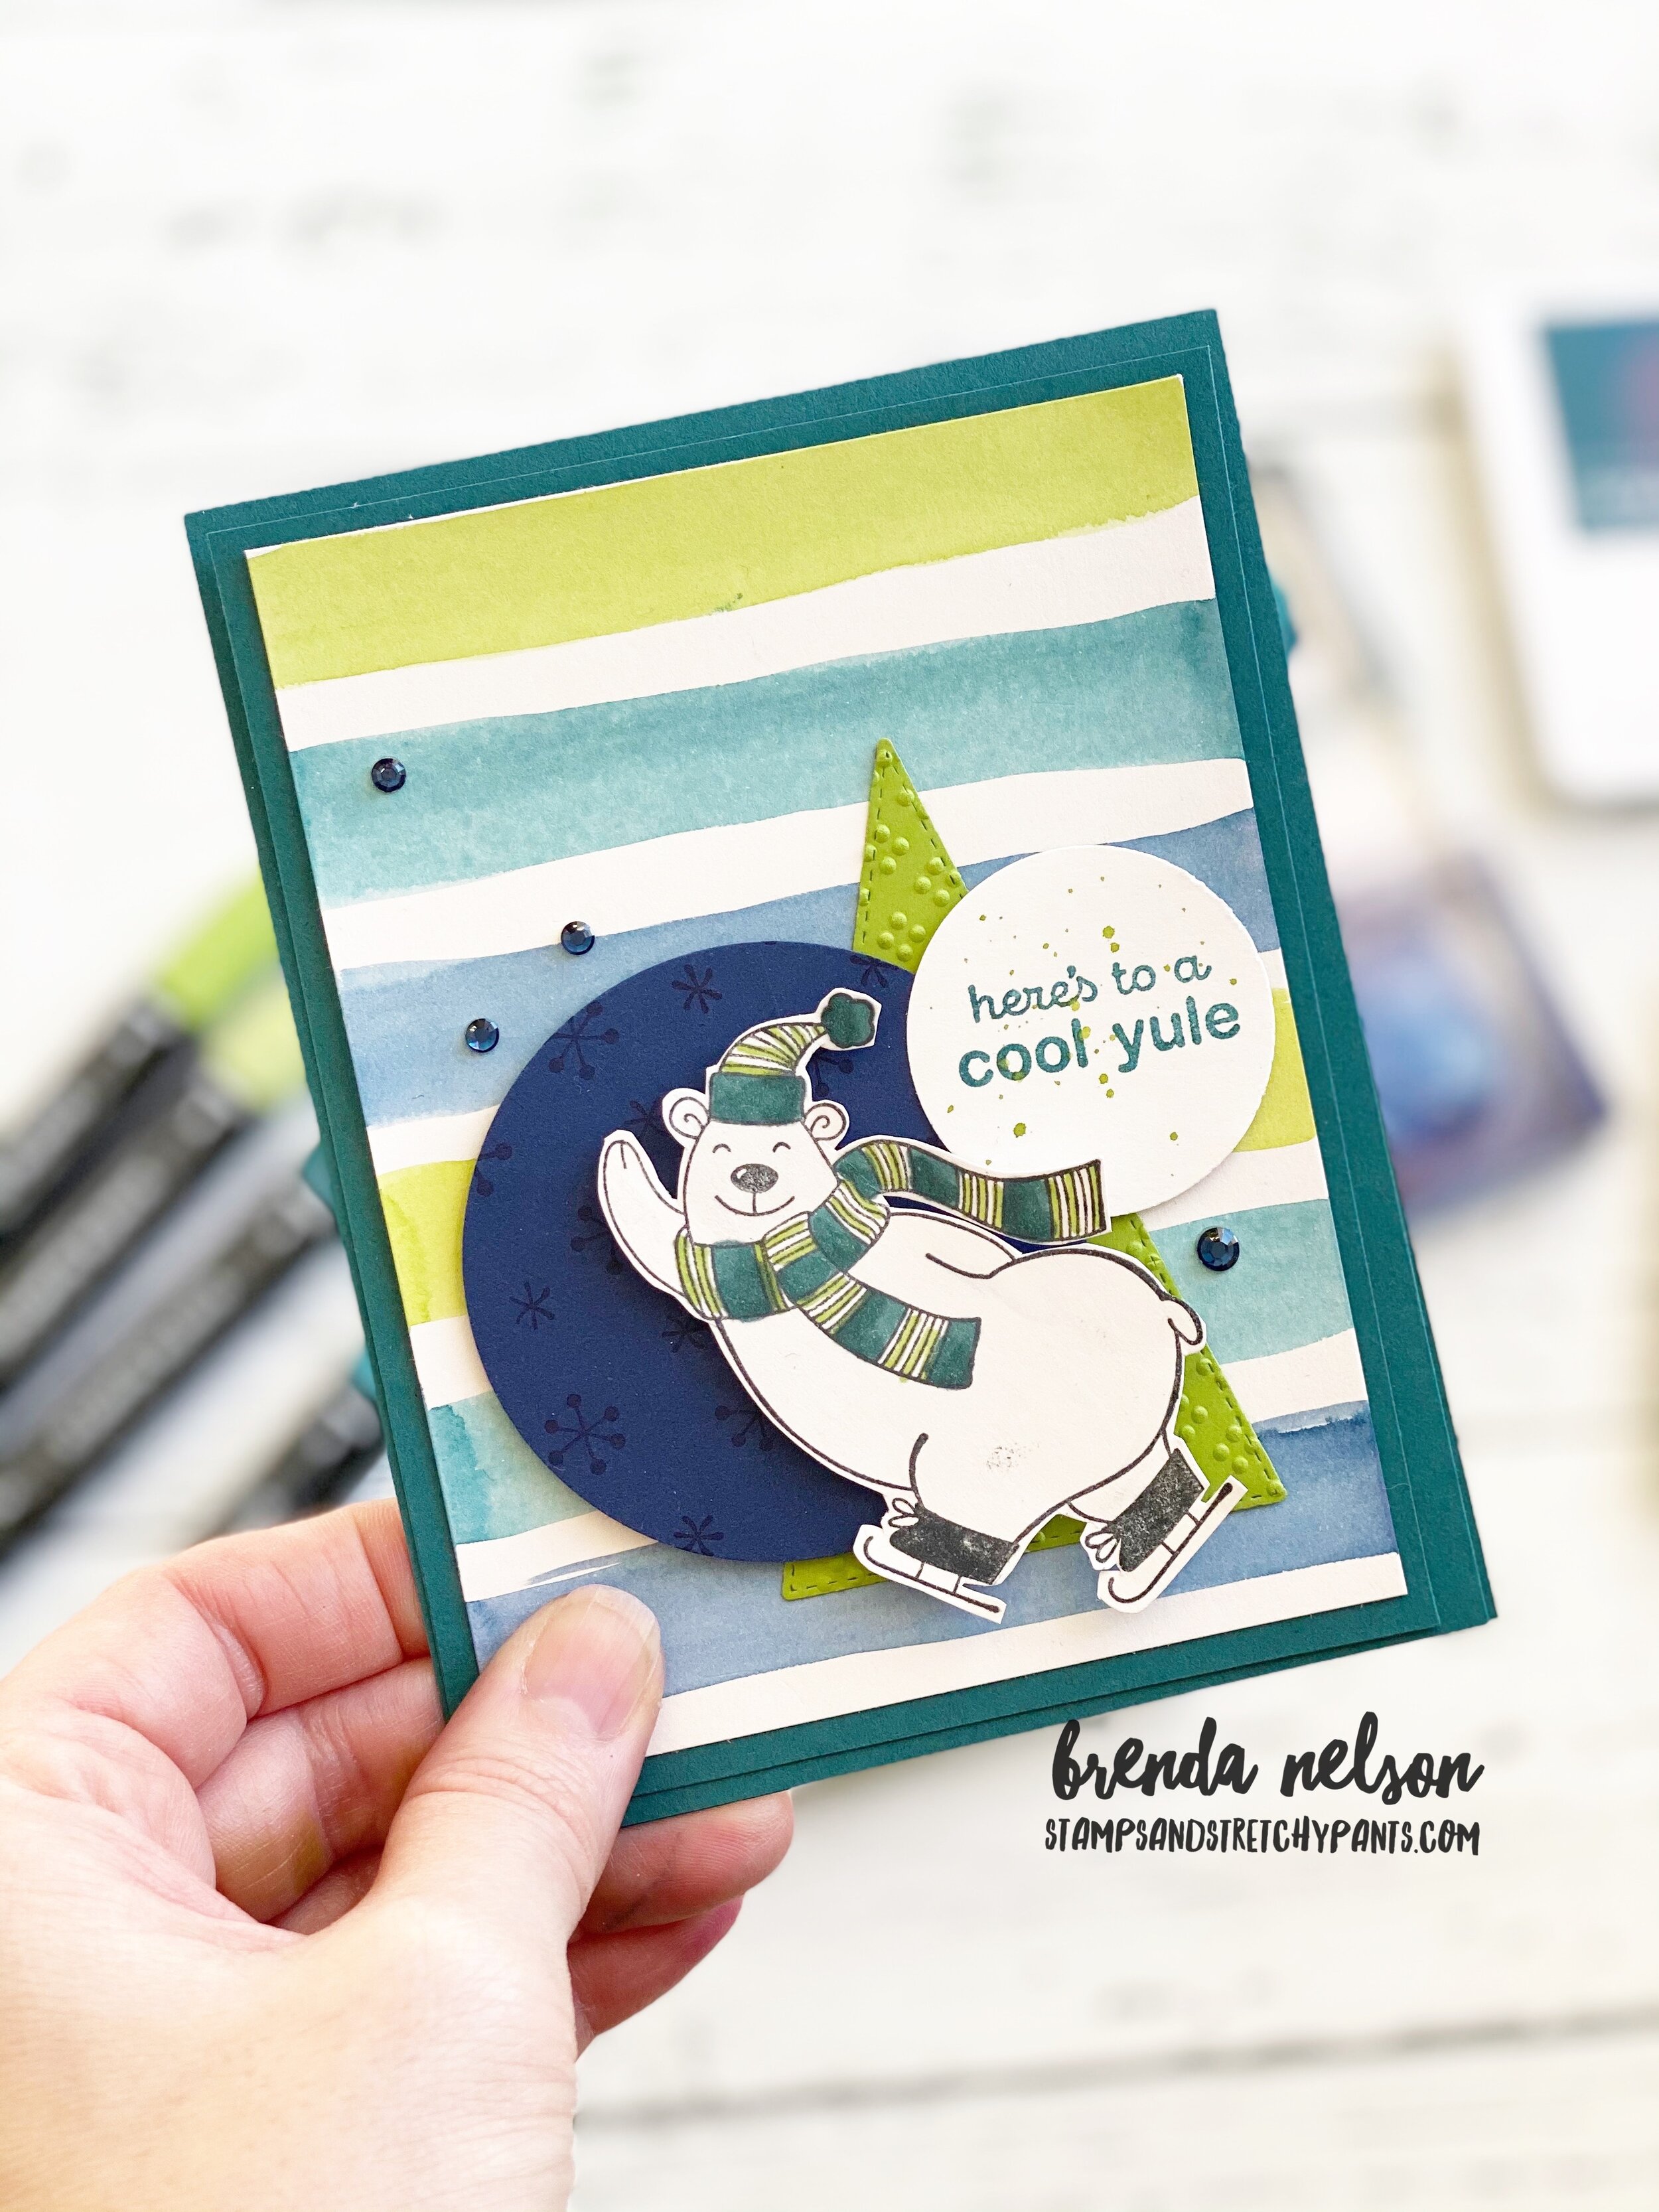
For the gumball shaker card I pulled in some DSP from the Pattern Party DSP Stack (a hostess benefit!) from the Annual catalogue. I then made my own striped accent with scraps of card stock in Granny Apple Green, Real Red and Pool Party as they were the focus colors of my project. I cut a strip of Basic White to 1 x 5, covered it in Tombow Multipurpose Glue and then added the strips of card stock on a diagonal.

This close up view shows you all of the fun things I added into the Gumball Machine Shaker Dome!

On the other side of my DSP panel I have used a die cut included in the Gumball Machine Dies that cuts out a strip of mini itty bitty hearts! The bottom of the machine is stamped in Momento Ink on Basic White, colored with Stampin’ Blends in Real Red and Grey Granite. It is then die cut. The topper of the gumball machine is stamped with Momento Ink on Real Red card stock and then I added a bit of detail with the coordinating Blends.

To add a realistic feel too the coin spinner, I added the little die cut handle and a shape from the Adhesive Backed Hexagons to the center!

The dome shape is cut with a die from the DSP and layered behind it, I stamped the dome filler. I added some stamped gumballs in Read Red, then I stamped and die cut some more in Pool Party. I added these with Mini Dimensionals inside the shaker dome area. I also stamped and die cut some hearts in Granny Apple Green and added some of the mini die cut hearts from the die strip in Real Red and Pool Party. Finally I added in some of the Frosted Beads in green and red. All of these elements made for some fantastic gumball machine filler!

I added a cute #tammybow using the new Real Red Faux Linen ribbon that was cut in half plus a few little gumballs rolling out of the bottom of the machine for some extra touches!

Each month we also need to incorporate a tip or technique into our project. I thought it would be fun to color the inside of the dome with a Dark Pool Party Stampin’ Blend to give a soft blue hue to the dome. Think of how cool this could look if you turned the Gumball Shaker Dome into fish bowl!

My second project uses the little mini gumball machine stamp as a background stamp which I love! I stamped them randomly in Pool Party ink on the coordinating paper. My favorite part of this card is how I used the heart border die as an accent behind the sentiment! I also used my Tombow Multipurpose Glue to add some of the green Frosted Beads to the card front as an embellishment, along with some stamped hearts and hearts from the die cut strip!

The sentiment is stamped in White Craft Ink with embossing powder to help the white pop on the Granny Apple Green. A little distressing of the edges and this card came together pretty quickly! I think its a fun one to give with a gift card inside!

Thank you for following along on my Artisan Journey again this year! I appreciate all of your comments and LIKES and if you live in Canada and my projects have inspired you, please consider shopping my online store!

Create with Connie and Mary--Kids Cards!

Are you loving all of the fun whimsical images in our new January to June catalogue? I know I am, especially this adorable crocodile! So when I heard this weeks theme was Kids Cards I knew I wanted to play with this awesome set!


The stamp set I am referring to is called Oh Snap! and its really just too much fun! I love the big bold crocodile and the 11 different phrases included in the set.

Design Team.jpg
final (2) 3.jpg

I wanted to include the Oh So Ombre Designer Series paper into this project as we are in the final weeks of Sale-a-bration! It makes for a great background and it was fun to stamp direct to the DSP, something that I don’t do that often.

The little fish as so cute and I colored them with the Mango Melody Stampin’ Blends. The little pool of water is stamped on Basic White with Balmy Blue ink and hand trimmed.


I wanted my crocodile to have a bit of a different look so I created this watercolor background on Shimmery White card stock.

I used Soft Seafoam, Pear Pizzazz and Granny Apple green.

And easy way to create a water color background is to cut a piece of Window Sheet to the same size of your card base.

final (10).jpg

Smash the lightest color of ink on the window sheet and then spritz with water. Make sure you move the water around to eliminate any harsh edges. You can then take your card base and lightly tap it against the window sheet to create a fun watercolor look.

Clean it with a tissue and move on to the next color, tapping your card base in different spots onto the ink. I let the ink move around on my paper and heat each layer with my heat tool.

You then get this really unique background! I thought it was fun to stamp my crocodile on top so he got lots of color and dimension to you know, maybe minim his scales? Either way, he looks fun and different.

You will need to hand trim this sucker out so make sure you have the time and patience to do it!

You will need to hand trim this sucker out so make sure you have the time and patience to do it!

Once I cut out my croc I popped him up on Mini Dimensionals to give him a little extra lift off the page. I decided to add in a strip of Balmy Blue card stock and a scallop edge in Mango Melody to help tie all of the colors together

I also added in a few of the Frosted & Clear Epoxy Droplets found in our main catalogue!

I had a lot of fun playing with this set, I hope you do too! If you would like to order from me and live in Canada you can do so any time by clicking the hostess link on the side!

I can’t wait to see what the rest of the design team came up with! You can go BACK to see Melissa’s project or NEXT to see what Connie has created! Make sure to hop the whole way through and leave a comment!

Color Fusers-December 2020


Hello everyone! I am SO EXCITED and honoured to be a new participant in the Color Fusers Blog Hop. The talent line up in this Hop is truly like no other so when they reached out to ask me to join, I had to pinch myself!

colorfusers.jpg

If you haven’t followed along before, welcome! Each month we create projects that feature a trio of colors. There are so many fantastic colors offered by Stampin’ Up! and this is a great way to showcase them and get you stamping with different color combos!

For December we are playing with Night of Navy, Pretty Peacock and Granny Apple Green (my favorite of all our greens!).

IMG_8865.jpg
final 3 4.jpg
 

Because it December I wanted to create a fun holiday card using these colors and the cute polar bear from Warm & Toasty. He is just too much fun!

I started with Pretty Peacock as my card base and first layer. I then took a piece of Shimmery White, its a little thicker and can hold water a bit better, and using the widest brush tip from the Water Painters I made some stripes in the three colors.

Granny Apple Green, Pretty Peacock and finally Night of Navy.

final 3 3.jpg

Its actually quite easy to create custom stripes on your projects. If you don’t have the Water Painters, you can even use your Stampin’ Blends.

However in this instance I used the large Water Painter brush and added the three colors onto our acrylic blocks. I just smash the ink pad a couple of times onto the block to leave some ink behind. You then squeeze a bit of water onto the ink on the block and start creating!

final 3 4.jpg

Once my background was done I colored my polar bear’s scarf and toque with my Stampin’ Blends, which are offered in all three of these colors! You will need to hand cut this little guy as this stamp set does not have coordinating dies.

The tree is cut from Granny Apple Green cards stock with the Stitched Triangle Dies and ran through an embossing folder from the Wrapped in Texture duo.

The circle is the largest offering in the Circle Dies and I stamped little bitty snowflakes in the background with Night of Navy Ink.

The sentiment is stamped in Pretty Peacock and I flicked my Water Paper across it for a splash of green. A few of the Holiday Rhinestones were the perfect touch.

I am really happy with how this card turned out and I have already made a different one with a different color combo that I will be sharing later this month! Thank you for hoping along!


You can head backwards if you are just going in to see what Nicole has created or you can go Next to see what awesome project Melanie has designed! Please feel free to leave a comment!

final 14.jpg


Hot Pink House!

Who would not love to live in a hot pink house? I mean its just beyond cute! I bet if I searched there are people on the east coast of Canada living in a hot pink house as it seems to be an east coast thing! Sadly on the prairies we are pretty boring! When I was a kid I would see images like this and imagine the life I would be living inside, did you ever do that? I can safely say I didn’t see myself designing cards as a living but I am so blessed to be doing so!

This is a card I shared with my Christmas Card group the other night and I couldn’t keep it to myself. It uses the Trimming the Town Suite from the Handmade for You catalogue. This suite is extra special because proceeds of the stamp set or bundle go towards charities devoted to adoption, infertility and foster care. Three things that I have a connection too so this suite has a bit of extra meaning to me.

final.jpg

I am not exactly sure what inspired this unique color combo but it is Magenta Madness, Granny Apple Green and Seaside Spray! And I could not love it more. I stamped the ‘Be Merry’ in Seaside Spray across the background and flicked it with the coordinating Stampin’ Write marker. The sentiment is from the Banner Year stamp set in the catalogue. It is a perfect set to recommend to new stampers because it has imagery and sentiments for fall, halloween, Christmas, and Valentine’s Day so they can get quite a bit of mileage out of it.

I cut the snow bank using the Home Together dies and used Shimmery White card stock so it was one or two tones different than the background. The hot pink house (sounds so fun) and the trees are all coloured with our Stampin’ Blends.

This is a card you can recreate in a million different color combos! I hope you are inspired and if you need any of the supplies, please feel free to order from my online store!